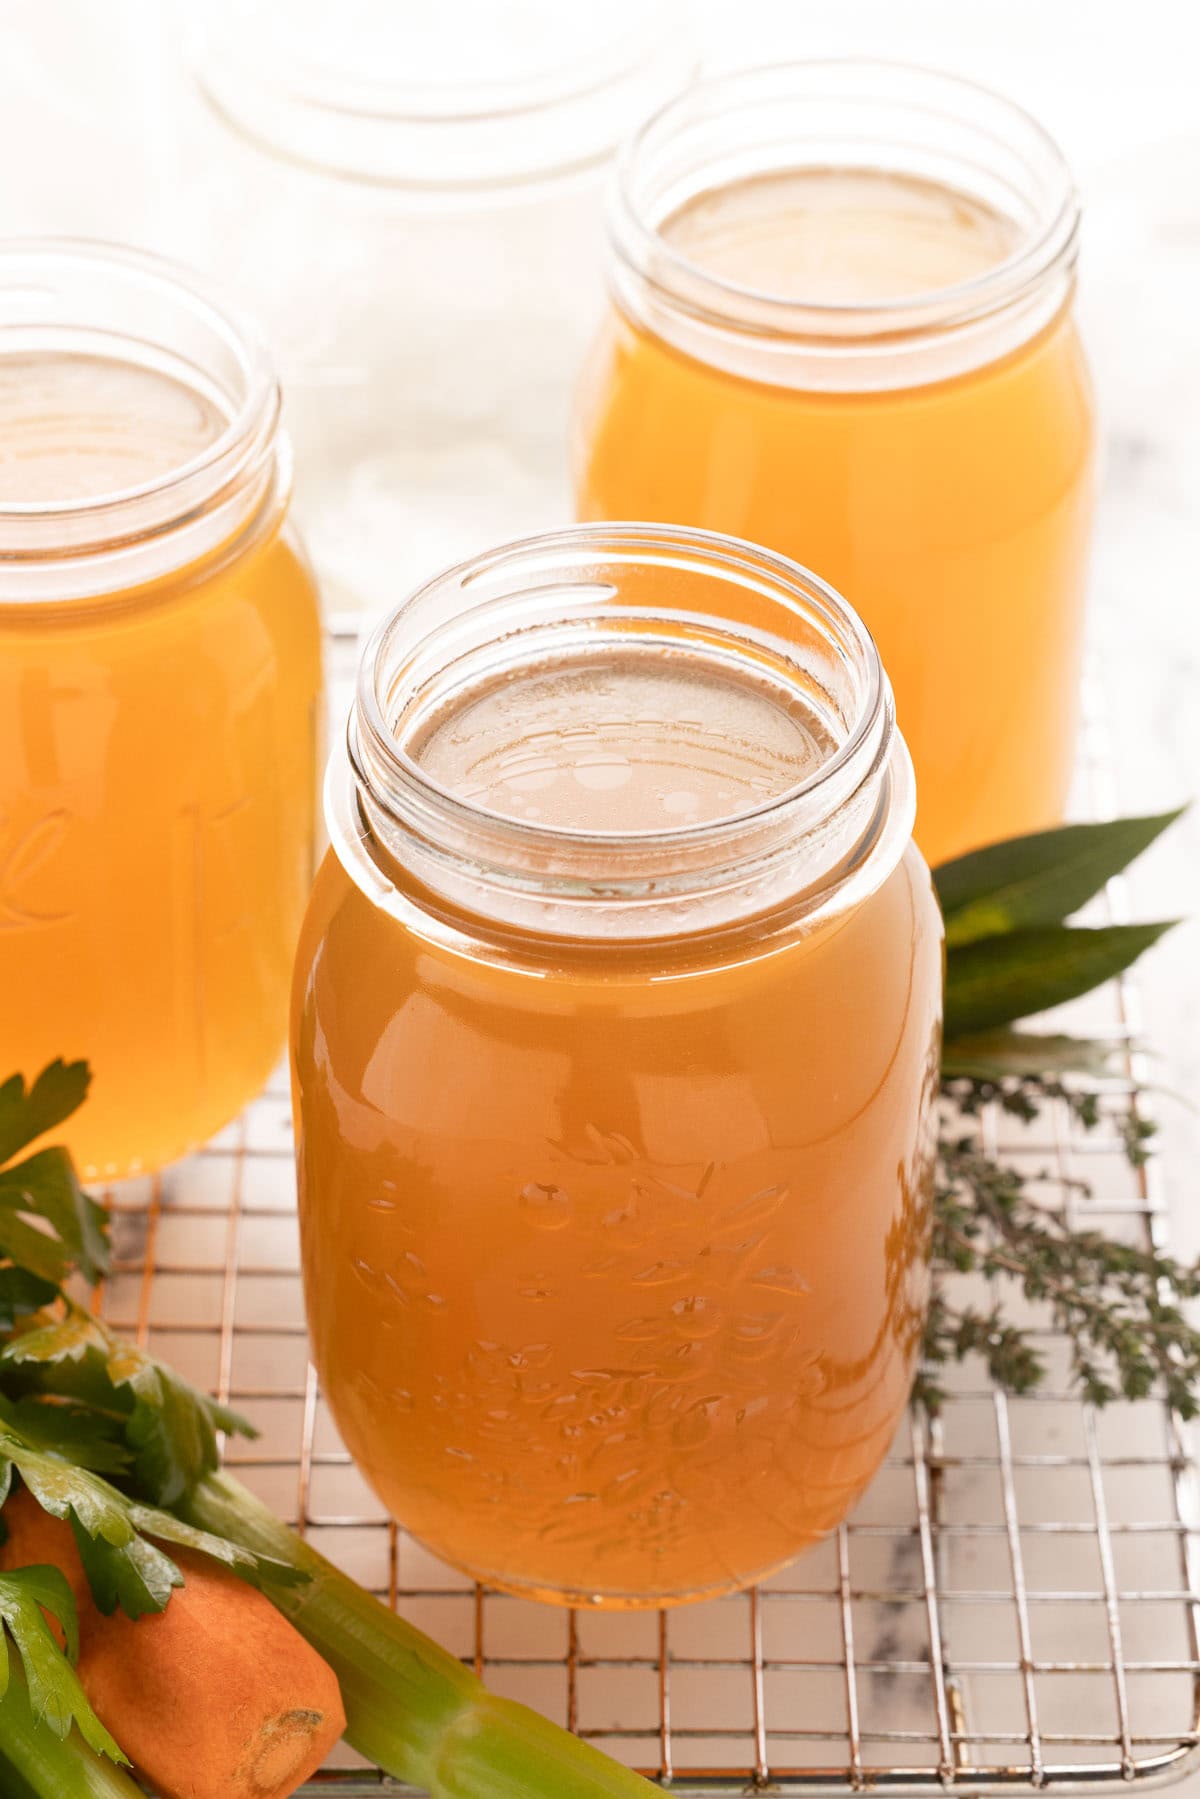
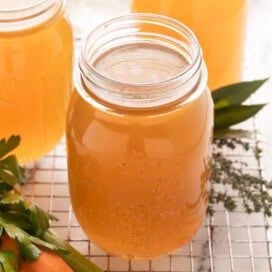
If you've never made chicken bone broth at home, this is the place to start. Meaty chicken parts and bones simmer low and slow with classic vegetables and herbs, creating a rich, golden, gelatin-rich broth with a silky body you won't get from a carton. Make a big batch once, freeze it in jars, and you'll have instant upgrade power for soups, stews, risotto, and sipping.
Homemade chicken bone broth is easy to make. Once everything is in the pot, it mostly takes care of itself while the broth gently simmers and your house fills with that "something good is happening" smell. There's little babysitting-just check the water level occasionally adding boiling water as needed, then strain and chill. I'll walk you through the simple step-by-step process so you can keep jars of this gelatin-rich chicken bone broth recipe in your freezer for soups, stews, and sipping.
Recipe
Why Make Chicken Bone Broth
- Control the ingredients - You decide exactly what goes in, especially the salt. I make bone broth without salt, so you can season each recipe later instead of being stuck with a salty boxed broth.
- No preservatives or additives - Just chicken, vegetables, herbs, and water. No "natural flavors," no MSG, and no mystery ingredients.
- Richer flavor and nutrition - A long, gentle simmer extracts deep chicken flavor and plenty of gelatin, creating a gelatin-rich chicken bone broth with a silky texture you don't get from most store-bought broth.
- Make once, use for weeks (freezer-friendly) - Cook a big batch, cool it, portion into jars or containers, and freeze. You'll have homemade broth ready for chicken soup, risotto, cooking grains-or sipping straight when you want "warm mug therapy."
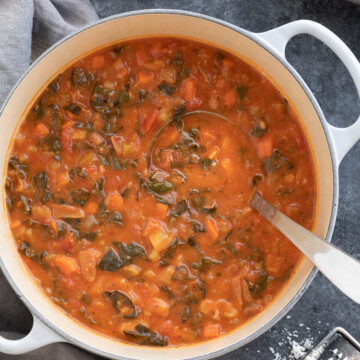
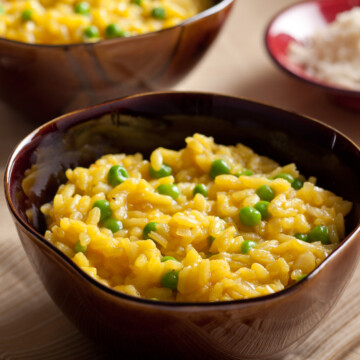
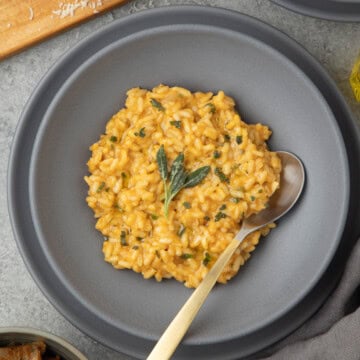
Making risotto, like this pumpkin risotto, is a favorite way to use good homemade chicken bone broth. It adds rich flavor.
Chef's Tip - Is it Chicken Broth or Chicken Stock?
People use "broth" and "stock" interchangeably, but traditionally there's a difference. Broth is made with meaty chicken pieces (often with vegetables) and may be seasoned for sipping. Stock is made mostly from bones, simmered longer, and typically left unsalted because it's a cooking building block. I use a hybrid method-meaty chicken pieces plus bones (like backs) and chicken feet for collagen/gelatin, along with vegetables and herbs-so you get deep flavor and that gelatin-rich body. Call it broth or stock-either works here.
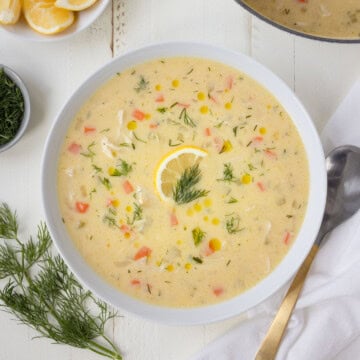
Any soup recipe using broth, like this Greek avgolemono chicken soup, gains extra flavor from homemade broth.
Ingredients You'll Need
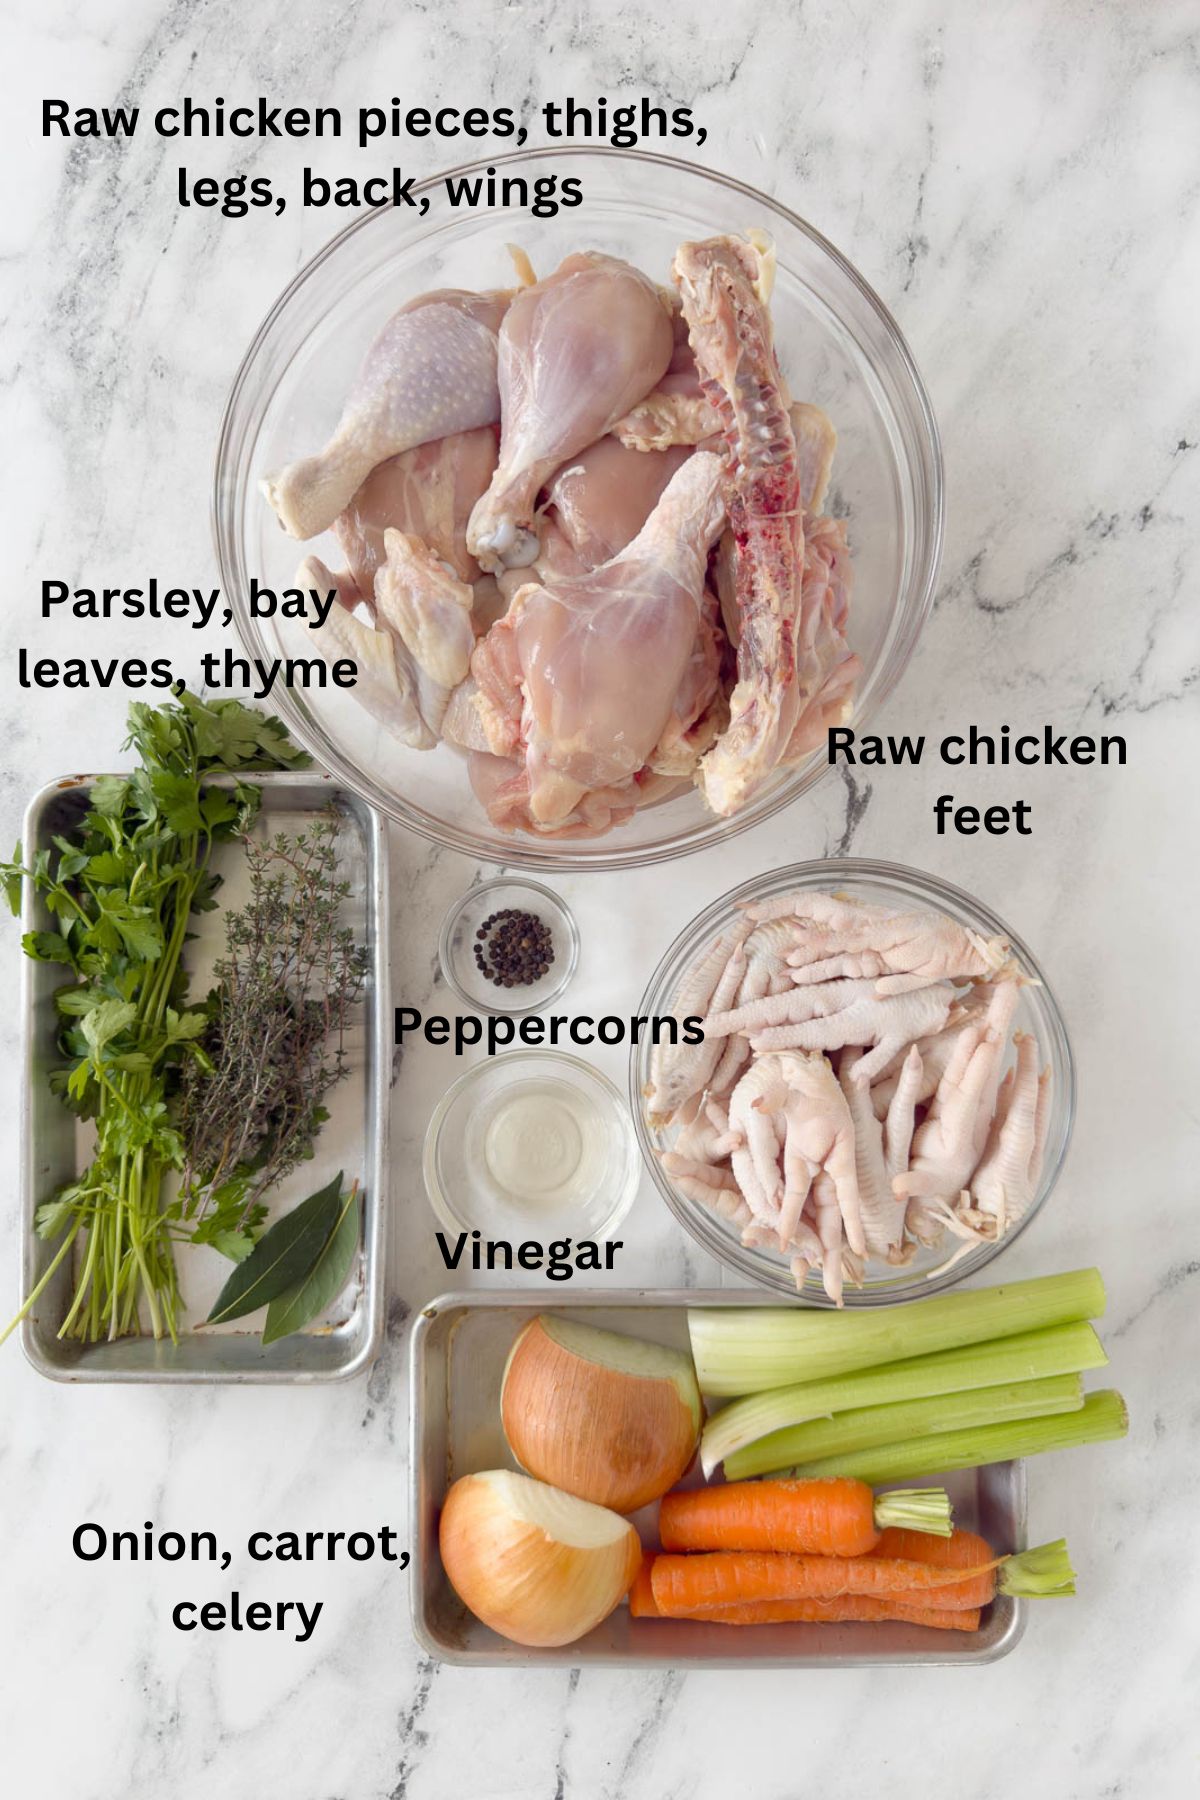
- Chicken - Use a whole cut-up organic chicken or a mix of bone-in thighs and legs. Adding chicken feet gives the broth extra collagen and body. Ask your butcher if they sell chicken backs or other chicken bones. The feet may look a little creepy, but they help your broth set like jello.
- Onion - Adds sweetness and depth, use brown or yellow onions, but not red (color).
- Celery - Brings fresh, savory flavor and round out the classic broth base.
- Carrots - Add gentle sweetness and helps give the broth its beautiful golden color.
- Parsley - Stems and leaves add a fresh, herbal note and help brighten the flavor of a long-simmered broth.
- Bay leaf - Use one or two bay leaves, fresh or dried, to add subtle, earthy depth.
- Peppercorns - Whole black peppercorns season the broth gently as it simmers without making it spicy or muddy like ground pepper can.
- Vinegar - Apple cider vinegar or white vinegar help extract minerals from the bones. Lemon juice or white wine work as well but are not quite as acidic.
Please see the recipe card for exact measurements. Don't add salt to the broth-season the dish you're using it in instead. If you plan to sip it, add a pinch of salt to your mug after it's done.
Chef's Note - Should I Peel the Onions for Chicken Bone Broth?
For the broth, you can leave onion skins on or peel them-both work. Skins add deeper golden color and a slightly more complex, rustic flavor (just wash well), while peeled onions give a paler broth with a cleaner, milder taste. Onion skins also contain beneficial plant compounds (like quercetin), but they can occasionally add a faint bitter or astringent edge depending on the onions and simmer time. Bottom line: choose skins-on for color and depth, peeled for a cleaner finish.
How to Make Chicken Bone Broth
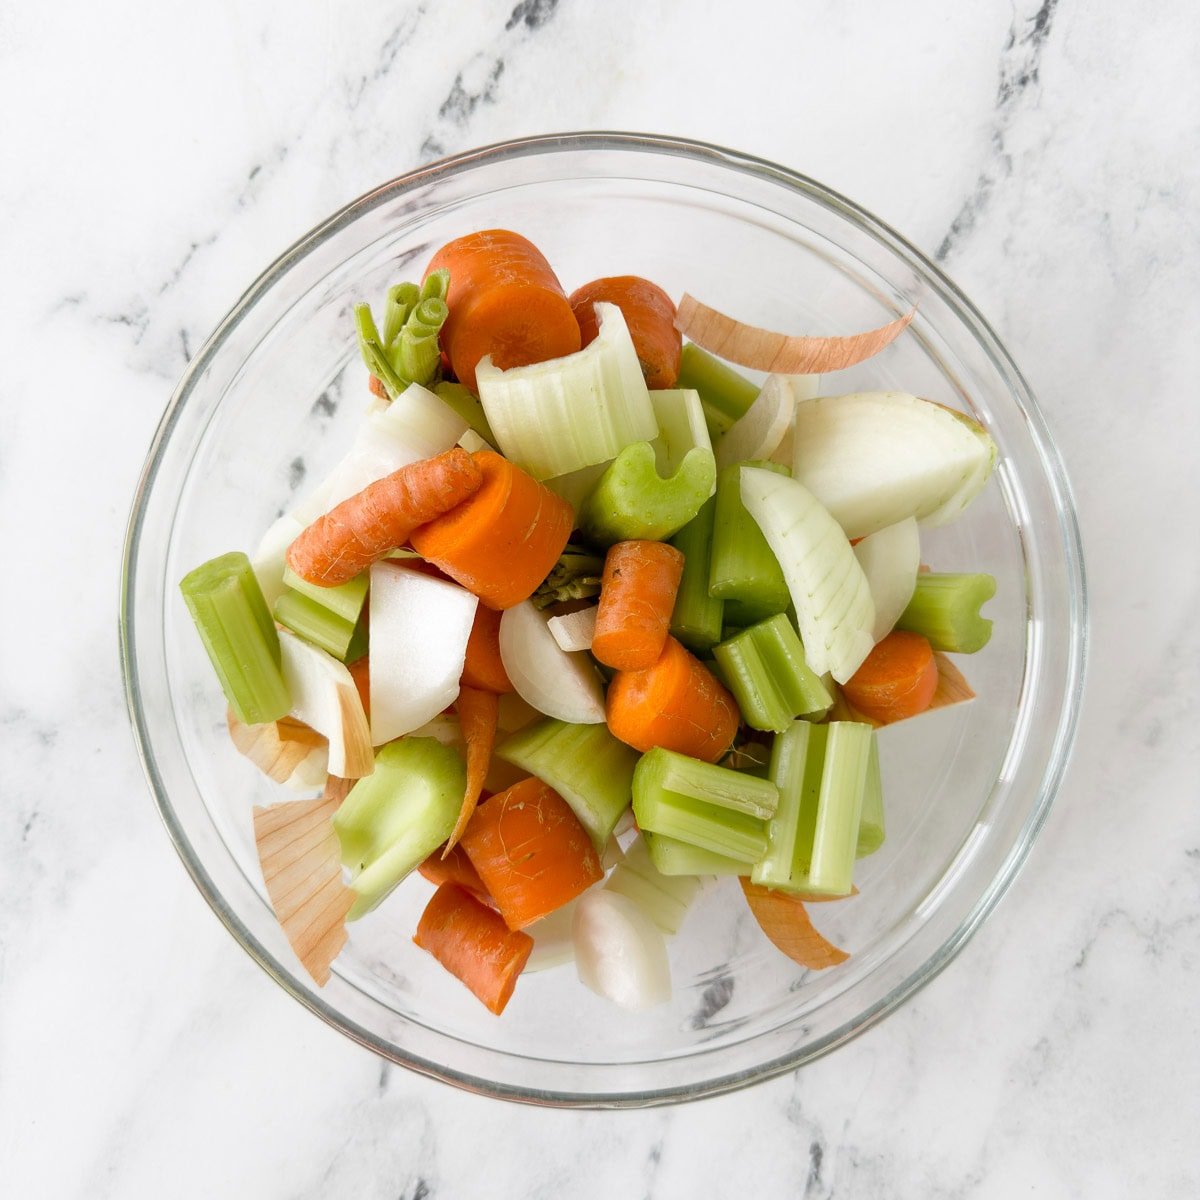
- Roughly chop the onion, carrot, celery.
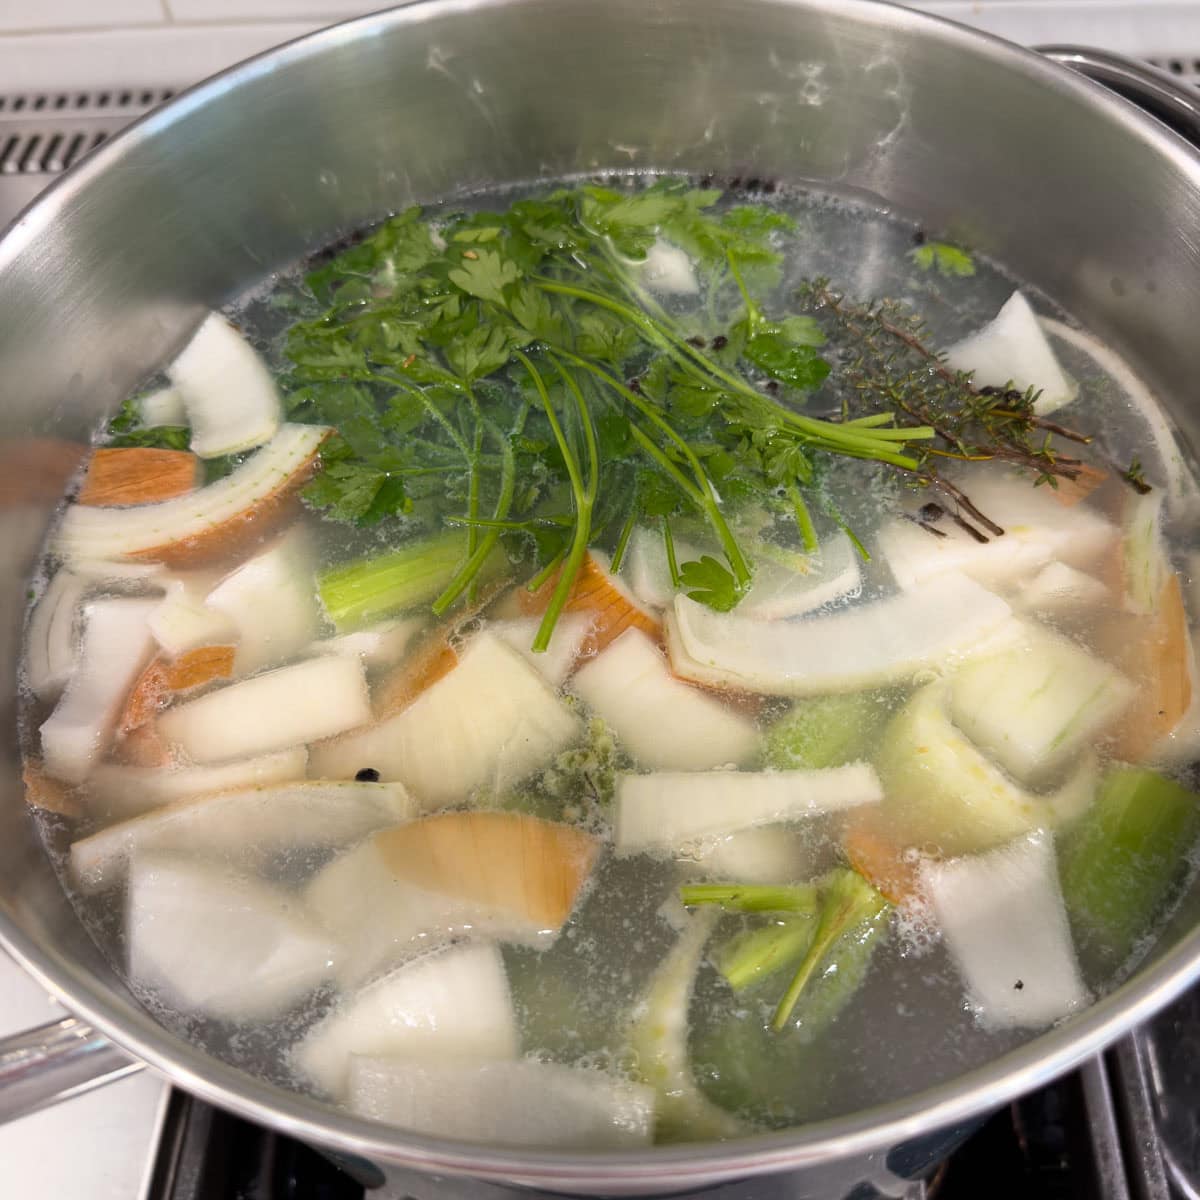
- Remove as much skin from the chicken as possible, add everything to the pot and cover with cold water.
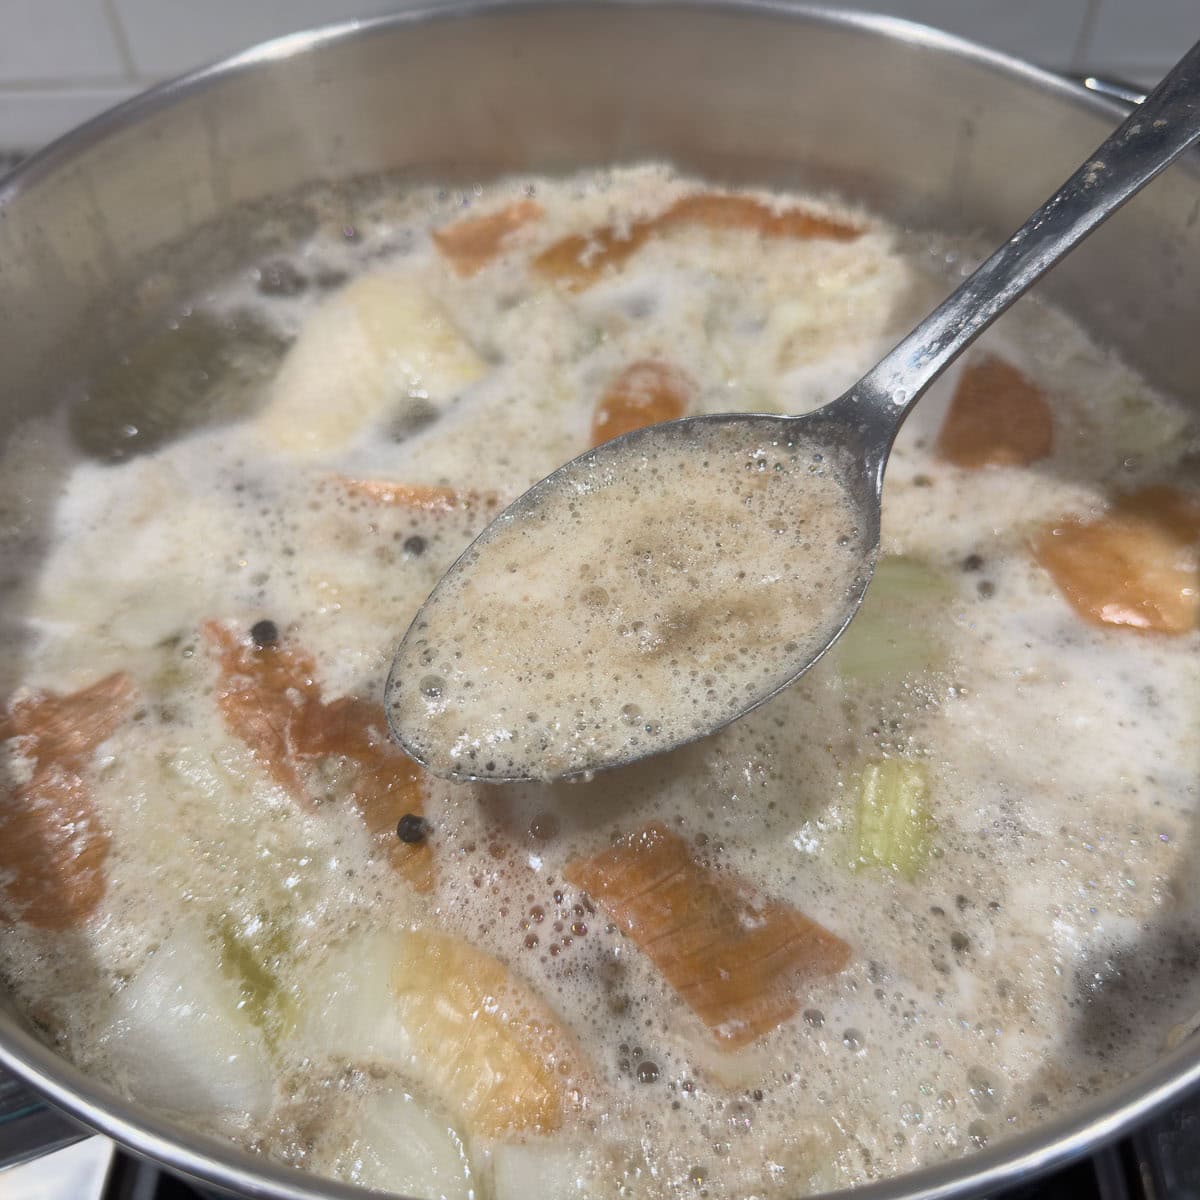
- As the broth heats up, impurities rise to the surface. Skim with a spoon and discard until it stops forming.

- As the broth simmers over the hours, the water level will drop. Keep an electric tea kettle of hot water ready and add water as needed. Don't worry, it won't dilute the broth.

- Strain finished broth through a mesh colander. Discard spent bones, meat, and aromatics.
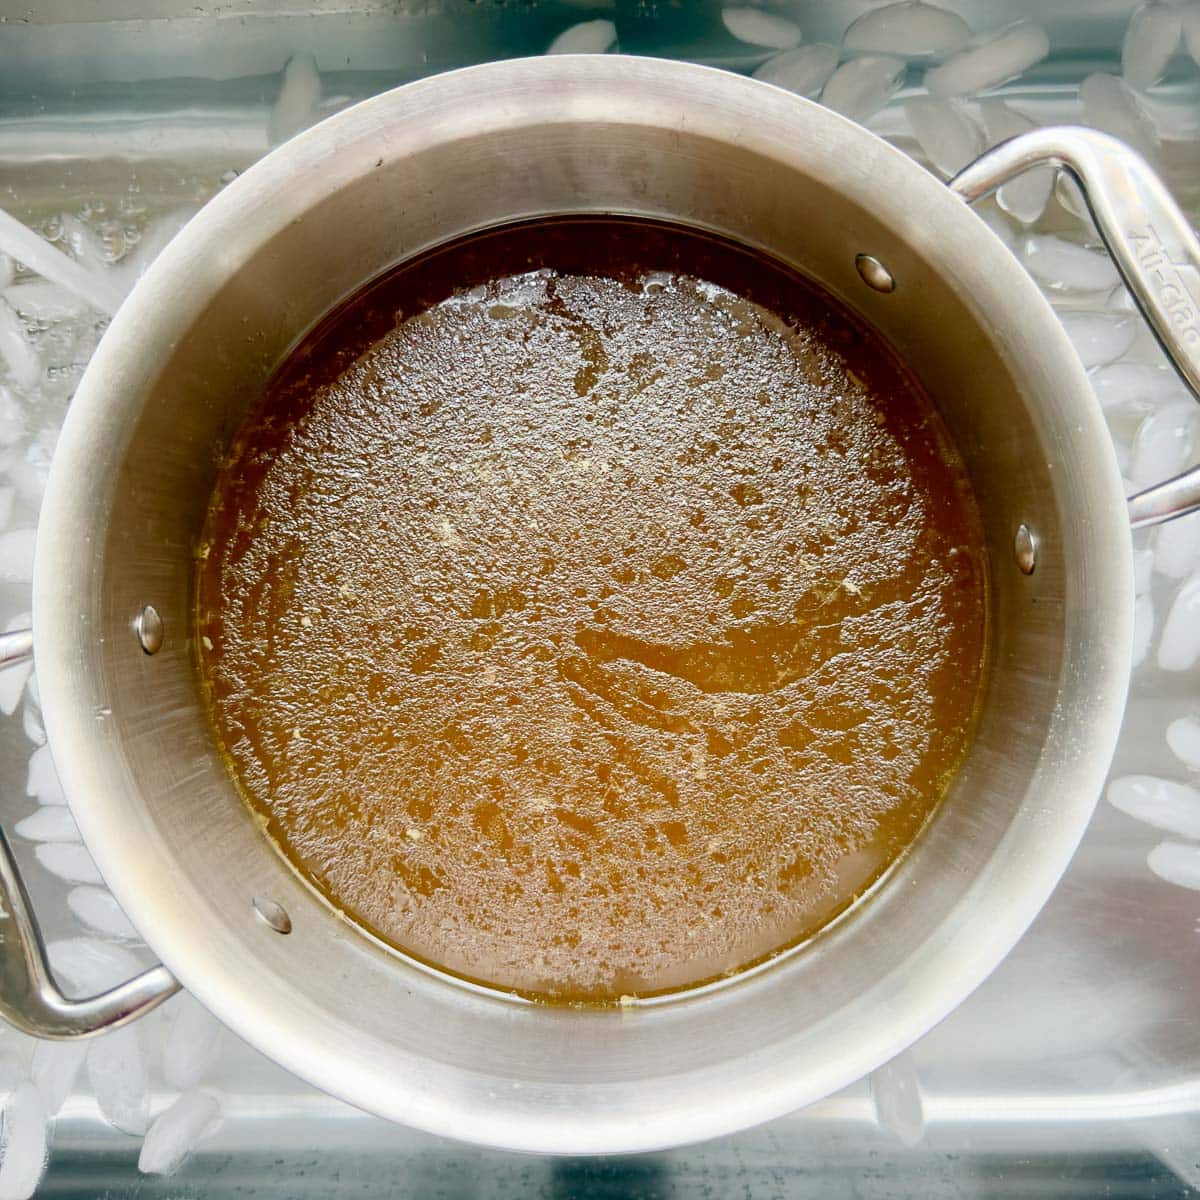
- Chill the strained chicken bone broth in a sink ice bath, in a clean pot, until 70°F or lower before refrigerating (covered) until the next day.
In the morning, skim the solidified fat off the top. Use your chicken broth within three days or freeze in portions. Freeze in muffin tins for small measures, canning jars, mason jars, and Souper Cubes for easy stacking.
Chef's Tip - For Even Clearer Broth
For a slightly clearer broth, you can start with just the chicken, water, and vinegar. Bring it to a gentle simmer, skimming off the foam as it happens, then add the vegetables and herbs and continue simmering. Most of the time I add everything at once (as you see in the photos) because it's faster and still makes a delicious, golden broth.
Bone Broth Tips & Troubleshooting
- Simmer; don't boil - Keep your broth at a low simmer. Boiling or stirring creates cloudy broth. Just let it bubble away.
- Skim the "scum" - The scum that forms when first simmering is simply impurities being released from bones and meat. Skim off and discard until it stops. Skimming gives you get a cleaner-tasting, clearer broth.
- Adding vinegar - A little vinegar (1-2 tablespoons) helps release collagen and minerals from the bones so more goodness ends up in your broth. Add 20-30 minutes before simmering. Optional but beneficial. Lemon juice and white wine also work.
- Low and slow - A low, slow simmer for a long duration (12 to 20 hours), is the primary driver of nutrient extraction and flavor (with or without vinegar).
- Broth didn't gel - It's still perfectly usable, but if you want that nice jiggly texture when it's cold, next time add collagen-rich parts like chicken feet (the best), wings, or backs, and be sure you're keeping the broth at a gentle simmer long enough.
- Strain gently - Use a fine-mesh strainer and let the broth drip through without pressing on the solids. Pressing can push sediment into your nice clear broth.
- Cool down quickly - Use an ice bath to cool below 70°F before refrigerating.
- Degrease - The next morning, scrape off the gelled fat from the top of the broth, then portion and refrigerate or freeze, with labels and dates.
- No extra sink for ice bath - Use a cooler partially filled with ice and cold water, or a large bucket.
Using Chicken Bone Broth
Storage & Freezing
Store chicken broth in the refrigerator, tightly covered and use within 4-5 days. For longer storage, freeze in jars or silicone freezer molds. Properly cooled and frozen, it keeps well for about 3 months. Label and date your containers so you actually use them. I freeze in 3 cup, 1 cup and ½ cup portions for different needs.
Chicken Broth FAQs
In short, no. I recommend keeping bone broth unsalted. That way you control the seasoning when you use it in recipes and you won't end up with overly salty soups or sauces. Taste and season with salt when you're cooking with the broth, not when you're making it.
For the best flavor and body, I like to cook chicken bone broth at a very gentle simmer on the stovetop for 12-20 hours. Keep the heat low so you see just an occasional lazy bubble rather than a hard boil. This helps extract collagen and flavor without turning the broth cloudy. This recipe is scaled to make about 1 gallon (16 cups) of broth, which is an ideal big batch to cool and freeze in portions for the time invested.
Cloudy broth is usually from boiling too hard, not skimming the initial foam, or stirring a lot as it cooks. It's still perfectly safe and tasty-it just won't be as clear. To keep broth clearer, bring it up to a gentle simmer slowly, skim the scum early, and avoid boiling.
Don't worry-broth that doesn't gel is still full of flavor and nutrients. It just means there wasn't quite as much collagen. Next time, add more collagen-rich parts (like feet, wings, or backs) and simmer a bit longer. You can still reduce a non-gelling broth on the stovetop to intensify flavor.
Use the best quality chicken that fits your budget. I prefer organic or pasture-raised chicken for broth because you're extracting so much from the bones and skin over many hours of cooking. But if that isn't available, use what you can find-homemade broth from a conventional chicken is still far better than most boxed broth.
Recipes Using Chicken Broth
Chicken broth is the foundation of so many great soups, stews, and dishes like risotto. Try a few of these or check out the soup recipes index page for more ideas!
Did You Make Broth?
If you make chicken bone broth, please leave a comment and let me know. I love hearing from you and your comments also help other readers. And please leave a start rating. Thanks for supporting my site.
📖 Recipe
Homemade Chicken Bone Broth
Equipment
- Tea kettle regular or electric
Ingredients
- 5 pounds chicken pieces and parts (thighs, legs, wings, backs) or whole chicken plus parts
- 1 pound chicken feet or 1 more pound chicken pieces (optional)
- 2 large celery ribs roughly chopped
- 2 medium carrots scrubbed, roughly chopped
- 1 medium onion roughly chopped
- 1 large dried bay leaf
- 1 handful parsley leaves and stems
- ½ teaspoon black peppercorns
- 6 sprigs fresh thyme
- 1-2 tablespoons apple cider vinegar
- 4 quarts filtered water
- Extra boiling water as needed
Would you like to save this recipe?
Instructions
How to Cut up a Whole Chicken
- If using a whole chicken, break it down into pieces with a sharp French knife, Chef's knife, or cleaver. Cut off the leg and thigh pieces and cut them in half at the joint, then cut off the wings. Next, cut through the center breast bone of the chicken, splitting the body into two halves. Cut the breasts free and cut them in half. What's left is the body. Cut that in half crosswise. Poultry shears also help break it down more easily. Remove excess skin.
Start the Broth
- Add the chicken pieces to a large stock pot, about 10-12 quarts. Cover with cold water and bring to a simmer. As the chicken simmers, impurities will begin to rise to the top. It looks like a gray foamy scum. Skim it off and discard. Continue to skim and discard until its mostly gone.
Long Simmer the Broth
- Add the vegetables, peppercorns, thyme and vinegar. Keep the pot at a low simmer (just a few bubbles) for 20-24 hours, adding boiling water from a kettle as the water level gets low. The longer you simmer, the better the broth.
Strain and Chill the Broth
- Strain out the spent vegetables, meat, bones, and cool the broth in a large clean stainless steel pot in a sink filled with ice and water. Place a small rack or trivet under the pot to speed cooling. Stir occasionally to assist cooling. Cool to 70°F or below before covering and refrigerating. Refrigerate overnight.
Use and Freezing
- In the morning, skim off the solidified fat. Use broth within 3-4 days (refrigerated) or portion and freeze in small containers, labeled, for up to three months.
Cathy Rowe says
I made this last week...used 8 pounds of whole chicken thighs.
It has no flavor!!!
Added all the stuff on the list plus upped the amount. Cooked for 24+ hours...
Looks great taste like nothing!!!
What did I do wrong!!??
Sally Cameron says
Hi Cathy. That is really odd. I've been making this for many, many years and it tastes terrific every time. One thing, you don't need to cook it that long. I usually do mine for about 20. But I am not sure that is why it doesn't have flavor. I don't see how it couldn't with all of the great ingredients and a long low, slow simmer. I always use organic, but I'm again not sure that would effect the taste that much. How did you taste it? If you sipped it as broth, did you add a little salt? It has no salt so you can add how much you want for how you are using it. Have you used it in a recipe yet? And just to confirm, you used bone-in thighs, right?
Melissa S. says
Would a pressure cooker (like an Instapot) work for making the broth? Would it affect the nutrition of it?
Thanks.
Sally Cameron says
Hi Melissa. Good question, the Instapot is popular these days, and I now have an Instant Pot chicken broth recipe that is terrific. It's what I make most of the time now for the speed, and it tastes terrific and is nutritious. https://afoodcentriclife.com/instant-pot-chicken-broth.
Nadine says
I'm wondering- Is this something I can pressure can for storage?
Sally Cameron says
Hi Nadine. I always freeze mine and have never tried pressure canning it. Here is a link I found with good directions. Maybe this will help. There are also other articles on the internet for canning. Good luck! http://www.culinate.com/mix/dinner_guest/how_to_pressure_can_stock
Tammy says
I am very new to all of this. My husband has a Traumatic Brain Injury so I am finding myself looking to save money, getting the best flavor , and spending my down time.
What do I do with the skin and insides as to not to waste?
Sally Cameron says
Hi Tammy. First, I am so sorry to hear about your husband and TBI. May God bless you both and heal him, and give you strength as his caregiver. Cooking is a great way to save money, and get healthier, more nutritious food on the table. The skin and insides (giblets) are fine to discard. You are not wasting much. Some people use part of the giblets, say, from a turkey, as part of a turkey dressing, but not usually from a chicken in my experience. There is nothing you can do with the skin. One thrifty idea, If you first roast a whole chicken, eat all of the meat over a few days (or freeze it), then save the carcass with a little meat attached, you can freeze it. Then when you have a few carcasses, make broth. It's really making use of something many people discard. You get full use of that chicken. Hope this makes sense. If not, please comment again and lets keep talking.
Lauren says
I've seen many different ideas for freezing it, which is my best option. If you freeze it in one ounce cubes and then transfer to a plastic bag, do you run the risk of ice crystals developing all over it? I would love to know a great recommendation for freezing it in both large and small portions. Also, if you freeze it, can you thaw in fridge and it will still keep for a few days??
Sally Cameron says
Hi Lauren. Ice cube trays works fine. I did that in the past but they are really too small for me. Most of the time I am using more, like 1-3 cups. I used to freeze broth in muffin pans that were about 4 ounces, so 1/4 cup. After frozen, pop them out and place them in a freezer zip bag. For larger portions, like 1-3 cups, I am using the Glasslock containers. Just started trying those. Used to use BPA-free plastic, but know that glass is better. Many people freeze broth flat in plastic freezer zip bags, laying them flat on a small, quarter rimmed baking sheet. When frozen they stack flat. Only issue I have with that solution is that if you get a leak they get messy upon thawing, so just remember to thaw them in the refrigerate on a bowl, pot or something to catch any possible leakage. Good question! Hope that helps. Blessings, Sally
Kayla says
Hi there, do you keep tinge chicken after to eat it or what do you do with the chicken? I've never done this before so don't want to mess it up. Can I can this after it is done to have for soups and recipes that call for chicken broth? Thanks
Sally says
Hi Kayla. Thanks for your question. After the chicken has simmered to create the broth for so long, it's pretty much give up its all for the broth. It's not very good to eat at that point. I toss it. Let me know how you do. I have never tried canning my broth because I freeze it, which is easy. Homemade broth tastes fantastic compared to anything boxed or canned from the store, and is so much better for you. Hope that helps. If you need more help, please let me know.
Linda Chin says
Hi Sally, I used this method with a frozen turkey carcass leftover from Thanksgiving and the family said it was the best homemade soup I had ever made them.......I make homemade soup fairly often in the Winter. All your little tips really make a difference, thank you! Also I love the idea of trying this with my pasta pot insert. I have some frozen chicken bones that will be my next try.
Sally says
Sally, beautiful! Great instructions on how to break down a chicken and turn it into stock. I try to buy necks and backs (organic, when they have them) and supplement with legs with thighs attached--about 8 pounds in all. I look for bargains and freeze if I can't make the stock right away. I also save bits and pieces in the freezer when I bone a chicken or remove chicken backs or wings. Lately I've been trying out making stock in the insert in my pasta pot. I'm not sure yet what I think, but it IS much easier to pull out the messy bits before straining. I strain right away into quart containers--it cools faster in smaller containers. Then I let it cool briefly and refrigerate overnight. The next day I spoon off the fat (once it's hardened) and pop that liquid gold in the freezer. I urge everyone to actually taste the stuff that comes in the box--I've done tastings in cooking classes. The word "dishwater" came up often (!) I like your muffin cup idea, too!
sally says
Hi Madonna. Glad it was helpful! I don't bother making beef stock as I don't use it often. When I do, I buy a good quality frozen brand.
Madonna says
This is beautiful. Even though I have made a lot of stock I always learn something from your tutorials. I always added the veg immediately, but now see the benefit of waiting to skim first. Also, good idea to freeze some in muffin tins for that recipe than calls for just a little stock. I love the thought of having stock ready to make soup or risotto. Any chance you will be making beef stock? When I make short ribs or beef bourguignon the recipes always call for beef broth/stock and all the ones in the market contain soy. As usual your photos are just wonderful.
Sally says
Hi Madonna. Glad it was helpful! I don't bother making beef stock as I don't use it often. When I do, I buy a good quality frozen brand that seems to be a better options than cans or boxes. So glad you still learned something as i know you are a good cook!