Whole roast chicken is a Sunday dinner tradition in our house and an enduring classic recipe. Golden and crisp-skinned, the classic simplicity of a whole roast chicken is always welcome. If you have any leftovers, it makes great meals during the week. Never done a whole chicken? Let me show you how using a different method that produces great results.
I've roasted many whole chickens with varying techniques. With a v-rack and a vertical roaster. Starting the bird breast side down and turning half way through. I've tried tying, or trussing the bird, or not.
Many of the techniques produced a good roast chicken. At times the results were inconsistent or the appearance not as eye-appealing as I wanted. Here is the best method in my opinion: sear first on the stovetop, then finish in the oven.
Recipe
Why You'll Like This Recipe
- Roast chicken is a classic recipe everyone cook should know.
- This method makes gives you crisp skin.
- Once you do it you won't need the recipe. It's about technique.
Recipe Ingredients
- Whole chicken: Buy a whole, fresh, chicken.
- Oil: Olive oil is what I use, but you could use a healthy neutral oil like this. It's terrific.
Please see the recipe card for measurements. You also need kitchen twine.
Recipe Instructions
It was chef Tom Colicchio's method of searing the chicken first on the stovetop that inspired me to start using this method. It's always how I start my bone-in chicken breasts and many meat dishes, so it made sense.

Step 1: Prep the Chicken
Get the chicken out of the refrigerator an hour ahead of time. Unwrap it and let it get the chill off. Don't worry, it is a food-safe practice and in my experience gives you better results.
Remove any fat globs near the cavity opening and the tail and discard. Pat the bird dry with a paper towel. Remove any bag of "innards" inside the cavity of the bird and discard. Wipe out the cavity with a paper towel. Sprinkle a little salt inside the cavity. Tie the legs together and bend the wings back under the body.
Step 2: Sear the Chicken
Pre-heat your oven to 375 degrees. Heat a cast iron skillet over medium heat. While the pan is heating, drizzle all olive oil over the bird and season. Place chicken in the hot pan bottom side down and sear for a few minutes until you achieve a golden crust. Watch your heat level and turn the heat down if needed so as not to burn the chicken.
When you get a golden crust on the bottom, turn the chicken breast side down and do the same. When the breast side is golden, stand the chicken on it's sides (on the wings) and sear the sides.

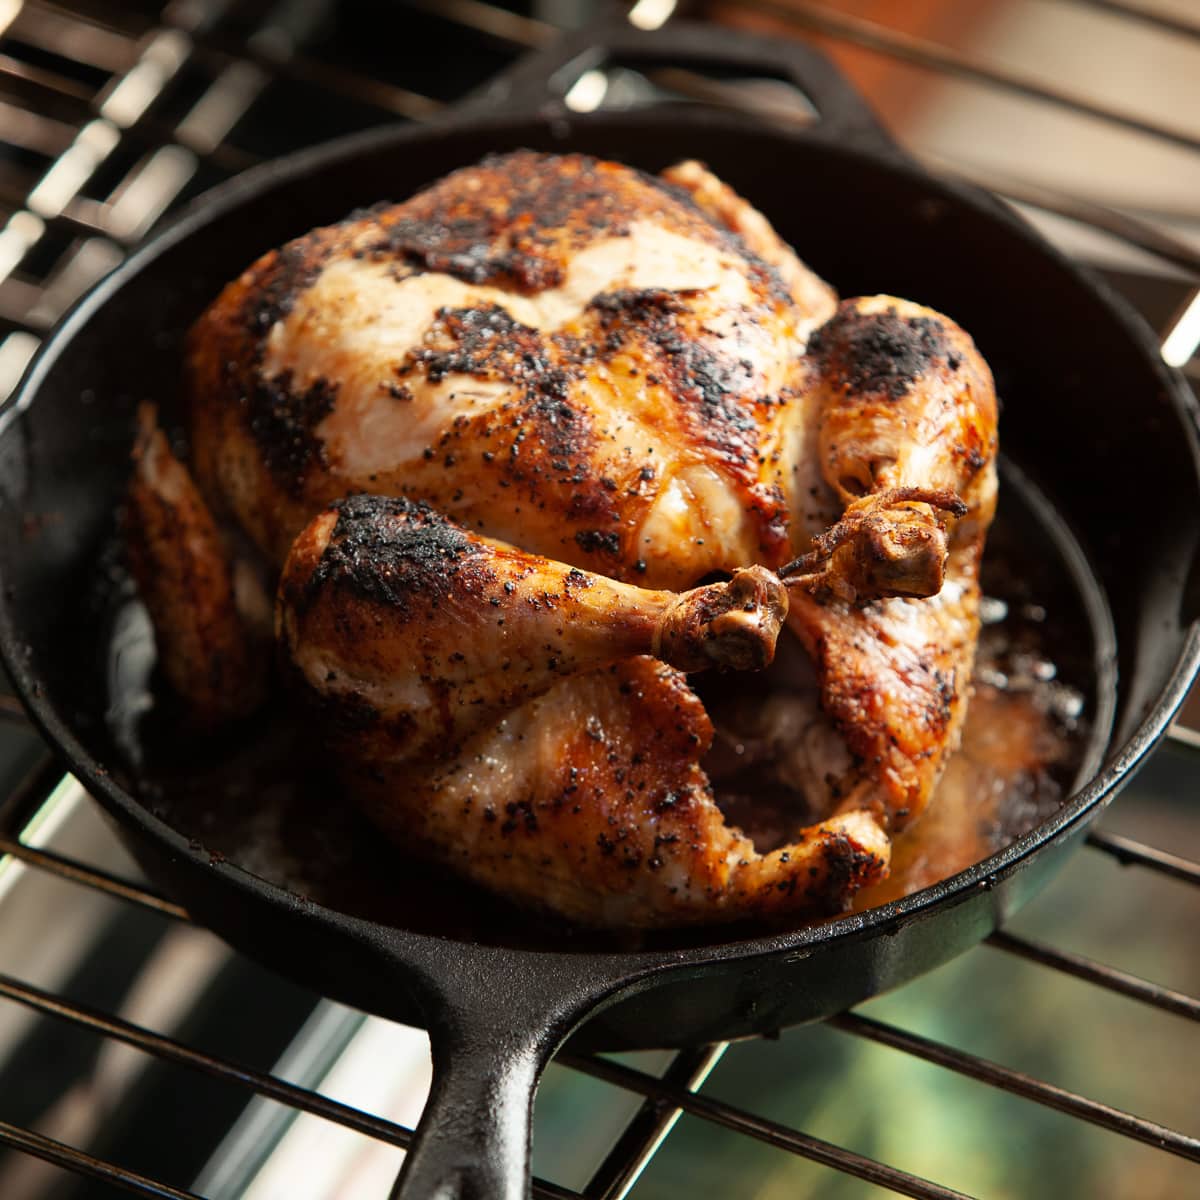
Step 3: Roast the Chicken
When done searing chicken on all sides and you have a golden exterior, place the pan with the chicken breast side up in the oven to finish roasting. Works like a charm. You get crisp, golden skin and moist meat.
Roast until a digital thermometer reads 175°F degrees in the deep part of the thigh without touching the bone. Timing will depend on the size of your chicken. A 4 to 4 ½ pound chicken will take approximately 60 minutes in the oven.
Chef's tip: The searing process is where tying the legs helps; the chicken is more stable when on its sides. This may seem a little awkward, but work with it. You'll get the hang of it. I use silicone tipped tongs to make handling the chicken easier as the edges are soft and don't tear the skin.
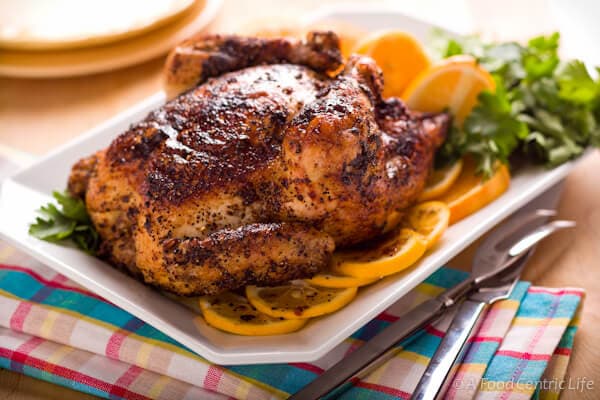
Step 4: Rest and Carve the Chicken
Remove the chicken from the oven and allow it to rest for 10 minutes. While the chicken is roasting, make a side dish and salad to complete dinner.
To carve a whole chicken, first cut off the leg-thigh pieces using a heavy Chefs or French knife. Slice the skin on the side of the bird between the breast and thigh. Pull the leg piece back until the joint is exposed. I pull mine back until it pops, then it's easy to see where to cut above the joint.
Next cut off the wings, then cut down the center breast bone and free the chicken breasts by running the knife down along the rib cage. See the photos for help.


After dinner, pick off any chicken meat still clinging to the body and save for chicken salad, tacos, quesadillas or soup.
Thrifty Option: Save the Body for Broth
If you want, save the roast chicken carcass and freeze. When I get 4-5 stored in the freezer, I use them to make homemade chicken broth. To fit more into an airtight container, cut as much of the body up as possible with a heavy knife or poultry scissors.
In summer I rotisserie outside. If you have a grill with the attachment, here is my recipe. What to serve with your roast chicken? How about sour cream mashed potatoes?
📖 Recipe
How to Roast a Whole Chicken
Equipment
- Cast iron pan
Ingredients
- 4 ½ pound whole chicken
- 2 teaspoons extra virgin olive oil
- 1 ½ teaspoons sea salt
- 1 ½ teaspoons ground black pepper
- 1 teaspoon granulated garlic optional
Would you like to save this recipe?
Instructions
- Remove the chicken from the refrigerator, unwrap and allow to stand for one hour at room temperature. Wash the chicken with cold water, discarding any packet of innards. Remove any extra fat globs around the cavity opening. Dry well with paper towels.
- Tie the chicken legs together with kitchen twine and trim off wing tips with kitchen scissors or shears, then season the chicken liberally with Florida Seasoned Pepper. Add salt if you prefer. Alternatively use coarse ground black pepper, granulated garlic and a coarse salt such as kosher or seal salt. Drizzle with olive oil.
- Pre-heat the oven to 375 degrees (190 C). Heat a cast iron skillet over medium heat. Place the chicken in the hot pan bottom side down and sear for a few minutes until you achieve a golden crust. Watch your heat level and turn the heat down if needed so as not to burn the chicken. When you get a golden crust on the bottom, turn the chicken breast side down and do the same. When the breast side is golden, stand the chicken on the sides and sear both sides.
- When the chicken is golden all over, turn the chicken breast side up and put the pan in the oven. Roast until a digital thermometer reads 165 degrees in the deep part of the thigh. Timing will depend on the size of your chicken. A 4 ½ pound (2 kilo) chicken will take approximately 60 minutes in my convection oven.
Mark says
So after searing the chicken in the cast iron skillet, you would not recommend immediately transferring the seared chicken to a roasting pan that already has the veggies cut, seasoned and drizzled with olive oil, and roast the chicken and veggies together (with the chicken resting on a bed of thickly sliced onions?
Sally says
Hi Mark. Thanks for your comment. That is yet another way to roast a chicken, another technique. What I like about doing it this way is that you are guaranteed a golden crisp crust, and it's pretty quick. Tie the legs, season and oil, sear and pop into the oven. In this case I do my vegetables on the side. Maybe I will even roast them, but do them on a rimmed baking sheet. The vegetables are not sitting in any of the fat drippings that you may not want to eat. Last comment, vegetables may take varying times to roast. I've roasted a chicken different ways and found that, at least for me, this is my go-to method.
wakanetwork says
Looks delicious! Another great recipe from you my dear. Thanks
Michelle K says
Yum! Looks amazing. We don't own any cast iron, but the link shows one for a great price, thank you! Do you have any thoughts on pulling some of the skin up and putting the seasonings between the chicken and the skin? I have done this before and just wonder if there is any reason not to? I am trying to be more careful with the fat, so it's less tempting when more seasoning is in the chicken, vs. skin. One more question - do you ever throw potatoes, carrots, parsnips or sides like this in the dish to cook with the chicken? Seems like it would work well, though thinking depending on what depends when to add them. Thanks for sharing!
Sally says
Michelle, I've added a link on how to care for cast iron, if you are wondering. Cast iron is the original non-stick surface. On seasoning, that should work just fine. I do that with my whole turkeys but not with my whole chickens. On adding other vegetables, not with this technique. I would do them in a separate pan. First, in the 10" cast iron pan, little extra room. And the vegetables would be cooking in the chicken fat in the bottom of the pan, which you may not want. I would line a rimmed baking sheet with foil, peel and cut up your vegetables, toss with olive oil and season, then roast along side. Watch your vegetables so they don't burn. Timing will depend on what size you cut your vegetables and your oven. I usually do parsnips and carrots together, and red potatoes on their own. Let me know if that helps.
Michelle K says
Yes! Thank you!!
Ron Goldman says
Looks delicious as always Sally!
Madonna says
Sally, I have implemented your technique from your previous post regarding searing the chicken breasts. Just the few extra minutes of prep to sear the chicken prior to roasting makes all the difference in both the visual and the flavor. I usually cook in small servings, but will keep this in mind for company.
Your food is so beautiful. And to anyone reading Sally’s post listen up and do what she says. You will raise your level of cooking just by following Sally’s prep instructions. For those that are wondering she is not my relative.