
Here is a tart crust recipe that works for your favorite fillings, whether pumpkin, chocolate, or even a savory goat cheese. It's made with simple ingredients, a blend of almond flour, coconut flour, butter and a little sugar. It's naturally gluten-free and grain-free too. Press the tart crust mix into a tart pan with your fingers, bake and fill. No rolling of pastry! Bake it a day ahead of filling to save time. It's so easy.
If you have not made a press-in crust like this, I think you'll love it like I do. No pastry dough to roll out and mess with. It takes about 15 minutes to assemble plus baking time. Combining almond flour and coconut flour for a cookie-like crust makes for a perfect gluten free tart crust. Fill it with my spiced pumpkin tart filling for Thanksgiving, a rich chocolate filling for Christmas, or other holidays and celebrations.
Recipe
Recipe Ingredients
- Almond Flour - Naturally gluten-free and rich in healthy fats, almond flour gives the crust a tender, buttery texture.
- Coconut Flour - Highly absorbent and also gluten-free, coconut flour adds structure and helps the crust hold together without becoming dense.
- Sugar - Light brown sugar adds a subtle caramel flavor.
- Butter - Use unsalted butter for better control over flavor. Salted butter can throw off the balance.
- Salt - Fine sea salt enhances the flavor of both the crust and the filling-don't skip it!
Substitutions and Variations
- For a vegan tart crust (or dairy-free), use a stick form (not in a tub) plant-based butter such as this.
- For a savory tart crust: If you want to make a savory (not sweet) crust, please read my post for the cherry tomato tart with fresh basil leaves and the crust adjustments. I eliminated the sugar, added an egg yolk.
Recipe Tools
- 9 ½″ light metal tart pan with a removable bottom.
- Half-sheet rimmed baking sheets. They have a raised edge, not flat like a cookie sheet (13″x 18″.) Buy them online from Amazon. Make sure they are heavy, not cheap. Heavy duty ones stand up to use without warping. Cheap ones warp. There are other brands too, just be sure they are heavy duty.
- A silicone liner is on the baking sheet. It prevents the tart crust from sliding around as well as protects it from the direct heat of the oven. Find Silpat on Amazon and cooking supply stores.
Recipe Instructions
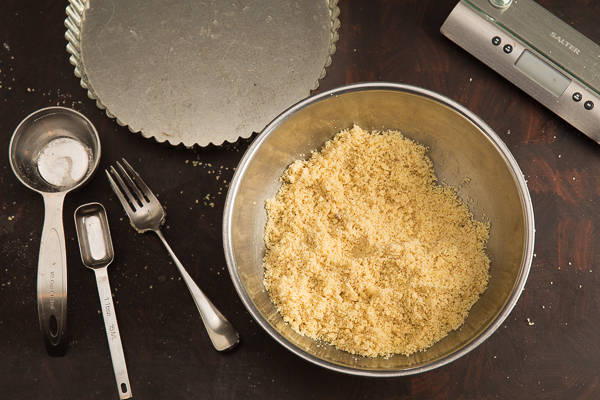
Step 1: in a medium mixing bowl, mix the dry ingredients (flours) and sugar together with a fork.

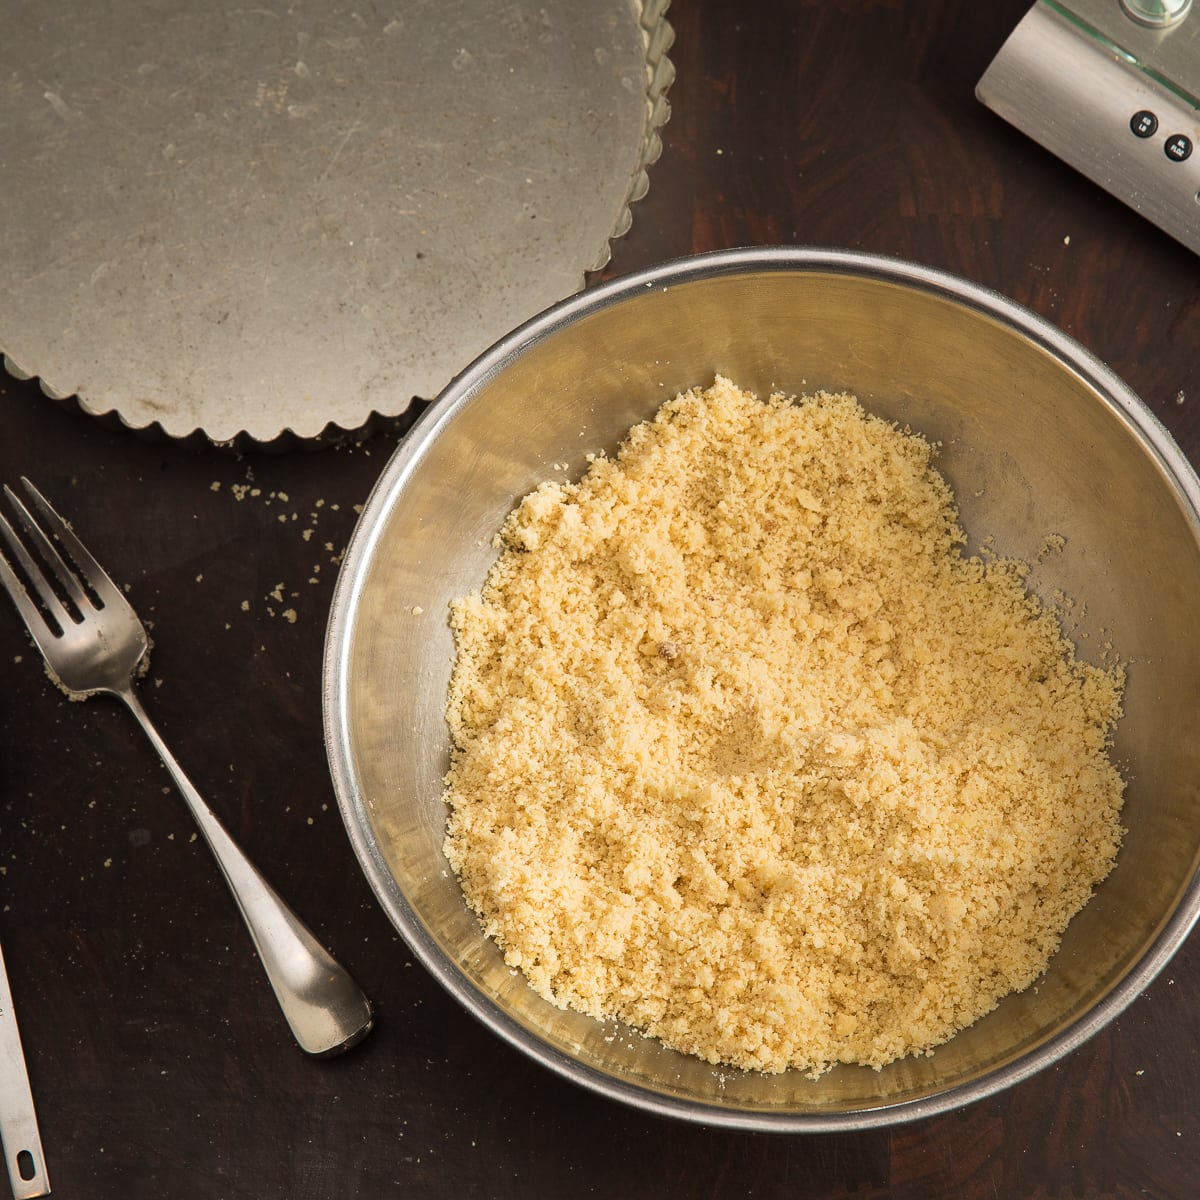
Step 2: Add in the melted butter and mix with a fork. When the mix looks evenly combined, squeeze a handful together. It should hold, like in the photo. The crust mix should feel moist. If not add a little more melted butter.
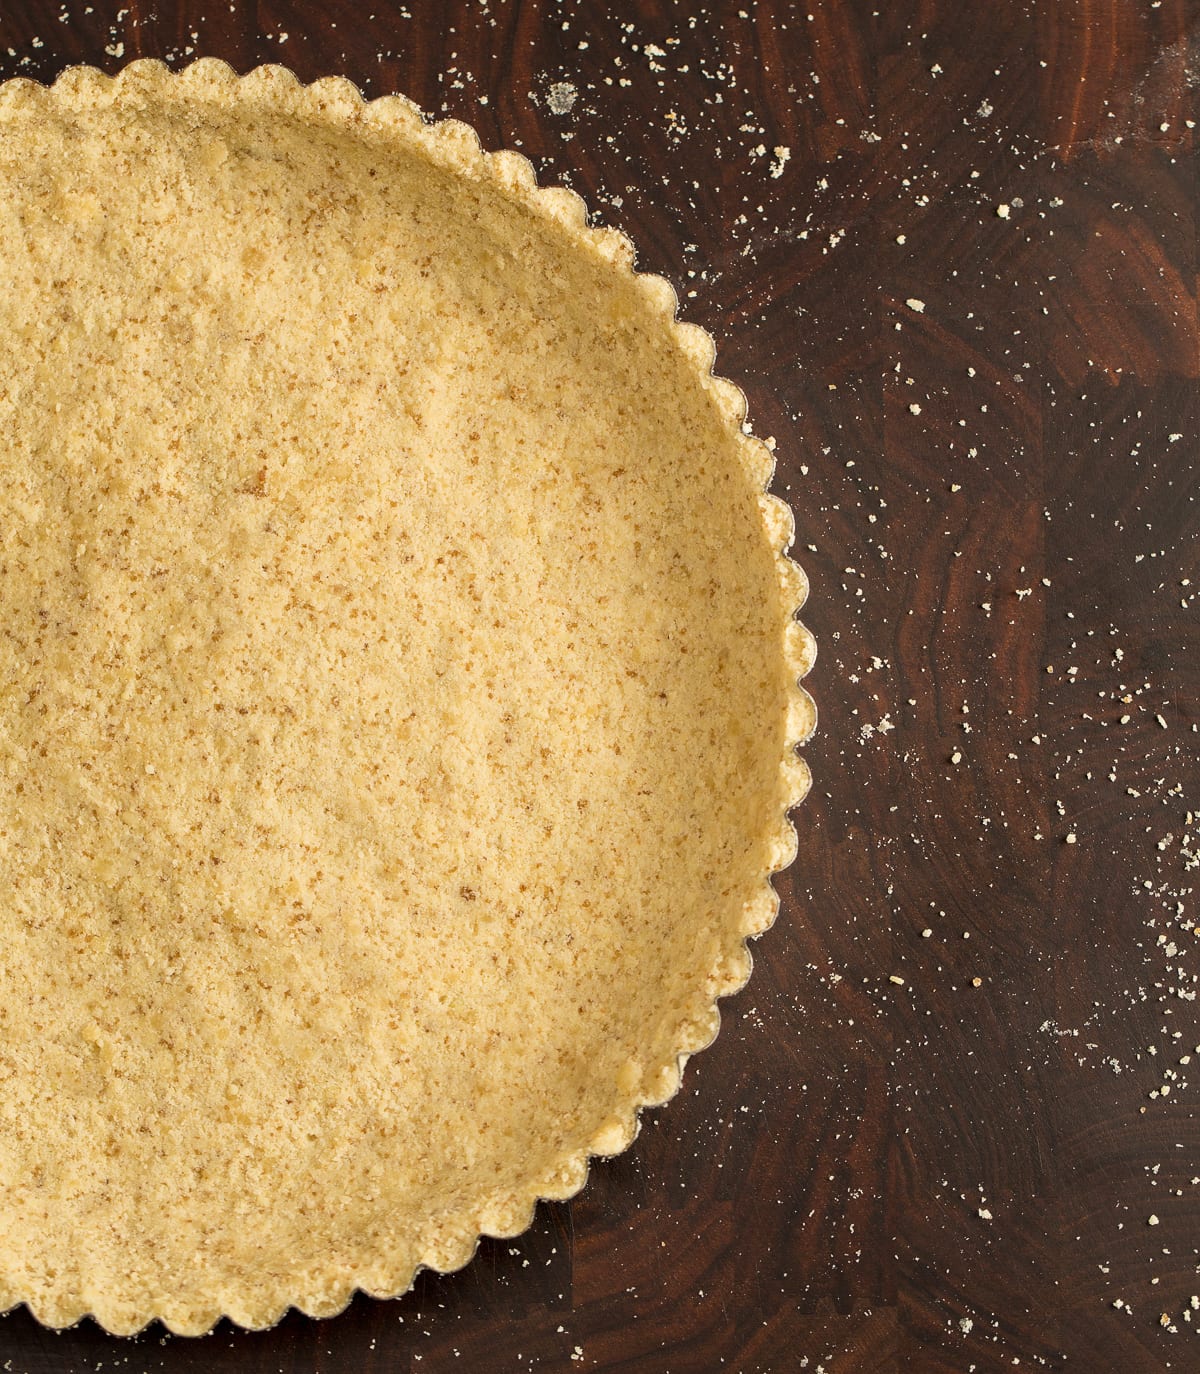
Step 3: Create the tart shell, fuss a bit and take your time. It take about 12 minutes to assemble.
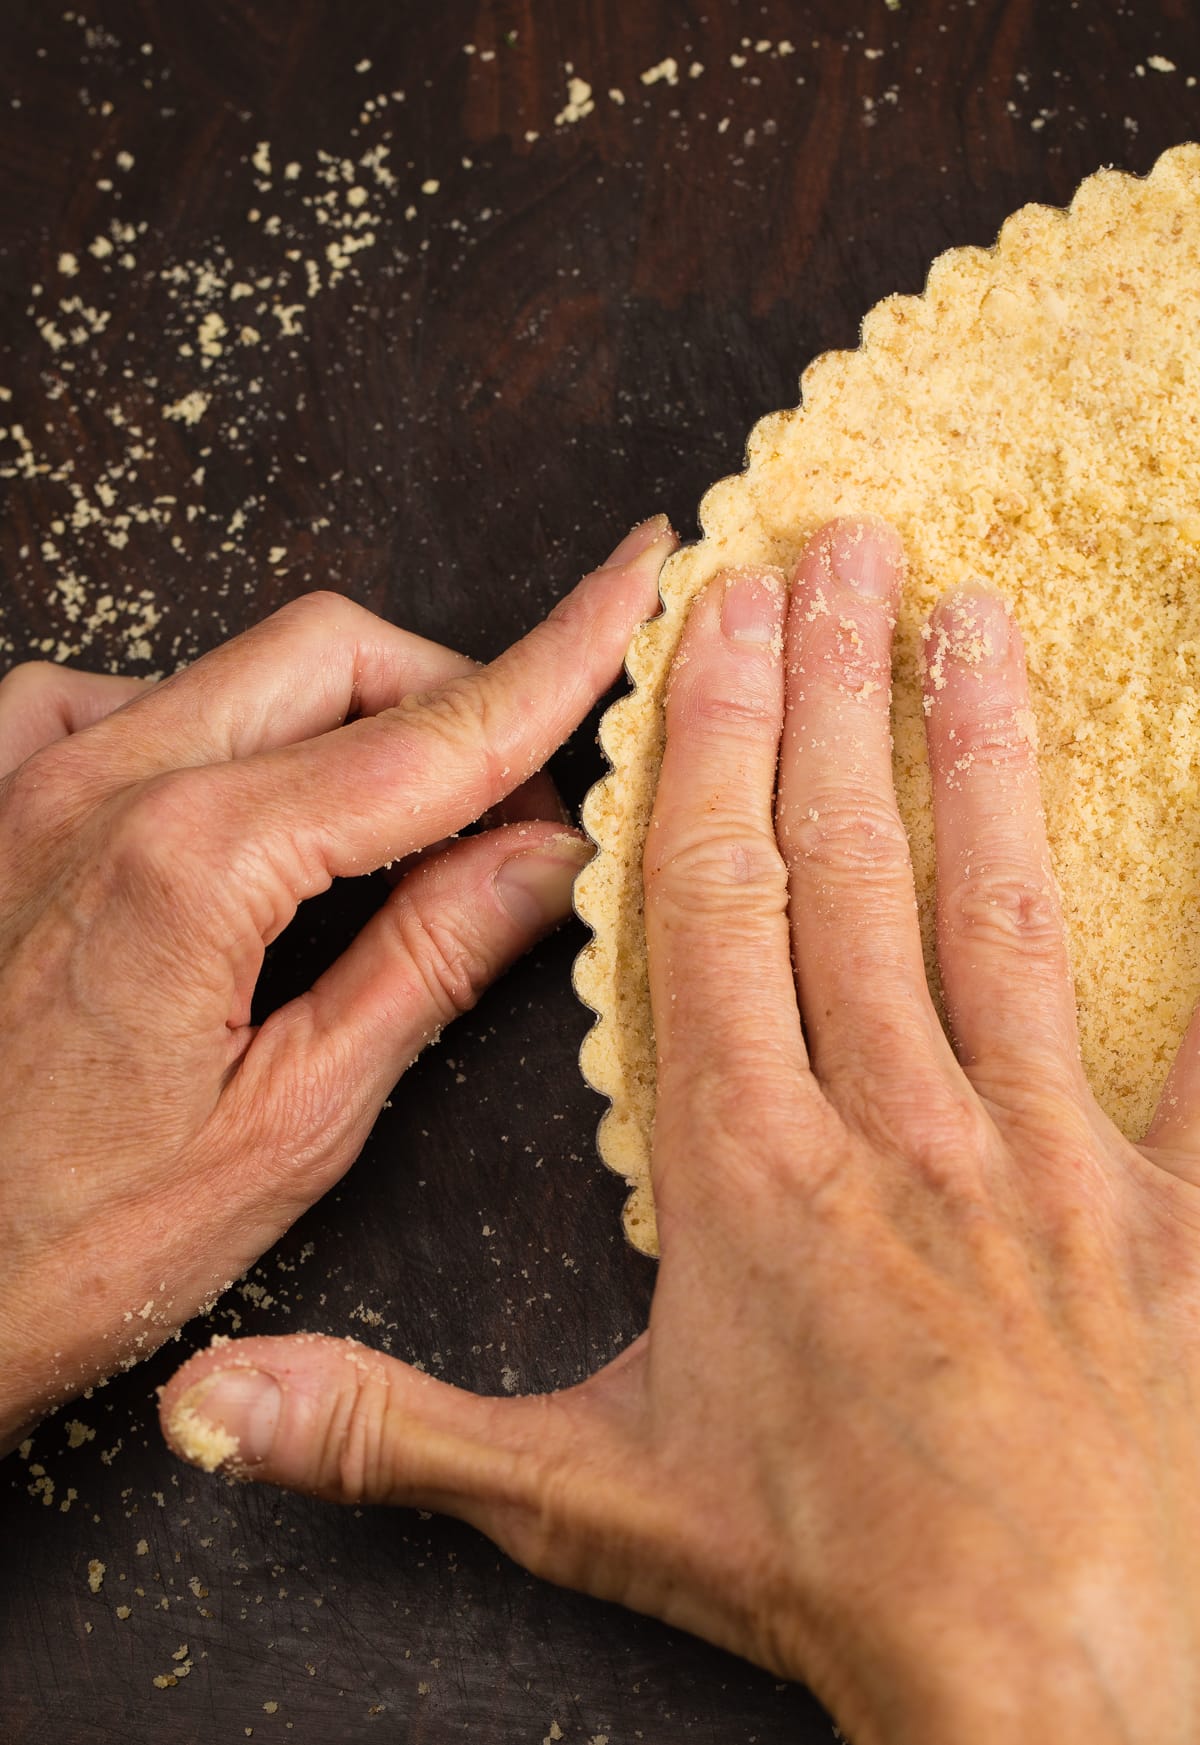
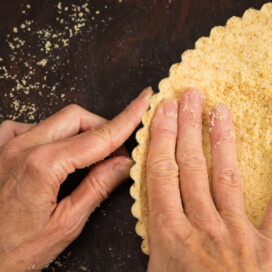
The time you take to make the crust perfect will be worth it. Pour the crust mix into the tart pan, distributing it evenly with your fingers. Work on the crust edge first. You want to create a strong, even edge.
Push and pinch the crust mix into the edge of the tart pan with your fingers and thumbs. Work to build it up in layers and keep moving around the tart pan. It takes a little time. Keep working it. A nice sturdy edge will give strength to the tart when you cut it.
When you have a nice strong edge, pat the rest firmly into the bottom of the tart pan for the base (and don't poke holes). The bottom of a flat glass helps.
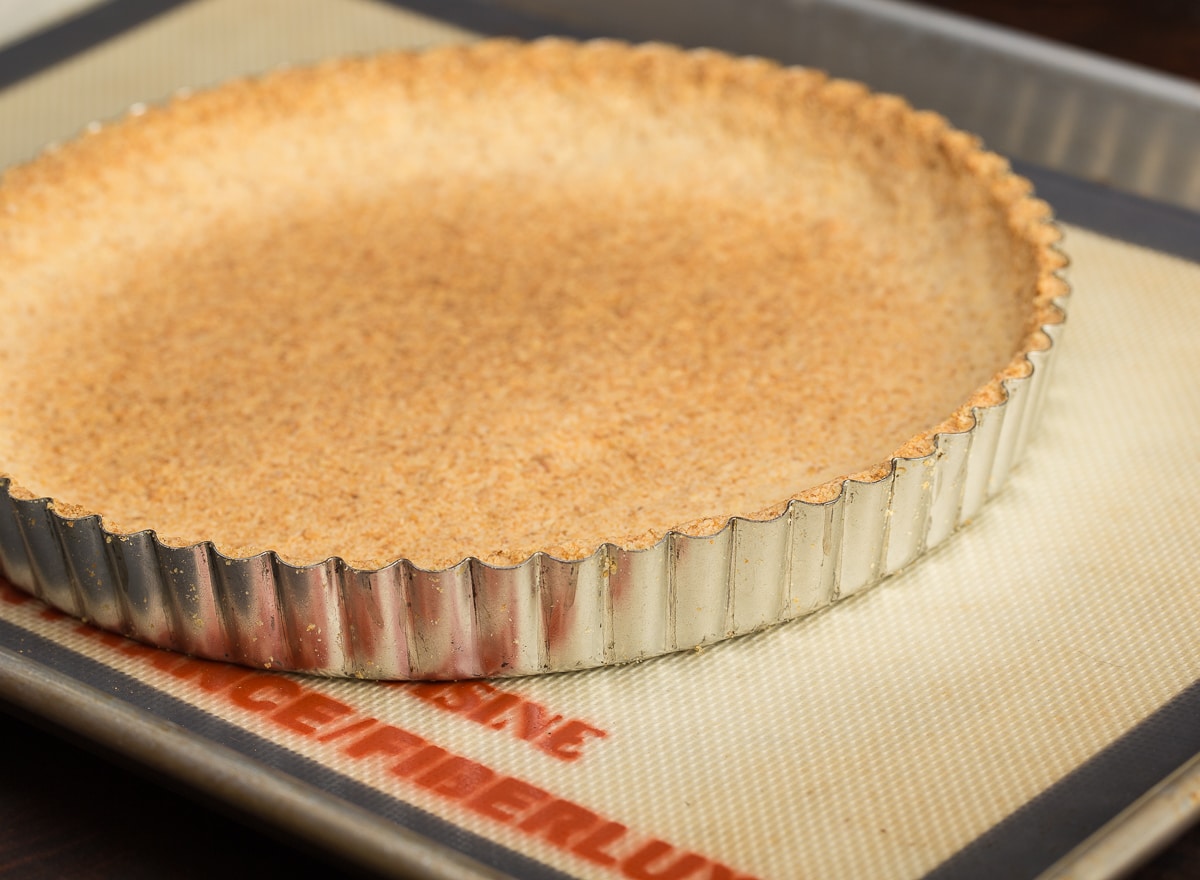
Step 4: Place the tart pan on a sheet pan for support. Blind bake the tart crust util it is golden. Remove from the oven and cool prior to filling.
Bake the tart crust in a 350° oven for approximately 15-17 minutes. Timing will vary with ovens. You want it to be a light golden brown. Remove and cool. Use with your filling of choice. If you are using my pumpkin filling, you will bake the tart a second time.
Make Head Tips
You can bake this easy gluten-free tart crust a day ahead. After baking and cooling, wrap it in the pan (for support) with plastic wrap. It's fine stored on the counter for a day.
Serving Suggestions
Here are the tart filling recipes I have created so far, both sweet and savory:
Recipe FAQs
After creating your tart crust, blind bake it, which means pre-bake it before filling. THis helps insure that the crust does not get soggy when filled and baked or filled with a no-bake filling.
Make the tart crust dairy-free or vegan using an unsalted plant-based butter in stick form, not tub form.
Because there are many choices in gluten-free flours, there is not one right answer. For tart crusts, a blend of gluten-free flours is best to get the best attributes of each flour, such as proteins and starches. It also depends on if you're making a roll out pastry style crust or a press-in style crust.
⭐️Did You Make This Recipe?
If you make this tart crust, please comment and let me know how you liked it and how it worked for you. If you loved it, please give it a 5 star rating! They really help other readers and I enjoy hearing from you.
📖 Recipe
Gluten free tart crust (grain free too)
Equipment
- 9 ½" removable bottom tart pan (light colored)
- Silpat or other non-slip liner optional
Ingredients
- 1 ½ cups almond flour 6 ounces
- ½ cup coconut flour 2 ounces
- 2 tablespoons light brown sugar or natural granulated sugar
- 6 tablespoons unsalted butter, melted or plant-based butter
- ¼ teaspoon salt
Would you like to save this recipe?
Instructions
Mix Crust
- Pre-heat oven to 350° (177 C). In a medium bowl, mix almond flour, coconut flour, sugar and melted butter with a fork until blended, then blend until completely combined with your fingers. To test, squeeze a handful together. It should hold together and feel moist.
Form Crust With Your Fingers
- Pour the crust mix into the tart pan and distribute it evenly. Start by building the edges of the tart. With your fingers and thumbs, pinch and crimp the crust mix together to form a strong, fairly thick edge. Refer to the photos in the post for guidance. This will take 12-15 minutes. Don't hurry. It will be worth it.
- Once you've created a strong edge, compress what is left of the crust mix into a firm base in the bottom of the tart pan with your hand or a flat bottom glass. Place the tart pan on a rimmed baking sheet. If you have a silicone liner, place it on the baking sheet first so the tart pan does not slide. If you don't have one, no problem. Just be careful with the unbaked tart crust.
Bake Crust and Cool
- Bake tart crust for 14-16 minutes, or until light golden brown. Timing will depend on your ovens. Cool and fill as desired.
Linda Cotov says
Hi can I make this using vegan butter? I love. Passion fruit!
Thanks
Sally Cameron says
Hi Linda, it should work fine with plant based butter. I would try either Miyoko's or Earth Balance (sticks not tub). Please let me know how it works out for you.
Christina says
Hi Sally, the crust was great for a fruit tart with cream cheese and mascarpone cheese filling. However, when I used it for a lemon tart, the lemon curd was absorbed by the crust base so it was really soggy and the lemon curd layer was also really thin. Do you have any advice on what to do, or a lemon curd recipe to recommend please? Thanks in advance!
Sally Cameron says
Hi Christina, it may have happened because the lemon curd is more fluid. You baked the crust first, before filling, right? I used the crust for a sort of key lime lemon pie a few weeks ago and it worked but I think it was a thicker filling. I used 2-7 oz can sweetened condensed coconut milk (half the sugar of dairy SCM, and non-dairy), 4 egg yolks, 1/2 cup lemon/lime juices. Baked 30 minutes (maybe a bit too long), then cooled and chilled well. It was my first test and tasted good. Using plain lemon curd, I'm not sure what to tell you without testing. I know in some lemon curd tart recipes they blind bake then fill (not bake any more) then chill.
Christina says
I followed the instructions to a tee and the tart crust came out came out perfectly! Thank you Sally!
Sally Cameron says
Love to hear that Christina! Thanks for reporting back!
Clare says
Sally, I learned this recipe from my very allergic niece, who learned it from you. Since I'm vegan, I make it with unrefined coconut oil and use it to make primitive apple or berry galettes. For vegans, here's what works for me:
1 1/2 cups almond flour
1/2 cup coconut flour
1 tablespoon brown sugar
1/8 teaspoon salt
4 tablespoons unrefined coconut oil, measured and chilled
Ice water, up to 4 tablespoons
I pulse the dry ingredients in a food processor, add the coconut oil, and pulse it till it's in crumbs. Then I add the ice water until the whole thing forms a manageable dough. Like you, I don't try to roll this out. I press it into a pie pan with my fingers, allowing the sides to rise an inch or more above the top of the pan. Then I fill it with 4-5 cups of a precooked, thickened berry or apple filling, "fold" the crust over the top to form a primitive partial top crust (I don't care what it looks like!), and bake it for 30 minutes at 350 degrees until the crust is golden. The coconut aroma and taste are delightful and really play well with mixed berries spiced with cinnamon and ginger.
Sally Cameron says
Hi Clare, thanks for sharing your version! Glad it has helped you both. Yes, coconut oil is a great swap for butter. Have you tried the Myokos vegan butter? It's delicious and should work great as well. Always fun to try new things. Tell your niece thanks for me. Happy baking!
Naomi says
Do you think this crust would work as is if i also add shredded coconut and almond slivers to it?
Sally Cameron says
Hi Naomi. I don't think so as it would change the texture quite a bit. It would depend on how large the coconut is. I've only made it with the more finely shredded type. You want something smooth enough to be pressed into a tart shell. Whatever you are going to fill it with, could you use the shredded coconut and slivered almonds for garnish on top?
Sue Kidd says
Thank you for sharing this wonderful recipe. It worked perfectly as written. I also appreciate the photos.
I used this recipe to make cheese cake bars in a 9x13 pan and they were delicious.
Sally Cameron says
Love to hear that Sue! My pleasure. I've been wanting to do that as well, use it in bar form instead of just a tart crust. Glad to hear it works. Thanks for commenting.
Donna says
This recipe is off. I followed the instructions exactly and the crust was not a crust at all, but instead a crumble. Possibly, as others have suggested, it is due to the wrong amount of butter or the butter being melted. In any case, a huge disappointment.
Sally Cameron says
Hi Donna. I am not sure what you did, but I have made this a hundred times if once and it always comes out as a crust, as it is designed. Wish I could help you and Im sorry you had trouble with it. The amount of butter was adjusted up at the beginning because others found it easier to make with more. This version reflects higher butter content.
Tiffany says
Is there any need to butter the tart pan before pressing the dough into it? Does the crust have any issues releasing? I'm about to make it tonight - thanks! =)
Sally Cameron says
Hi Tiffany. No need to butter the tart pan. Just dump in the crust mix and press with your fingers like the photos show. At the end sometimes I will take a flat glass and press a bit more to be sure its nice and tight. And get a nice sturdy edge too. I've made this so many times and while it seems a bit of a fuss, it really just takes about 10-12 minutes tops.
Tere Batham says
Today I tried your quick Almond/coconut tart crust recipe on a damp winter's day in New Zealand. Not having access to Almond flour, I followed the advice of one of the blogger's above and added one egg and an extra tablespoon of melted butter and a bit of cinnamon for flavor to my almond meal and coconut flour. Popped into the oven for 14 minutes, it came out perfectly done. Thanks for the recipe and the helpful adjustments in the comments!
Sally Cameron says
Love to hear that Tere, especially from someone around the world. I am sure your notes will help others. We love NZ! Spent there incredible weeks, mostly on the south island, last year. We hope to get back one day! Thanks for your comment.
amsuka says
Thank you for this great straight-forward recipe. I love the marriage of delicious and simple! I have my tart just out of the oven, and it looks gorgeous. I so appreciate bloggers/cooks/foodies such as yourself, who generously share their recipes for free. I always strive to make a recipe exactly as written (the first time anyway!) as it does not seem fair to make changes and then wonder why it didn't work! Anyway, thanks again 🙂
Sally Cameron says
Thanks for the comment Amsuka! So happy it was a success for you!
Effie J. Sorg says
Great looking almond coconut tart crust ! And so easy. And it is looking awfully tasty. Good photos, too. This is just an all around good post! thanks for this.
B Jones says
I added water to my almond crust recipe. It is chilling in the refrigerator overnight. Will the addition of water make the crust fall apart?
Sally Cameron says
Hi B. I've never tried that method so I have no idea. Why did you add water and chill overnight versus just baking it ahead of time as the recipe directs? You can bake it ahead and wrap well, then fill the next day. Please let me know. I hope it works out for you. It really is a good recipe.