A Foodcentric Life

  • Best Fall Recipes
  • Meet Chef Sally
  • Recipe Index
  • Subscribe
menu icon
go to homepage
  • Best Fall Recipes
  • Meet Chef Sally
  • Recipe Index
  • Subscribe
    • Facebook
    • Instagram
    • LinkedIn
    • Pinterest
  • search icon
    Homepage link
    • Best Fall Recipes
    • Meet Chef Sally
    • Recipe Index
    • Subscribe
    • Facebook
    • Instagram
    • LinkedIn
    • Pinterest
  • ×
    Home » Recipes

    High Protein Overnight Oats (with Chia Seeds)

    01/26/2024 by Sally Cameron 2 Comments

    A single bowl of healthy overnight oats with blueberries and pomegranates seeds.

    High-protein overnight oats are an easy, make-ahead breakfast perfect for busy mornings and meal prep. No cooking required - just mix the ingredients, refrigerate overnight, and enjoy. Whether you keep them simple or load them with toppings, these overnight oats are a healthy grab-and-go option and a great alternative to smoothies. Use dairy milk or plant-based milk, such as almond milk, for a nutritious start to your day.
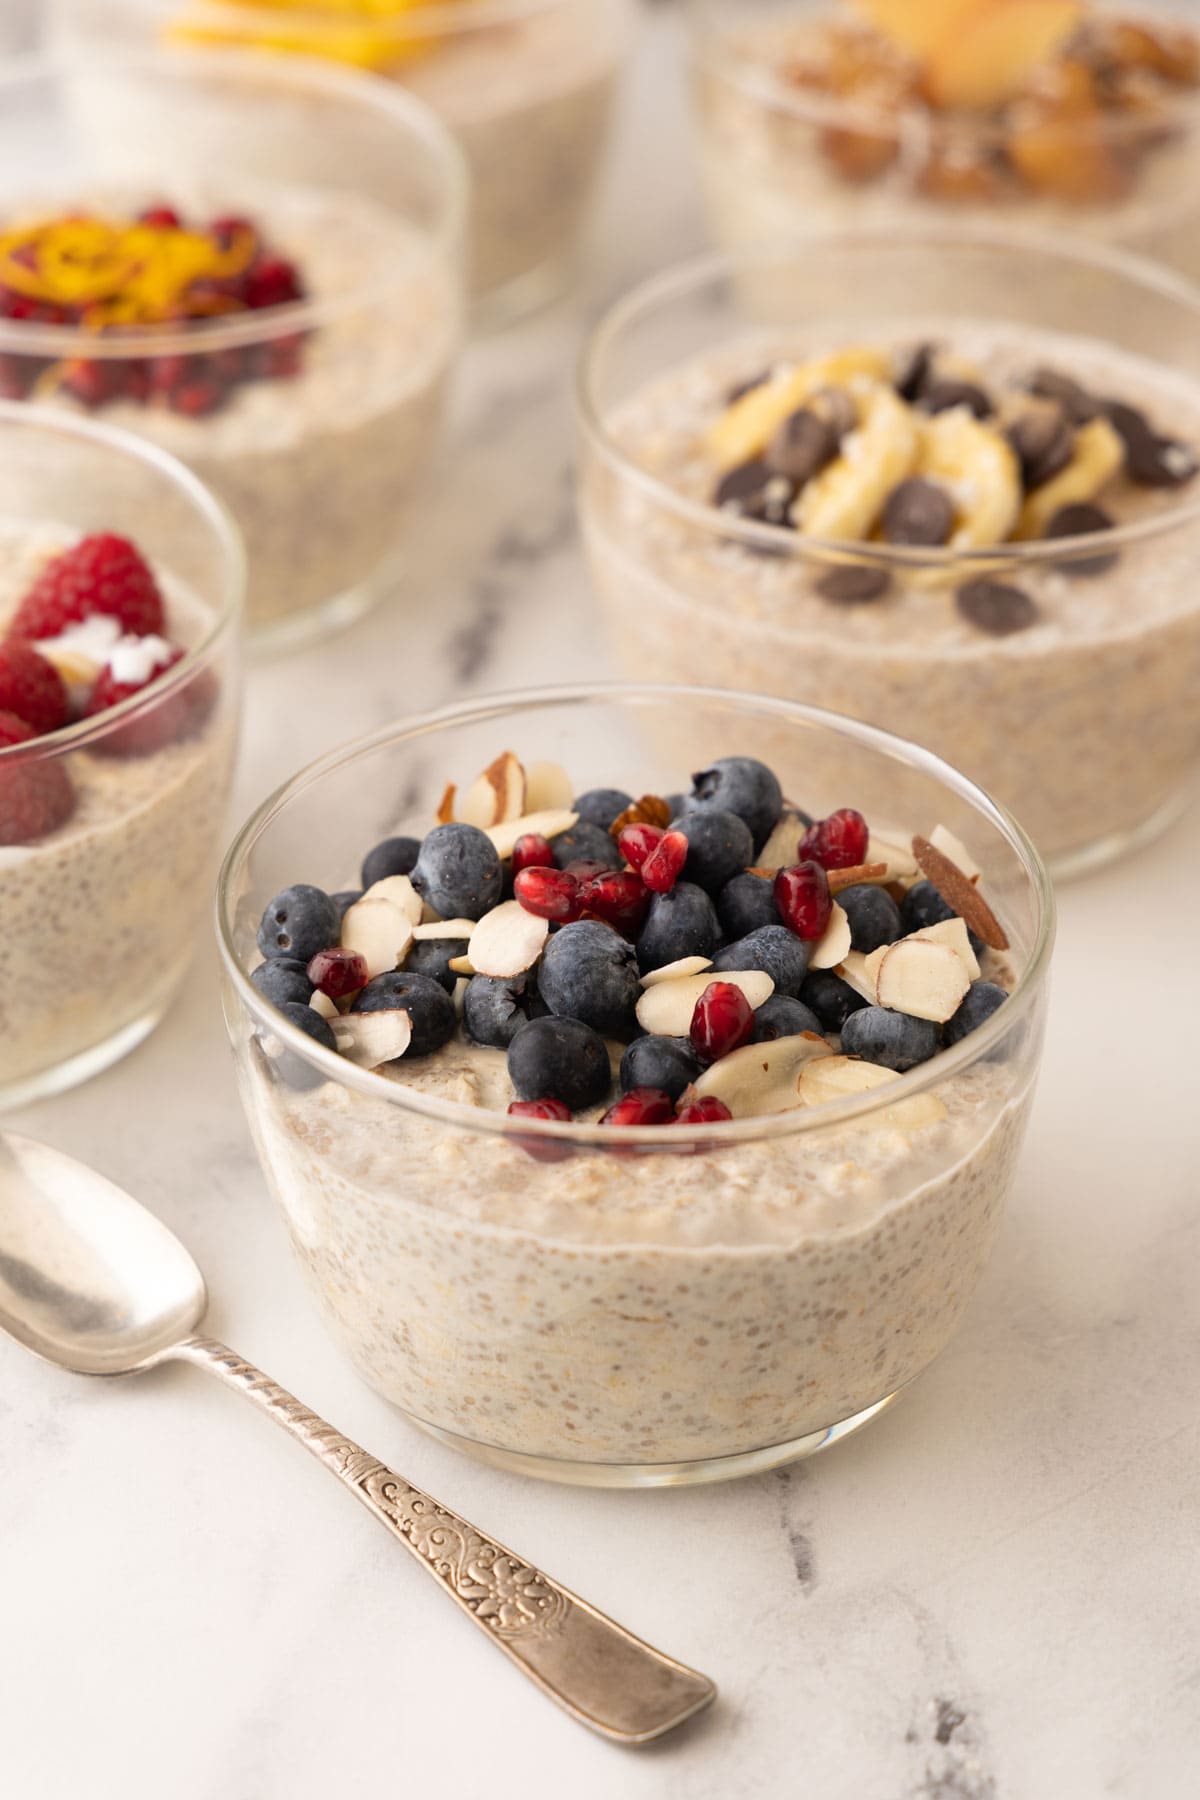
    A glass bowl of overnight oats with blueberries and pomegranate seeds.

    So what makes them high protein overnight oats? The combination of healthy ingredients, like rolled oats, chia seeds, toppings, and your choice of milk. For the most protein, try homemade hemp milk for 14 grams of protein in an 8-ounce glass. For higher protein, add a little protein powder if desired.

    [feast_advanced_jump_to]

    Why You'll Love High Protein Overnight Oats

    • High in protein, low in effort - 20-30g of protein per serving, no stove needed.
    • Meal-prep friendly - Make a few jars ahead for the week.
    • Customizable - Add fruit, nut butter, or protein powder to fit your goals.
    • Naturally gluten-free and dairy-free options - Easy to adapt for any diet.
    • Budget-friendly - Wholesome ingredients you already have in your pantry.

    For a terrific weekend or holiday breakfast, try these naturally gluten-free buckwheat pancakes.

    Chef's Tip - Protein Powder Math:
    Most protein powders provide about 20-22 grams of protein per scoop, or roughly 5 grams per tablespoon. You rarely need a full scoop for overnight oats - 1 to 2 tablespoons is plenty to boost protein without overpowering flavor or texture. Add more only if you're specifically targeting higher protein intake. Don't like powders? Stir in 1-2 tablespoons Greek yogurt for a creamier texture and approximately 1 gram extra protein per tablespoon.

    Ingredients You'll Need

    This is the basic overnight oats recipe with chia seeds. Toppings take it to a whole new level. See my notes for varying the protein levels.
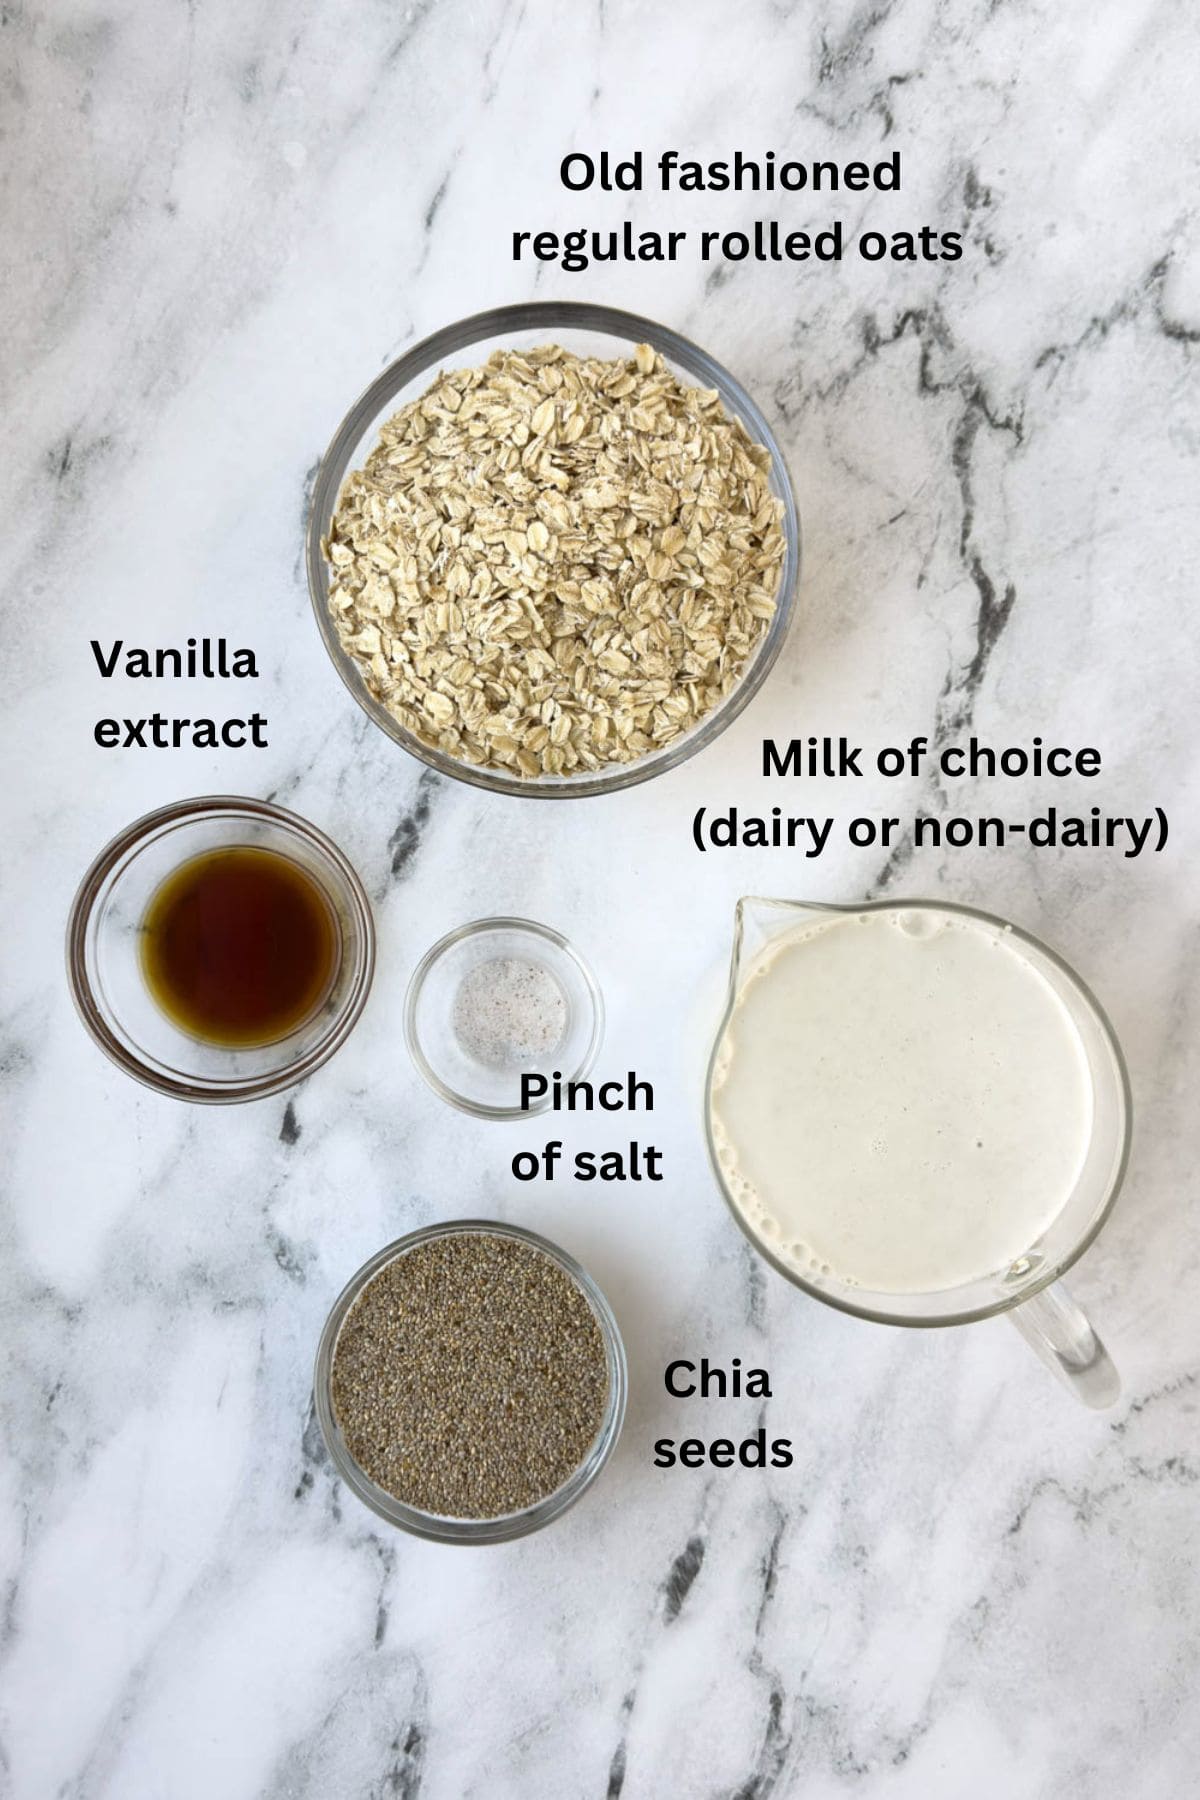
    Simple ingredients for overnight oats with chia seeds.
    • Oats - Buy old-fashioned rolled oats labeled gluten-free if needed. If gluten isn't a concern, use regular rolled oats. Avoid instant oats - they get too soft overnight.
    • Milk - The milk you choose affects both flavor and protein. Use dairy milk, almond, hemp milk, or cashew, for a plant-based option.
    • Chia seeds - Chia seeds make the overnight oats set up nicely and add a little healthy fat, fiber, and creaminess. I prefer white chia seeds for overnight oats.
    • Sweetener - Try agave syrup, maple syrup, date syrup, yacon or raw honey. You can mix it in as the oats set up overnight, or use a little in the morning over the top. For zero sugar use monk fruit honey or maple syrup.
    • Vanilla - Use either vanilla extract or try vanilla paste with little flecks of vanilla bean.

    For measurements please see the recipe card. For optional toppings, see below in serving suggestions section.

    Substitutions and Variations

    • Swap almond extract - use vanilla extract instead.
    • Add spices - try cinnamon or pumpkin pie spice in fall.
    • Make it chocolate - stir in cocoa powder for a rich flavor.
    • Apple cinnamon overnight oats, - make a batch of this easy apple compote to top your overnight oats with. It tastes almost like apple pie. Dessert for breakfast? Why not.

    For another make-ahead breakfast, try this chia pudding with coconut milk.

    Choosing the Right Milk for Overnight Oats

    The milk you use changes both texture, flavor, and protein. Here's how the numbers compare (from my homemade milk recipes, not store bought) at 8 oz (1 cup). Coconut milk is not listed as it provides no protein, just fat.

    Milk (homemade unless noted)Approx. Protein / 8 ozTexture & FlavorBest For
    A2 cow’s milk (2% or whole)~8 gNaturally creamy, clean dairy flavorHighest protein + classic texture if dairy is OK
    Hemp milk – standard batch~9 gLight, slightly nuttyDairy-free, solid protein without powder
    Hemp milk – extra-hemp~14 gRicher, more bodyMaximum plant protein; super satisfying
    Cashew milk~8 gUltra-creamy, silkyDessert-level creaminess with real protein
    Almond milk~5 gClean, mild, lighterLighter oats with a decent protein bump
    Oat milk (store-bought, optional)~3 gSmooth, slightly sweetExtra creaminess if you like/tolerate it.

    How to Make Overnight Oats

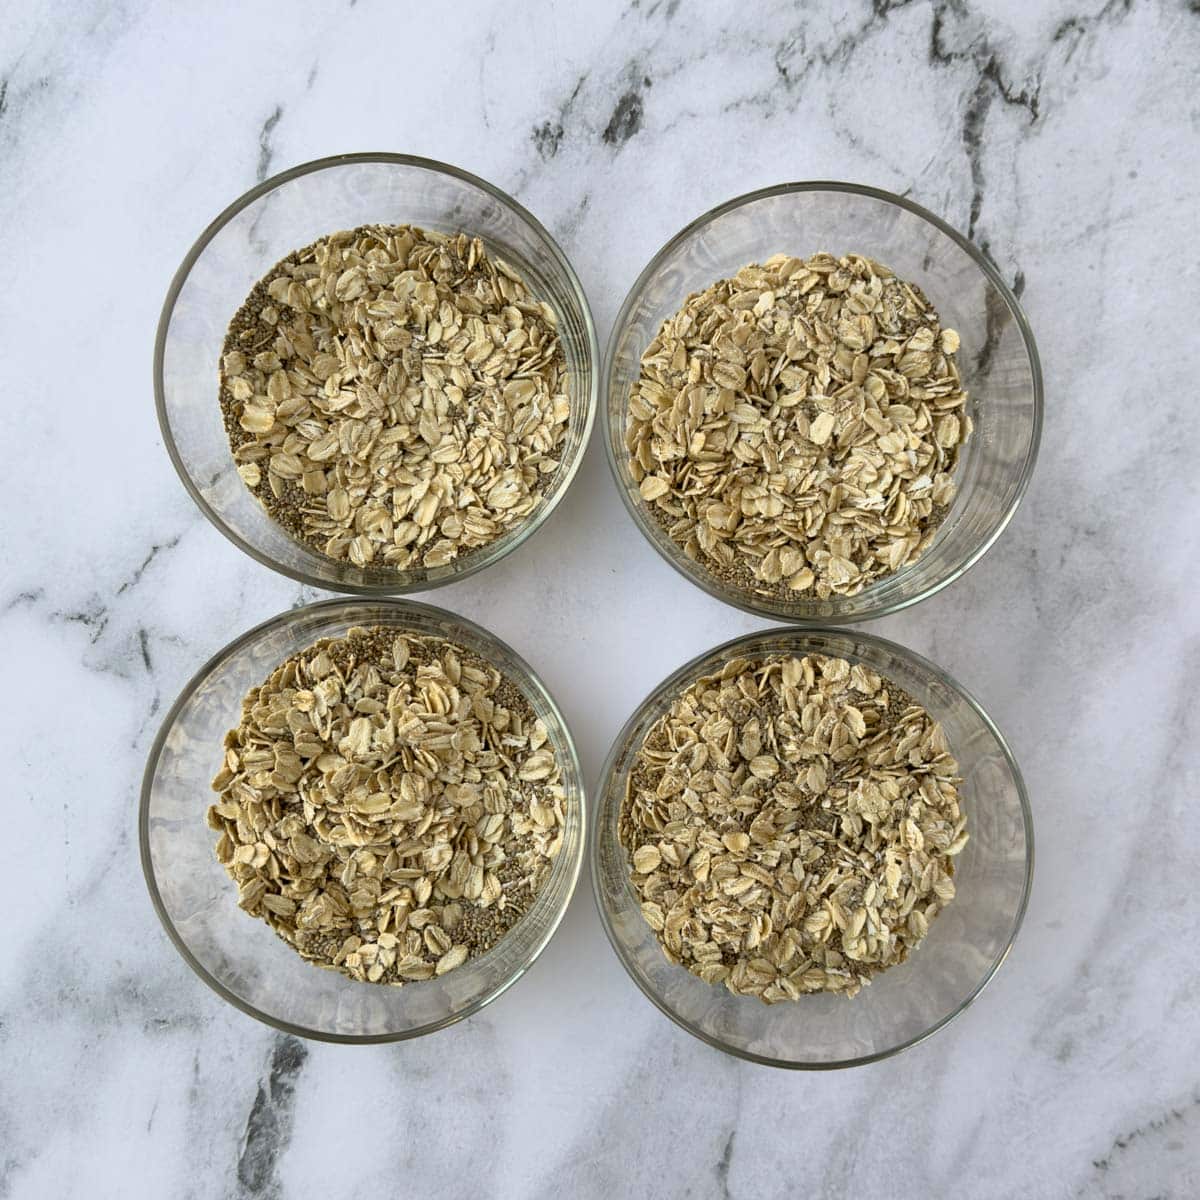
    Four glass bowls with dry rolled oats and chia seeds ready for milk and vanilla.
    Step 1: Measure rolled oats, chia seeds, and a pinch of salt into appropriate container with a tight fitting lid. Add milk and vanilla, and stir very well. Refrigerate overnight.

    Best Containers for Overnight Oats

    Choose airtight containers like a glass jar or a bowl with a tight fitting lid. I like ones that stack easily in the refrigerator and for storage. Tight lids mean no leakage. A 16-ounce meal prep bowl or jar with an airtight lid gives you enough headroom to add your toppings. Another alternative is a 16-ounce wide mouth Mason jar.
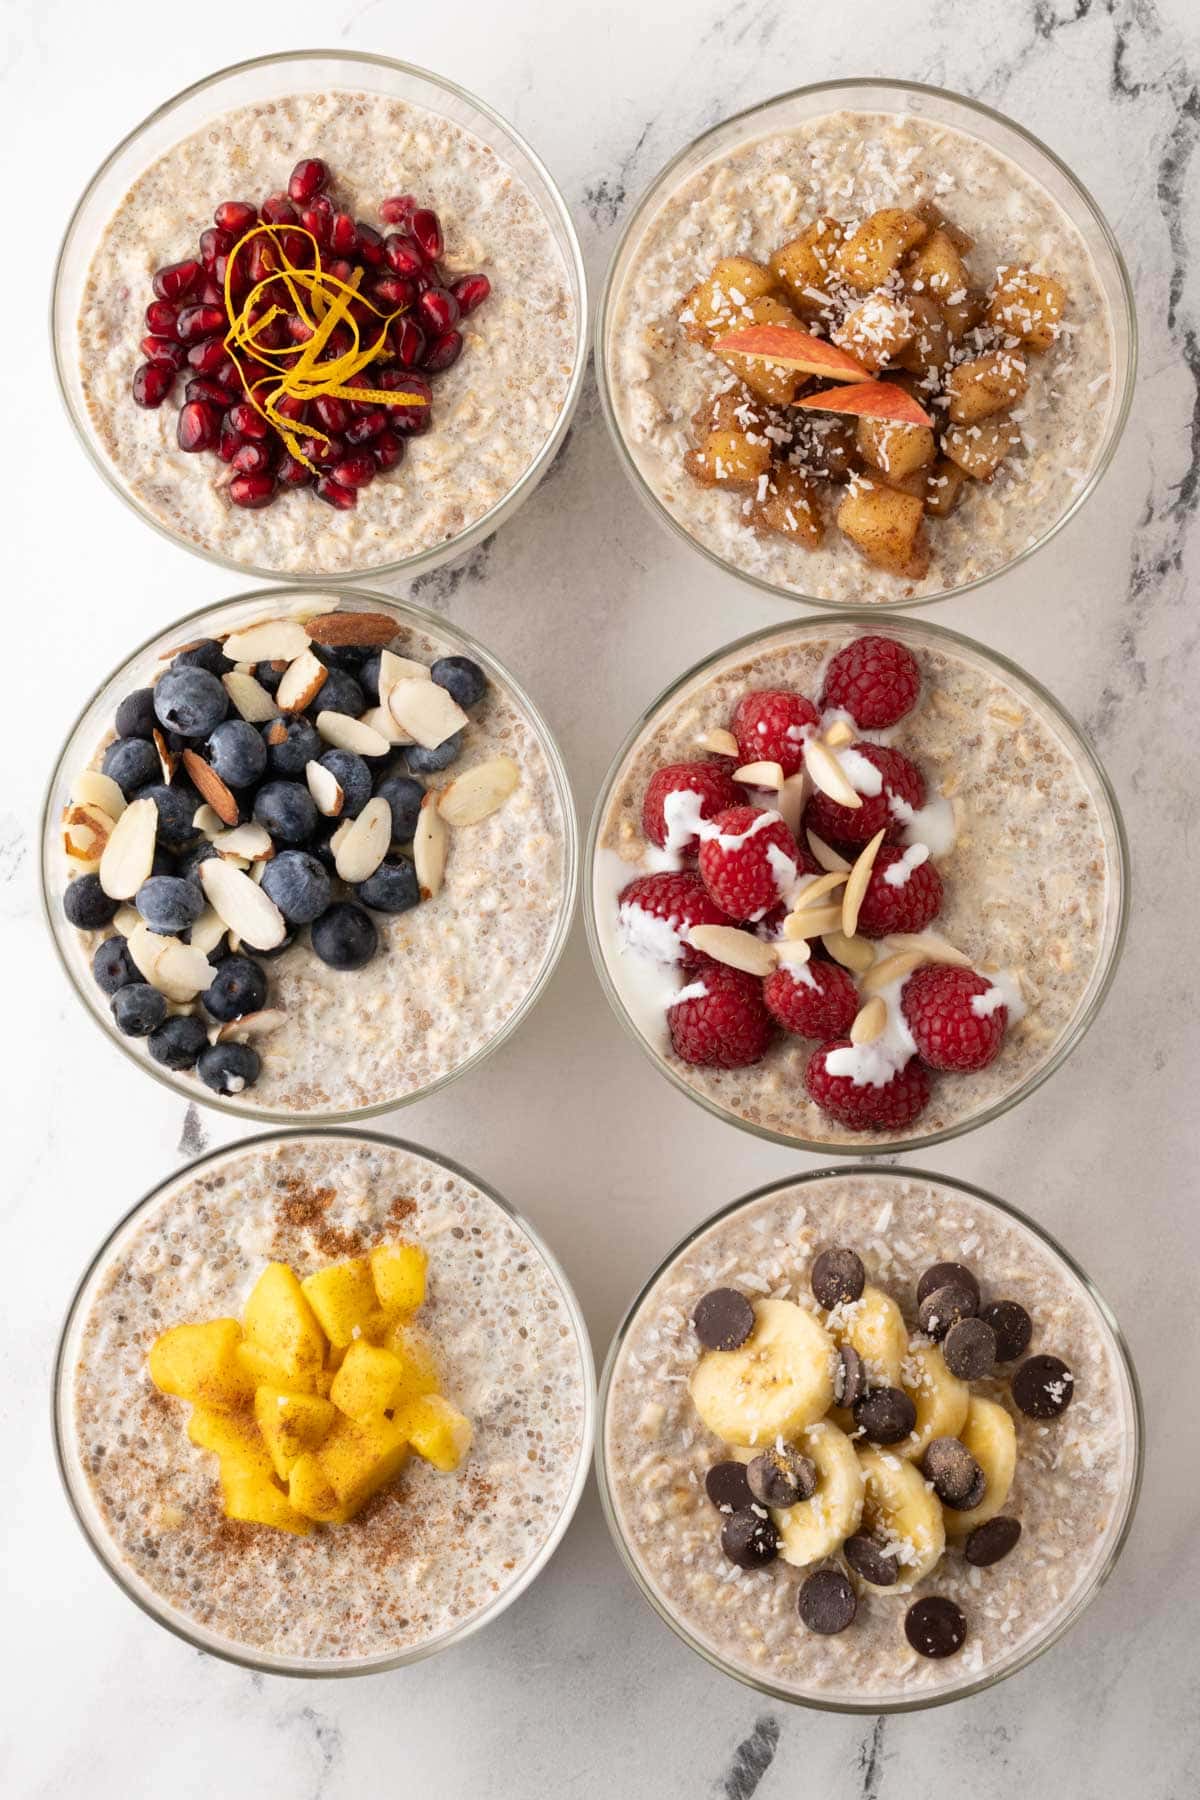
    Six bowls of overnight oats with a variety of colorful toppings.

    Serving Suggestions

    When to add toppings: Stir your overnight oats first, then add toppings-or pack them separately in a small container to add just before eating. Mix and match these ideas to find your favorite combinations for high-protein overnight oats.

    • Fresh berries - Strawberries, raspberries, blueberries, or blackberries add antioxidants and color.
    • Frozen fruit - Works beautifully; just thaw first so your oats don't get watery.
    • Fresh fruit - Try apples, this cinnamon apple compote, or a spoonful of homemade applesauce, plus pears, bananas, mango, peaches, nectarines, plums, or pomegranate seeds.
    • Crunchy add-ins - Sliced or slivered almonds, pepitas, hemp seeds, or coconut flakes for healthy fats and texture.
    • Nut butters - Almond, cashew, or peanut butter add richness and extra protein.
    • Jams & spreads - Choose lower-sugar or fruit-only versions for natural sweetness.
    • Chocolate lovers' twist - Stir in dark chocolate chips or raw cacao nibs for a lightly sweet, antioxidant-rich finish.
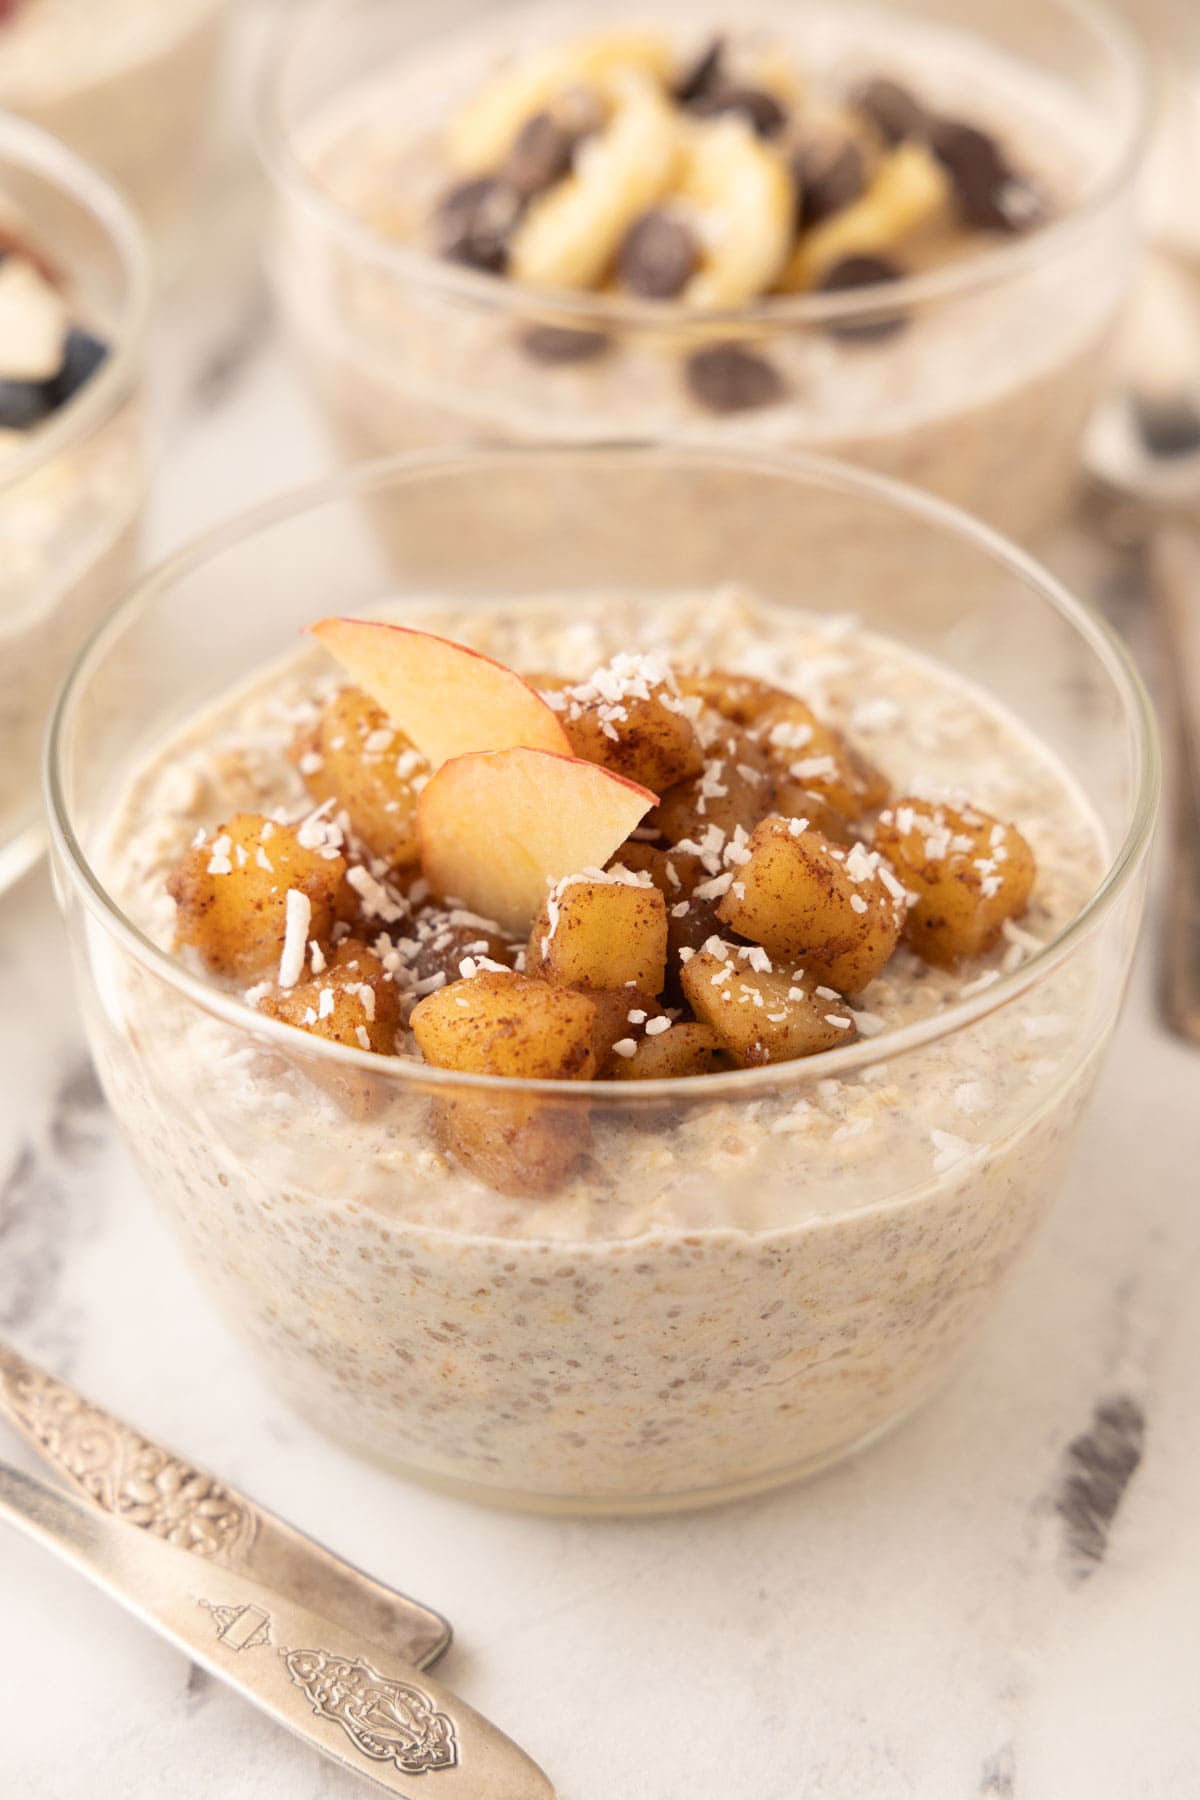
    Overnight oats topped with apple cinnamon compote in a glass bowl.

    Storage & Shelf Life

    Overnight oats keep well for up to 4 days in the refrigerator. Stir before eating, as the chia seeds continue to thicken the mixture over time.

    If the oats become too thick, add a splash of milk and stir until creamy again. For meal prep, store each portion in a sealed 16-ounce container so it stays fresh and travel-ready.

    Recipe FAQs

    Are overnight oats with chia seeds healthy?

    Yes. Overnight oats with chia seeds are a nutrient-dense breakfast packed with protein (typically 16-22 grams), fiber (about 10 grams), and healthy fats. Chia seeds also provide antioxidants, minerals, and omega-3s, while oats offer slow-digesting carbohydrates that keep you full longer.

    How can I sweeten overnight oats naturally?

    For natural sweetness, try raw honey, pure maple syrup, date syrup, or brown rice syrup. For a low-sugar option, use monk fruit-sweetened honey or maple syrup. You can also stir in a little low-sugar jam or fruit compote before serving. Avoid artificial sweeteners if possible, as some leave a bitter aftertaste.

    Do overnight oats need to be refrigerated, and how long do they last?

    Yes - overnight oats must be refrigerated. The combination of oats, milk, and chia seeds needs to stay below 40°F to remain safe. Properly stored, overnight oats last up to 5 days in the refrigerator.
    If you take them to go, keep them chilled or use ice packs; they're safe unrefrigerated for about 2 hours.

    What kind of oats are best for overnight oats?

    Use rolled (old-fashioned) oats for the best creamy texture. Steel-cut oats stay too chewy unless pre-cooked, and instant oats can turn mushy. If you prefer a lower glycemic index, you can lightly cook steel-cut oats, cool them, and then add your toppings for the same make-ahead convenience.

    How can I add more protein to overnight oats?

    There are a few easy ways to boost protein. Stir in 1-2 tablespoons of your favorite protein powder (most add about 5 grams per tablespoon) or 1-2 tablespoons of Greek yogurt for a creamier texture and extra protein. Using high-protein milk alternatives like hemp milk also raises the protein content naturally.

    More Healthy Breakfast Ideas

    From Greek yogurt parfaits to terrific healthy smoothies, homemade granola, or poached eggs over sautéed veggies, you'e covered.
    • A single yogurt breakfast parfait with layers of fruit, granola, and yogurt.
      How to Make Greek Yogurt Parfaits
    • two chocolate smoothies in glasses on an antique tray.
      Chocolate Banana Smoothie
    • A close up of an open jar of homemade granola with a silver scoop.
      Gluten-Free Granola (Healthy and Easy)
    • A glass of cream chia coconut pudding topped with blueberries and raspberries with a silver spoon.
      Chia Pudding with Coconut Milk

    ⭐️Did You Make This?

    If you made high protein overnight oats, please comment and let me know, I love to read your comments. If you loved it, please give it a 5 star rating! They really help other readers.

    📖 Recipe
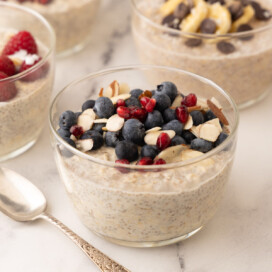
    A single bowl of healthy overnight oats with blueberries and pomegranates seeds.

    High Protein Overnight Oats

    Sally Cameron
    A healthy breakfast is easy each morning when you make overnight oats the night ahead. Soaking rolled oats and chia seeds in your preferred milk makes them soft and creamy. Meal prep them in individual sized containers to grab-and-go on busy mornings. This recipes scales easily for more servings. Make as many as you need. They last 5 days in the refrigerator.
    5 from 3 votes
    Prevent your screen from going dark
    Print Recipe Pin Recipe
    Prep Time 5 minutes mins
    Total Time 5 minutes mins
    Course Breakfast
    Cuisine American
    Servings 1 serving
    Calories 371 kcal

    Ingredients
      

    Basic overnight chia oats

    • ½ cup traditional rolled oats gluten-free if desired
    • 1 ½ tablespoons chia seeds
    • 1 cup unsweetened milk of choice dairy or plant, see notes at end of recipe card
    • 1 teaspoon vanilla extract or ½ teaspoon vanilla paste
    • 1 pinch sea salt

    Optional sweeteners

    • See below for ideas

    Optional toppings

    • Fresh berries: Strawberries, raspberries, blueberries, blackberries, pomegranate seeds.
    • Frozen fruit: almost anything works. Thaw first.
    • Other fruit: Apples (like this cinnamon apple compote), pears, bananas, mangos, peaches, nectarines, plums and others.
    • Extra goodies: Sliced almonds, slivered almonds, pepitas, chocolate chips, shredded coconut.
    • Nut butters: Almond butter, cashew butter, coconut butter, or peanut butter.
    • Jams: Best to choose lower sugar options.

    Would you like to save this recipe?

    Never lose a recipe! We'll email this post to you, so you can come back to it later.

    Instructions
     

    • Into a 12-16 ounce container add rolled oats, chia seeds, and salt. Add the milk, sweetener if using, and vanilla. Stir well or cap tightly and shake well to combine.
    • Place in the refrigerator overnight to set up. Stir in the morning and serve, adding whatever toppings you prefer.

    Notes

    Homemade plant milk recipe links: 
    • Almond milk (5 grams protein per 8-ounce serving)
    • Coconut milk (2 grams protein per 8-ounce serving)
    • Cashew milk (8 grams protein per 8-ounce serving)
    • Pumpkin seed milk (5 grams protein per 8-ounce serving)
    • Hemp seed milk  (14 grams protein per 8-ounce serving)
    Sweetening Options : Try agave syrup, maple syrup, date syrup, yacon or raw honey. You can mix it in as the oats set up overnight, or use a little in the morning over the top. For zero sugar use this monk fruit honey or maple syrup.
    Nutritional calculation note: As there are so many "milk" options, I used low fat dairy milk for reference (8 grams protein per 8-ounce serving). If you want a high protein milk, use hemp seed milk. See the recipe link above.
    Hemp seed milk is 14 grams of protein in 1 cup so it adds another 6 grams of protein for 22 grams of protein total for high protein overnight oats (this is what I do).

    Nutrition

    Calories: 371kcalCarbohydrates: 47gProtein: 16gFat: 13gSaturated Fat: 4gPolyunsaturated Fat: 5gMonounsaturated Fat: 3gTrans Fat: 0.2gCholesterol: 19mgSodium: 155mgPotassium: 556mgFiber: 10gSugar: 13gVitamin A: 250IUVitamin C: 1mgCalcium: 418mgIron: 3mg
    Tried this recipe?Let us know how it was with a comment and leave a star rating!

    Cranberry Oatmeal Cookies Recipe (gluten-free)
    12/10/2024 by Sally Cameron 20 Comments

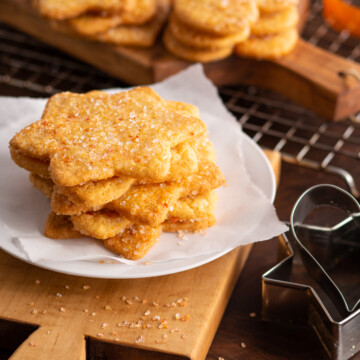
    A stack of crunchy cookies on a counter with a glass of milk and cookies cooling behind.

    Here's a favorite cookie that my friends and neighbors absolutely love: cranberry oatmeal cookies. These cookies are so good, no one will guess they're gluten-free. Packed with tart dried cranberries, rolled oats, and golden brown sugar, they're irresistible. I've included tips for making them dairy-free, plus fun variations like for a tasty twist. Not gluten-free? Make them with all purpose wheat flour as well. I've made them both ways.

    A stack of cranberry oatmeal cookies on a white plate with a glass of milk, and tray of more cookies.

    Thinking about baking cookies for the holiday season, I wanted something a little sweet and it had to be oatmeal. After many test batches (my neighbors loved all the tests), here's my recipe for cranberry oatmeal cookies. They are impossible to resist. It's hard not to just eat all of the batter. Bake a batch. They'll disappear quick. And be sure to try the optional orange zest!

    [feast_advanced_jump_to]

    Why You'll Like This Recipe

    • A classic oatmeal cookie with sweet dried cranberries.
    • Gluten-free but no one would ever know (or with wheat).
    • Dairy-free option and fun flavor variations included.

    For another delicious and easy holiday cookie, make these chocolate chip meringues (aka Forgotten Cookies).

    Recipe Ingredients

    Ingredients to make cranberry oatmeal cookies in prep bowls on a marble counter.
    • Flour: I've used Bob's Red Mill 1:1 GF baking and King Arthur Measure for Measure gluten-free blends.
    • Oats: Regular old-fashioned rolled oats, not quick-cooking, quick oats, instant oats, extra thick, or steel-cut oats. Certified gluten-free if needed (and buy organic).
    • Butter: Unsalted butter or unsalted plant-based butter (sticks not tubs). If you only have salted butter, omit the salt.
    • Baking soda: Leavening agent, check your package expiration date before baking.
    • Sugars: For softer cookies use all light brown sugar. For crisper cookies, use half white sugar and half brown. I've tested both, and both are good!
    • Eggs: Large eggs.
    • Vanilla: Use either vanilla extract or vanilla bean paste, and use real vanilla, not artificial flavor.
    • Dried fruit: I like dried cranberries, use raisins if preferred.
    • Spices: Cinnamon is traditional, but also try nutmeg or allspice.

    Please see the recipe card for measurements and salt.

    Chef's tip on dried cranberries: I purchased several different bags of dried cranberries, both sweetened and unsweetened, to see the difference (Trader Joe's). The sweetened dried cranberries were moist and plump but not so for the unsweetened. I preferred the sweetened for cranberry oatmeal cookies but use whichever you prefer. If you're cranberries are hard and dried out, rehydrate them in a little very hot water until softened, then drain and dry well before using in the recipe. One more tip, some brands have soybean oil (generally GMO if not organic) in their ingredient list. If you're allergic or sensitive to soy, be sure to read labels.

    Substitutions and Variations

    I've made cranberry oatmeal cookies with all of these variations and they are delicious!

    • Orange zest: Not included in most recipes but it adds so much fresh flavor! Optional, but try it if you love orange. Orange and cranberry are great partners.
    • For oatmeal chocolate chip cookies, add chocolate chips or white chocolate chips for white chocolate cranberry oatmeal cookies.
    • Add crunchy chopped walnuts.
    • Unsweetened shredded coconut adds another layer of flavor and texture.

    For a chocolate treat with dried cranberries, try these fun to make chocolate bark bites.

    Chef's tip: Butter too cold? Forget to get your butter out? Bring cold butter to room temperature faster for baking with these methods: 1) Grate cold butter with a box grater onto a plate. 2) Cut cold butter into small pieces and spread them out. 3) Microwaving is risky as you don't want to melt the butter. Use very low power in short bursts until butter is soft.

    Recipe Instructions

    Step 1: Pre-heat the oven to 350º. Line a rimmed baking sheet (half sheet size) with parchment paper. For tools, you'll need a hand mixer.

    Cinnamon and flour in a glass bowl, dry ingredients for cookies.
    Step 2: Whisk the dry ingredients in a medium bowl (flour, baking soda, salt).
    Light brown sugar and golden butter cubes in a glass bowl on a marble counter.
    Step 3: Add soft butter and sugar to a medium bowl, beat butter and sugar until combined and fluffy.
    Creamed cookie dough with added eggs and beaters in a glass bowl.
    Step 4: Add the eggs and vanilla and beat until smooth.
    Creamy cookie dough coming together after beating.
    Step 5: Beat in the flour, start slow, build speed, beat until smooth and creamy.
    Cookie dough batter with rolled oats in a glass bowl with a spatula for mixing.
    Step 6: Combine oats and flour by hand.
    Deep red dried cranberries added to cookie dough in a glass bowl with a mixing spatula.
    Step 7: Fold cranberries in by hand. Mix well.
    Finished cranberry oatmeal cookie dough ready for scooping and baking.
    Step 8: Finished cookie batter, dough is stiff, ready for portioning onto a sheet pan.
    Balls of cranberry oatmeal cookie dough portioned onto a cookie sheet with parchment.
    Step 9: Portion balls of dough onto cookie sheets for baking using a tablespoon or a #40 cookie scoop.
    Golden oatmeal cookies cooling on a wire rack with more cookies on the baking sheet.
    Step 10: Bake cookies until light golden brown, about 18 minutes for a conventional oven. Cool cookies for a couple of minutes then remove to a wire rack. When totally cool, package in an airtight container.

    Chef's tip to reduce sugar: If you want to reduce sugar, use part sugar and part monk fruit blend or all monk fruit. They may spread a little differently while baking but taste great with less sugar.

    For an over the top holiday appetizer with dried cranberries and dried figs, try this easy baked brie with jam recipe.

    A pile of cranberry oatmeal cookies on a plate with cooling cookies in the back.

    Serving and Storage

    Homemade cranberry oatmeal cookies can be stored at room temperature for a week or in the refrigerator for up to 2 weeks stored in an airtight container.

    Freeze cookies for up to 3 months for best quality upon thawing. Place them between layers of waxed paper or parchment paper then in an airtight container.

    Recipe FAQs

    Can I make cranberry oatmeal cookies gluten-free or vegan?

    Cranberry oatmeal cookies are easily made gluten-free, vegan, or dairy-free for individual dietary needs. Be sure to use a gluten-free flour blend. For vegan, use plant-based butter and an egg substitute such as flax eggs, and for dairy-free, use plant-based butter.

    How do I prevent my cookies from spreading too much?

    Use parchment paper on your cookie sheets versus portioning the dough directly onto the greased cookie sheet. If you are baking on a hot day, chilling the dough also helps minimize the spread.

    How do I make my cookies chewier or crispier?

    For chewier cookies, us more brown sugar (or a mix of brown and white sugar) and underbaking slightly can help as most cookies crisp further upon cooling. For crispier cookies, more white sugar and a longer bake time will create a crunchier texture.

    Can I use fresh or dried cranberries?

    Most cookie recipes specify dried fruit such as dried cranberries as fresh cranberries are very tart (dried cranberries are sweetened) and have a lot of moisture that will alter the results of the recipe. For best results, stay with what the recipe specifies and was tested with.

    More Terrific Cookie and Treat Recipes

    If you're looking for delicious sweet treats that are fun to make, try a few of these recipes and be sure to check out the dessert recipes index.

    • Gluten-free brownies with melted chocolate in a square pan after baking.
      Fudgy Gluten-Free Chocolate Brownies
    • A round white plate piled with chocolate chip meringue cookies.
      Forgotten Cookies (chocolate chip meringues)
    • Bark bites on a round display plate for serving.
      Chocolate Bark Recipe (bark bites)
    • sand tart cookies
      Old Fashioned Sand Tarts Cookie Recipe

    ⭐️Did You Make This Recipe?

    If you make cranberry oatmeal cookies, please comment and let me know. If they were a hit, please give it a 5 star rating. They really help other readers and I love hearing from you. If you have a question, please comment and I will answer.

    Recipe updated from 12/2014

    📖 Recipe

    A stack of crunchy cookies on a counter with a glass of milk and cookies cooling behind.

    Cranberry Oatmeal Cookies (gluten-free or wheat)

    Sally Cameron
    Chewy and crispy, these cranberry oatmeal cookies are a wonderful treat. Use GF flour blend for gluten-free. Make them dairy-free with plant-based butter. See notes below recipe card.
    5 from 2 votes
    Prevent your screen from going dark
    Print Recipe Pin Recipe
    Prep Time 25 minutes mins
    Cook Time 18 minutes mins
    Cooling time 15 minutes mins
    Total Time 58 minutes mins
    Course Cookies, Dessert
    Cuisine American
    Servings 18 yield 36 cookies
    Calories 249 kcal

    Equipment

    • Cookie sheets
    • Cookie scoop (aka disher) #40 size

    Ingredients
      

    • 1 ½ cups gluten-free flour blend 6.8 ounces or see blend below
    • 1 teaspoon baking soda
    • 1 teaspoon cinnamon or use some nutmeg or allspice
    • ¼ teaspoon salt
    • 1 ½ sticks unsalted dairy butter or dairy-free butter 6 ounces, at room temperature
    • 1 cup light brown sugar packed
    • 2 large eggs
    • 2 teaspoons vanilla
    • 1 ½ cups rolled oats
    • 1 ¼ cups dried cranberries

    Optional add-in's

    • ¾ cup chopped walnuts
    • ¼ cup unsweetened shredded coconut or more
    • 1 large orange, zested use zest only
    • ½ cup chocolate chips or white chocolate chips

    Would you like to save this recipe?

    Never lose a recipe! We'll email this post to you, so you can come back to it later.

    Instructions
     

    • Pre-heat oven to 350º. Line a rimmed baking sheet (half sheet size) with parchment paper. Add flour, baking soda, spice, and salt to a bowl and whisk to combine.
    • In another bowl, add butter and sugar. With an electric hand mixer, beat until well combined and fluffy (start slow and build up speed). Add eggs and vanilla and beat until incorporated. Blend in the flour beating until smooth. By hand blend in the oats, then the cranberries with a flexible spatula. Batter will be stiff.
    • Using a tablespoon (or a #40 disher), drop rounds of batter about 1 ½" around onto the baking sheet. Bake cookies until light golden brown, approximately 18 minutes.
      Convection ovens bake a little faster so watch the first batch and adjust your timing (each oven is different).
      Let cookies rest for a few minutes on the hot baking sheet then remove to a wire cooling rack. When totally cool, package.
    • Stored in an airtight container at room temperature, oatmeal cookies stay fresh for about a week. Refrigerated they last up to 2 weeks, and frozen up to 3 months. Place them in an airtight container or freezer bag with parchment paper between layers to prevent sticking. Thaw at room temperature when ready to eat.

    Notes

    Homemade GF Flour Blend

    I originally created my own GF flour blend to bake these cookies but since using a pre-blended flour is easier for home bakers I retested the recipe and use either King Arthur or Bob's Red Mill. If you are a dedicated GF bake with multiple GF flours in your pantry and would like the recipe, please comment and I'll send the recipe. Includes brown rice flour, oat flour, sweet rice flour and cornstarch. 

    Vegan Butter Notes:

    To make these dairy-free try Miyoko's European Style Cultured Unsalted Vegan Butter (my preference, love the taste) or Earth Balance Original Buttery Spread in sticks not tubs. 

    Variations

    If adding variations such as white chocolate chips, chocolate chips, nuts, orange zest, or coconut, add by hand after mixing the cranberries and oats.


    •  

    Nutrition

    Serving: 2Calories: 249kcalCarbohydrates: 32gProtein: 4gFat: 13gSaturated Fat: 6gPolyunsaturated Fat: 3gMonounsaturated Fat: 3gTrans Fat: 0.3gCholesterol: 41mgSodium: 107mgPotassium: 86mgFiber: 3gSugar: 19gVitamin A: 269IUVitamin C: 1mgCalcium: 34mgIron: 1mg
    Tried this recipe?Let us know how it was with a comment and leave a star rating!

    No-Cook Asian Dipping Sauce With Almond Butter

    05/19/2014 by Sally Cameron 17 Comments

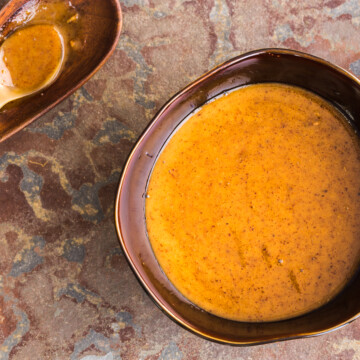
    asian almond sauce in a bowl

    Sauces are the secret weapon in any cook's kitchen, and this Asian dipping sauce is no exception. Made with creamy almond butter, tamari (gluten-free soy sauce), rice vinegar, and ginger, it's a quick, no-cook sauce that brings bold, savory flavor with a touch of sweetness. Whether you use it as a dip, drizzle, or dressing, this versatile sauce transforms everything from spring rolls, noodle bowls, grilled chicken, and grain bowls into something delicious.

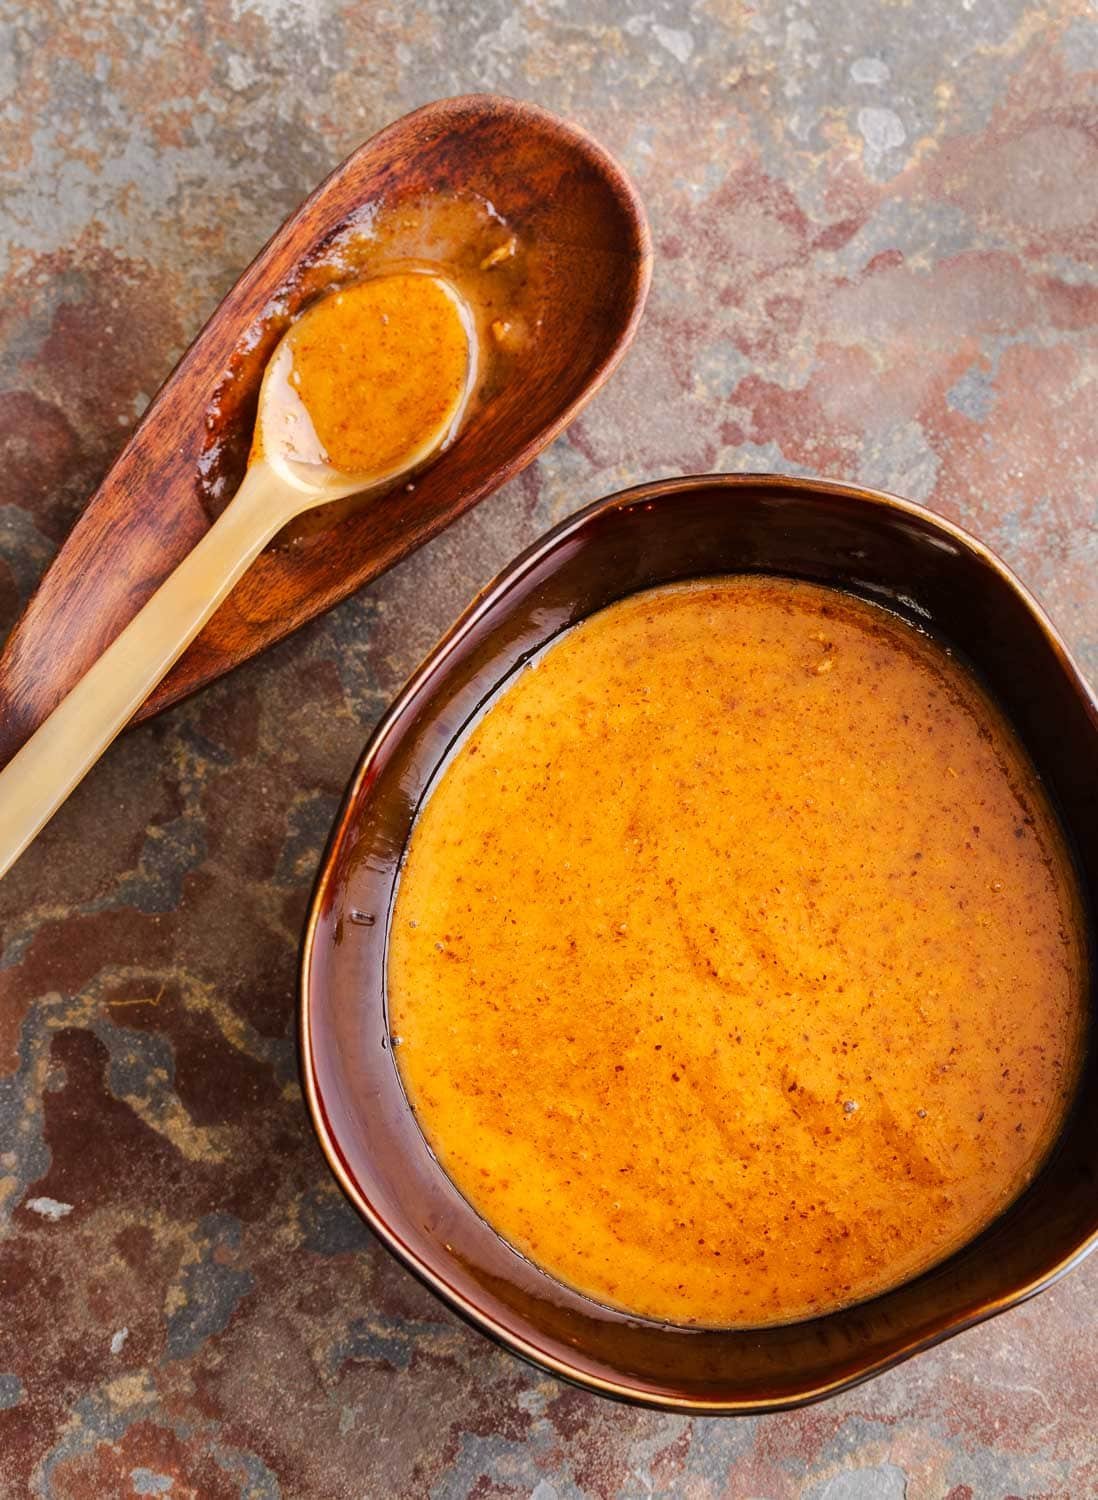
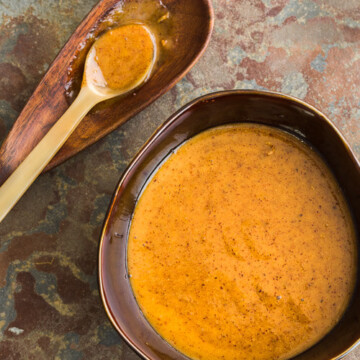
    A brown bowl of creamy golden brown Asian dipping sauce and a spoon on the side.

    Using creamy almond butter, I created this quick Asian-style sauce with ginger, garlic, sesame oil, rice vinegar, tamari (wheat-free soy sauce) and a little honey. It's thick and creamy. If you want it thinner add a little warm water and stir until smooth.

    [feast_advanced_jump_to]

    Why You'll Love Asian Dipping Sauce

    • No cooking required - Just whisk or blend, ready in minutes.
    • Versatile flavor - Great with spring rolls, noodle bowls, grilled meats, or roasted veggies.
    • Wholesome ingredients - Made with almond butter, tamari, vinegar, and honey.
    • Make it gluten-free - With tamari instead of soy sauce, and it's dairy-free.
    • Make-ahead friendly - Keeps well in the fridge for several days for easy meal prep.

    Asian dipping sauce is perfect with the colorful vegetable spring rolls as an appetizer.

    What You'll Need

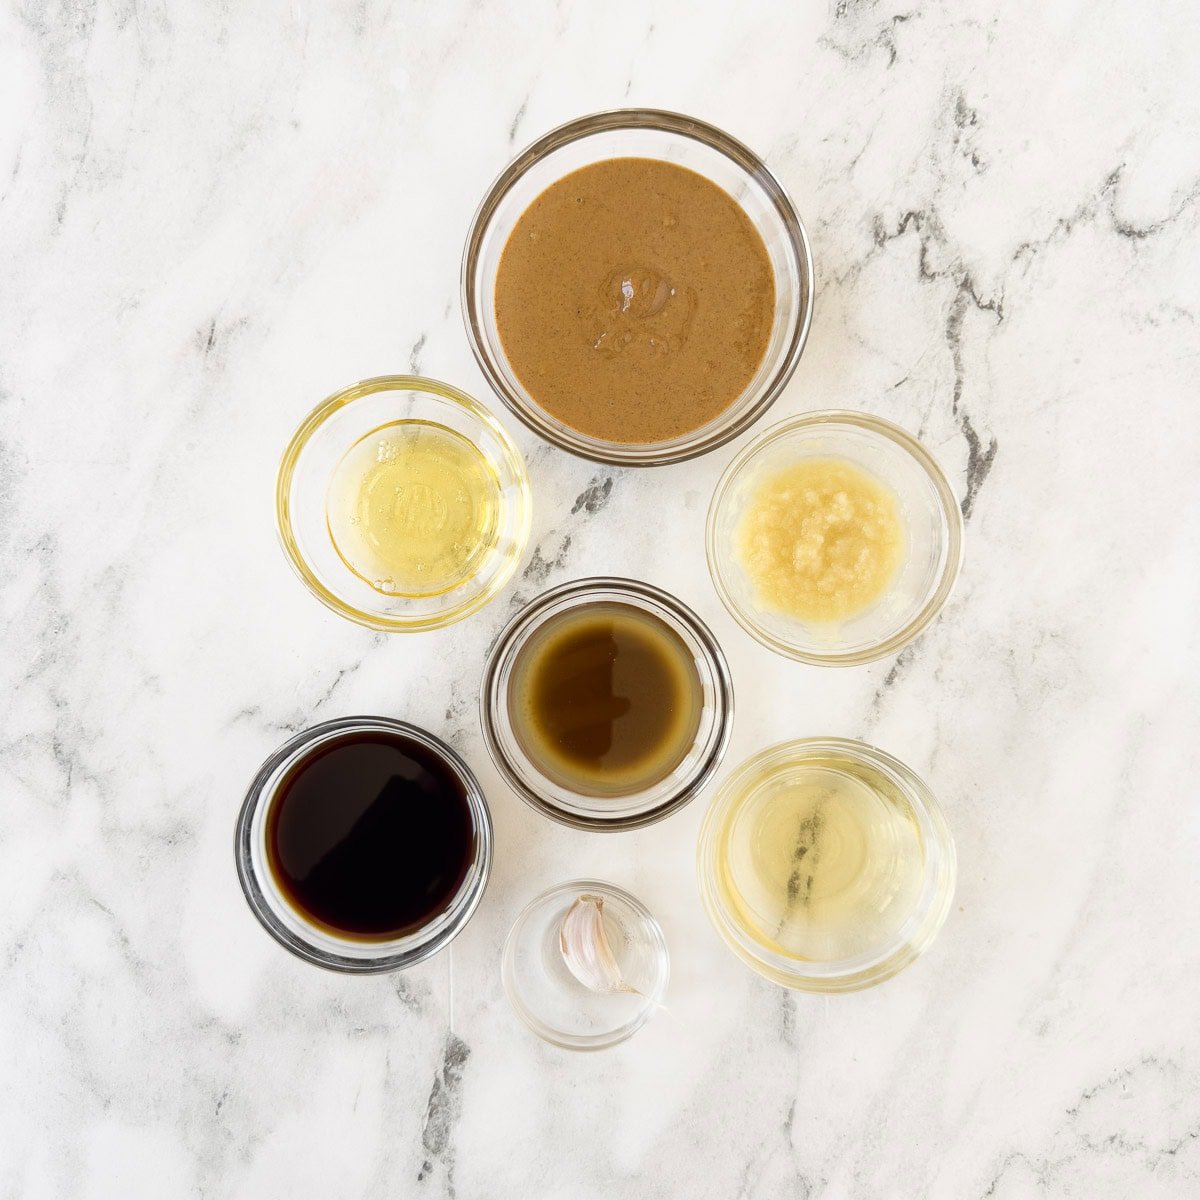
    Ingredients for creamy asian dipping sauce with almond butter, ginger, garlic, soy sauce, oil, and honey.
    • Nut Butter - Use natural almond butter with no added sugar, salt, or preservatives. Stir well or reblend if separated.
    • Vinegar - Unseasoned rice vinegar adds brightness without overpowering.
    • Oil - Sesame oil (toasted or not) adds signature flavor and is classic in Asian-style sauces. Other options are a neutral oil like avocado or MCT oil. Melted coconut oil is good too but may thicken the sauce more when chilled. Don't use standard vegetable oil. In fact it you have it, toss it.
    • Soy Sauce - Low-sodium tamari (gluten-free) or regular soy sauce. For soy-free, try San-J No Soy Sauce or coconut aminos (if you like the taste).
    • Sweetener - Mild honey balances the savory notes. For sugar-free, use a monk fruit-based liquid sweetener or sugar-free "honey."
    • Ginger - Finely grated fresh ginger or jarred ginger puree adds warmth and zing.
    • Garlic - Minced fresh garlic adds savory depth; garlic powder works in a pinch.

    Chef's Tip: Choose the soy sauce option that best meets your needs. Tamari is gluten-free and widely available. Be sure to choose low sodium. Coconut aminos are a soy-free alternative, but the flavor is a little sweeter and less savory. For those avoiding both soy and gluten, San-J's No Soy Tamari is an excellent option-it tastes surprisingly close to the real thing. Not gluten-free? Low sodium soy sauce is fine, my recommendation is buy organic.

    This almond butter sauce is a nice way to dress up simple crispy chicken cutlets.

    Substitutions and Variations

    • Nut butter swap - Try raw cashew butter or tahini (good for nut-free) for a sesame-forward twist. Peanut butter works too but changes the flavor profile.
    • Vinegar - If you don't have unseasoned rice vinegar, try apple cider vinegar or white wine vinegar.
    • Sweetener - Try maple syrup (but it has it's own flavor) or agave if preferred. Avoid anything with erythritol-it may crystallize.
    • Citrus - Add a splash of lime juice for another flavor level.
    • Texture tip - Want it thinner for drizzling? Add a little warm water to loosen.

    Chef's Tip: How to Fix Separated Almond Butter
    If your almond butter has separated (oil on top, solid on the bottom), don't toss it! Scrape the whole jar into a food processor, digging the bottom out with a table knife, and blend until smooth and creamy again. It takes just a minute and makes it easier to measure-and to use in recipes like this one. Plus with the cost of nut butter, it's better to save it.

    How to Make Asian Dipping Sauce

    So simple! Place everything in a small bowl and stir or whisk together until smooth.

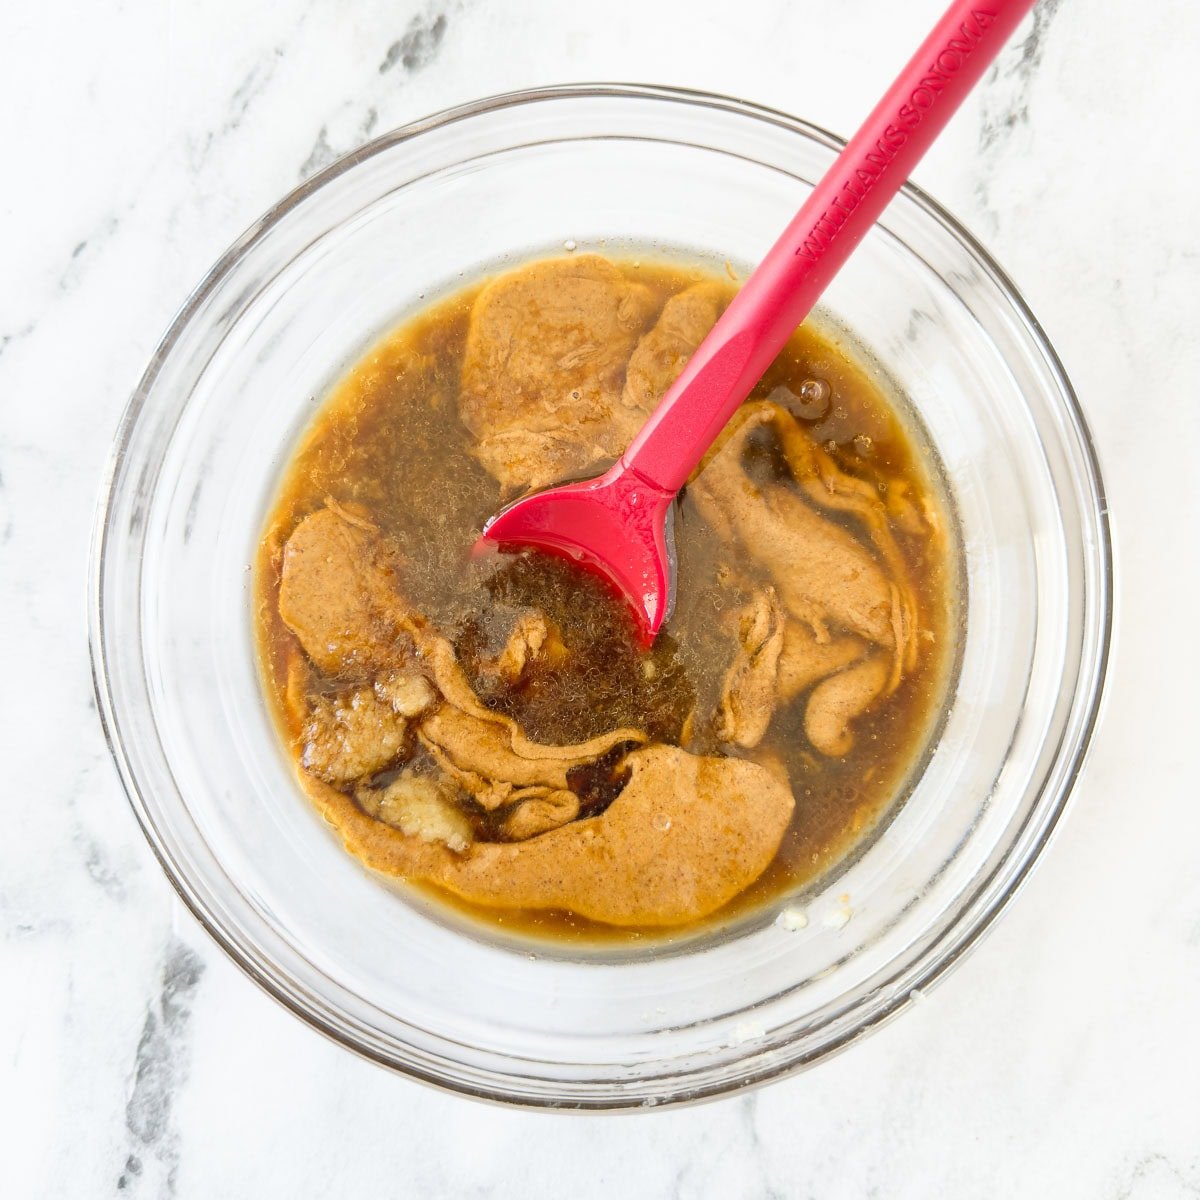
    Almond butter and ingredients for Asian dipping sauce in a glass bowl before blending with a red spatula.
    1. Add all ingredients to a medium bowl.
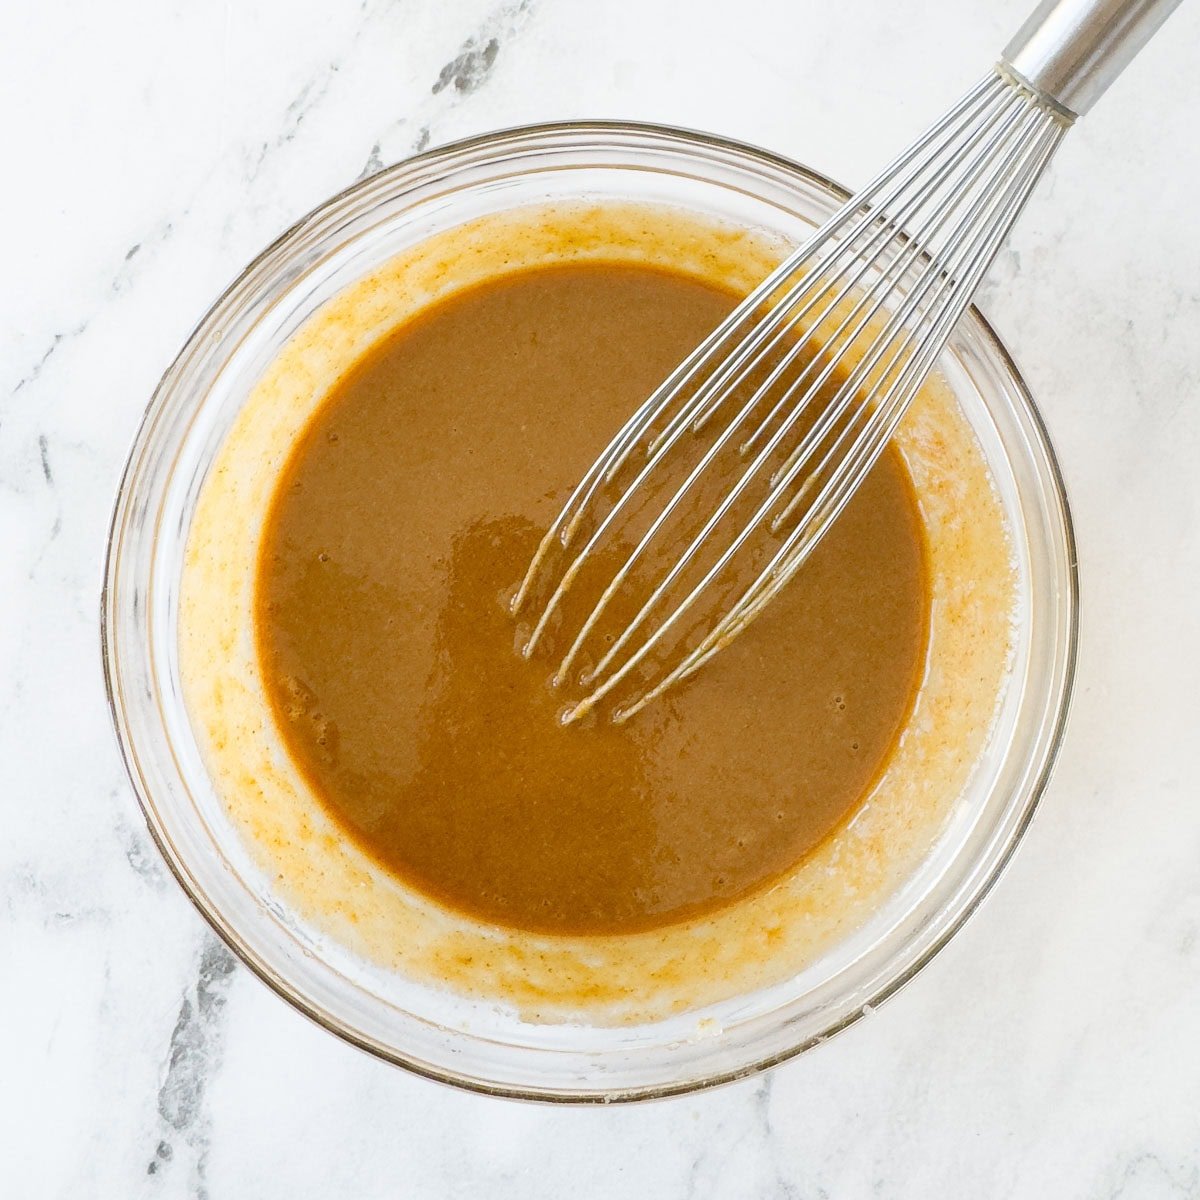
    Golden brown, creamy almond butter dipping sauce blended smooth with a whisk and ready to use.
    1. Blend until smooth and creamy. Taste and adjust with more ginger or garlic.

    Chef's Tip: Adjusting Sauce Thickness. This sauce is meant to be adaptable for different dishes. As made, it has a drizzle-able consistency. If you want it thicker, add a little more almond butter, or use a little less vinegar and oil at the start. You can always taste and adjust. Sometimes I also add more ginger, as I love the taste.

    Serving Suggestions

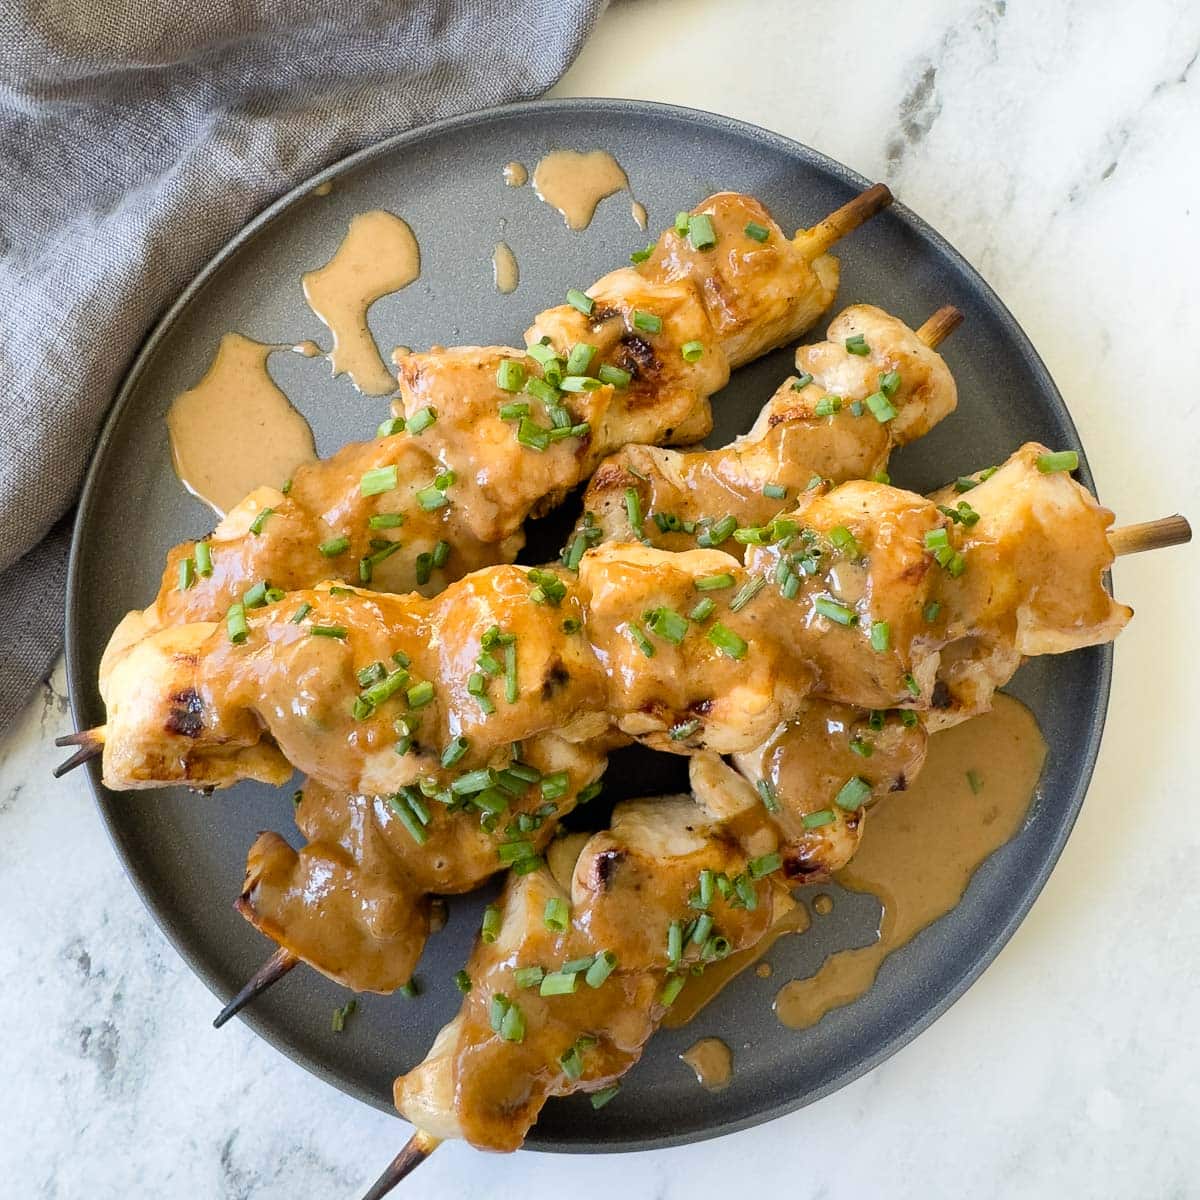
    Creamy almond butter Asian dipping sauce drizzled over grilled chicken skewers on a gray plate.

    Great ways to Use Asian dipping sauce:

    • Grilled proteins - Spoon over grilled chicken (like above!) or shrimp kabobs.
    • Noodle salad - Thin the sauce and toss with cooked, chilled brown rice noodles and chopped raw vegetables.
    • Ahi tuna - Drizzle over seared Ahi for a bold, flavorful finish.
    • Burgers - Use as a spread on grilled or air fryer burgers for an Asian-inspired twist.
    • Salads - Use as the dressing for my Asian cabbage salad recipe as the dressing
    • Veggie platter - Serve as a dip for raw vegetables.

    Leftovers and Storage

    Thick or thin, this versatile sauce will keep in the refrigerator for up to a week. If it stiffens when cold, let it come to room temperature and stir before using. If it needs thinning to loosen it, add a little water.

    Recipe FAQs

    Can I use cashew butter instead of almond butter?

    Absolutely. Cashew butter can be swapped for the almond butter in this recipe.

    What if I an allergic to nuts?

    Try it with tahini (sesame seed butter), made with sesame seeds.

    What if I am allergic to soy?

    Use coconut aminos or soy-free tamari sauce instead of tamari or soy sauce.

    Can I make this ahead?

    Yes! It's perfect for meal prep. Just store it in a sealed jar or container and give it a good stir before using.

    📖 Recipe

    Asian Almond Sauce | AFoodcentricLife.com

    Asian Dipping Sauce

    Sally Cameron
    Almond butter makes an Asian-inspired sauce. Use it thick with chicken or shrimp. Thin it and use with cold noodles, cabbage or salads. It keeps week in the refrigerator for a few days. Let it warm up and stir before using. This recipe doubles easily for more servings and leftovers.
    5 from 6 votes
    Prevent your screen from going dark
    Print Recipe Pin Recipe
    Prep Time 5 minutes mins
    Cook Time 0 minutes mins
    Total Time 5 minutes mins
    Course Sauce
    Cuisine Asian
    Servings 3 Yield 1 cup
    Calories 177 kcal

    Ingredients
      

    • ½ cup natural almond butter sub cashew butter
    • 3 tablespoons unseasoned rice vinegar sub white vinegar
    • 3 tablespoons neutral flavored oil or sesame oil coconut oil or MCT oil
    • 3 tablespoons low sodium tamari or soy sauce
    • 1 ½ tablespoons honey
    • 1 ½ tablespoons pureed ginger from jar or finely zested fresh peeled ginger
    • 1 large garlic zested fine

    Would you like to save this recipe?

    Never lose a recipe! We'll email this post to you, so you can come back to it later.

    Instructions
     

    • Place everything in a small bowl and stir together until smooth. Use thick or thin with a little warm water.

    Notes

    Thickness note - This almond butter sauce is designed to be slightly pourable for maximum versatility-ideal for drizzling, tossing, or dipping. If you prefer it thicker, stir in a little more almond butter. Want it thinner? A splash of vinegar or oil will do the trick.
    How to use this sauce:
    • Grilled proteins - Spoon over grilled chicken or shrimp kabobs.
    • Noodle salad - Toss with cooked, chilled brown rice noodles, and chopped raw vegetables.
    • Ahi tuna - Drizzle over seared Ahi for a bold, flavorful finish.
    • Burgers - Use as a spread on grilled burgers for an Asian-inspired twist.
    • Salads - Use as the dressing for my Asian Cabbage Salad (link when ready).
    • Veggie platter - Serve as a dip for raw vegetables.
    •  
    •  
    •  
    •  
    •  

    Nutrition

    Serving: 2tablespoonsCalories: 177kcalCarbohydrates: 7gProtein: 4gFat: 16gSaturated Fat: 1gPolyunsaturated Fat: 4gMonounsaturated Fat: 9gTrans Fat: 1gSodium: 202mgPotassium: 137mgFiber: 2gSugar: 4gVitamin A: 1IUVitamin C: 1mgCalcium: 57mgIron: 1mg
    Tried this recipe?Let us know how it was with a comment and leave a star rating!

    Chocolate Bark Recipe (bark bites)

    02/03/2023 by Sally Cameron 2 Comments

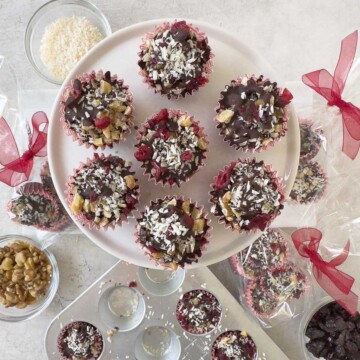
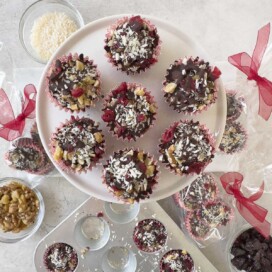
    Bark bites on a round display plate for serving.

    Here's a fun to make sweet treat, an easy chocolate bark recipe in bite sized form. Chocolate bark bites! Make them in mini muffin pans. Dark chocolate with nuts, coconut and dried fruit all in one delicious bite. No messy fingers and a party in a bite. Chocolate lovers rejoice!

    [feast_advanced_jump_to]

    Why You'll Like This Recipe

    • It's like sheet-style chocolate bark but bite-sized.
    • Easy to package little bags make great homemade gifts for Valentines Day chocolate treats, Easter chocolate, or for any holiday season. Make some for baby shower treats and wedding party favors. Doubles or triples easily.
    • An easy dessert to take to a potluck or picnic.
    • They are fun to make!

    Love chocolate? Make a batch of these easy chocolate chip meringue cookies called Forgotten Cookies. Make the batter and forget them for awhile!

    Recipe Ingredients

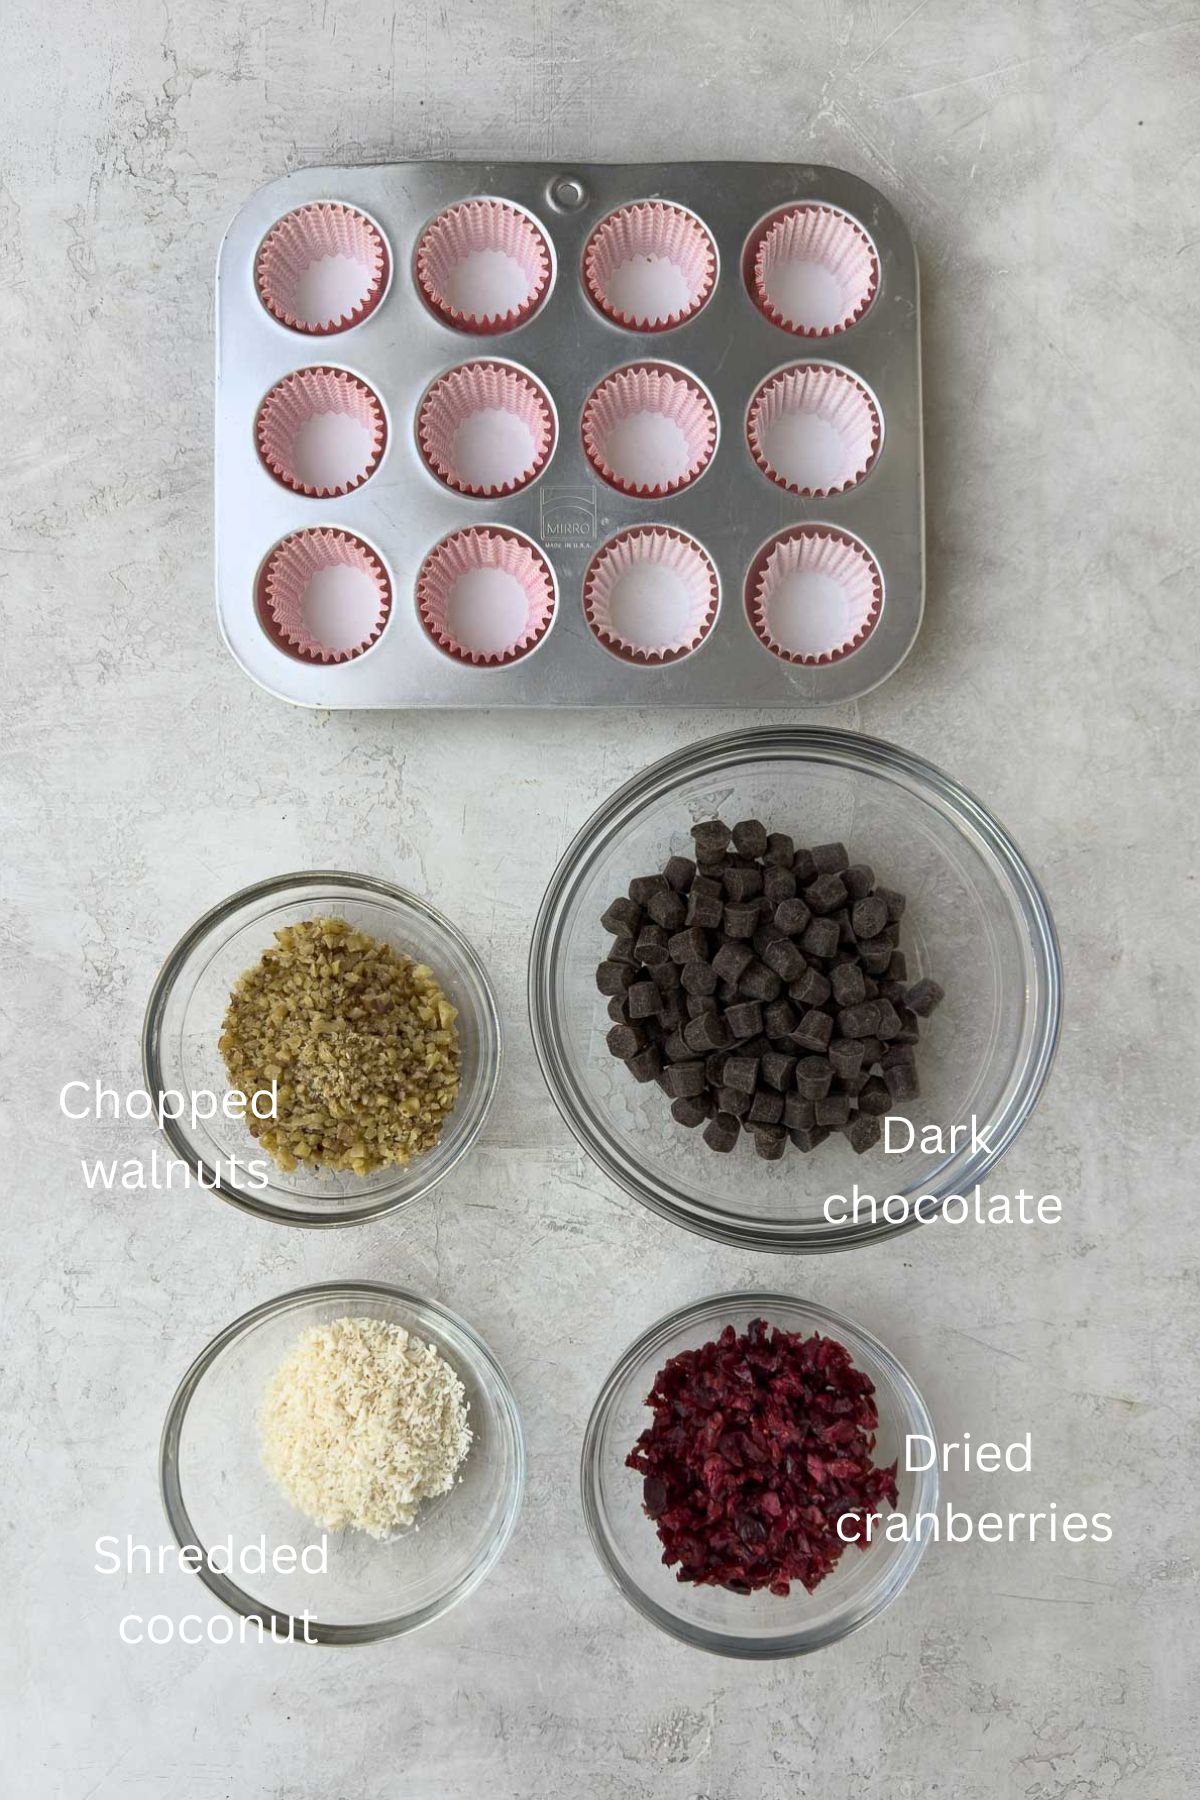
    Ingredients for chocolate bark on a counter.

    Please see the recipe card for quantities. The simple ingredients are:

    • Chocolate: Buy high-quality chocolate at 72% or more depending on how dark you prefer your chocolate. The higher the number, the less sweet the chocolate is. If you love chocolate, here is a fun resource. I have not tried this recipe with milk chocolate, but it should work because of the butterfat.
    • Walnuts: Buy chopped walnuts or walnut pieces and chop them fine.
    • Shredded coconut: Buy dry, unsweetened, shredded coconut flakes, not the sticky sugary stuff.
    • Dried cranberries: They provide a tart-sweet contrast to the dark chocolate, crunchy nuts and coconut. A terrific combination. Dried fruit options below.

    Chef's Tip: Chopping chocolate. Buy chocolate bars and break them up by hand or chop them into pieces with a serrated knife on a cutting board. That bread knife you rarely use is great for chopping chocolate. Sometimes I use chunks of chocolate meant just for baking (and snacking). Here is the chocolate I used in the photos. No chopping required.

    Substitutions and Variations

    • Don't like walnuts? Use chopped almonds, chopped macadamia nuts, chopped cashews, pistachios or pumpkin seeds.
    • For dried fruit, substitute dried apricots combined with goji berries, golden berries, or dried cherries.
    • Feel free to experiment and use your favorite toppings, like fancy sprinkles or crushed peppermint candy canes at Christmas for peppermint bark, even white chocolate chips.

    For another bite-sized, small chocolate treat, make these mini pots de creme or these beautiful chocolate dipped strawberries (also fun to make). For gift-giving, these sweet and spicy roast cashews are always a huge hit.

    Chocolate Bark vs. Chocolate Bark Bites

    Chocolate bark bites is a riff on, or a variation of chocolate bark. Chocolate bark is melted chocolate poured onto parchment paper supported by a sheet pan or cookie sheet, spread into a thin layer, then decorate with dried fruit and many other toppings.

    With bark bites, the chocolate is melted and drizzled into mini paper cups (or silicone cups) and layered with the dried fruit and other toppings. 

    Mini muffin tin of dark chocolate treats called chocolate bark bites.

    Tools

    To make these as shown you need a 12-well mini muffin pan and mini paper liners. I use a metal mini muffin pan, but you can use silicone (and use papers or not). If you use silicone, you will need a metal baking tray underneath to support the flexible silicone pan.

    The mini paper liners vary just a tiny bit by brand, so depending on what you buy, your chocolate bark bites might be a slightly different size. Buy them online and at cooking and speciality baking stores. Even some grocery stores have them.

    Option: If you don't have a mini muffin pan you can still make these. Place double paper cups flat on a plate to fill. They will spread more since there are no sides to help them hold their shape, but it still works.

    Recipe Instructions

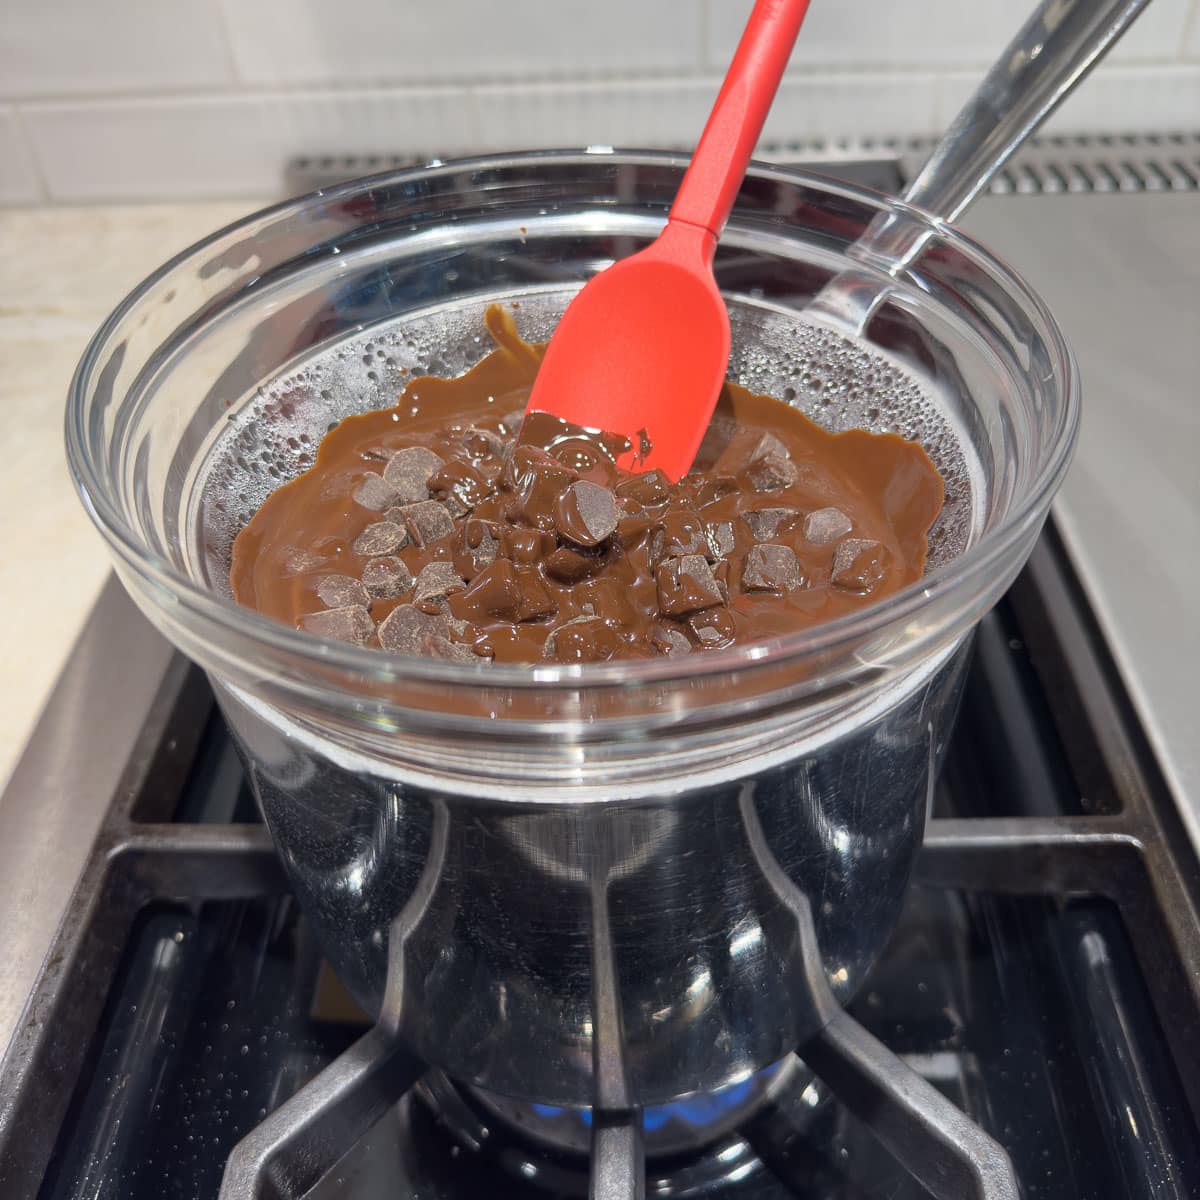
    Chocolate melting on the stovetop in a double boiler.

    Start by chopping the chocolate into small pieces as it melts faster. Then melt your chocolate. There are two ways to melt chocolate: in a double boiler or the microwave. Either way you need a heat-proof bowl.

    While the chocolate is melting, place the other ingredients into individual small bowls and set up your mini muffin pan with paper liners.

    To make the chocolate bark bites, drizzle a little bit of melted chocolate into the mini paper cups then layer with sprinkles of the walnuts, coconut and dried fruit. Start with a thin layer and build into 3 layers. You will use about 1 tablespoon of melted chocolate in total per chocolate bark bite, 1 teaspoon per layer.

    When you're done, place the pan in the refrigerator until they harden, about 30 minutes.

    Chef's Tip: Chocolate and water do not mix. Water makes chocolate "seize". It goes from being fluid to a stiff grainy mess. Be careful if using the stove top method that no moisture gets into your melted chocolate when removing the bowl from the pan.

    Melting Chocolate: Stovetop Method

    Set up a double boiler or "bain marie" (water bath). Place a couple inches of water in a pan over medium heat and bring to a simmer. Do not boil. Turn heat to low and place a small metal or glass bowl with the chocolate over the hot water.

    The bowl should sit on top and barely into the pan, but not touch the hot water. Stir occasionally, until chocolate melts smooth. It won't take long. Don't rush it by turning up the heat.

    I prefer the double boiler method because you can easily see the chocolate melting and it's more controllable.

    Melting Chocolate: Microwave Method

    Place chocolate in a microwave-safe bowl. Microwave using 50% power for 1 minute. Remove and stir. Continue in 30 second increments until chocolate is mostly melted. It's ready when there are still a few lumps. It will smooth out as you stir.

    Do not overheat or the chocolate could burn. If it burns, you will have to toss it and start over (which is why I prefer the traditional stove top method). If you use the microwave, just be careful.

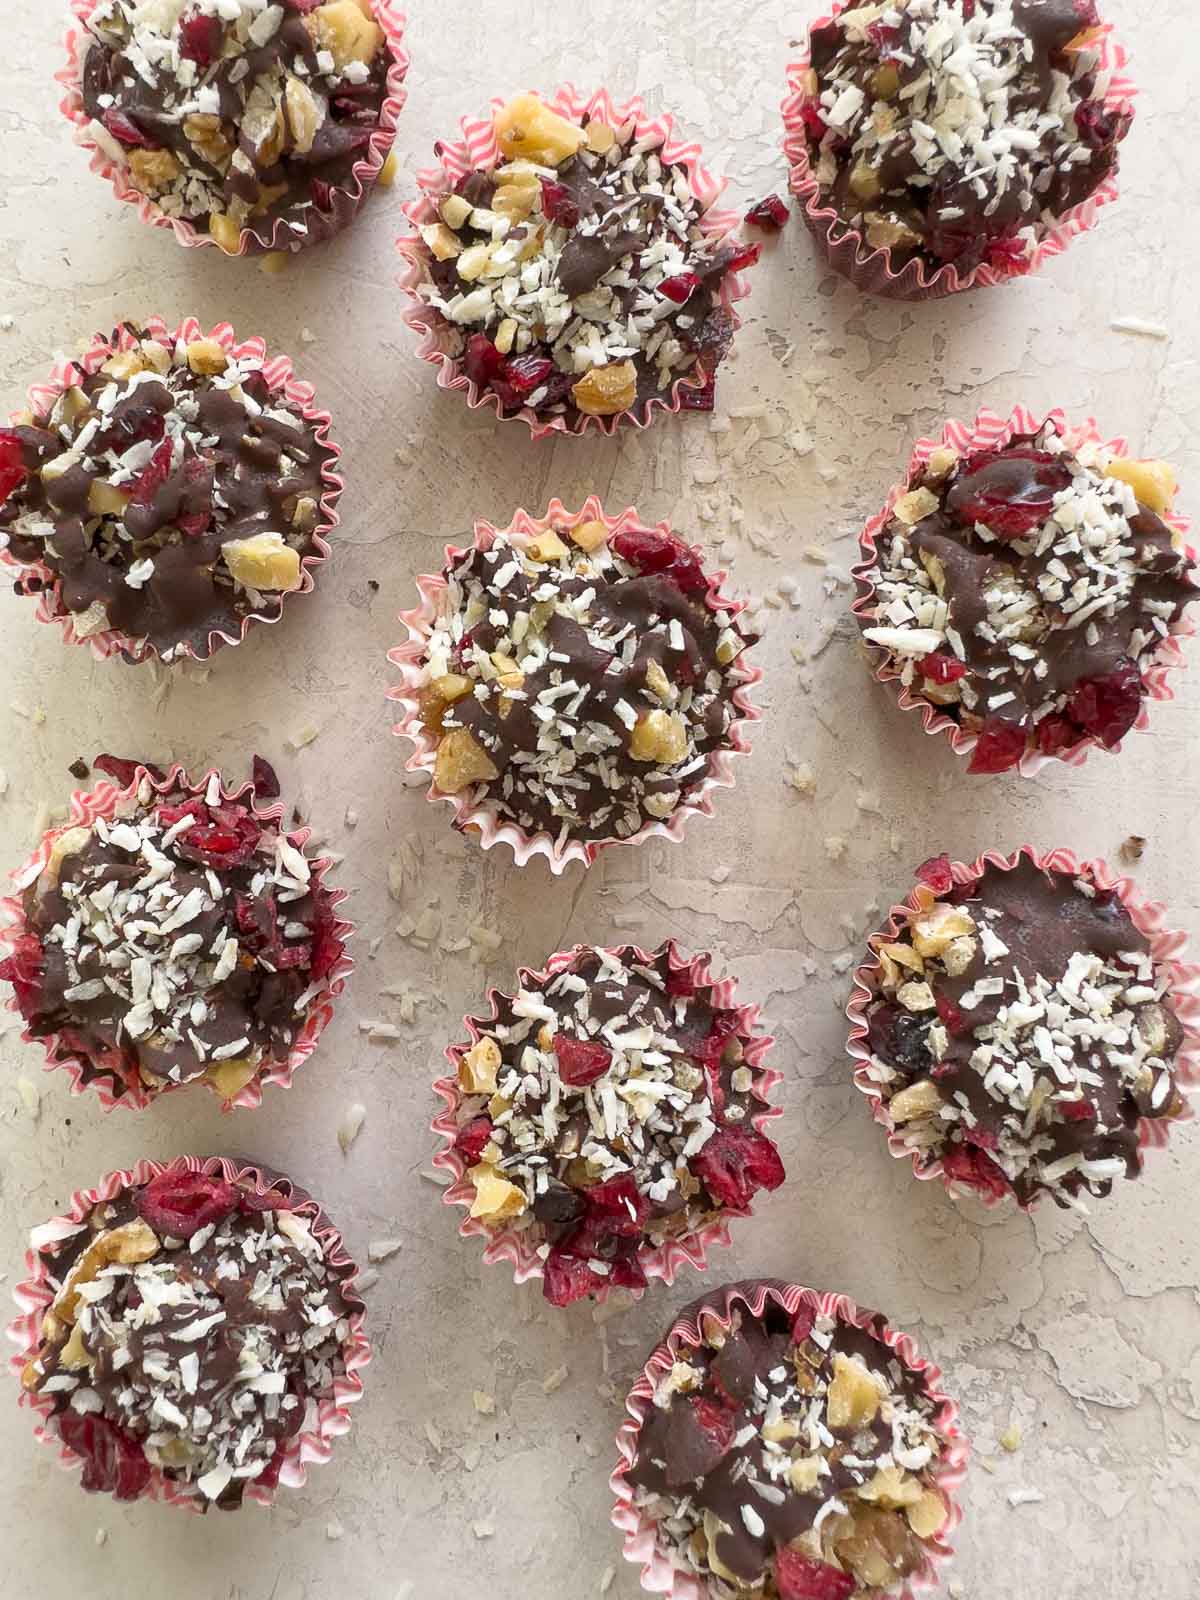
    Dark chocolate bark bites with cranberries, walnuts and coconut on a counter top.

    Storing Chocolate Bark Bites

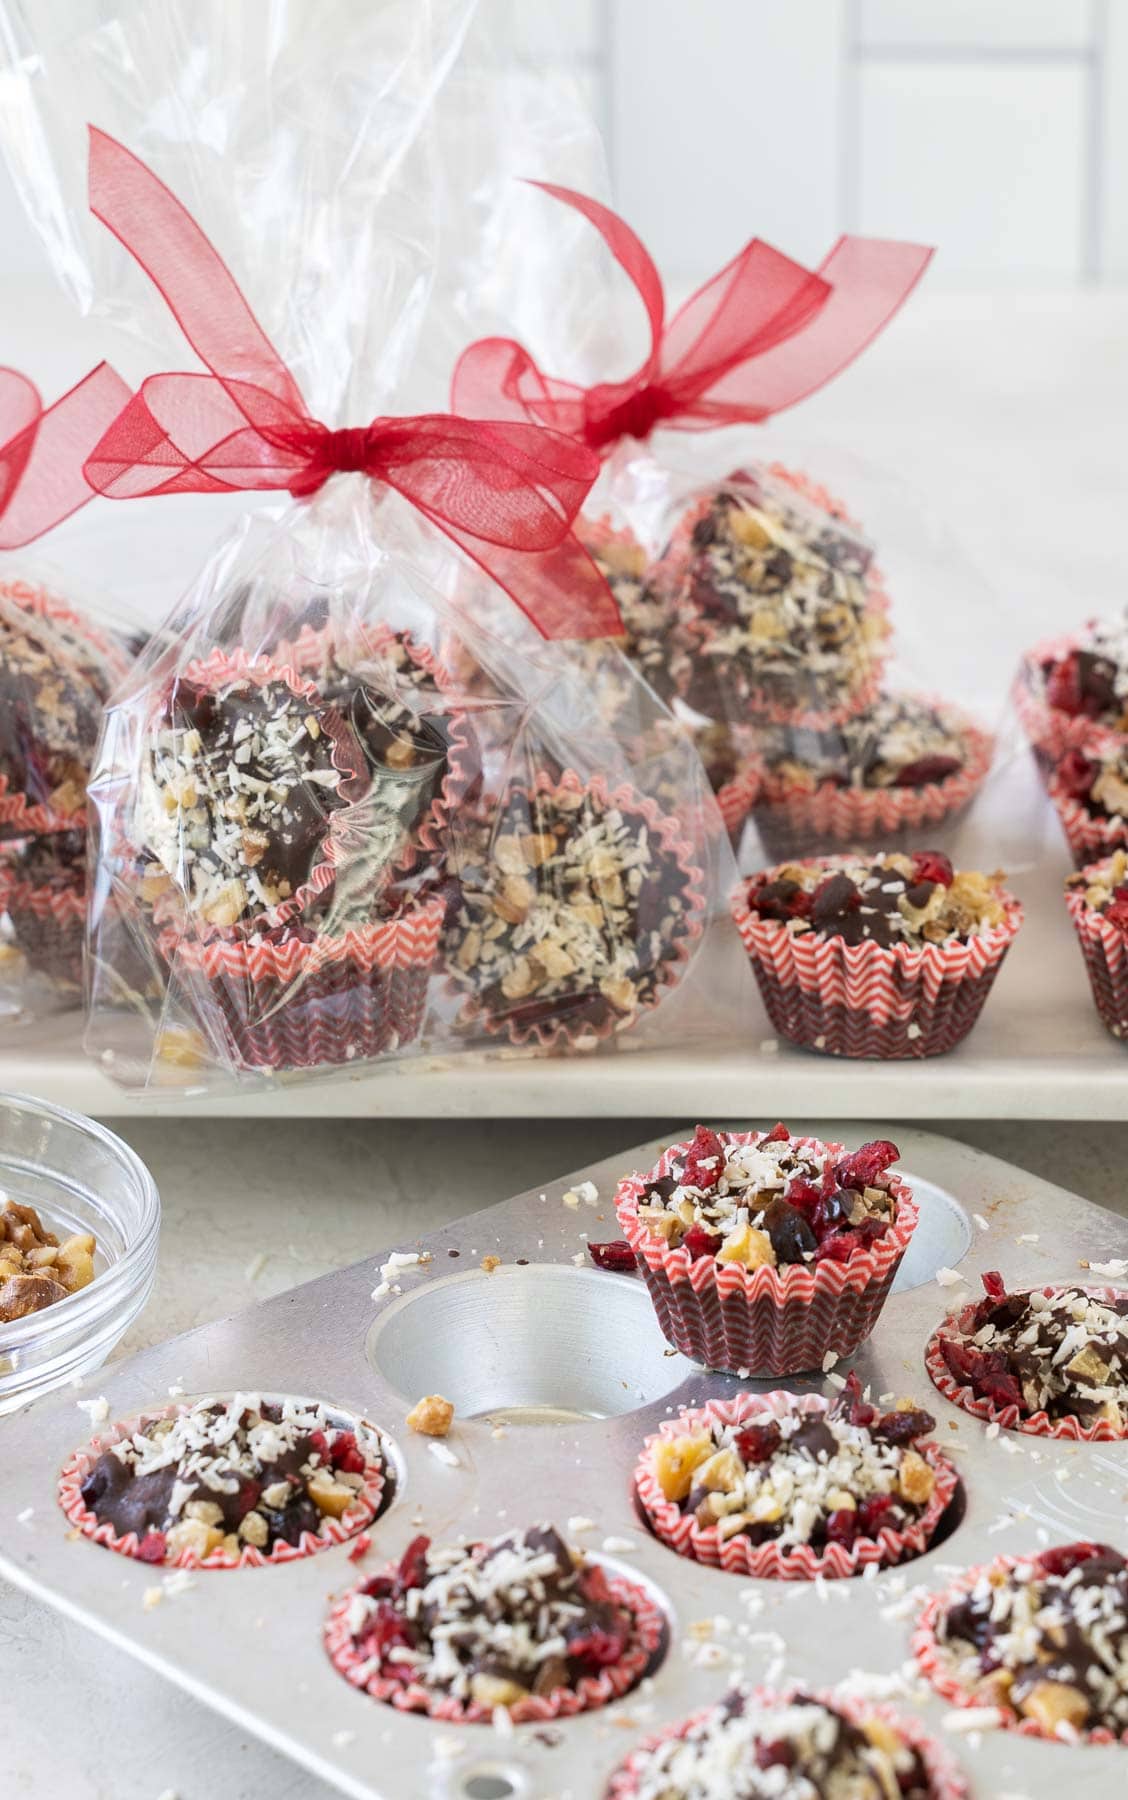
    Store chocolate bark bites in an airtight container on the counter at room temperature or package into cello bags and tie with ribbon as a gift. You can also store them in the refrigerator.

    Chef's Tip: To make cutting sticky dried fruit easier, first spray your knife with non-stick spray. It makes the blade slice through the stickiness much easier and also makes cleaning your knife easier.

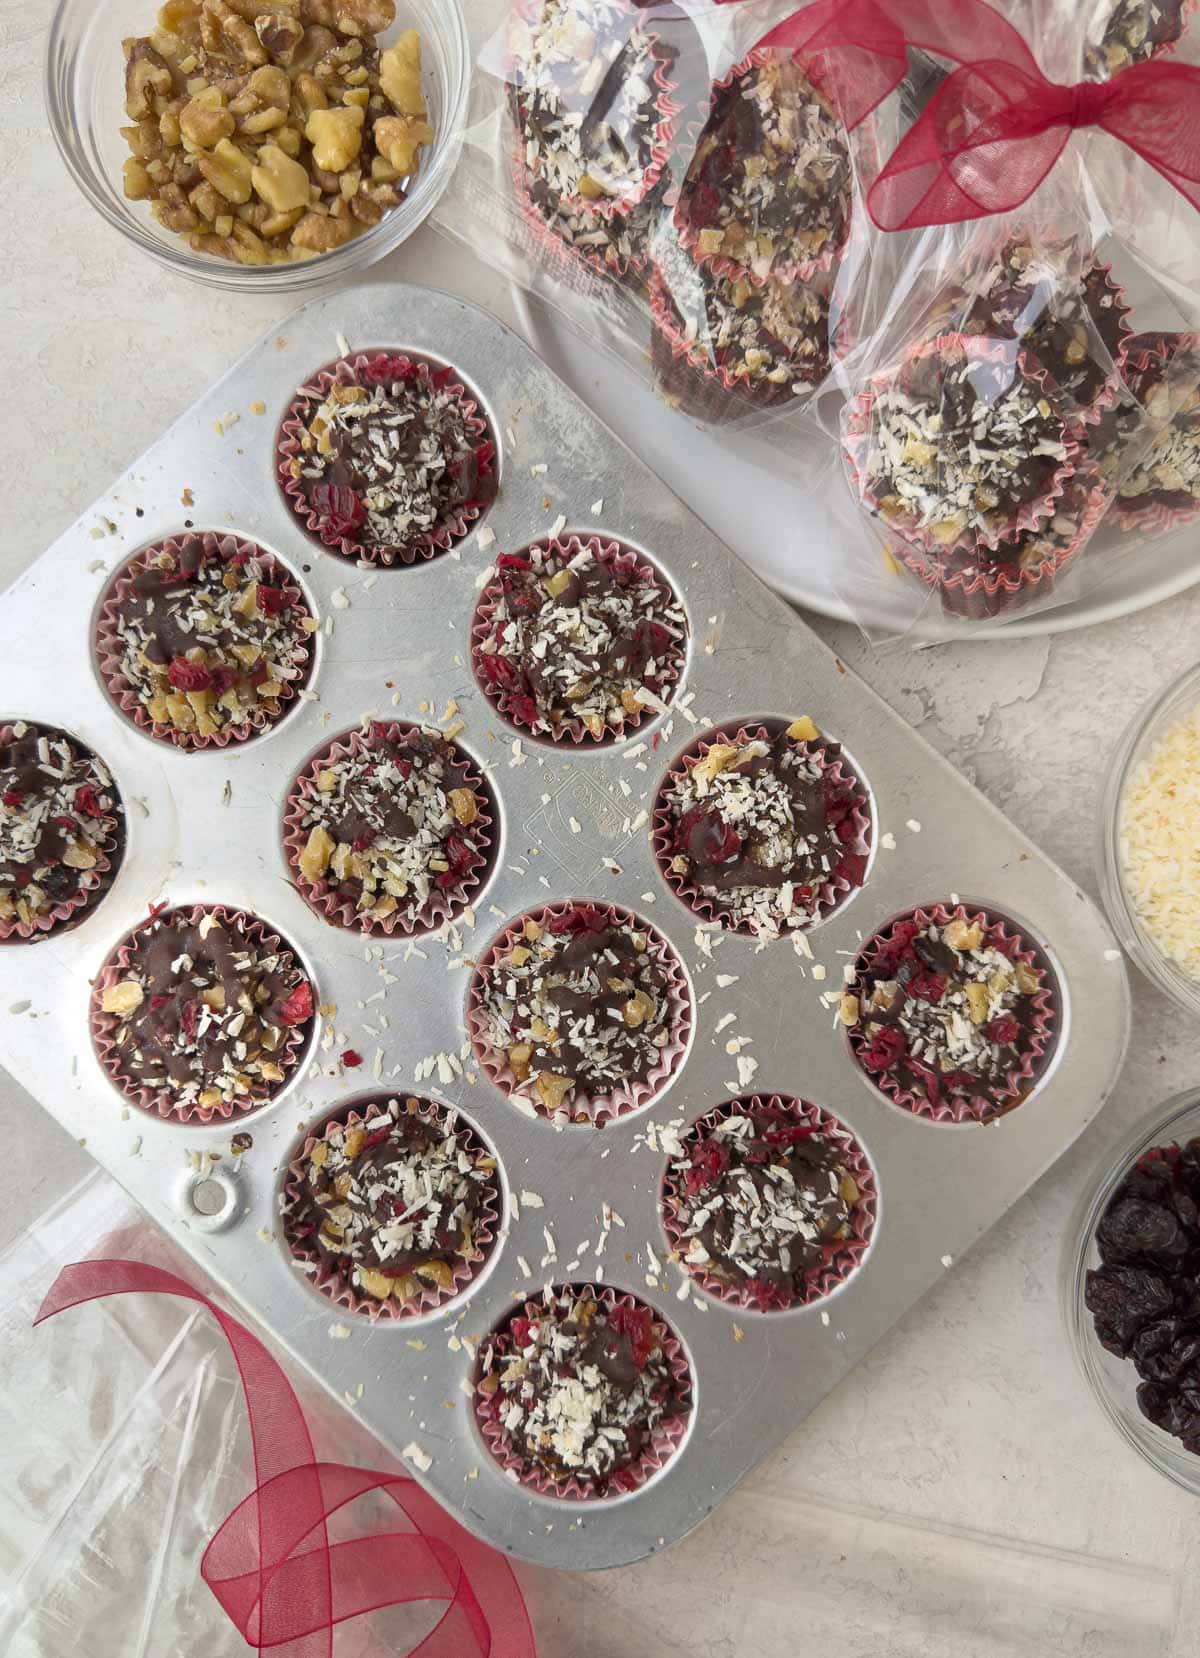
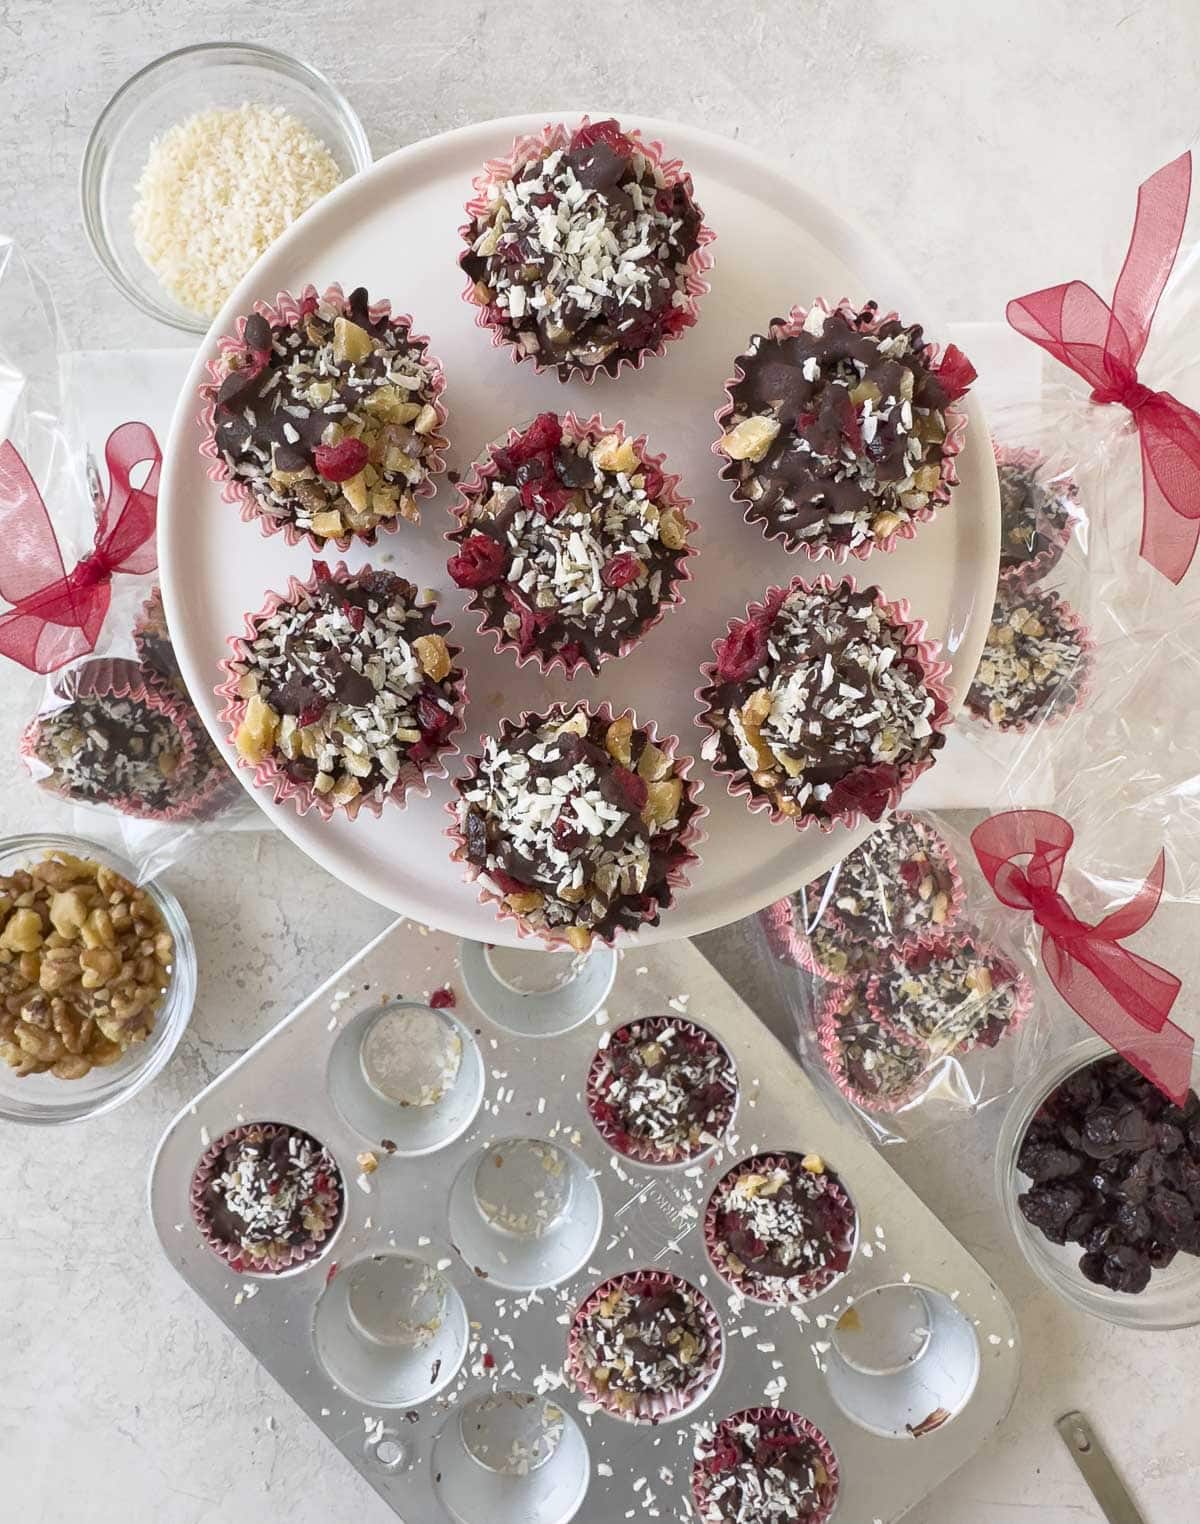
    Individual chocolate bark bites in mini muffin pan and on a display plate.

    How to Make For Gifts and Party Favors

    Because these are so easy to make, you can make batches and package them for hostess gifts, holiday gifts and party favors. Use small cello bags with twist ties and ribbon. You choose how many per package.

    Recipe FAQ's

    Does chocolate bark need to be tempered?

    I do not temper the chocolate for this recipe, but you can if you want to take that extra step. Read here to learn how. Tempering chocolate gives it more snap and a glossy finish. It matters more when you are making chocolate bark poured onto a baking sheet or candies. Since these are in bite size form, I decided to skip it.

    How long will chocolate bark keep?

    Chocolate bark bites will last 2-3 weeks in the refrigerator, but I've never had them last that long! If you're kitchen is not too warm (below 70°F) they can be stored on the kitchen counter in an airtight container.

    More Delicious Recipes

    For more gifts from the kitchen ideas, try these recipes too. The no-bake chocolate chip energy balls are a terrific afternoon snack or post workout pick-me-up.

    • A jar of golden glazed pecans on a white round marble plate.
      Candied Pecans Recipe
    • A stack of crunchy cookies on a counter with a glass of milk and cookies cooling behind.
      Cranberry Oatmeal Cookies Recipe (gluten-free)
    • A small plate of peanut butter protein balls, plain, and rolled in hemp seeds and coconut.
      Peanut Butter Protein Balls (No-Bake)

    ⭐️Did you Make This?

    If you make this recipe, please comment and let me know. And if you loved it, please give it a 5 star rating! They really help other readers. If you have a question, please comment and I will answer.

    📖 Recipe

    Bark bites on a round display plate for serving.

    Easy Chocolate Bark (bite size)

    Sally Cameron
    Bite-sized chocolate bark with nuts, coconut, and dried fruit. Portion controlled in mini paper baking cups. Each bite has about ½ ounce (1 tablespoon) of chocolate. No cooking required.
    5 from 2 votes
    Prevent your screen from going dark
    Print Recipe Pin Recipe
    Prep Time 15 minutes mins
    Chill 30 minutes mins
    Total Time 45 minutes mins
    Course Dessert, Snack
    Cuisine American
    Servings 12 pieces
    Calories 166 kcal

    Equipment

    • 1 mini muffin pan
    • 12 mini paper liners for muffin pan about 2" size

    Ingredients
      

    • 7 ounces good quality semisweet or bittersweet chocolate or chocolate chips
    • ¼ cup + 2 tablespoons finely chopped walnuts
    • ¼ cup + 2 tablespoons chopped dried cranberries
    • 3 tablespoons unsweetened shredded coconut

    Would you like to save this recipe?

    Never lose a recipe! We'll email this post to you, so you can come back to it later.

    Instructions
     

    • Chop the chocolate into small pieces if needed. Use a serrated knife, bread knife or a large heavy chefs knife. Melt chocolate in either the microwave or a double boiler on the stove.

    How to Melt Chocolate in the Microwave

    • To melt chocolate in the microwave, place chocolate in a microwave-safe bowl. Microwave using 50% power for 1 minute. Remove and stir. Continue in 30 second increments until chocolate is mostly melted. It's ready when there are still a few lumps. They will smooth out as you stir. Do not overheat or chocolate could burn.

    How to Melt Chocolate on the Stovetop

    • To melt chocolate in a double boiler, place a small pan with a few inches of water over medium heat and bring to a simmer. Turn heat to low and place a small bowl with the chocolate over the hot water. The bowl should sit on top and partially into the pan, but not touch the hot water. Stir occasionally, until chocolate melts smooth.

    Assemble the Chocolate Bark Bites

    • Place 12 paper cups mini cupcake pan for support. Drizzle in 1 teaspoon of melted chocolate, then top with a sprinkle of nuts, coconut and a few dried cranberries. Drizzle with another teaspoon melted chocolate, and sprinkle with a bit more nuts and coconut. Drizzle with a third teaspoon of melted chocolate and sprinkle with the goodies. Refrigerate about 30 minutes to set up or until they are firm.

    Notes

    Mini paper baking cups can be found at cooking stores, Target, and in the baking section of craft stores. If using as gifts, find cello bags, twist ties and ribbon online and at craft stores. 
    An alternative to a mini muffin pan is to place the mini muffin papers on a flat plate or rimmed baking sheet. Your chocolate bark bites might spread a bit more as they don't have the support of the muffin pan, but they will still be good. 
    The easiest way to measure loose ingredients like chocolate pieces is with a digital kitchen scale, an inexpensive and useful tool. 
    Use good quality 70% - 85% chocolate for the best flavor. If you don't like walnuts, use another nut. These make terrific hostess and holiday gifts!
     

    Nutrition

    Calories: 166kcalCarbohydrates: 15gProtein: 2gFat: 12gSaturated Fat: 5gPolyunsaturated Fat: 4gMonounsaturated Fat: 2gTrans Fat: 0.01gCholesterol: 1mgSodium: 3mgPotassium: 127mgFiber: 2gSugar: 11gVitamin A: 9IUVitamin C: 0.1mgCalcium: 17mgIron: 1mg
    Tried this recipe?Let us know how it was with a comment and leave a star rating!

    Carne Asada Marinade (for Grilled Steak)

    06/10/2014 by Sally Cameron 1 Comment

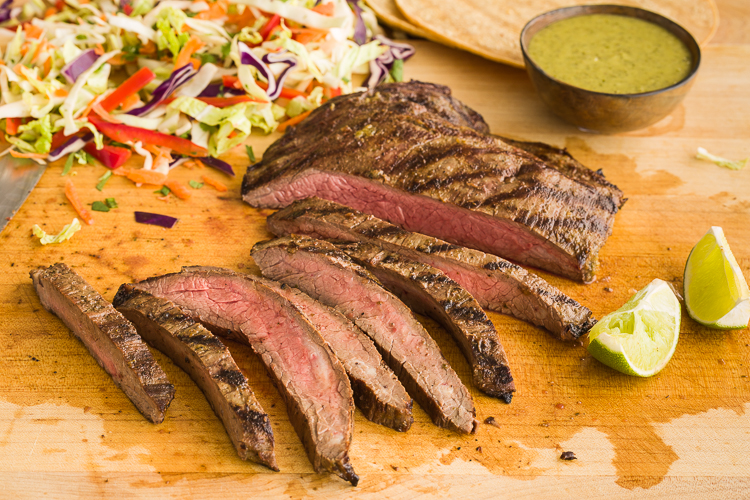
    Sliced flank steak on a cutting board with flank steak marinade in a small bowl.

    This carne asada marinade is bold, zesty, and comes together fast in the blender with fresh lime juice, garlic, cumin, and jalapeño-classic flavor in every bite. It's an easy way to make juicy, flavorful carne asada steak at home. The marinade does double duty, tenderizing the meat and serving as a sauce for finishing. After a quick 10-12 minutes on the grill, the steak is charred, juicy, and ready to slice for tacos, bowls, or simple plates.

    Grilled carne asada steak on a wood cutting board with a knife.

    Carne asada is usually made with thin, flavorful cuts of beef that cook quickly over high heat. Skirt steak is the more traditional choice, but flank steak (my usual choice), flat iron steak, hanger steak, or flap steak/bavette all work well. The key is a bold marinade, a hot grill, and slicing the steak thinly across the grain for the best texture. With fresh lime, garlic, cumin, jalapeño, and cilantro, this marinade adds bright, savory flavor without extra fuss.

    [feast_advanced_jump_to]

    Carne Asada Marinade Recipe Highlights

    • Big, bold flavor - Fresh lime, orange juice, cilantro, garlic, jalapeño, cumin, and oregano create a bright, punchy carne asada marinade.
    • Fast grilling - Thinner steak cuts cook quickly over high heat, making this an easy recipe for tacos, bowls, salads, or grilled vegetables.
    • Double-duty marinade - Reserve some clean marinade before adding the meat, then use it as a fresh finishing sauce for extra flavor.
    • Make-ahead - Make marinade up to 2 days ahead and refrigerate.

    For another flank steak recipe, try this Asian inspired flank steak recipe with ginger.

    Ingredients You'll Need

    • Steak - Skirt steak is the more traditional cut for carne asada, with bold beefy flavor. Flank steak is easier to find, lean, reliable, and slices beautifully, which makes it my go-to for this carne asada marinade. Flat iron, hanger, or flap steak are good alternatives.
    • Cilantro - Adds fresh, herbaceous flavor.
    • Oil - Use avocado oil or olive oil for richness and body.
    • Jalapeño - Adds gentle heat. Seed and devein it for a milder marinade.
    • Citrus juice - Fresh orange and lime juice adds acidity, balancing the richness of the steak.
    • Garlic - Adds bold, savory depth.
    • White onion - For mild onion flavor without overpowering, red onion and shallot also work.
    • Cumin - Warm, earthy, and classic with carne asada flavors.
    • Mexican oregano - Adds earthy, herbal depth. Regular oregano works if needed.

    Please see the recipe card for measurements, salt, and black pepper.

    Chef's Tip - Fresh Spices Matter:
    Ground spices lose potency over time. For the best carne asada flavor, use fresh cumin and oregano (ideally within 6-12 months). If your spices smell flat, they'll taste flat. Store them in a cool dark place like a drawer, cabinet, or pantry, not next to the stove where light and heat degrade their flavor.

    Substitutions and Variations

    • Spice it up - Use a serrano pepper instead of jalapeño, or add a pinch of red pepper flakes.
    • Chicken - Use carne asada marinade for chicken too, dark meat works great.
    • Extra savory depth - Add 1 tablespoon of tamari or soy sauce. Not traditional, but it adds umami.
    • Cilantro-free option - Use flat-leaf parsley, or a mix of parsley and fresh oregano, for a different herb profile.
    • Tequila option - Add 1-2 tablespoons blanco tequila for a clean, bright flavor, or reposado for a slightly warmer note. Use just a little so it enhances the marinade without overpowering the lime, garlic, and cilantro.

    Chef's Tip: how to get perfect grill marks? Use the 10:00 and 2:00 trick. When you lay the meat on the grill, point one end towards 10:00 on the clock. When first set of grill marks are set, move that point to 2:00. When grill marks are set, flip the steak and finish grilling.

    If the sounds of a little tequila in the marinade sounds fun, try this grilled tequila lime shrimp!

    How to Make Carne Asada Marinade

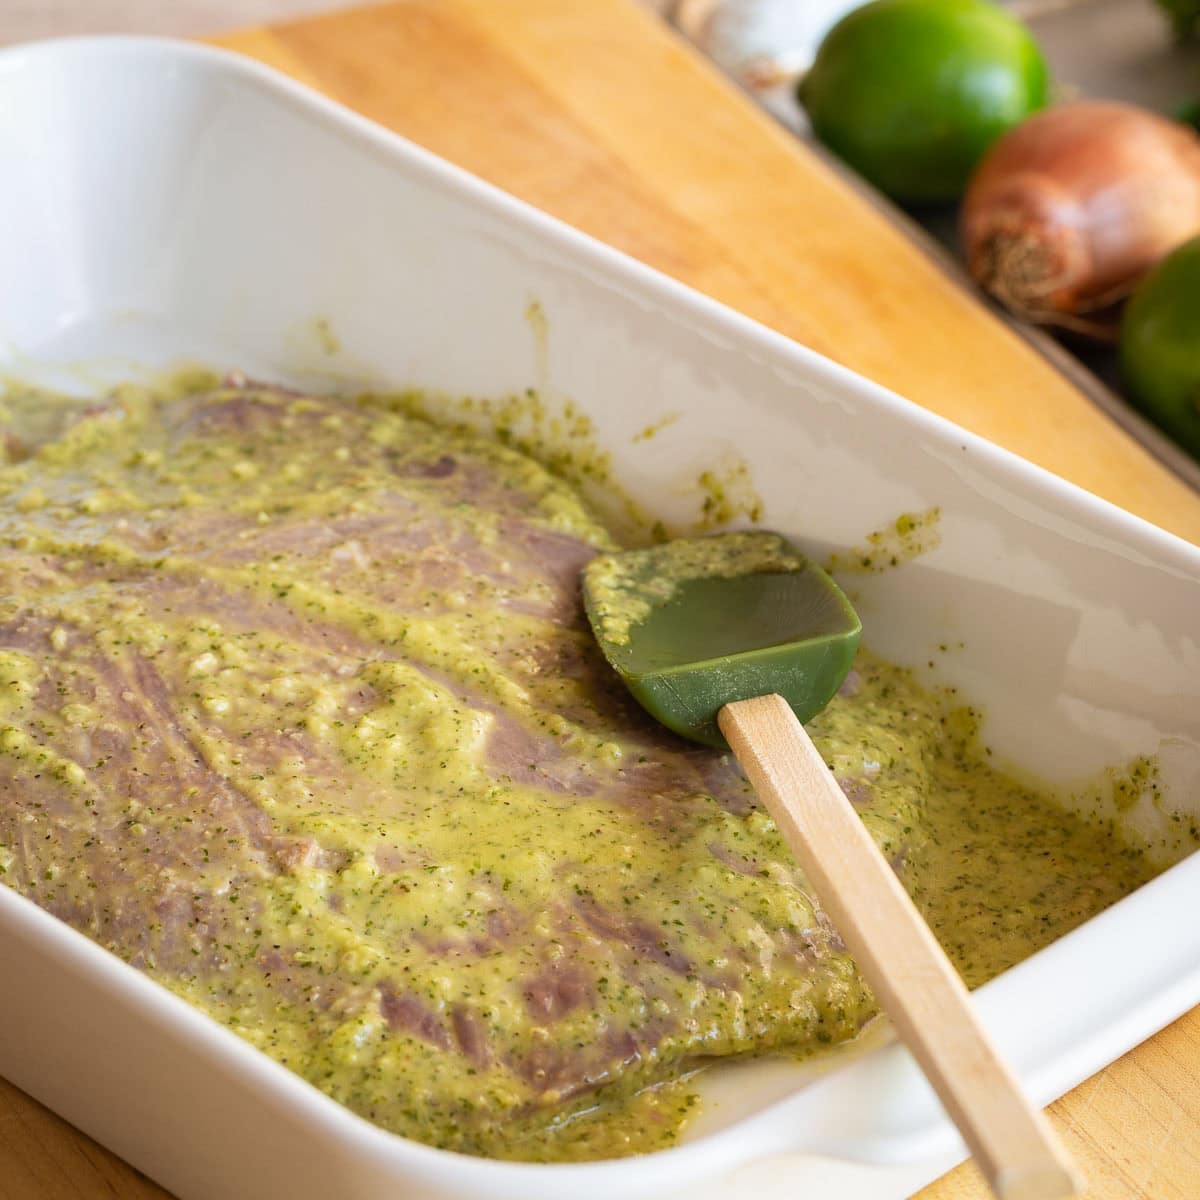
    Flank steak marinating in a white casserole dish covered in a bright green carne asada marinade.
    1. Make carne asada marinade - Add all marinade ingredients to a blender and blend until smooth. Reserve half to use as a finishing sauce if desired.
    2. Marinate steak - Place the steak in a zip-top bag with half of the marinade. Seal and marinate at room temperature for 1 hour, or refrigerate for up to 6 hours.
    3. Prepare to grill - Remove the steak from the marinade and discard the used marinade. If the steak has been refrigerated, let it sit at room temperature for about 45 minutes to take the chill off.
    4. Preheat your grill - Set to high and clean the grates well. Oil the grates to prevent sticking or spray the meat with avocado oil spray. Grill the steak for 10-11 minutes total.
    5. Rest the steak - Remove the carne asada from the grill and let it rest for 10 minutes before slicing to allow the juices to redistribute.
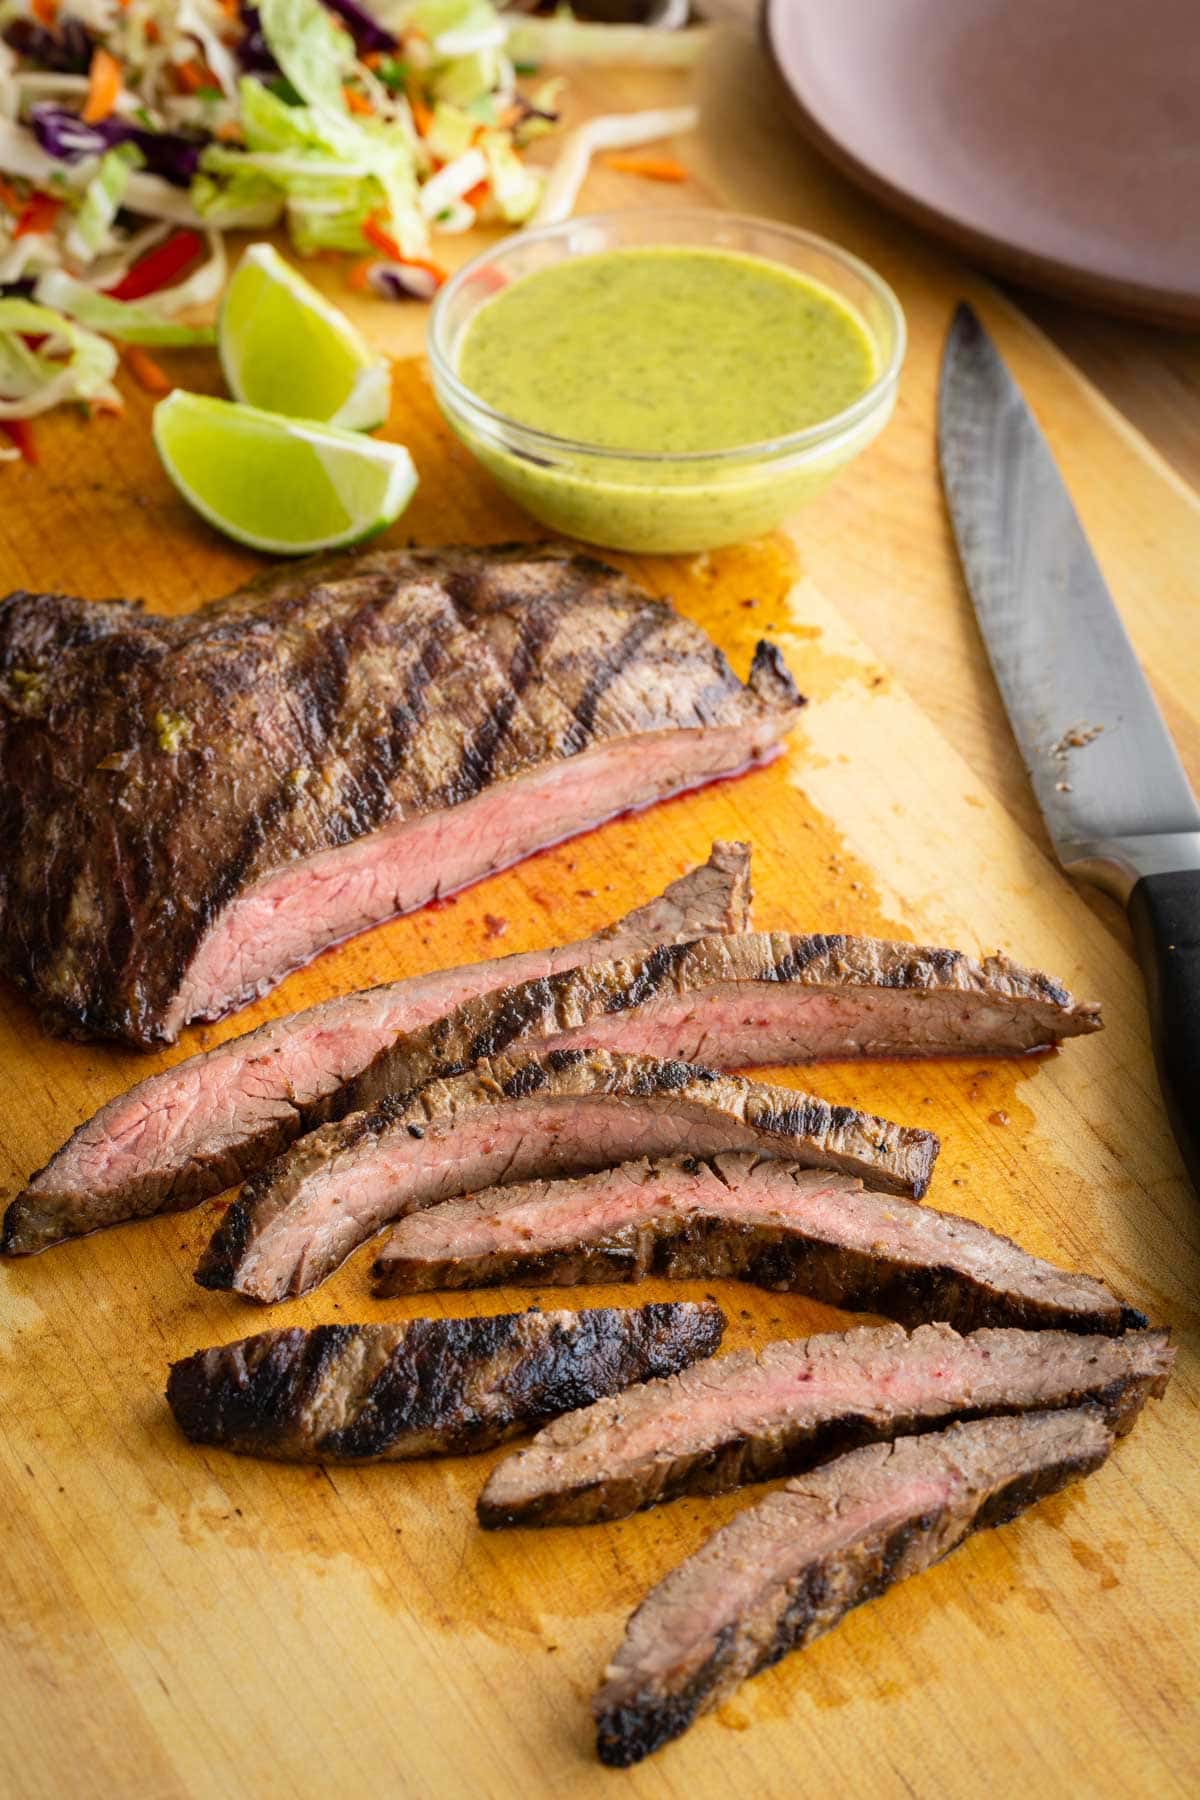
    6. Slice the steak - Slice thinly across the grain to maximize tenderness. Use a sharp chef's knife or a sharp slicing knife.

    Serving Suggestions

    Serve carne asada with warm corn tortillas and thinly sliced vegetables for easy tacos. For a grain-free option, use cassava tortillas and pair with a crisp slaw. It's also great with:

    • Salad greens for a carne asada salad.
    • Mexican rice.
    • Pinto beans or black beans.
    • Avocado sauce or guacamole.
    • Smoked salsa, ranchero sauce, or salsa verde.
    • Grilled vegetables, like grilled zucchini.

    Storage and Leftovers

    Let the steak cool completely, then store in an airtight container in the refrigerator for up to 4 days. To freeze leftover carne asada, slice the cooked steak thinly, wrap tightly, and freeze for up to 2 months. Thaw overnight in the fridge before reheating.

    Reheat gently in a covered skillet over low heat with a splash of broth or reserved marinade, or enjoy cold on salads, tacos, or wraps.

    Sliced flank steak on a cutting board with a green dressing, lime wedges, and a colorful salad.

    For another terrific Mexican-inspired recipe, try this Mexican chicken tortilla soup. It's filled with big bold flavors and topped with wonderful garnishes.

    More Mexican-Inspired Recipes

    Build a complete meal with these Mexican-inspired recipes, from flavorful mains and fresh salsas to sauces, sides, and easy weeknight favorites, and check out the Mexican-inspired recipes page.

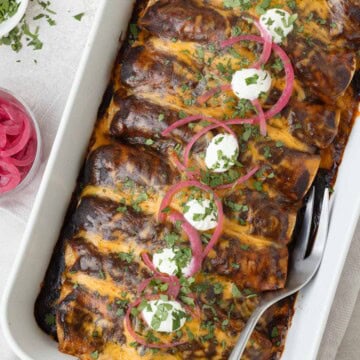
    • A baking dish full of shredded beef enchiladas with a deep red enchilada sauce cilantro, and pickled onions.
      Shredded Beef Enchiladas
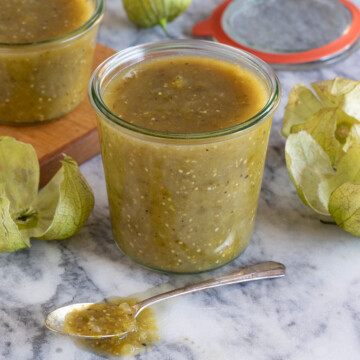
    • tomatillo salsa verde
      Tomatillo Salsa Recipe
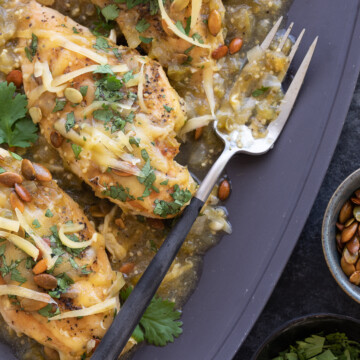
    • A gray platter of sals verde chicken breasts with tomatillo sauce, grated cheese and chopped cilantro.
      Easy Salsa Verde Chicken (green salsa chicken)
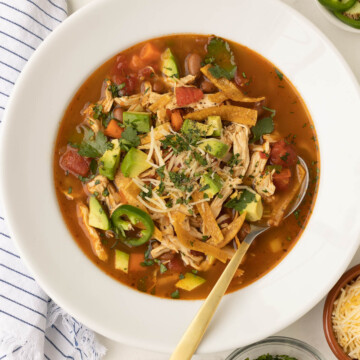
    • Close up of Mexican chicken soup in a white bowl.
      Mexican Chicken Tortilla Soup Recipe

    If You Make This Recipe

    If you make this carne asada marinade, please add your comment. I love hearing from you and your comments help other readers. Thanks for supporting my site.

    📖 Recipe

    Sliced flank steak on a cutting board with flank steak marinade in a small bowl.

    Carne Asada Marinade (for grilled steak)

    Sally Cameron
    Juicy, grilled steak marinated in a bold carne asada marinade of citrus juices, garlic, cumin, and jalapeño. Quick to make, full of flavor, and perfect for tacos, salads, or grilled veggies. Not a cilantro fan? Use fresh Italian parsley.
    5 from 2 votes
    Prevent your screen from going dark
    Print Recipe Pin Recipe
    Prep Time 5 minutes mins
    Cook Time 11 minutes mins
    Marinade time 8 minutes mins
    Total Time 24 minutes mins
    Course Main Course
    Cuisine Mexican
    Servings 4 servings
    Calories 380 kcal

    Ingredients
      

    Meat

    • 1 ½ pounds flank steak

    Marinade & Sauce

    • ½ cup fresh chopped cilantro
    • ⅓ cup avocado or olive oil
    • ½ medium jalapeno chopped fine
    • 3 tablespoon fresh lime juice
    • 2 tablespoons orange juice
    • 3 large garlic cloves
    • 1 tablespoon chopped white onion
    • 1 tablespoon Worcestershire optional, not traditional
    • 1 ½ teaspoons ground cumin
    • 1 ½ teaspoons sea salt
    • 1 teaspoon dried Mexican oregano
    • ½ teaspoon black pepper

    Would you like to save this recipe?

    Never lose a recipe! We'll email this post to you, so you can come back to it later.

    Instructions
     

    Make the marinade

    • Combine all marinade ingredients in a blender or small food processor and pulse until mostly smooth. and pulse to puree, or use the small bowl of a food processor.

    Marinate the steak

    • Reserve about ⅓ cup clean marinade for serving. Place the steak in a heavy zip-top bag or shallow dish. Add the remaining marinade, turning to coat both sides. Marinate hour at rom temperature or refrigerate for 2-6 hours.

    Grill the steak

    • Remove the steak from the refrigerator 45-60 minutes before grilling to take off the chill. Preheat the grill over high heat and clean the grates. Remove the steak from the marinade and let excess drip off.
      Grill about 10–11 minutes total, turning once, until the steak reaches 125°F–130°F for medium-rare. For grill marks, grill 4 minutes in one direction, rotate, grill 2-3 minutes more, then flip and cook about 3 minutes on the second side.
      Rest 10 minutes, then slice thinly across the grain. Serve with the reserved clean marinade spooned over the top or on the side.
    • When done, allow steak to rest for about 10 minutes before slicing to insure moist meat. Slice cross-grain into thin strips. Serve with clean marinade as sauce on the side or drizzled over the top.

    Notes

    Grill Tip -  For perfect grill marks, use the 10:00 and 2:00 trick. When you lay the meat on the grill, point one end towards 10:00 on the clock. When first set of grill marks are set, move that point to 2:00. When grill marks are set, flip the steak and finish grilling.

    Nutrition

    Calories: 380kcalCarbohydrates: 6gProtein: 31gFat: 25gSaturated Fat: 5gPolyunsaturated Fat: 2gMonounsaturated Fat: 16gCholesterol: 85mgSodium: 81mgPotassium: 613mgFiber: 1gSugar: 2gVitamin A: 174IUVitamin C: 11mgCalcium: 54mgIron: 3mg
    Tried this recipe?Let us know how it was with a comment and leave a star rating!
    • « Previous Page
    • 1
    • …
    • 9
    • 10
    • 11
    Chef Sally Cameron of aFoodcentricLife.com in her kitchen.

    Welcome! I'm Sally, a professionally trained chef, former personal chef and caterer, lover of fresh healthy food, and sharing it with others.

    More about me →

    Best Fall Recipes

    • A gray bowl of pumpkin risotto with a golden spoon and sage leaves.
      Creamy Pumpkin Risotto With Sage
    • A gray bowl of air fryer butternut sqhuas with pepitas and sage leaves with gray napkin.
      Air Fryer Butternut Squash
    • A saute pan of Chicken Marsala without cream, topped with mushroom sauce and herbs.
      Chicken Marsala Recipe (No Cream)
    • The deep colors of beef barley soup in a white bowl with herbs.
      Beef Barley Soup Recipe (Gluten-Free Option)
    • A golden loaf of pumpkin bread sliced and ready to enjoy with coffee.
      Easy Gluten-Free Pumpkin Bread Recipe
    • Deep red and golden roasted beets tossed with vinaigrette, herbs, feta, and nuts in a salad bowl.
      Beet Salad with Feta

    Best Fall Recipes -->

    Footer

    as seen on

    Logos of Featured Publications

    About

    • Privacy Policy
    • Disclaimer
    • Terms & Conditions
    • Accessibility policy

    Newsletter

    • Sign Up! for emails and recipes.

    Menu

    • Home
    • About
    • Contact
    • Facebook
    • Instagram
    • Pinterest

    As an Amazon Associate I earn from qualifying purchases.

    Copyright © 2026 aFoodcentricLife.com

    Rate This Recipe

    Your vote:


    A rating is required
    A name is required
    An email is required