A Foodcentric Life

  • Valentine's Day
  • Meet Chef Sally
  • Recipe Index
  • Subscribe
menu icon
go to homepage
  • Valentine's Day
  • Meet Chef Sally
  • Recipe Index
  • Subscribe
    • Facebook
    • Instagram
    • LinkedIn
    • Pinterest
  • search icon
    Homepage link
    • Valentine's Day
    • Meet Chef Sally
    • Recipe Index
    • Subscribe
    • Facebook
    • Instagram
    • LinkedIn
    • Pinterest
  • ×
    Home » Recipes

    Cheesy Scalloped Potatoes

    09/26/2012 by Sally Cameron 15 Comments

    scalloped potatoes gratin

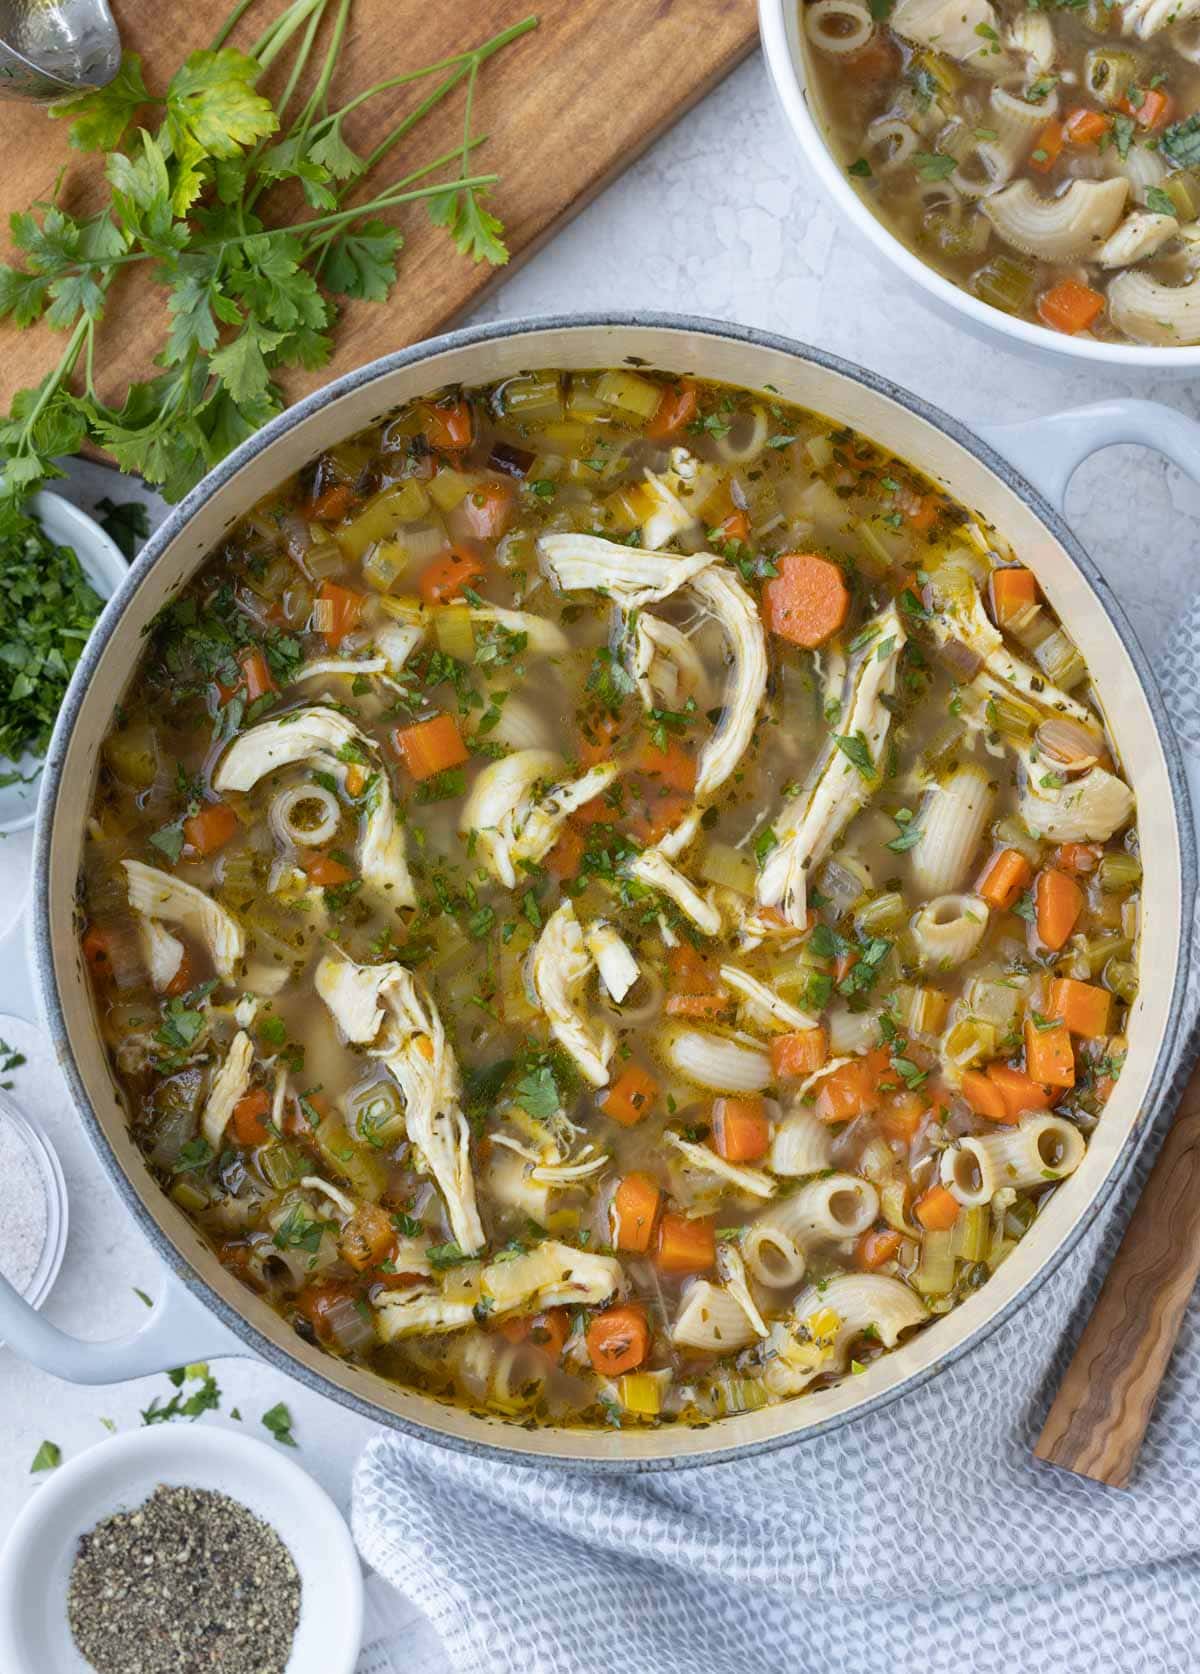
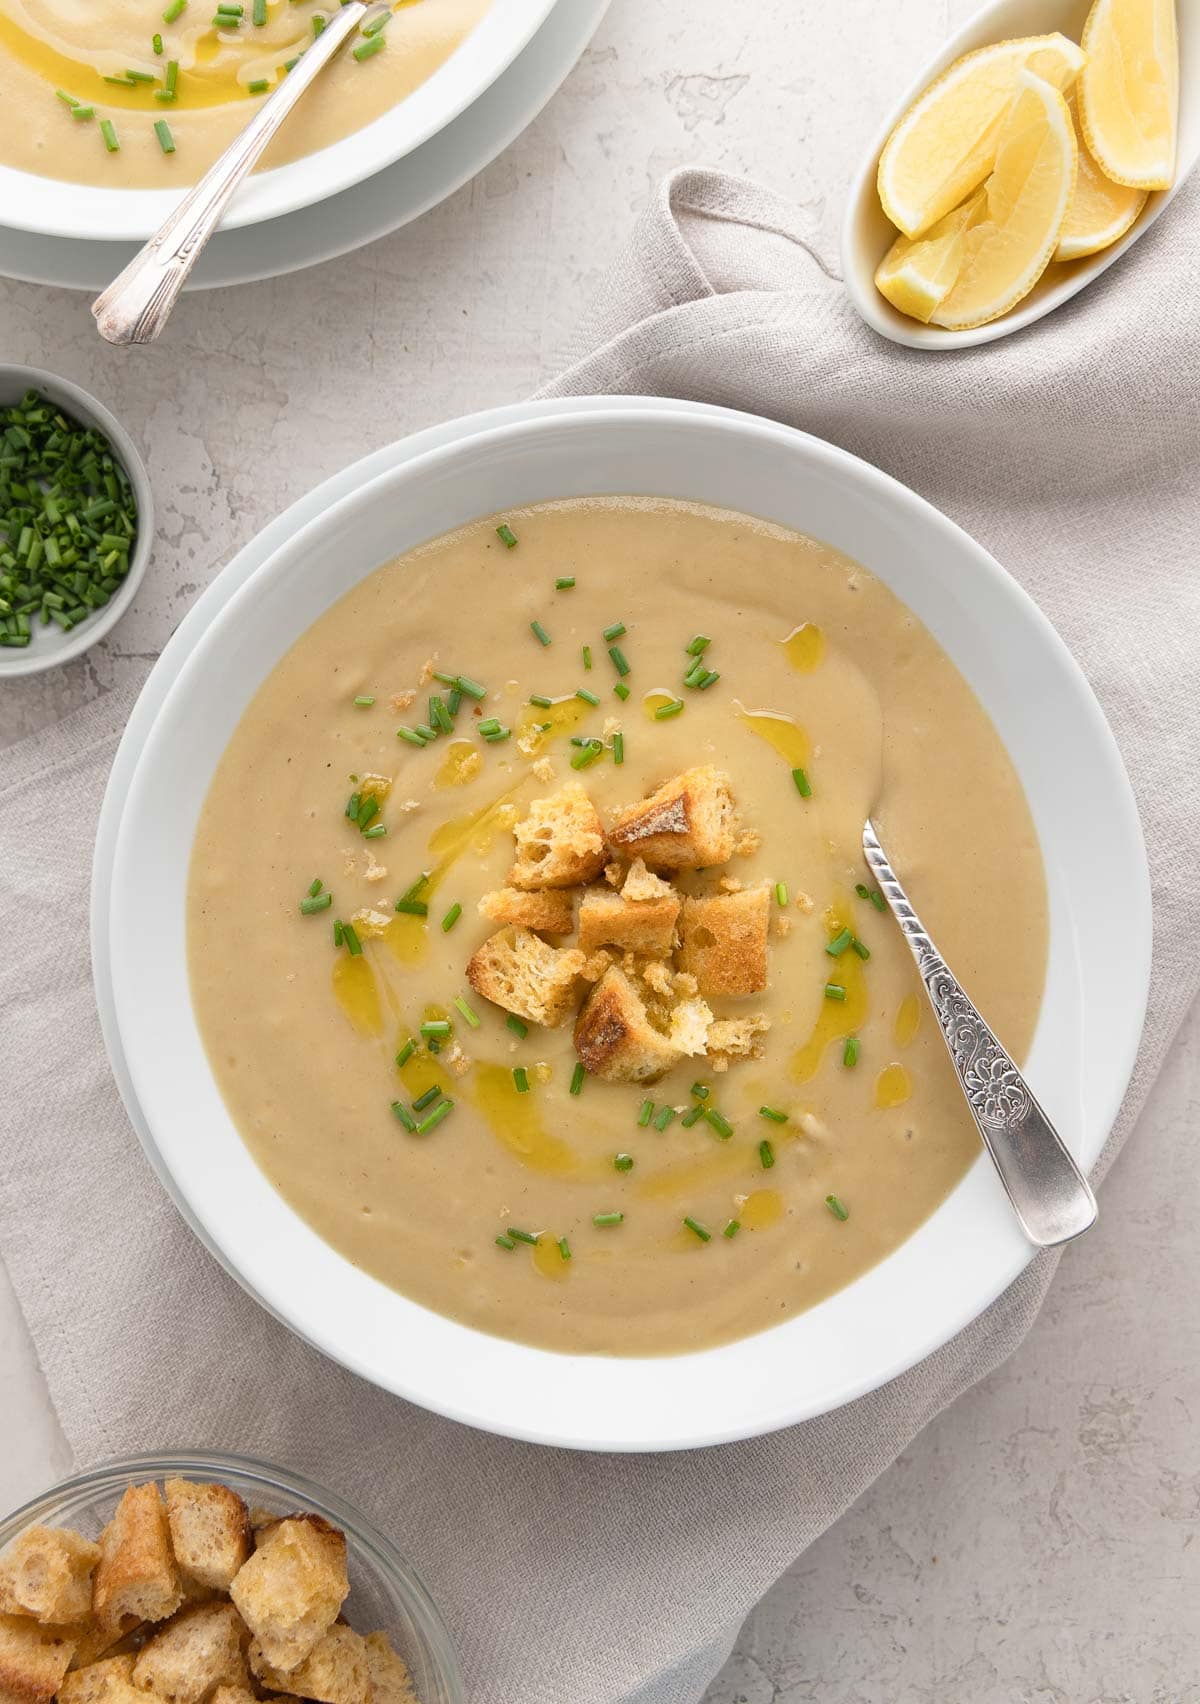
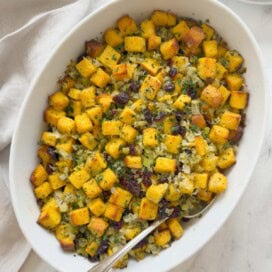
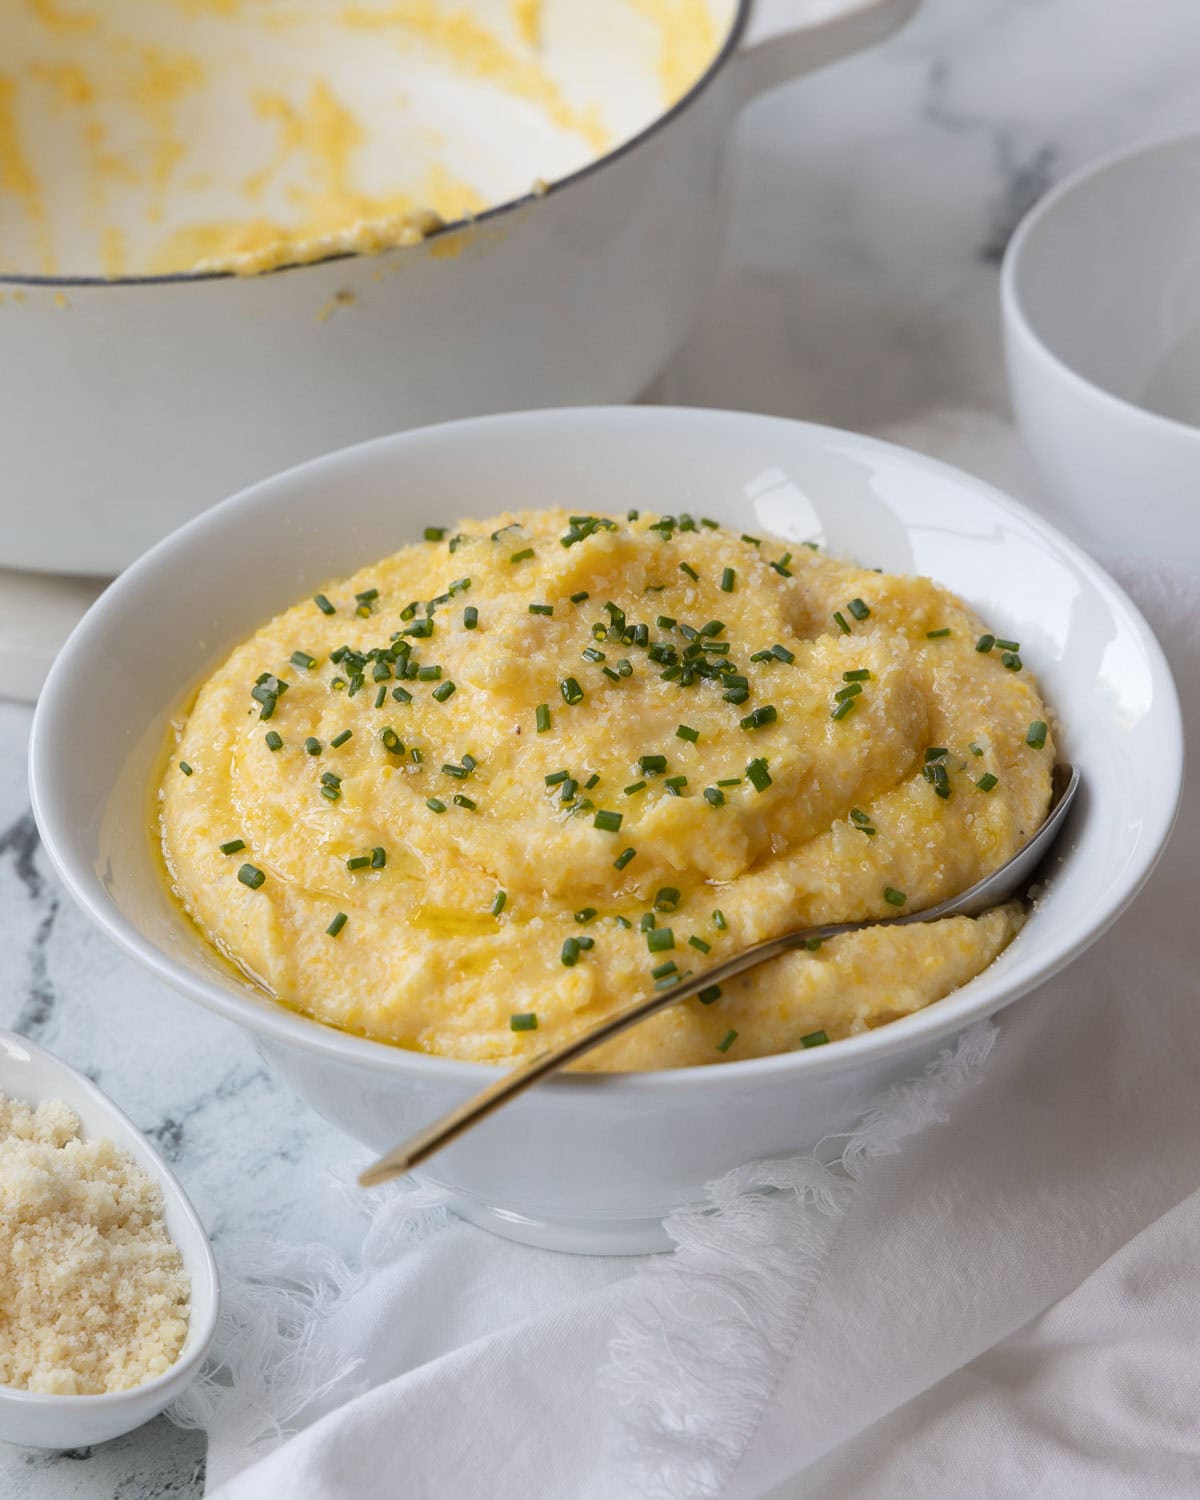
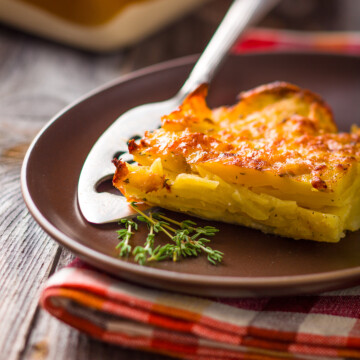
    Cheesy scalloped potatoes are a classic, crowd-pleasing side dish and pure heaven for any potato lover. Thinly sliced potatoes are layered with Gruyère and Parmesan and baked until the top is bubbly, golden, and irresistibly cheesy. Often called potatoes au gratin, this rich, creamy casserole is an elegant side for Easter, Christmas, and any special occasion dinner.

    A slice of scalloped potatoes on a serving spatula with perfect layers of golden potatoes.

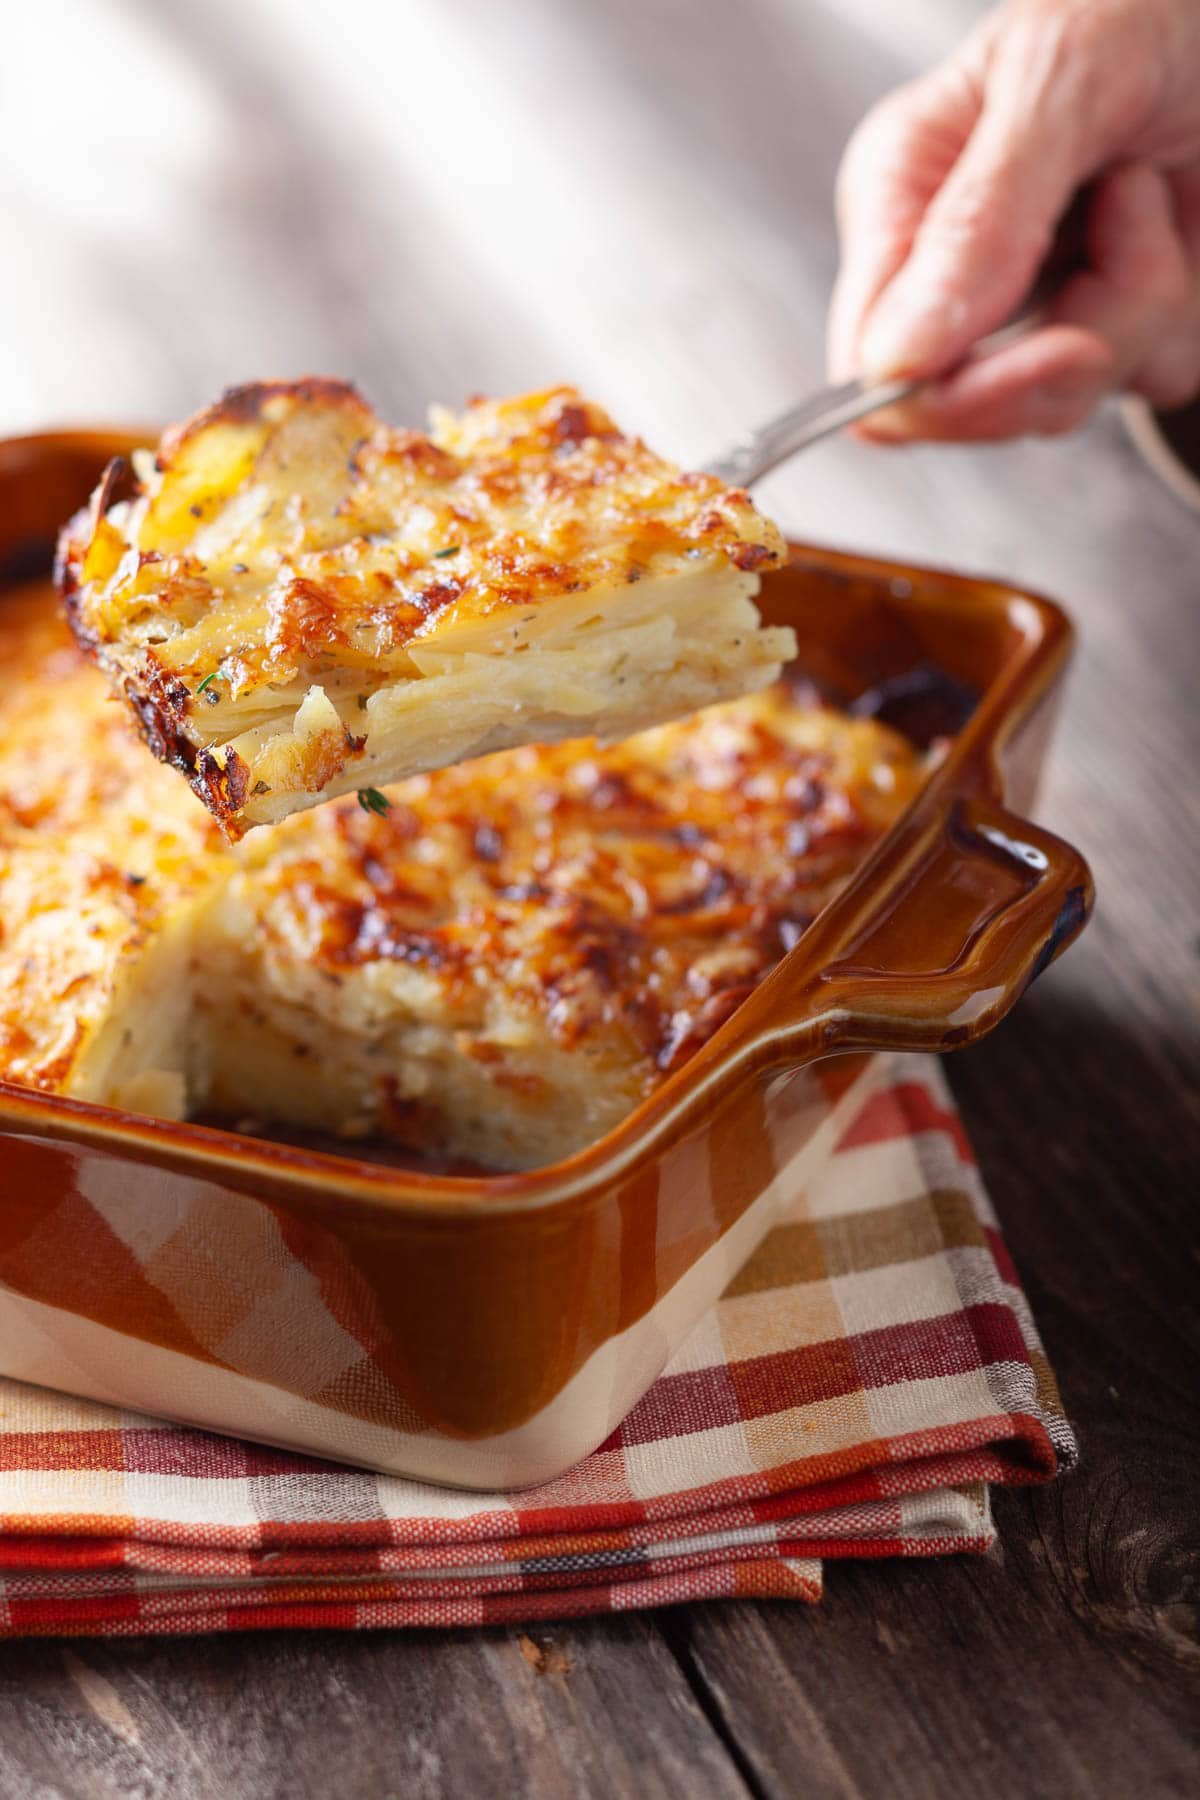
    This cheesy scalloped potatoes recipe is all about real ingredients and reliable results: fresh potatoes, good cheese, milk or half-and-half, and a few fragrant herbs. I slice the potatoes ⅛-inch thick and gently simmer them in the dairy until just tender before baking, which makes them foolproof-no crunchy centers, just perfectly creamy, melt-in-your-mouth potatoes every time.

    [feast_advanced_jump_to]

    Why You'll Love Cheesy Scalloped Potatoes

    • Simple ingredients - No canned soup or boxed mix, just fresh potatoes, good cheese, dairy, and a few herbs.
    • Ultra-cheesy flavor - Bake with Gruyère and Parmesan until golden.
    • Foolproof method - ⅛-inch potato slices simmered in dairy before baking give you perfectly tender potatoes with no crunchy centers.
    • Perfect for special dinners - Great for Easter, Christmas, & holidays.
    • Make-ahead friendly - Assemble and bake ahead, then reheat before serving.

    Ingredients You'll Need

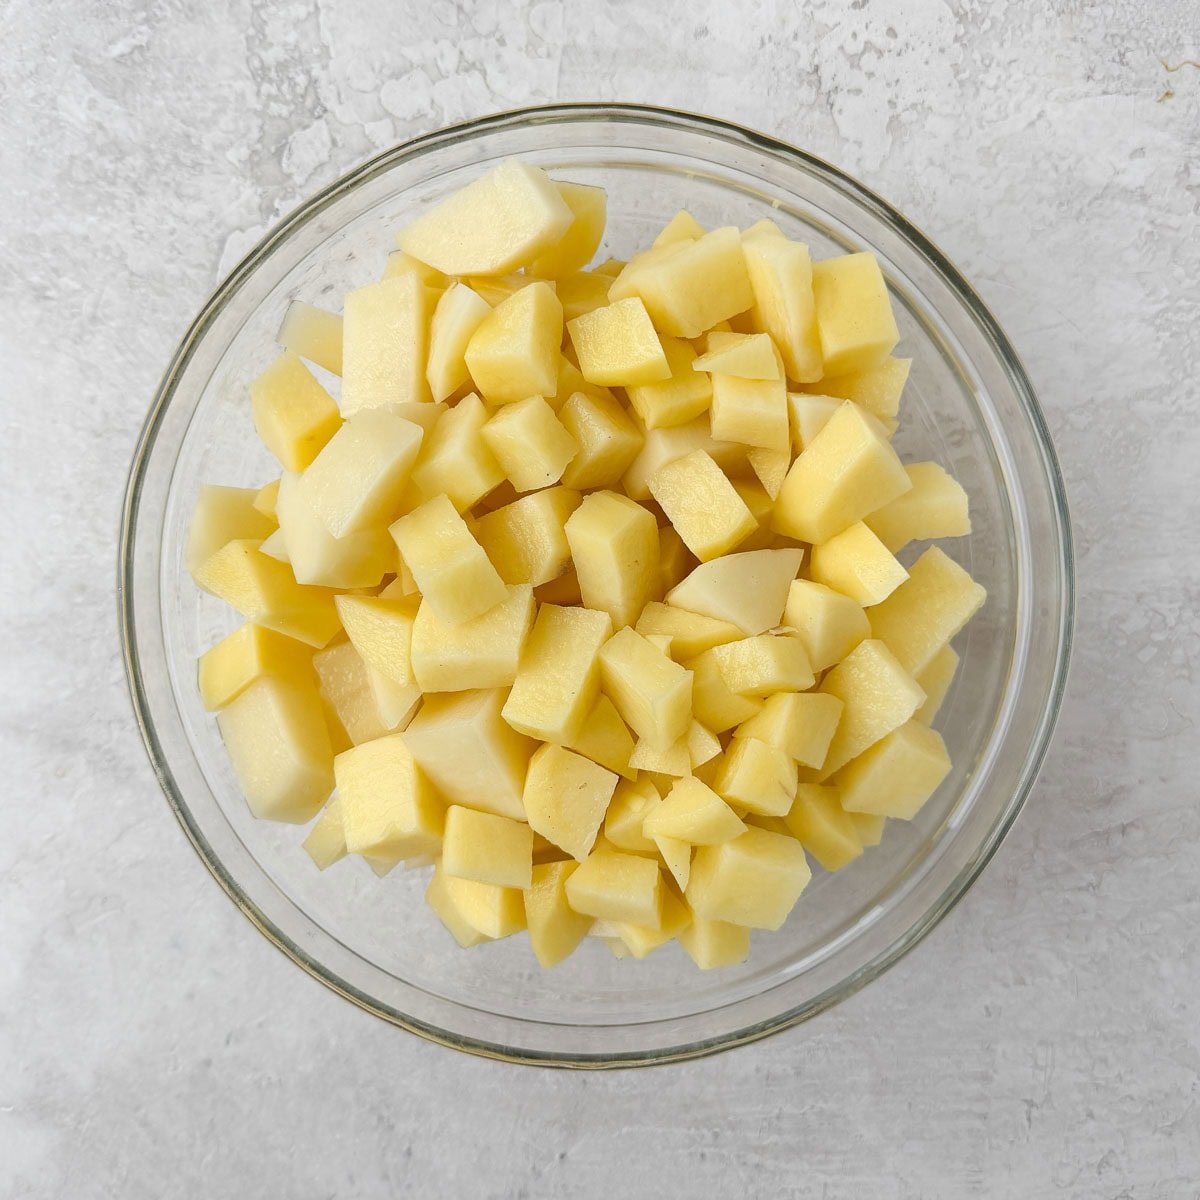
    • Potatoes - Gold potatoes are perfect for cheesy scalloped potatoes-they're moist, creamy, and hold their shape when sliced and baked.
    • Dairy - Whole milk works well; half-and-half is richer for holidays and special occasions. You can also add a little heavy cream for an extra-indulgent, French dauphinoise-style version.
    • Cheeses - Use cave-aged or regular Gruyère for nutty flavor and good Parmesan for its salty, umami kick.
    • Herbs -Fresh thyme leaves add an earthy, aromatic note.
    • Spice - A pinch of nutmeg or mace subtly elevates the flavor (optional).

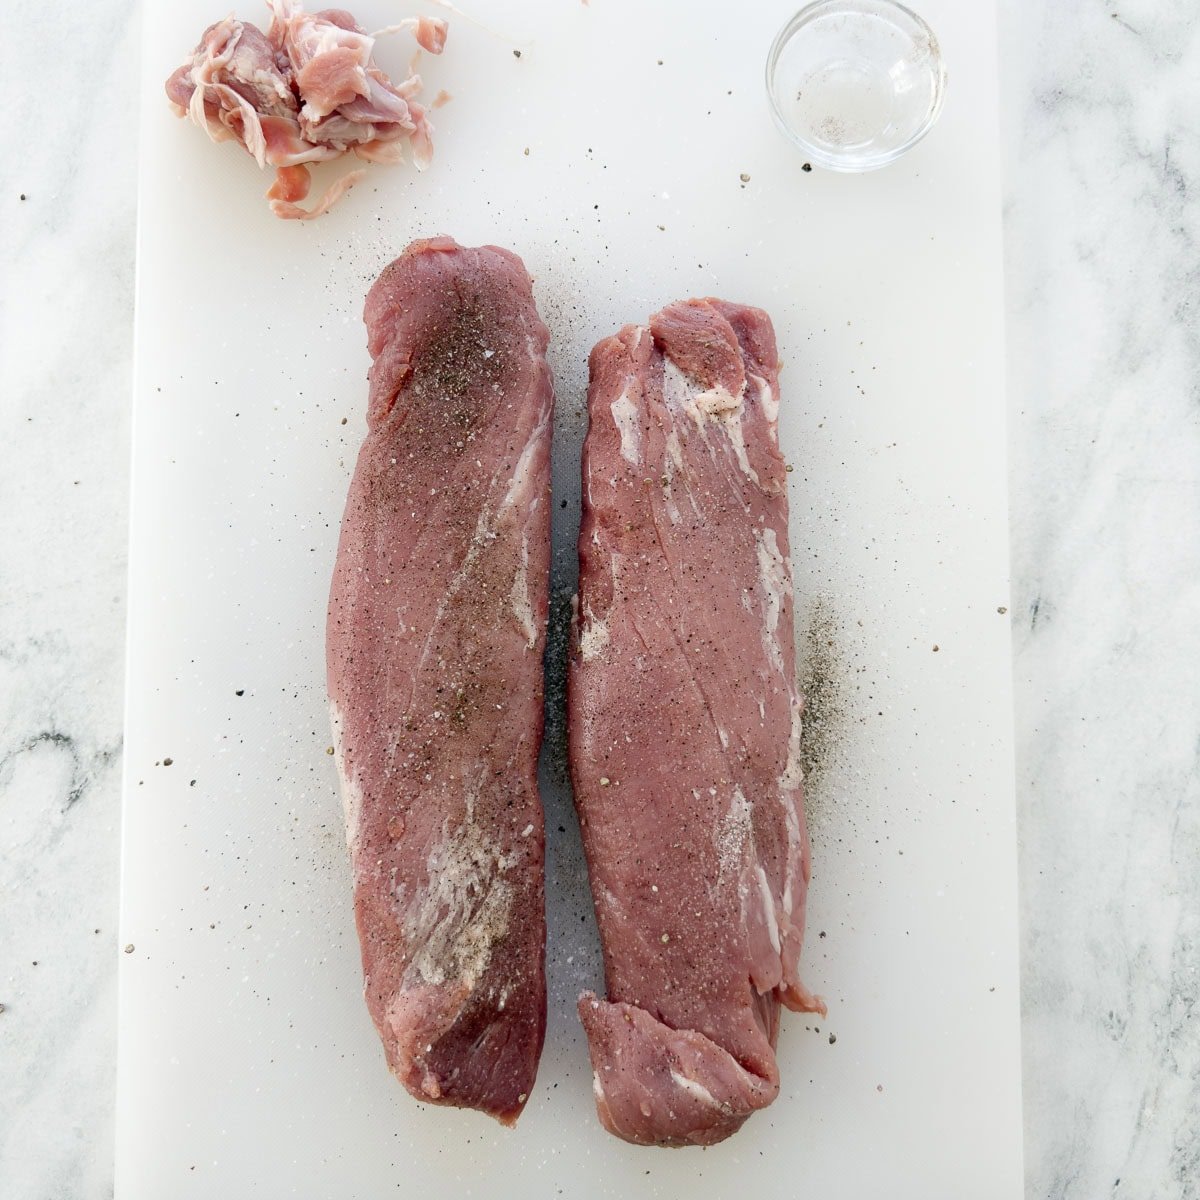
    Please see the recipe card for measurement, salt, and black pepper.

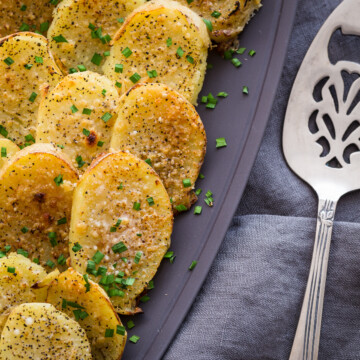
    For another terrific potato dish try my French Potato Salad, served chilled or warm.

    Chef's tip on buying potatoes:
    Potatoes labeled as "yellow" and "gold" both belong to the broad category of yellow-fleshed potato, and they work the best in scalloped potatoes providing a creamy texture that still holds its shape. Buy large potatoes instead of small ones-they're easier to peel and slice on a mandoline. Skip bagged potatoes when you can and pick them individually, looking for smooth skins with no sprouts, soft spots, or green patches.

    Substitutions and Variations

    • Cheese options - If you can't find Gruyère, use another mild, good-melting cheese such as regular Gruyère, Comté, Fontina, or Cheddar cheese.
    • Herb options - Dried thyme can stand in for fresh; use about ⅓-1/2 the amount. You can also use fresh marjoram or a little fresh rosemary (it's much stronger), or dried Italian seasoning.

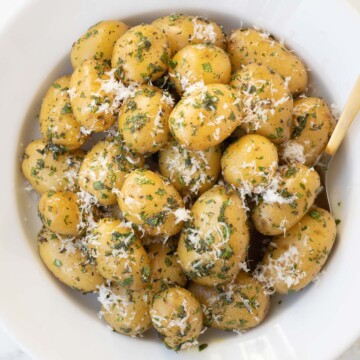
    If you love potatoes, another great recipe that simple is this Baby Dutch Yellow Potato recipe with herbs.

    Chef's Tip - Why I Simmer the Potatoes First
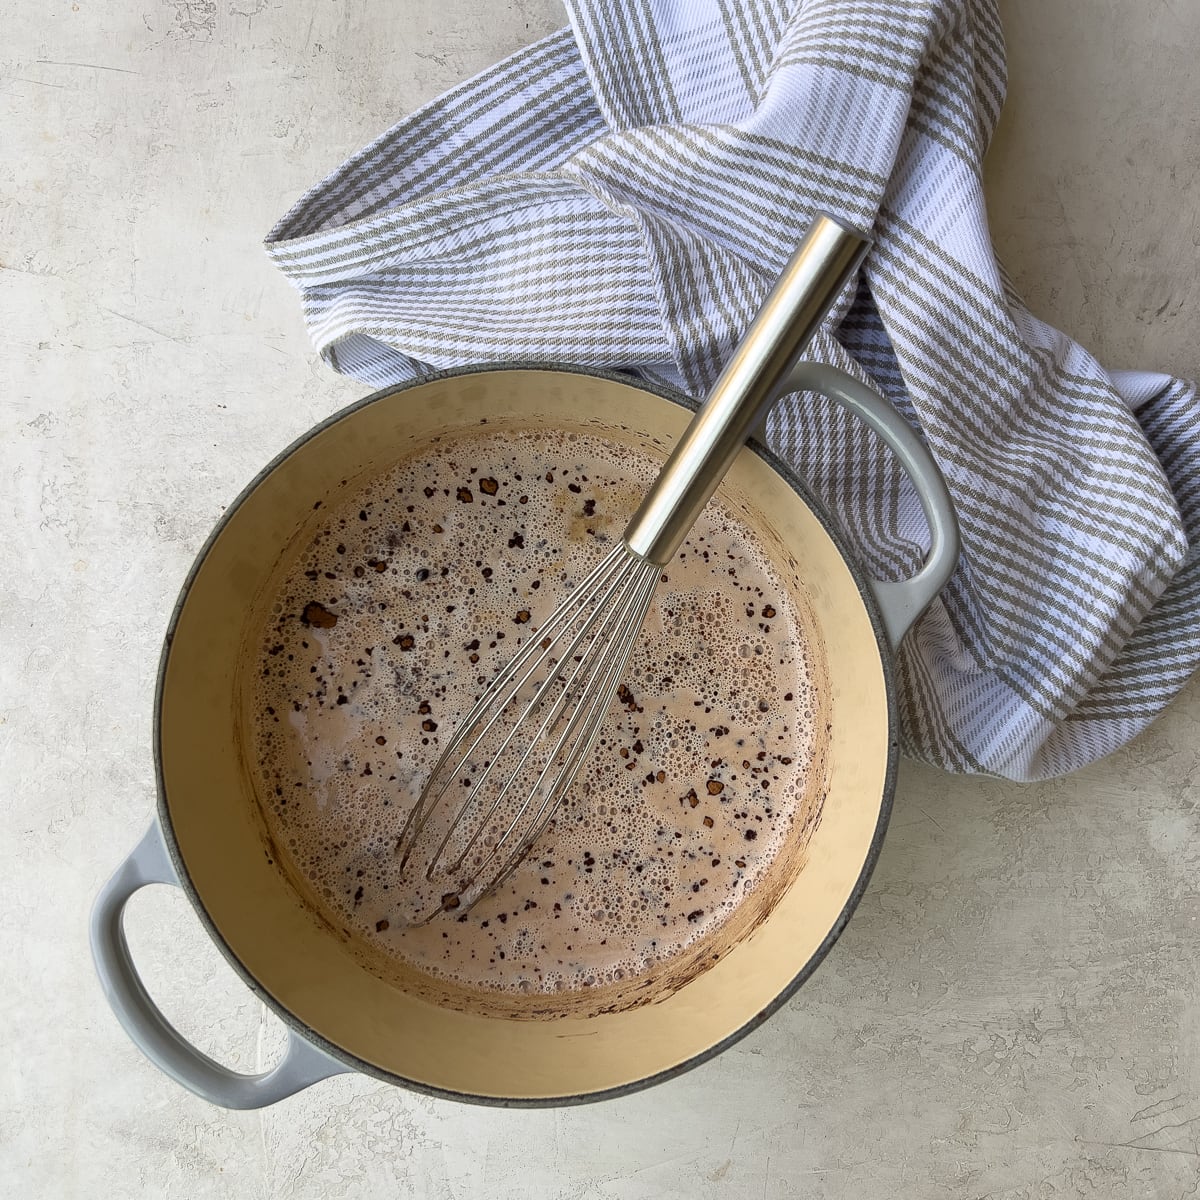
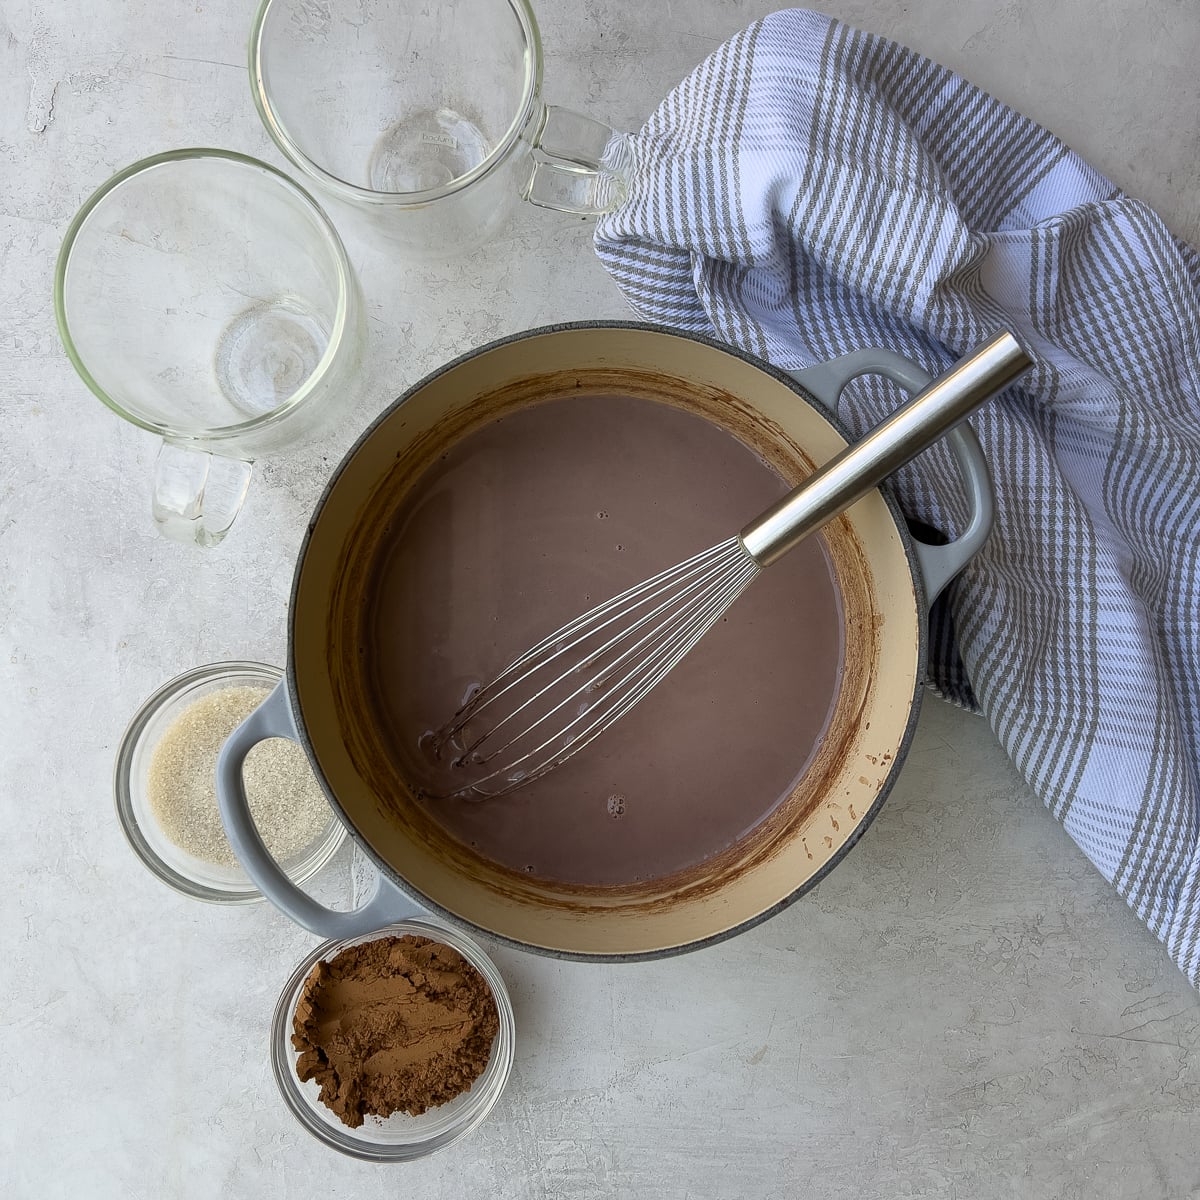
    Most scalloped potatoes recipes layer raw potato slices with cream and cheese, then bake until tender. It works-but it can take a long time, and it's easy to end up with underdone slices in the center. I prefer to slice the potatoes ⅛-inch thick and gently simmer them in the milk or half-and-half first, just until they're tender. Then I layer and bake. It's faster, more reliable, and gives you perfectly tender cheesy scalloped potatoes every time. I've made these so many times, they're practically fool-proof.

    How to Make Cheesy Scalloped Potatoes

    Thin slices of gold potatoes sliced with a mandoline in hands and on cutting board.
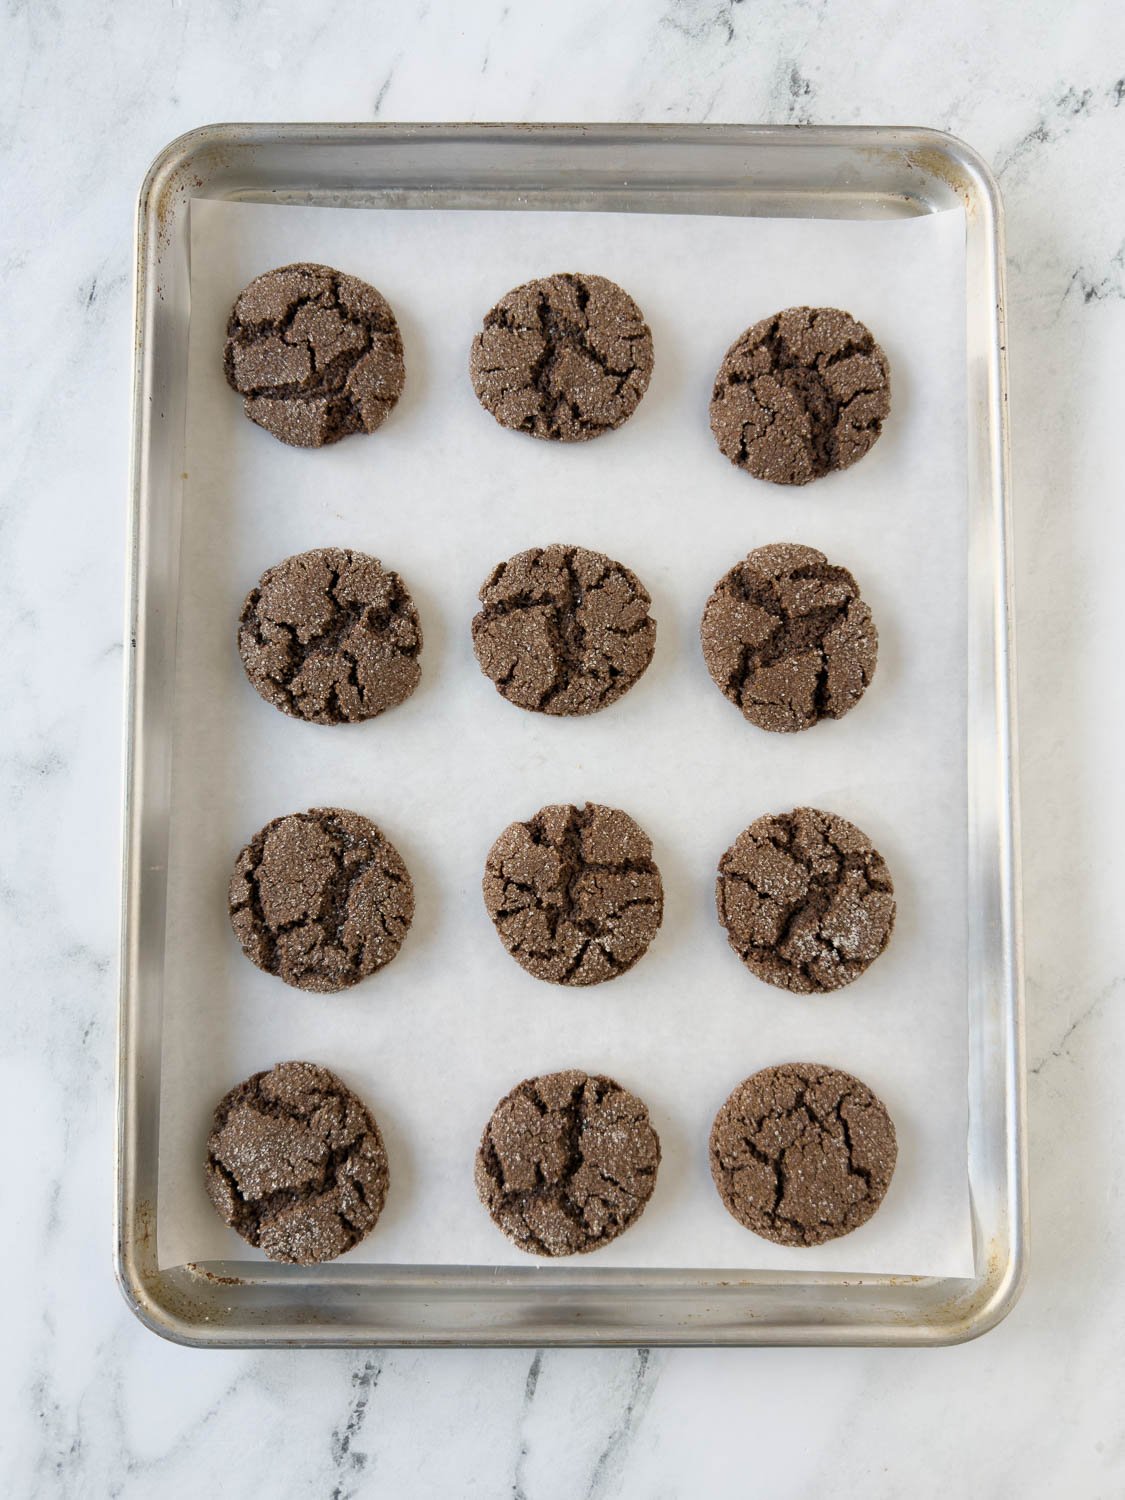
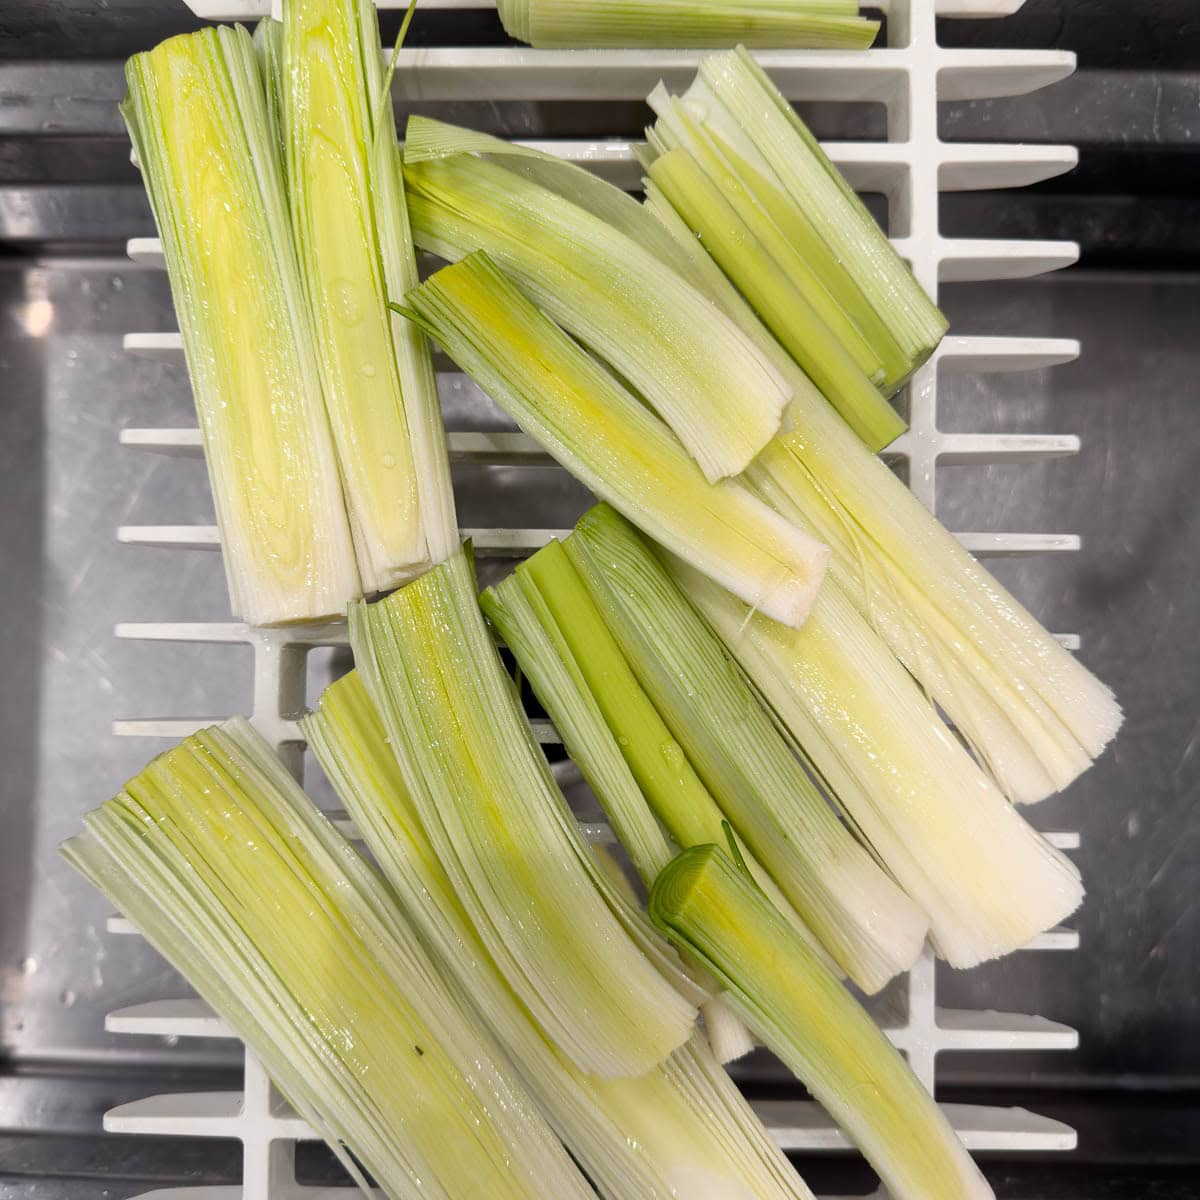
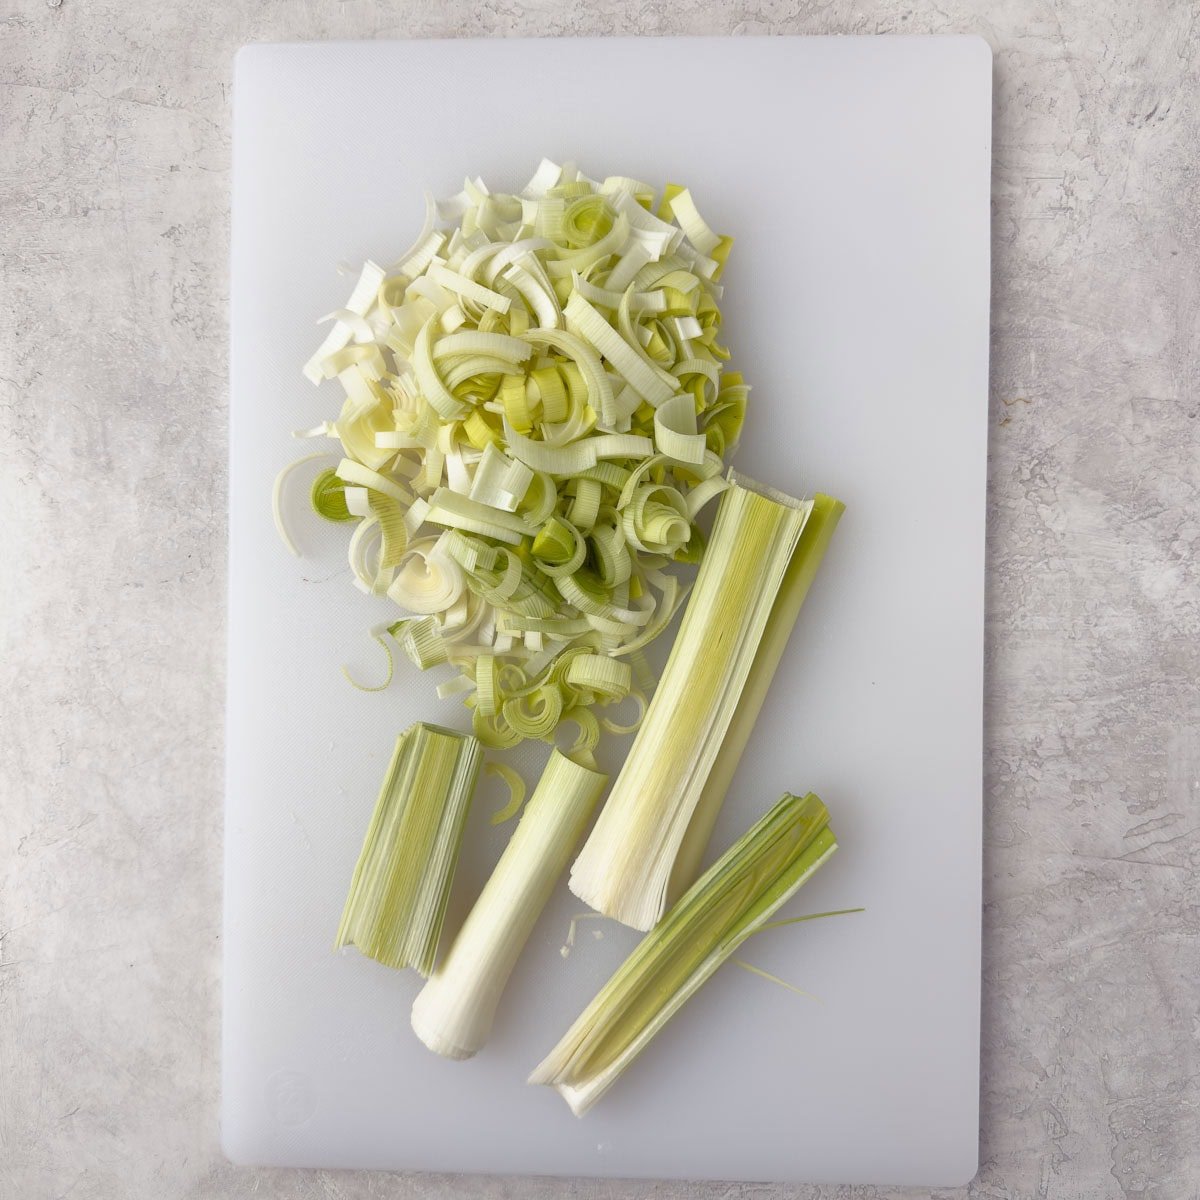
    1. Peel potatoes and slice ⅛" thick with a mandoline or food processor with slicing blade.
    Simmering potato slices in milk and herbs for scalloped potatoes.
    1. Simmer potatoes in milk with herbs just until tender when pierced.
    Layering cooked potatoes slices with cheese into a square baking dish for potatoes au gratin.
    1. Begin layering potato slices into a buttered 9x9 or two quart casserole dish alternating with the grated Gruyere and Parmesan cheeses.
    An almost finished dish of scalloped potatoes with bowl of grated cheese on side.
    1. Finish layering and end with the rest of the cheese and parmesan. Bake scalloped potatoes until golden brown on top and the potatoes are set and a bit firm. They will set more upon cooling for a few minutes which makes slicing easier.

    Chef's tool tip: If you don't have a food processor, a classic tool called a mandoline is a terrific kitchen tool for slicing at an economical price. Slice potatoes, apples, pears, beets, carrots and other fruits and vegetables uniformly thin when needed.

    Make-Ahead & Re-Heat

    Assemble and bake the scalloped potatoes until the potatoes are just tender and the top is lightly golden, then cool, cover, and refrigerate for up to 1 day.

    Before serving, let the dish sit at room temperature while the oven heats (up to an hour), then reheat covered at 350°F until hot. Uncover for the last few minutes to re-crisp and brown the top.

    Serving Suggestions

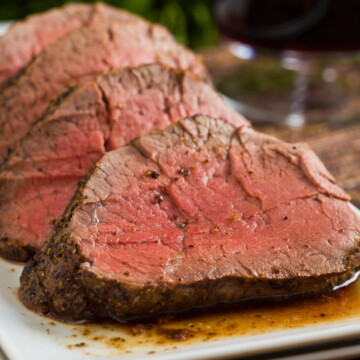
    Au gratin potatoes are terrific with main dishes such as grilled or roast meats such as roast beef tenderloin, roast chicken, pork roast, Thanksgiving roast turkey, or an Easter ham.

    Keep your green vegetable side dish simple as scalloped potatoes are rich and filling. Simple green beans are a great option. And be sure to serve a big side salad.

    A slice of cheesy scalloped potatoes on a brown plate with thyme sprigs.

    Storage

    To reheat, warm portions in the microwave until hot, or cover the dish with foil and bake in a preheated 350°F oven until heated through. Timing will depend on how cold they are from the refrigerator, but they should reach 165°F internally when checked with a digital thermometer.

    Leftover cheesy scalloped potatoes keep in the refrigerator in an airtight container for up to 4 days.

    Recipe FAQs

    Can I make cheesy scalloped potatoes ahead of time?

    Yes, au gratin potatoes are a great make ahead dish. Make them the day ahead, cool completely, and wrap well to refrigerate. Remove the dish from the refrigerator an hour ahead to get the chill off then re-heat in a 350°F oven until 165°F measured internally.

    Can I add extra ingredients like garlic, onions, or bacon?

    For fun variations on au gratin potatoes, add roasted garlic, crisp crumbled bacon, or thinly sliced onions and garlic sautéed before layering.

    Can I use different types of potatoes?

    Gold or yellow potatoes are the best option for au gratin potatoes. They are the perfect cross between waxy and starchy potatoes and hold up well to slicing and baking while holding their shape. Russets are too starchy and light. Save them for baked potatoes and mashed potatoes.

    More Potato Recipes

    Who doesn't love potatoes? They are so versatile and an always welcome side dish. Try a few of my other potato recipes.

    • White bowl of golden browned air fryer red potatoes with rosemary.
      Air Fryer Red Potatoes (or oven roasted)
    • Baby dutch yellow potatoes wtih herbs and Parmesan cheese.
      Buttery Baby Dutch Yellow Potatoes
    • Whipped sweet potatoes ready for serving in a gray bowl.
      Simple Whipped Sweet Potatoes Recipe
    • Parmesan potato wedges
      Crispy Baked Parmesan Potatoes (Sliced & Oven-Roasted)

    ⭐️Did You Make This Recipe?

    If you make this Cheesy Scalloped Potatoes recipe, please add your comment. I appreciate your feedback and enjoy hearing from you. If you loved it, please give it a 5-star rating! They really help other readers.

    📖 Recipe

    scalloped potatoes gratin

    Cheesy Scalloped Potatoes

    Sally Cameron
    A classic casserole dish, this recipe for scalloped potatoes is sure to please for special occasions or holidays. Choose aged gruyere cheese for its rich, nutty flavor. A small piece will satisfy. Use half and half versus whole milk for a richer dish. A sprinkle of grated Parmesan cheese is nice for the top before baking for extra crunch and flavor.
    5 from 2 votes
    Prevent your screen from going dark
    Print Recipe Pin Recipe
    Prep Time 15 minutes mins
    Cook Time 1 hour hr
    Total Time 1 hour hr 15 minutes mins
    Course Side Dish
    Cuisine American
    Servings 8 (or 6 big servings)
    Calories 200 kcal

    Equipment

    • Food processor, mandoline or handheld slicer

    Ingredients
      

    • 2 ¼ pounds large gold or yellow potatoes
    • 2 cups whole milk or half and half
    • 1 tablespoon chopped fresh thyme leaves
    • 1 ½ teaspoons kosher salt
    • ¼ teaspoon white pepper or black pepper
    • ⅛ teaspoon nutmeg or mace
    • 4-5 ounces aged gruyere cheese
    • 2-3 tablespoons grated Parmesan cheese

    Instructions
     

    Peel and Slice the Potatoes

    • Pre-heat the oven to 350 degrees. Peel the potatoes and slice on a mandolin or hand-held slicer adjusted to ⅛″ (3-4 cm) thickness.

    Simmer Potatoes

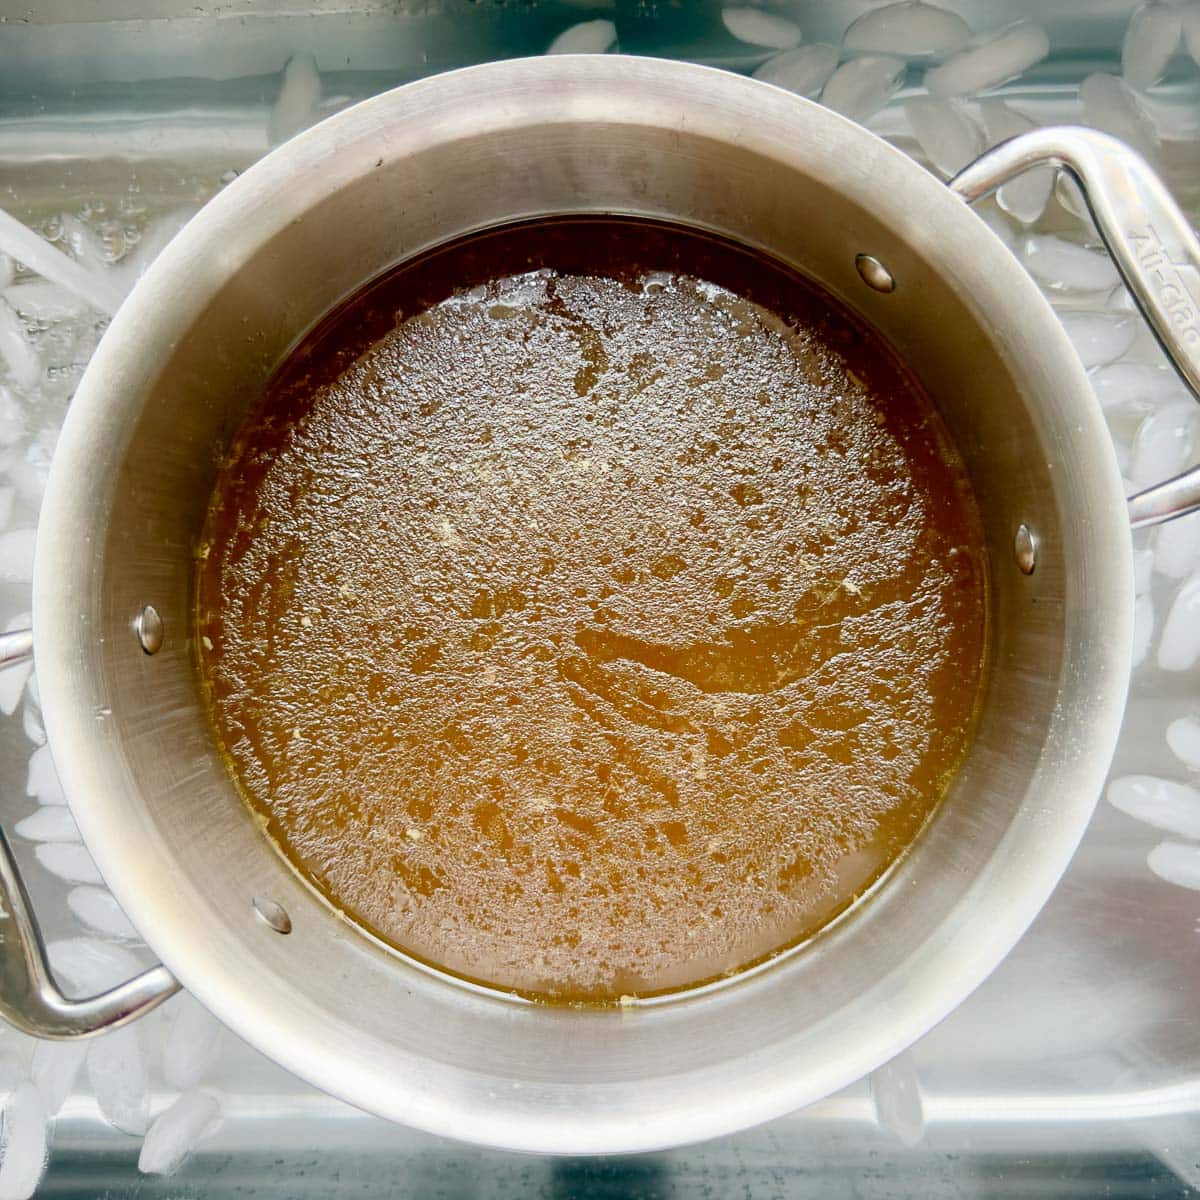
    • Place the potatoes and milk in a deep sauté pan and bring to a simmer over medium heat. Add the thyme, salt and pepper. Cover and turn heat to low. Watch carefully and don't let the milk boil over. It's messy to clean up and happens in the blink of an eye. Simmer over low for about 7 minutes or until potatoes are tender when pierced with the tip of a sharp paring knife. Remove potatoes from the heat and allow to cool a bit.

    Assemble the Casserole

    • Layer half of the potatoes in a lightly buttered or sprayed 9x9 square casserole or oval baking dish. Sprinkle with the nutmeg. Add ⅔ of the grated cheese. Layer on the rest of the potatoes and top with remaining ⅓ of the cheese and Parmesan.

    Bake the Potatoes

    • Bake casserole uncovered for 50-60 minutes, until the top is golden brown. Remove from the oven and allow to cool for a few minutes. Slice and serve.

    Notes

    Cheese options - If you can't find Gruyère, use another mild, good-melting cheese such as regular Gruyère, Comté, Fontina, or Cheddar cheese.
    Herb options - Dried thyme can stand in for fresh; use about ⅓–½ the amount. You can also use fresh marjoram or a little fresh rosemary (it’s much stronger), or dried Italian seasoning.
    Leftover scalloped potatoes keep in the refrigerator for 3-4 days well covered. Re-heat covered with foil at 350 degrees for about 30 minutes or until hot. To save time, you can make this dish a day ahead, then heat for your dinner. Heating time depends on how cold the casserole is out of the refrigerator. Allowing it to sit on the counter for an hour first helps get the chill off. 

    Nutrition

    Calories: 200kcalCarbohydrates: 26gProtein: 9gFat: 7gSaturated Fat: 4gPolyunsaturated Fat: 0.4gMonounsaturated Fat: 2gCholesterol: 24mgSodium: 590mgPotassium: 648mgFiber: 3gSugar: 4gVitamin A: 288IUVitamin C: 27mgCalcium: 249mgIron: 1mg
    Tried this recipe?Let us know how it was with a comment and leave a star rating!

    Gluten-Free BBQ Sauce Recipe

    05/22/2024 by Sally Cameron 3 Comments

    A glass jar of deep red homemade bbq sauce.

    Making your own gluten-free BBQ sauce is a fantastic way to spice up your grilling game without the worry of gluten. Whether you're slathering it on ribs, brushing it over grilled chicken, or using it as a dipping sauce for barbecued shrimp, this gluten free BBQ sauce is packed with classic smoky, tangy, and sweet savory flavor loved by many. No one will even know it's gluten-free! This barbecue sauce works for everyone.

    A jar of burnished red, thick homemade bbq  sauce with a pastry brush.

    I've tinkered, tested, and tasted my way through many batches to create my homemade gluten-free barbecue sauce recipe and now I'm sharing it. Make your own bbq sauce to avoid hidden gluten and customize the flavors to suit your taste and dietary preferences perfectly.

    Skip unhealthy ingredients common in many big brand store-bought barbecue sauces (sorry sweet baby ray). Read the package label and you'll find high fructose corn syrup, corn syrup, and preservatives.

    [feast_advanced_jump_to]

    Why You'll Love This BBQ Sauce

    • Takes just minutes to make.
    • Versatile for many grilling needs.
    • Everyday ingredients, easily customizable.
    • No gluten, no added salt, lower sugar, can be made vegan if preferred.
    • Gluten-free BBQ sauce is not just for people with celiac disease. Many people are gluten-sensitive.

    BBQ Sauce Ingredients

    Ingredients for homemade bbq sauce in small bowls on a tray.
    • Ketchup: Start with prepared tomato ketchup (preferably unsweetened) so you control the sweetness. Here is the ketchup brand I prefer. It is easier than starting with tomato paste. 
    • Sugar: Choose either dark brown sugar, light brown sugar, coconut sugar, or for a no-sugar gluten-free bbq sauce use golden brown monk fruit. 
    • Molasses: Gives barbecue sauce a deep, sweet, rich flavor and color.
    • Onion: I've used chopped sweet onion, shallot, and onion powder and onion powder is easiest and works great. 
    • Vinegar: Use apple cider vinegar (or white vinegar) for tang, and balsamic vinegar for it's rich sweet flavor. 
    • Spices: Cayenne pepper or chipotle pepper (which is smoky too) for heat and spice, ancho chili powder for that bbq flavor, smoked paprika, and granulated garlic or garlic powder for flavor.
    • Mustard: I recommend using dijon mustard for more flavor and kick instead of mustard powder. 
    • Worcestershire sauce: Lends a rich, savory, umami kind of flavor to many sauces and dishes. A must for bbq sauce.
    • Liquid smoke: A bottled liquid condiment providing natural smoke flavor. Optional but adds a nice smoky flavor. It's very concentrated, use just a little!

    Please see the recipe card for measurements.

    Chef's tip: Gluten-free worcestershire sauce. Is worcestershire sauce gluten-free? Some are, some are not. Top brand Lea and Perrins is certified GF (in US) as is the Wizard's (also vegan, no anchovy). Another is French's Classic Worcestershire. Call the company's customer service number for produce information if in doubt as many are not gluten-free, and  look for an allergen notification on their website. 

    Substitutions and Variations

    • For a honey BBQ sauce, either swap the brown sugar for honey or use some of both.
    • For a sweeter BBQ sauce without sugar, use monk fruit (brown or regular).
    • For spicy BBQ sauce, add your favorite hot sauce, more cayenne pepper or chipotle pepper, but add carefully!

    Chef's tip: Many BBQ sauces include soy sauce. If you like the salty flavor it adds, use only tamari soy sauce as it is wheat-free gluten-free soy sauce. I've left it out of this recipe as many people are soy-sensitive. If you're not soy-sensitive and like it, add a little. Start with a teaspoon or two and taste, remembering even the low-sodium brands have a lot of sodium.

    Recipe Instructions

    Why make homemade BBQ sauce? It's always fresh and there are no expired bottles taking up space in the fridge when you need to grab some. It takes about 5 minutes!

    Ingredients for gluten-free bbq sauce in a small steel pan cooking.
    Step 1: Combine all ingredients into a small (2 qt) saucepan.
    Whisking bbq sauce in a small stainless steel pan to thicken.
    Step 2: Whisk until smooth and cook over medium heat until bubbly and thickened, 4-5 minutes.
    Pouring finished barbecue sauce from pan into a glass measuring cup.
    Step 3: Pour hot barbecue sauce into a container for cooling. When cool, refrigerate in an airtight container for up to 2 weeks. Be sure to label and date.

    Ways to Use Gluten-free BBQ Sauce

    • As a dipping sauce for sweet potato fries or wedges.
    • Brush onto grilled shrimp after grilling.
    • Use instead of hoisin sauce for these grilled chicken kabobs.
    • Smear over a burger instead of ketchup.
    • A must for baby back ribs!
    • Terrific to glaze grilled, broiled, baked, or stovetop seared salmon.
    • Use almost anywhere you'd use ketchup for more flavor.

    Recipe FAQs

    What ingredients typically contain gluten in BBQ sauce?

    Gluten-containing ingredients to be wary of when making homemade BBQ sauce are worcestershire sauce (Lea and Perrins and Wizard's are gluten-free), soy sauce (made with wheat), or ingredients like barley malt, malt vinegar, or modified food starch which may contain gluten. Read labels carefully and if in doubt, call the company's customer service line and ask or research their website. 

    What are the best gluten-free substitutes for thickening BBQ sauce?

    If your BBQ sauce needs thickening, the best way is to thicken it by cooking it down a little bit over medium-low heat in a small pan. For a thickening ingredients, arrowroot starch works well as it is clear. To use arrowroot, mix a tablespoon into 1-2 tablespoons of cold water until smooth and add to the bubbling bbq sauce, stir until thickened. Cool and refrigerate.

    How do I store homemade gluten-free BBQ sauce?

    Store homemade GF BBQ sauce in the refrigerator in an airtight container, labeled and dated, for up to 2 weeks. If it smells "off" or looks funny, toss it and make more. It's easy to do. It also freezes, but as it takes little time to make, making fresh is a good way to go. 

    More Recipes!

    Try the dry rub as the seasoning for what you're grilling, like baby back ribs, chicken, shrimp, or more! And you'll need side dishes for that great grilled dinner!

    • Savory dry rub for grilling with spices and a little brown sugar.
      Homemade BBQ Spice Rub
    • Oven baby back ribs glazed with rich brown hoisin sauce.
      Baby Back Ribs Recipe (Oven Method)
    • White shallow bowl stilled with green cabbage coleslaw, carrots, and parsley with a light dressing.
      Simple Easy Coleslaw Recipe
    • Broccoli bacon salad
      Crunchy Broccoli Salad with Bacon

    ⭐️Did You Make This Recipe?

    If you make this gluten-free bbq sauce recipe? Please add your comment. I appreciate your feedback and enjoy hearing from you. If you loved it, please give it a 5-star rating! They really help other readers.

    📖 Recipe

    A glass jar of deep red homemade bbq sauce.

    Gluten-Free BBQ Sauce

    Sally Cameron
    Whether you're slathering it on ribs, brushing it over grilled chicken, or using it as a dipping sauce for barbecued shrimp, this gluten free BBQ sauce is packed with classic smoky, tangy, and sweet savory flavor.
    5 from 3 votes
    Prevent your screen from going dark
    Print Recipe Pin Recipe
    Prep Time 2 minutes mins
    Cook Time 3 minutes mins
    Total Time 5 minutes mins
    Course condiment
    Cuisine American
    Servings 8 Yield 1 ½ cups
    Calories 44 kcal

    Equipment

    • Small pan like a 2 quart

    Ingredients
      

    • 1 cup unsweetened ketchup
    • ¼ cup water
    • 2 tablespoons brown sugar or golden monk fruit
    • 1 tablespoons apple cider vinegar or white vinegar
    • 1 tablespoon molasses
    • 1 tablespoon balsamic vinegar
    • 2 teaspoons worcestershire sauce
    • 2 teaspoons dijon mustard
    • 1 teaspoon smoked paprika
    • 1 teaspoon ancho chili powder
    • 1 teaspoon garlic powder
    • ¼ teaspoon onion powder
    • ¼ teaspoon cayenne pepper or chipotle pepper
    • ⅛ teaspoon liquid smoke optional

    Instructions
     

    • Add all ingredients to a small (2 quart) pan and whisk until smooth over medium heat until bubbly. Cook 3-4 minutes until smooth and thickened. Remove from the heat and cool completely. Turn heat down a bit if needed. Refrigerate, label and date for up to two weeks.

    Notes

    How to customize gluten-free bbq sauce:
    • For a sweeter bbq sauce, add more brown sugar, monk fruit, or use honey.
    • For a hotter, spicer bbq sauce, add your favorite hot sauce or more cayenne or chipotle powder. 
    • For tangier, add a little more apple cider vinegar.
    • This is thick bbq sauce. If you need it thinner, like more of a glaze, thin it down with a little water. 
    I use Primal Kitchen brand organic unsweetened ketchup for my recipes and that is what is reflected in the nutritional analysis per serving. 
     

    Nutrition

    Serving: 3tablespoonsCalories: 44kcalCarbohydrates: 7gProtein: 0.2gFat: 0.1gSaturated Fat: 0.01gPolyunsaturated Fat: 0.04gMonounsaturated Fat: 0.04gSodium: 41mgPotassium: 71mgFiber: 0.2gSugar: 6gVitamin A: 102IUVitamin C: 0.3mgCalcium: 12mgIron: 0.3mg
    Tried this recipe?Let us know how it was with a comment and leave a star rating!

    Cabbage and Chicken Soup

    01/27/2026 by Sally Cameron Leave a Comment

    Cabbage and chicken soup with vegetables, cannellini beans, and chicken in a white pot.

    If you're craving a soup that feels fresh but not heavy, this cabbage and chicken soup with white beans is it. It's brothy and light, but still satisfying with plenty of vegetables, white beans, and tender shredded chicken. It comes together quickly after a little chopping and is a great way to use leftover or rotisserie chicken. Cabbage is the quiet hero-it softens into silky chunks, adds body and fiber, and makes the soup feel hearty without weighing you down.

    A pot of colorful cabbage and chicken soup with tomatoes, carrots, beans, and herbs, with sliced bread.

    This cabbage and chicken soup with white beans is a bright, colorful, satisfying one-pot soup. Chunky cabbage, tender chicken, and cannellini beans simmer in a savory broth for a bowl that feels hearty but still light-and packs plenty of protein. Finish with fresh parsley and a squeeze of lemon at the table to wake up all the flavors. Definitely not your typical bland chicken cabbage soup.

    Cabbage and Chicken Soup Highlights

    • Easy, weeknight soup - about 15 minutes prep and 30 minutes cooking.
    • Not boring cabbage soup - colorful veggies and tender chicken in every bowl.
    • Great texture - chunky-cut carrot, celery, and cabbage added at the end for a crisp-tender bite.
    • Light but filling - brothy, veggie-forward, with beans for extra body and protein.

    Ingredients You'll Need

    Ingredients for cabbage and chicken soup with broth, vegetables, herbs, oil, and tomatoes.
    • Cabbage - A small head of green cabbage, adds body without heaviness.
    • Chicken - Roast chicken breast or rotisserie chicken, shredded.
    • Broth - Chicken broth (homemade or good-quality store-bought).
    • Beans - Cannellini beans add gentle creaminess and make the soup more satisfying.
    • Onion - Builds a savory base and a little natural sweetness.
    • Carrot - Adds sweetness and color.
    • Celery - Adds classic soup flavor.
    • Garlic - Adds savory depth.
    • Oil - Olive oil or avocado oil for sautéing.
    • Bay leaf - Adds subtle background flavor as the soup simmers.
    • Thyme - Gives the soup a simple, savory backbone (fresh or dried both work).
    • Tomatoes - Diced canned tomatoes add color and a gentle sweetness that balances the cabbage.
    • Parsley - Stir in at the end for freshness.
    • Lemon wedges - Serve at the table to brighten each bowl without making the whole pot taste lemony.

    Please see the recipe card for measurements, salt, and pepper.

    If you love chicken soups, here is a reader favorite chicken vegetable soup with pasta

    Substitutions and Variations

    • Use other beans - Instead of cannellini beans, use Great Northern beans or navy beans.
    • Herbs - Add a little fresh chopped dill at the end, it goes nicely with the cabbage and lemon.

    Beans in soup are wonderful, here's another, creamy fennel and white bean soup.

    Chef's Tip: Homemade Broth Is Worth It
    This soup is simple, so the broth you start with really matters. Homemade broth has deeper flavor and a richer body than most store-bought options-and once you make a batch, it's easy to freeze. I freeze homemade broth in portioned containers so a great pot of soup is always within reach. If you have time, use my long-simmered chicken bone broth for the best flavor. Need it faster? My Instant Pot chicken broth is a great shortcut. This soup is also perfect with roasted turkey broth, and vegetable broth works well when that's what you have.

    How to Make Cabbage and Chicken Soup

    Chopped onion sautéing with oil in a white pot stovetop.
    1. Over medium to med-low heat, saute onion in oil until soft, 2-3 minutes. Add garlic and cook 30 seconds.
    Red carrots in a pot with onions and celery for making soup.
    1. Add the carrots and celery and cook another 5 minutes until softened.
    Chopped carrots, celery, onion, and cabbage in a pot.
    1. Add the tomatoes, half the cabbage, bay leaf and thyme, and cook for 5 minutes with a lid, med-low heat.
    Golden chicken broth pouring into a pot of vegetables for soup.
    1. Add the broth and simmer 5 minutes.
    Adding chicken and white  beans being added to a soup pot with broth and veggies.
    1. Add the chicken and beans to the pot.
    Adding cabbage to a pot of cabbage and chicken soup.
    1. Add the rest of the cabbage and cook a few minutes until softened. Adding part of it later adds more texture.
    Adding fresh green parsley as garnish to a pot of chicken , vegetables, and white beans soup.

    7. Finish off with fresh parsley, remove bay leaves, and serve.

    Cabbage and chicken soup with vegetables, cannellini beans, and chicken in a white pot.

    8. Finished cabbage and chicken soup.

    Serving Suggestions

    I typically serve cabbage and chicken soup with garlic toast as the crunchy salty Parmesan finish tastes great against the soup, but a salad is another good option, or even a grilled cheese sandwich for a fuller meal. For another side, try homemade cornbread smeared with soft butter.

    Storage & Freezing

    Cool completely, then refrigerate in an airtight container for up to 4 days. Freeze in airtight containers or freezer bags for up to 3 months (leave a little headspace). Thaw overnight in the refrigerator.

    To reheat, warm gently on the stovetop.

    Recipe FAQs

    Can I make this soup without beans?

    Yes. Skip the cannellini beans for a lighter soup, or replace them with extra chicken or more vegetables, or swap for rice or cooked small potatoes.

    How do I keep the cabbage from getting too soft?

    Add only part of the cabbage earlier for flavor, then stir in the rest at the end so it stays crisp-tender and chunky.

    Can I make it in a slow cooker or Instant Pot?

    You can, but it's so fast on the stove that it's usually not worth it. If you do, add the "last half" of cabbage at the end so it doesn't overcook.

    Can I use rotisserie chicken?

    Yes. Rotisserie or any leftover cooked chicken works great. Remove any skin and shred, then add it near the end just to heat through.

    What's the best cabbage to use?

    Green cabbage is best. It softens nicely but still has good texture, especially if you add part earlier in cooking, then some at the end.

    More Great Soups to Try

    From smooth and creamy soups to hearty, satisfying bowls, there's a soup here for every season and appetite. Explore the full soup recipe index to find your next favorite.

    • A bowl of Greek avgolemono chicken soup with fresh dill in a white bowl.
      Greek Avgolemono Soup Recipe (Lemon Chicken Soup)
    • Navy bean soup with ham and vegetables.
      Instant Pot Navy Bean Soup Recipe (with ham)
    • The deep colors of beef barley soup in a white bowl with herbs.
      Beef Barley Vegetable Soup
    • roasted red pepper soup
      Roasted Red Pepper Soup (sheet pan recipe)

    If You Make This Soup

    If you make this chicken cabbage soup, please let me know! I love to hear from you and your comments help other readers. Thanks for supporting my site!

    📖 Recipe

    Cabbage and chicken soup with vegetables, cannellini beans, and chicken in a white pot.

    Cabbage and Chicken Soup

    Sally Cameron
    A bright, hearty-but-light cabbage and chicken soup with cannellini beans, chunky vegetables, and a savory broth. Finish with parsley and a squeeze of lemon.
    No ratings yet
    Prevent your screen from going dark
    Print Recipe Pin Recipe
    Prep Time 15 minutes mins
    Cook Time 30 minutes mins
    Total Time 45 minutes mins
    Course Soup
    Servings 4 2 cup servings, Yield 9 cups
    Calories 312 kcal

    Equipment

    • 4-5 ½ quart Dutch oven or large heavy soup pot

    Ingredients
      

    • 1 tablespoon olive oil
    • 1 cup chopped onion
    • 3 garlic cloves finely chopped
    • ¾ cup chopped carrot
    • ½ cup chopped celery
    • ¾ teaspoon dried thyme or 1 ½ teaspoons fresh chopped
    • 15 ounce can diced tomatoes drained
    • 2 bay leaves
    • 4 cups chopped green cabbage about 1 pound, half a head
    • 4-5 cups chicken broth
    • 15 ounce can cannellini beans drained and rinsed
    • 2 cups shredded cooked chicken 11 ounces
    • 1 tablespoon chopped fresh parsley
    • lemon wedges optional for serving

    Instructions
     

    • Heat the pot over medium heat, add the oil and saute the onion until soft, 2-3 minutes. add the garlic and cook another 30 seconds. Add the carrot and celery and cook another 5-7 minutes until all vegetables are softened.
    • Add the diced tomatoes, bay leaf, thyme, and half of the cabbage to the pot with the sautéed vegetables. Cover and cook for about 5 minutes to soften the cabbage and let the flavors start to mingle.
    • Pour in 4 cups of the broth, then simmer about 5 minutes more with the lid partially on. Add the beans and cooked chicken and heat through until hot. Stir in the remaining cabbage at the end so it stays a little crisp and fresh for texture. For a more brothy soup, add the last 1 cup of broth. Add the chopped parsley.
    • Serve with lemon wedges for brightness if desired.

    Notes

    Cabbage prep: Use about ¾ pound chopped green cabbage. Cut the cabbage in half, cut out the tough core, then slice into about 1-inch strips and chop crosswise into bite-size chunks. Don't stress exact size-chunkier pieces hold their texture best in this soup.

    Nutrition

    Calories: 312kcalCarbohydrates: 31gProtein: 30gFat: 10gSaturated Fat: 2gPolyunsaturated Fat: 2gMonounsaturated Fat: 5gCholesterol: 53mgSodium: 533mgPotassium: 748mgFiber: 8gSugar: 6gVitamin A: 4315IUVitamin C: 17mgCalcium: 146mgIron: 5mg
    Tried this recipe?Let us know how it was with a comment and leave a star rating!

    1 Pound Meatloaf Recipe

    01/20/2026 by Sally Cameron 4 Comments

    Bbq glazed beef meatloaf on a platter with a serving fork, sprinkled with chopped parsley.

    This 1 pound meatloaf recipe is lean, flavorful, and tender without feeling heavy. Lean ground beef keeps it from being greasy, and quick-cooking oats replace breadcrumbs for a moist, sturdy texture (use certified gluten-free quick oats if needed). A little finely chopped apple adds moisture (you won't taste it), and the top can be finished with tangy barbecue sauce or classic ketchup-whatever your family loves.

    A simple all-beef 1 pound meatloaf with bbq glaze on a plate with a serving fork.

    As a personal chef, this 1 pound meatloaf recipe was a regular request for weekly menus. It's built around the standard 1-pound package of ground beef, so it's easy to shop for and cooks faster than a bigger meatloaf. Quick-cooking oats replace breadcrumbs as the binder, giving you a meatloaf that's tender and evenly textured, never heavy (and gluten-free if needed).

    [feast_advanced_jump_to]

    Gluten-Free Meatloaf Highlights

    • Classic comfort, updated - A fresh take on meatloaf with a tangy BBQ glaze.
    • Lean and flavorful - Made with 93/7 grass-fed beef for great flavor without excess grease.
    • Family-friendly and easy - Simple steps, everyday ingredients, dependable results.
    • Great for meal prep - Slices well and makes excellent leftovers.
    • Gluten-free - Made without breadcrumbs, using whole grain quick oats instead.

    This air fryer butternut squash is great with the meatloaf and compliments the tangy BBQ glaze, or easy roast broccoli.

    Ingredients You'll Need

    Ground beef, onion, herbs, egg, oats, and ingredients for a 1 pound meatloaf ready for mixing.
    • Ground beef - I use 93/7 pasture-raised ground beef. It stays moist but isn't greasy. 90/10 is another good option.
    • Onion - Yellow, brown, or white onion adds moisture and savory flavor.
    • Apple - Yes, apple! It adds moisture and a little texture. Granny Smith is my first choice, but Honeycrisp or any crisp apple works.
    • Egg - Large eggs help bind the loaf so it slices cleanly.
    • Quick oats - The "secret" to a tender, evenly textured meatloaf. Quick oats absorb just enough moisture to hold everything together without feeling heavy. (See Chef's Tip on oat types.)
    • Garlic - Fresh garlic gives the best flavor.
    • Herbs - Go fresh or dried. Thyme and oregano for classic meatloaf flavor or a dried Italian seasoning blend works nicely.
    • Parsley - Fresh parsley adds a clean, garden-fresh lift.
    • Worcestershire sauce - A small amount adds savory depth and a little punch.
    • BBQ sauce - I use my homemade BBQ sauce (low sugar, gluten-free), but your favorite works-just read labels if you need it gluten-free.

    Please see the recipe card for measurements, salt, and pepper.

    Chef's Tip - Quick Oats vs. Instant Oats vs. Rolled Oats
    For the best meatloaf texture, use quick oats (they hydrate fast and disappear into the mix). Some brands label them as quick-cooking rolled oats-same thing. Instant oats also work in a pinch (same amount) they are a bit more processed. Old-fashioned rolled oats can leave more texture; if that's all you have, pulse them briefly in a food processor to refine them, and let the meatloaf mixture rest 20 minutes before baking to hydrate the oats. Avoid steel-cut oats (too hard/chewy).

    For another super side, try this corn souffle, made without box mixes.

    Substitutions and Variations

    • Horseradish kick - Add a spoonful of prepared horseradish to the meatloaf mixture for a little heat and backbone without making it "spicy."
    • Turkey option - You can use ground turkey instead of beef, but choose a higher-fat turkey (93% or similar) and watch it closely so it doesn't dry out.
    • Breadcrumbs or panko instead of quick oats - You can use plain or gluten-free breadcrumbs or panko in place of the quick oats. Start with about the same amount you would use of oats, then add a spoonful more if the mixture feels too soft; it should hold together when you gently press it into a loaf.

    Chef's Tip - Free-Form Meatloaf vs. Loaf Pan Meatloaf
    I've baked meatloaf both ways many times. For this 1 pound meatloaf recipe, a free-form loaf works better because the smaller amount of mixture holds its shape and bakes nicely. You can bake it in a standard loaf pan, but it will be a thinner, flatter meatloaf. If you do, line the pan with a parchment sling so you can lift the meatloaf out easily.

    How to Make a 1 Pound Meatloaf

    Pre-heat the oven to 350°F. Line a sheet pan with parchment or foil.

    Sauteing chopped onion and garlic until soft in a pan on the stovetop.
    1. Saute onion until soft over medium low heat in olive oil, add garlic and cook 30 seconds.
    Finely chopped Granny Smth apple on a white cutting board.
    1. While onion is cooking, core, peel, thinly slices, and very finely chop the apple (you need ⅓ cup).
    Onion, egg, herbs, ketchup, wet ingredients for a meatloaf in a bowl.
    1. Add onion, herbs, egg, ketchup, worcestershire, seasonings, to a bowl.
    Wet ingredient blend of egg, ketchup, herbs, onion and apple in a glass bowl.
    1. Blend the wet ingredients well.
    Adding quick oats to the meatloaf mix as a binder.
    1. Add the quick oats and mix well.
    Chunks of pink ground beef, next step in making a meatloaf mixture.
    1. Tear the beef into chunks and add it to the bowl for easier mixing. Mix gently until well combine but don't overwork. Wear disposable gloves if desired.

    A free form 1 pound meatloaf on a parchment covered baking sheet.

    7. Form the beef mix into a long narrow smooth loaf on the baking sheet. Aim for a loaf about 1 ½" high at the center.

    Glazing a meatloaf before baking with BBQ sauce with pastry brush.

    8. Add a tablespoon of bbq sauce to a small bowl and glaze the meatloaf. Be sure to wash the brush and bowl right away for next use.

    A finished meatloaf baked with barbecue glaze, cooling to slice.

    9. Glaze the meatloaf at halfway point in baking, then again at the end of baking, 30-35 minutes, or until the meatloaf reads 165°F with a digital thermometer. Allow it to cool 10 minutes before slicing. Serve with extra bbq sauce if desired.

    Meatloaf Serving Suggestions

    • Mashed potatoes - Classic meatloaf partner. Serve with creamy mashed potatoes.
    • Green beans or other green veg - Simple blanched green beans tossed with oli e oil are perfect, or use roasted broccoli, asparagus, or Brussels sprouts for an easy green side (link where it fits).
    • Glazed carrots - Maple glazed carrots (link to your recipe) are a great contrast to the savory meatloaf and look pretty on the plate.
    • Simple salad - A crisp green salad with a light vinaigrette helps balance the richness and makes this feel like a complete, well-rounded dinner.

    Storing and Freezing

    Freezing - Meatloaf freezes well, but like most dishes it's best fresh. If you do want to freeze it, cool completely, then wrap individual slices (or the remaining piece) tightly in parchment and foil, or place in a freezer bag, and freeze for up to 2-3 months. Thaw overnight in the refrigerator and reheat at 325-350°F until hot.

    Refrigerating leftovers - Let the meatloaf cool, then store slices or chunks in an airtight container in the refrigerator for up to 3 days.

    Reheating - Reheat slices in a small baking dish, covered, at 325-350°F until warmed through, or gently reheat in the microwave, adding a spoonful of water or broth if they look dry.

    Recipe FAQs

    Can I make this meatloaf ahead of time?

    You can mix and shape the meatloaf, then cover and refrigerate it for several hours or up to overnight. When you're ready to bake, add the BBQ sauce or ketchup glaze and bake, adding a little extra time if the loaf is going into the oven very cold. Always check that the internal temperature reaches 160°F - 165°F.

    Can I use breadcrumbs or panko instead of oats?

    Yes. You can use plain or gluten-free breadcrumbs or panko instead of the quick oats. Start with about the same amount, then add a little more if the mixture feels too soft-the meatloaf should hold together when you gently shape it into a loaf. The texture will be slightly different than with oats (a bit more traditional and fine-crumbed). I like using quick oats because they're a whole grain and give the meatloaf a tender, sturdy texture.

    Can I use old-fashioned rolled oats instead of quick oats?

    Yes, if you refine them in a food processor first, to break them down into smaller pieces. Pulse in quick bursts so you don't make oat flour. They need some texture.

    Can I make this with ground turkey instead of beef?

    Yes. Use a higher-fat ground turkey (around 93% lean) so the meatloaf stays moist, and keep an eye on the baking time, as turkey can dry out if overcooked. The internal temperature for ground turkey should reach 165°F.

    More Recipes With Ground Meat

    Ground meat is endlessly versatile and perfect for simple, satisfying meals. Whether you have ground turkey, ground beef, or even ground bison, these recipes are full of flavor.

    • Taco meat in a cast iron pan with fixings for tacos around it.
      Ground Meat Taco Recipe (or ground turkey)
    • bison bolognese with pasta
      Bison Bolognese(Ground Bison Meat Sauce)
    • Colorful baked ground turkey stuffed peppers with quinoa and herbs.
      Ground Turkey Stuffed Peppers
    • Creamy casserole dish of beef stroganoff made with meatballs with herbs on top.
      How to Make Meatball Beef Stroganoff

    Did You Make This?

    If you make this 1 pound meatloaf recipe, please let me know by leaving a comment. I enjoy hearing from you and your comments help other readers as well. Thanks for supporting my site! ⭐⭐⭐⭐⭐

    Originally posted in 2011, now updated.

    📖 Recipe

    Bbq glazed beef meatloaf on a platter with a serving fork, sprinkled with chopped parsley.

    1 Pound Meatloaf Recipe (with BBQ Glaze)

    Sally Cameron
    A fresh take on an American classic comfort food with lean ground beef. The classic side dishes are green beans and mashed potatoes. Leftovers are terrific the next day.
    5 from 1 vote
    Prevent your screen from going dark
    Print Recipe Pin Recipe
    Prep Time 20 minutes mins
    Cook Time 30 minutes mins
    Total Time 50 minutes mins
    Course Main Course
    Cuisine American
    Servings 4
    Calories 330 kcal

    Equipment

    • Rimmed sheet tray
    • Parchment paper
    • Pastry brush
    • Digital thermometer
    • Disposable kitchen food handling gloves

    Ingredients
      

    • 1 tablespoon extra virgin olive oil
    • ½ cup finely chopped onion
    • 2 large garlic cloves finely chopped or microplaned
    • 1 tablespoon olive oil for sauteing onions and garlic
    • ⅓ cup finely chopped granny smith apple peeled, cored, very finely chopped
    • ¼ cup ketchup
    • 1 large egg
    • 2 tablespoons chopped fresh parsley
    • 1 teaspoon dried Italian blend herbs or dried thyme and oregano
    • 1 teaspoon worcestershire sauce
    • ¾ teaspoon sea salt
    • ¼ teaspoon black pepper
    • ½ cup quick cooking oats GF if needed
    • 1 pound ground beef 93/7 grass fed or pastured beef

    Glaze

    • ½ cup low sugar barbecue sauce homemade or bottled, or ketchup

    Instructions
     

    Prep the pan and oven

    • Preheat oven to 350°F. Line a rimmed baking sheet with parchment (or foil) and lightly spray with nonstick spray.

    Sauté the aromatics

    • In a small skillet over medium heat, warm 1 tablespoon olive oil. Sauté the onion until softened, about 2-3 minutes. Add the garlic and cook 30 seconds. Cool slightly.

    Mix the wet/flavor base first

    • In a large bowl, add the sautéed onion and garlic, chopped apple, ketchup, egg, parsley, dried herbs, Worcestershire, salt, and pepper. Stir together well.

    Mix in oats and meat

    • Mix in the oats. Tear the meat into chunks and add to the bowl. Mix gently with your hands to incorporate all ingredients. Using disposable kitchen gloves makes it easier and cleaner. Don't overwork the meat mixture.

    Shape the loaf

    • Turn mixture onto the prepared baking sheet and with your hands, smooth and form into a compact loaf, aiming for a long narrow oval.

    Glaze safely

    • Brush the top of the meatloaf with some barbecue sauce (or ketchup). Be careful not to double dip into the clean glaze with a pastry brush that has touched the raw meat. Set aside the remaining glaze for later (wash the brush).

    Bake meatloaf

    • Bake until the center reaches 165°F, about 30-40 minutes. Brush with additional glaze at the mid point during baking if you like, then at the end.
      Note - If you are glazing while baking, be sure to pull the meatloaf and close the oven door quickly to preserve the heat while glazing, then return it to the oven.

    Slice and serve

    • Allow the baked meatloaf to rest about 10 minutes before slicing and serving.

    Nutrition

    Calories: 330kcalCarbohydrates: 26gProtein: 28gFat: 11gSaturated Fat: 4gPolyunsaturated Fat: 1gMonounsaturated Fat: 6gTrans Fat: 0.4gCholesterol: 117mgSodium: 919mgPotassium: 595mgFiber: 2gSugar: 14gVitamin A: 327IUVitamin C: 5mgCalcium: 54mgIron: 4mg
    Tried this recipe?Let us know how it was with a comment and leave a star rating!

    Pork Tenderloin Medallions with Pan Sauce

    02/03/2026 by Sally Cameron Leave a Comment

    A black carbon steel pan with golden pork medallions in pan sauce with serving fork.

    Pork tenderloin medallions with a simple pan sauce feels fancy, but it's easy enough for a weeknight. Sear the pork tenderloin whole for flavor, slice into medallions, then briefly finish in the oven. While the pork rests, make a quick pan sauce in the skillet (with an optional creamy version). It's a restaurant-worthy dinner that's perfect for special occasions or date night at home.

    Seared pork tenderloin medallions in a black pan surrounded with creamy brown pan sauce.

    I discovered this method by accident, and now it's a go-to way to cook pork tenderloin. I meant to slice the tenderloin into medallions first, but I started searing it whole (on cooking auto-pilot). So I pulled it off the heat, sliced it into medallions, gave them some quick heat for color, and briefly finished them in the oven. Best mistake ever-those medallions looked like little pork filets, and the flavor and texture were fantastic. And that simple pan sauce? The perfect easy finishing touch.

    [feast_advanced_jump_to]

    Why You'll Love Pork Medallions

    • Easy and fast - A quick sear and a short oven finish means dinner is on the table without a lot of effort.
    • Looks fancy (but it's not) - The medallions look like little pork filets and plate beautifully for family and friends.
    • Simple ingredients, big flavor - Shallots, thyme, wine, broth, and butter make a pan sauce that tastes restaurant-worthy.
    • Tender, juicy pork - Searing the tenderloin whole first helps lock in flavor and keeps the medallions tender.

    If you love pork tenderloin (we do), try my smoked pork tenderloin if you have a pellet grill. Its fantastic.

    Ingredients You'll Need

    Prepped ingredients to make pork tenderloin medallions.

    Medallions

    • Pork tenderloin - For nice medallions, you'll need two 1-pound tenderloins.
    • Oil - Use an oil that works for higher heat needs such as searing. See note below.

    Pan Sauce

    • Unsalted butter - Builds flavor and gives the pan sauce a silky start, then a glossy finish, plus you control the salt.
    • Shallot - For a sweet, delicate onion base that melts into the sauce.
    • Fresh thyme - Classic with pork; perfumes the sauce without overpowering it.
    • Dry white wine - Deglazes the pan and adds brightness; reducing it concentrates flavor and keeps the sauce from tasting flat.
    • Chicken broth - Adds savory depth and volume so the sauce is spoonable and coats the pork. Choose low sodium broth or homemade broth.
    • Dijon mustard - Adds gentle tang and helps the sauce emulsify for a smooth, restaurant-style texture.

    Please see the recipe card for measurements, salt, and pepper.

    Substitutions and Variations

    • No wine: Swap the white wine with more chicken broth, then finish with a small squeeze of lemon or a splash of white wine vinegar for brightness.
    • Herb swap: Use rosemary or sage instead of thyme (go lighter, both are stronger).
    • Add balsamic vinegar - Add a teaspoon towards the end, adds depth and subtle sweetness.
    • Thicker sauce - At the end, whisk in a combination of 1 teaspoon water to ½ teaspoon arrowroot starch (called a slurry), and cook 1 minute to thicken.
    • Creamy Option - For a creamier, glossy sauce, stir in 2 tablespoons heavy cream at the very end and warm gently (don't boil).

    If you want to brine your pork tenderloin, follow my Pork Brine.

    Chef's Note:  Skip "Vegetable Oil" For high-heat searing, I recommend using a clean-tasting, high-heat neutral oil. Personally, I skip generic grocery-store "vegetable oils" as they're highly refined. I use Zero Acre Farms (online, no affiliate) and love how it performs for searing, but any healthy neutral oil you trust and use regularly will work.

    How to Make Pork Tenderloin Medallions

    This pork medallions recipe goes fast when your mise en place is done-the French teaching of having everything prepped and ready before you turn on the heat. Measure your liquids, chop the shallot, and have the butter and Dijon ready so you can move through the pan sauce without stopping.

    Drying pork tenderloin well for seasoning and searing on a white cutting board.
    1. Dry meat well with paper towels. Preheat the oven to 375°F.
    Trimming pork tenderloins of extra fat and silverskin with a knife.
    1. With a sharp knife, trim excess fat and the silverskin (tough connective tissue, not good to eat).
    Seasoning pork with kosher salt and pepper.
    1. Season the tenderloins all over with salt and pepper.
    Searing pork tenderloins in a stainless steel wide skillet.
    1. Heat a 12" fry pan over medium high, when hot add the oil, the place the top side of the pork down in the pan. Watch your temperature. You want to sear and get it brown, not burn.
    Browned pork tenderloin in a large fry pan.
    1. After the first side is done, flip the tenderloins and do the other side, then the sides. You want a light golden brown all around.
    Slicing pork into medallions on a cutting board.
    1. Remove the pork to a cutting board. Trim the little ends, then slice the rest into medallions approximately 1 ½" wide.
    Pork medallion pieces searing briefly in a hot skillet to brown top side.
    1. Pop the medallions back into the hot pan for about 30 seconds per side to give them color.
    Tenderloin medallions ready for the oven to finish roasting.
    1. Place the medallions on a parchment covered sheet pan and finish in a 375°F oven for about 5 minutes or to 140°-145°. Remove from oven and cover with foil if needed while making the sauce.
    Adding butter to a skillet with lots of brown bits called fond.
    1. While the medallions are finishing, start the sauce. Add 2 tablespoons butter to the pan.
    Adding chopped shallots to a pan with butter to make a pan sauce.
    1. When butter is melted and foamy, add the shallots and cook 2-3 minutes until softened and lightly browned
    Adding chopped garlic to a pan with sautéed shallots in butter.
    1. Add the garlic and cook 1 minute longer.
    Deglazing a pan for pan sauce with white wine.
    1. Add the wine to deglaze the pan, scraping up the browned bits.
    Adding golden Dijon mustard to a pan for thickening a sauce.

    7. Whisk in the Dijon until smooth, add the thyme springs and chicken broth.

    A browned pan sauce cooking down with thyme sprigs for flavor.

    8. Simmer the pan sauce until it reduces and thickens. 2-3 minutes.

    Finishing the pan sauce with extra butter for serving.

    9. Stir in the last 2 tablespoons of butter. if you want thicker pan sauce, add the arrowroot and water slurry and cook 1 more minute while it thickens.

    Finished pork tenderloin medallions in a golden brown creamy pan sauce in a black pan.

    10. Pork tenderloin medallions are ready to serve with the pan sauce, unless you are doing any options. See recipe card.

    Serving Suggestions

    • Mashed potatoes - Perfect for soaking up the pan sauce.
    • Rice - Serve over jasmine, basmati, or brown rice to make it a simple.
    • Cauliflower puree - A lighter option that still feels creamy.
    • Green beans or asparagus - Blanched, sautéed or steamed with a little olive oil, salt, and lemon for a fresh contrast.
    • Simple salad - A crisp green salad with a light vinaigrette balances the richness of the pork and sauce.

    Recipes FAQs

    Why sear the tenderloin whole before slicing into medallions?

    Searing the whole tenderloin builds a browned crust all the way around. When you slice after searing, the medallions look like little pork filets and stay tender and juicy.

    What temperature should pork tenderloin medallions be cooked to?

    For juicy pork, cook to 145°F internal temperature, then rest a few minutes before serving.

    Can I make the pan sauce without wine?

    Yes. Use more chicken broth, then finish with a small squeeze of lemon juice or a splash of white wine vinegar for brightness.

    Can I make pork tenderloin medallions ahead?

    You can make the sauce a few hours ahead and rewarm gently. For best texture, cook the pork just before serving (tenderloin is lean and can dry out when reheated).

    More Recipes with Pork

    sPork is such a versatile protein with great cuts, from pork tenderloin, to rib roasts, pork chops, pork ribs and more. Try one of these recipes for options! And if you have a pellet grill, try my 3-2-1 baby back ribs, or oven method baby back ribs for year round.

    • Pork tenderloin with creamy mustard sauce close up with a serving fork.
      Roast Pork Tenderloin with Dijon Mustard Sauce
    • A golden crusted pork rib roast on a gray platter with fresh green parsley.
      Pistachio Crusted Pork Rib Roast
    • Close up of creamy pork chops with sauce.
      Sour Cream Pork Chops Recipe
    • BBQ glazed smoked pork tenderloin sliced on a gray platter for serving.
      Smoked Pork Tenderloin (pellet grill)

    ⭐️Did You Make This Recipe?

    If you make pork tenderloin medallions, please add your comment. I appreciate your feedback and enjoy hearing from you. If you loved it, please give it a 5-star rating! They really help other readers.

    📖 Recipe

    A black carbon steel pan with golden pork medallions in pan sauce with serving fork.

    Pork Tenderloin with Simple Pan Sauce

    Sally Cameron
    No ratings yet
    Prevent your screen from going dark
    Print Recipe Pin Recipe
    Prep Time 10 minutes mins
    Cook Time 15 minutes mins
    Total Time 25 minutes mins
    Course Dinner, Entree, Main Course
    Cuisine American
    Servings 4
    Calories 423 kcal

    Equipment

    • 12" skillet
    • Quarter sheet pan

    Ingredients
      

    Pork Tenderloin

    • 2 pounds pork tenderloins 2 pieces at 1 pound each
    • ¾ teaspoon kosher salt or sea salt
    • ½ teaspoon ground black pepper
    • 1 ½ tablespoons neutral oil good for higher heat

    Pan Sauce

    • 4 tablespoons unsalted butter
    • ¼ cup finely chopped shallot ½ a large
    • 2 garlic cloves finely chopped or microplaned
    • ½ cup dry white wine
    • ¾ cup chicken broth
    • 1 tablespoon smooth Dijon mustard
    • 4-5 small thyme sprigs or ½ teaspoon dried thyme

    Sauce options

    • 2 tablespoons heavy cream optional for a creamier sauce
    • 1 teaspoon good balsamic vinegar or glaze
    • ½ teaspoon arrowroot starch optional for thickening sauce

    Instructions
     

    Sear pork

    • Pre-heat the oven to 375°F. Heat a 12" skillet over medium high heat, season the pork, add the oil to the pan, and sear the pork tenderloin on all sides. Quickly sear to a nice golden brown, about 6 minutes. Remove meat to a cutting board.

    Slice medallions

    • With a sharp slicing knife, cut the pork tenderloin into 1 ½" wide medallions. The end pieces will be a bit smaller.

    Sear top and bottom of medallions

    • Return the medallions to the hot pan, cut sides down, just long enough to get a little color on each side, about 30 second each. You're not cooking them through-just adding a bit of color on the top and bottom.

    Finish in the oven

    • Transfer the medallions to a parchment-lined quarter sheet pan. Roast at 375°F for about 5 minutes, or until they reach 140-145°F in the center. Let rest covered in foil to stay warm while you make the pan sauce. Timing depends on the size of your tenderloins.

    Make pan sauce

    • Add half of the butter to the hot pan over medium low heat. When melted and foamy, add minced shallots. Sauté until soft and lightly browned, 2-3 minutes. Add garlic and cook 1 minute longer.
      Pour in the wine to deglaze, scraping up any tasty browned bits. A wooden spatula works great. Let wine reduce by half. Whisk in Dijon, add the thyme sprigs, and broth. Simmer until the sauce is thickened 2-3 minutes. Whisk in the final 2 tablespoons of butter.

    Add any options

    • To make sauce thicker, add the ½ teaspoon of arrowroot starch mixed with 1 teaspoon water, then cook 1 minute. Taste and adjust seasoning with any salt and pepper. If using heavy cream option (2 tablespoons), add now and heat through gently. Stir in the balsamic at the end as well.

    Plate and serve

    • Add medallions to plates and spoon the pan sauce over the top to serve.

    Notes

    For searing pork tenderloin, use a neutral oil that handles higher heat and has a clean flavor and profile. I skip generic grocery-store "vegetable oil" blends and choose a better-quality neutral oil instead. I use Zero Acre Farms (no affiliate) and highly recommend it for high-heat cooking (it's currently sold online). Use any neutral high-heat oil you trust and like for your kitchen.
    If you don't really drink wine but sometimes cook with it, such as for deglazing a pan, buy the little airline size bottles. They work great and are inexpensive (come in a 4-pack). Although I drink wine, I cook with these little bottles a lot. 

    Nutrition

    Calories: 423kcalCarbohydrates: 5gProtein: 49gFat: 20gSaturated Fat: 10gPolyunsaturated Fat: 2gMonounsaturated Fat: 6gTrans Fat: 1gCholesterol: 178mgSodium: 178mgPotassium: 1025mgFiber: 1gSugar: 2gVitamin A: 407IUVitamin C: 3mgCalcium: 37mgIron: 3mg
    Tried this recipe?Let us know how it was with a comment and leave a star rating!

    Simple Steamed Brussels Sprouts

    02/05/2026 by Sally Cameron Leave a Comment

    A white bowl of brght green Brussels sprouts tossed with olive oil, salt, pepper and red pepper flakes.

    Steamed Brussels sprouts is one of the easiest ways to enjoy them so they turn out tender, bright green, and pleasantly sweet, not mushy or bitter in under 20 minutes. Simply steam Brussels sprouts, then flavor in many ways. Try one of 7 flavor options, or all of them (eventually). You'll love these!

    A white round bowl of bright green steamed Brussels sprouts with a serving spoon.

    This simple method for steamed Brussels sprouts is ready in under 20 minutes and makes the perfect base for all kinds of flavors. Toss them with garlic confit and lemon, a quick soy-ginger drizzle, or a sprinkle of Parmesan and chili flakes. Once you know how to steam Brussels sprouts properly, you can finish them a dozen different ways.

    [feast_advanced_jump_to]

    Why You'll Love Steamed Brussels Sprouts

    • Fast and foolproof - From pot to plate in about 10 minutes.
    • Tender, not sulfur-y - Gentle steaming keeps them bright green and sweet instead of gray.
    • Healthy base, endless finishes - Use this method as a canvas, then add garlic confit, soy-ginger, lemon-butter, or Parmesan on top.
    • Versatile side dish- Serve with meatloaf, roast chicken, pork tenderloin, or simply with eggs for a quick lunch.

    For another great way to cook Brussels, try this Brussels sprouts with balsamic vinegar.

    Ingredients You'll Need

    Please see the section below ingredients for 7 different ways to flavor simple stem Brussels sprouts, or serve them simply steamed with salt, pepper, and a little olive oil or butter.

    A bowl of bright green raw Brussels sprouts and olive oil for steaming.
    • Brussels sprouts - Look for firm, tight sprouts that feel heavy for their size. When buying, remember that about a 20% trim loss is normal (stems + outer leaves).
    • Olive oil or butter - To lightly coat the hot sprouts so seasoning sticks (or use garlic confit oil).
    • Water - Just enough to sit under the steamer basket; the sprouts should sit above the water, not in it.
    • Fresh lemon juice (optional) - A squeeze at the end brightens the flavor and balances their natural sweetness.

    Please see the recipe card for measurements, salt, and pepper.

    Variations: Flavor Ideas for Steamed Brussels Sprouts

    For the flavor variations you don't need much volume of your chosen option, 1 - 2 tablespoons is about all.

    • Garlic Confit & Lemon - Toss hot steamed Brussels sprouts with a tablespoon of the garlic oil and 3-4 confit garlic cloves, mash into a paste, toss with the hot sprouts. One of my favorites!
    • Soy-Ginger-Sesame - Drizzle with tamari (GF) or soy sauce, a little grated fresh ginger, a few drops of toasted sesame oil, and sprinkle with sesame seeds.
    • Chili & Citrus - Toss with olive oil or neutral oil, red pepper flakes or chili crisp, and finish with lemon or lime juice.
    • Lemon-Butter & Parmesan - Drizzle a tablespoons of melted butter or ghee over the hot sprouts, add lemon juice, salt, pepper, and a shower of freshly grated Parmesan.
    • Miso-Maple - Whisk together sweet white miso paste, a little maple syrup, a splash of rice vinegar, and a little oil. Toss with hot steamed Brussels sprouts for a glossy, sweet-savory glaze with lots of umami. Add a little microplaned garlic (or garlic confit).
    • Maple-Dijon - Whisk Dijon, maple syrup, olive oil (or melted butter), a pinch of salt, and a splash of apple cider vinegar, toss with hot sprouts.
    • Basil Pesto - Toss hot sprouts with a spoonful of basil pesto (thins out nicely with a bit of cooking water or olive oil.

    Prep ahead tip - Trim root end and peel off any outer rough layer, then store in an airtight container for using during the week. Then all you have to do to is halve them and steam. Doing the prep work saves precious time (about 10 minutes).

    Try the Brussels sprouts with pancetta, a great savory stovetop option.

    How to Make Steamed Brussels Sprouts

    Bowls of trimmed Brussels sprouts and the trimmings on a counter.
    1. Trim the stem ends, remove any yellowed outer leaves.
    A glass bowl of trimmed and halved Brussels sprouts.
    1. Halve the sprouts.
    Steaming Brussels sprouts in a pan seeing through a glass lid on the stovetop.
    1. Add about an inch of water to a pot with steamer basket. Bring to a simmer. Add veggies and steam until tender when pierced with the tip of a paring knife, 5-8 minutes. Check at 5 minutes.
    Steamed sprouts in a stainless bowl in a steaming rack.
    1. Transfer immediately to a bowl. Toss with a drizzle of olive oil or butter, salt, and any finishing flavors (see ideas below). Serve hot or warm.

    Chef's Tip - Using Frozen Brussels Sprouts
    Frozen Brussels sprouts are blanched before freezing, so they cook faster and turn out softer than fresh. You can use them when fresh aren't available-just know they'll be softer and less crisp. Steam them from frozen (don't thaw) and start checking around 4 minutes so they don't overcook. Drain well, let the steam evaporate for a minute, then toss with plain butter or olive oil, or finish with one of the flavor variations.

    Serving Suggestions

    Steamed Brussels sprouts are neutral enough to work with almost any main dish-it's the flavor variation you choose that ties them to the rest of the plate.

    • Weeknight dinner side - Serve alongside roasted or baked chicken, pork tenderloin, meatloaf, or salmon.
    • With comfort food - Balance richer mains like meatloaf, mashed potatoes, roast beef, or mac and cheese with a bright, veggie-forward side. A lemony or Dijon finish works especially well here.
    • With grilled or roasted meats - Pair soy-ginger, miso-maple, or chili oil Brussels with grilled steak, pork chops, ribs, or BBQ chicken when it's too cold (or too dark) to grill veggies.
    • On a grain bowl - Spoon warm Brussels over cooked quinoa, farro, or brown rice with a protein (rotisserie chicken, leftover roast meat, tofu, or beans) and drizzle with extra sauce or dressing.
    • As part of a veggie spread - Serve them warm or at room temperature with other simple vegetables (roasted carrots, green beans, roasted potatoes) and a creamy sauce or dip on the side.
    • Lunch prep - Steamed Brussels sprouts reheat well. Add them to meal-prep containers with leftover chicken or meatloaf and a grain for an easy, veggie-forward lunch.

    Storing Leftovers

    Cool leftover Brussels sprouts, then store in an airtight container in the refrigerator for up to 3 days. Reheat gently, or slice and add to grain bowls, salads, frittatas (chopped), or quick sautéed veggie mixes.

    Recipe FAQs

    How do I keep steamed Brussels sprouts from getting mushy or sulfur-y?

    The two keys are not overcooking and getting them out of the steam as soon as they're done. Start checking early, and as soon as they're just tender, remove the basket from the pot and transfer the sprouts to a bowl. Overcooking is what gives Brussels sprouts that strong cabbagey, sulfur-y flavor many people dislike.

    Do I need a steamer basket to steam Brussels sprouts?

    A steamer basket is easiest, but you can improvise. Use a heat-safe metal strainer or colander that fits over your pot, making sure the bottom doesn't sit in the water. In a pinch, you can put the sprouts directly into a small amount of simmering water, cover, and treat it like a shallow steam-just watch closely and drain them as soon as they're tender. Steamer baskets are inexpensive tools to add to your kitchen.

    Can I make steamed Brussels sprouts ahead of time?

    Yes. For the best texture, steam them until just tender, cool quickly, then refrigerate in an airtight container for up to 3 days. Reheat gently in a steamer, in a covered skillet with a splash of water, or in the microwave, then toss with your chosen flavor variation.

    More Vegetable Side Dish Recipes

    These terrific veggie sides make the saying "eat more veggies" easy! And check out the vegetables and side dish recipe index page for more ideas.

    • Rund bowl of golden green Brussels sprouts with pancetta, herbs, and shallots ready for serving.
      Brussels Sprouts With Pancetta (Stovetop)
    • roasted carrots with thyme
      Maple Roasted Carrots (Easy Glazed Carrots Recipe)
    • roasted broccoli
      Roasted Broccoli with Parmesan and Lemon
    • cauliflower colcannon
      Cauliflower Colcannon with Kale

    Did You Make This Recipe?

    If you made steamed Brussels sprouts, please leave a comment and let me know. I love hearing from you and your comments also help other readers. And please leave a star rating ⭐⭐⭐⭐⭐. Thank you!

    📖 Recipe

    A white bowl of brght green Brussels sprouts tossed with olive oil, salt, pepper and red pepper flakes.

    Simple Steamed Brussels Sprouts

    Sally Cameron
    Bright green steamed Brussels sprouts, a simple side dish that takes minutes and goes with just about anything. See the notes at the bottom for 7 flavor variations beyond simple salt and pepper.
    No ratings yet
    Prevent your screen from going dark
    Print Recipe Pin Recipe
    Prep Time 10 minutes mins
    Cook Time 8 minutes mins
    Total Time 18 minutes mins
    Course Side Dish, vegetables
    Cuisine American
    Servings 4 to 6
    Calories 104 kcal

    Equipment

    • Medium pot with a lid 5 quarts
    • Steamer basket that fits inside pot

    Ingredients
      

    • 1 ½ - 2 pounds fresh Brussel sprouts of similar size trimmed and halved
    • 1 tablespoon extra virgin olive oil or melted butter
    • ¼ teaspoon salt
    • ⅛ teaspoon pepper

    Instructions
     

    Prep Brussels sprouts

    • Trim the stem ends, remove any yellowed outer leaves, and halve the sprouts.

    Steam sprouts

    • Add a steamer basket to a medium pot 4-5 quart pot and pour in cold water just to the bottom of the steamer basket (the sprouts shouldn't sit in the water).
      Cover with a lid and bring to a boil over medium-high heat. Add the Brussels sprouts, cover, and steam for about 5–8 minutes, until bright green and just tender when pierced with the tip of a paring knife. Check at 5 minutes.

    Season and serve

    • Toss the hot Brussels sprouts with a little butter or olive oil and salt and pepper to taste.
      For more flavor ideas (garlic confit, miso–maple, soy–ginger, lemon–Parmesan, and more), see the “Variations: Flavor Ideas for Steamed Brussels Sprouts” section in the post.

    Notes

    Using frozen Brussels sprouts: You can make this with frozen Brussels sprouts when fresh aren't available. Cook them from frozen (don't thaw) and steam just until heated through and tender, 4-6 minutes. When they're done, drain well and let excess moisture evaporate for a minute or two, then toss with one of the flavor variations. They'll be softer than fresh, but still good-see the post above for more tips and flavor ideas.
    Flavor variations: This recipe card gives you the basic method for perfectly steamed Brussels sprouts. In the post above, you’ll find 7 easy flavor ideas—like garlic confit + lemon, miso–maple, soy–ginger, Dijon–ACV, and lemon–Parmesan—to dress them up.
    The garlic confit flavor variation is one we have often. Use 1 tablespoon of the oil and 3-4 garlic confit cloves, mash into a paste (a mortar and pestle work well), and toss with the hot sprouts to serve. Sprinkle with red pepper flakes, lemon, if desired. 
     

    Nutrition

    Calories: 104kcalCarbohydrates: 15gProtein: 6gFat: 4gSaturated Fat: 1gPolyunsaturated Fat: 1gMonounsaturated Fat: 3gSodium: 188mgPotassium: 663mgFiber: 6gSugar: 4gVitamin A: 1283IUVitamin C: 145mgCalcium: 72mgIron: 2mg
    Tried this recipe?Let us know how it was with a comment and leave a star rating!

    Almond Flour Chocolate Cookies

    01/29/2026 by Sally Cameron Leave a Comment

    Chocolate almond cookies with crinkled tops and sugar sprinkles.

    These almond flour chocolate cookies are everything a chocolate cookie should be-soft, chewy, deeply chocolaty, and nicely crinkled on top. They bake up light and delicate, with a melt-in-your-mouth center and perfectly crisp edges. Naturally gluten-free and easy to prepare, they're the kind of cookie you can make for holidays, dessert boards, cookie boxes, or whenever you're craving something a little indulgent.

    A stack of chocolate almond cookies on a white plate with cooling cookies behind.

    After nailing the texture of my soft, crinkly ginger cookies, I knew I wanted a chocolate version with that same tender bite and effortless simplicity. This recipe delivers-an easy, naturally gluten-free chocolate cookie made with everyday ingredients and no traditional flour. Rich, tender, and deeply chocolaty, it's the kind of cookie you'll keep in regular rotation year-round.

    [feast_advanced_jump_to]

    Almond Flour Chocolate Cookies at a Glance

    • Perfect bite - Crisp edges but inside, chewy chocolate cookies.
    • Chocolate-forward - Deep cocoa flavor that tastes rich, not overly sweet.
    • Quick + simple - Pantry ingredients and a straightforward mix-and-scoop dough.

    For another chocolatey baked treat, make some fudgy gluten-free brownies.

    Ingredients You'll Need

    Almond flour, cocoa powder, sugar, and other ingredients for chocolate almond flour cookies.
    • Flour - Fine blanched almond flour creates a tender crumb with a slightly chewy texture.
    • Cocoa powder - Unsweetened cocoa powder for rich chocolate flavor, notes below on type, dutch, natural, or blend.
    • Baking soda- Helps the cookies spread and brown properly.
    • Salt - Balances the sweetness and enhances the chocolate flavor.
    • Espresso powder - Deepens the chocolate flavor without adding a coffee taste, optional but try it!
    • Butter - Unsalted butter for proper control of salt.
    • Brown sugar - Light brown sugar adds sweetness, moisture, and chew.
    • Sugar - Granulated sugar contributes structure and crisp edges.
    • Egg - Binds the dough and adds structure.
    • Vanilla extract - Adds warmth and rounds out the chocolate.
    • Almond extract - A subtle complement to vanilla that enhances the chocolate, optional.

    Please see the recipe card for measurements.

    Chef's Tip - Natural Cocoa vs. Dutch-Process Cocoa and Black Cocoa Powder
    Natural cocoa is more acidic and lighter in color, with a brighter chocolate flavor. Dutch-process cocoa is treated with an alkaline solution to neutralize natural acidity, so it's darker, smoother, and tastes less sharp. Black cocoa is ultra-dutched with it's black color and mellow flavor. I use a blend of all three cocoas and it works beautifully with baking soda because there are other mild acids in the dough (like brown sugar) to balance things out.

    For another easy and fun to make chocolate treat, makes these chocolate bark bites, like chocolate bark in bite-sized mini muffin cups.

    Substitutions and Variations

    • The only substitution would be using non-dairy butter for a dairy- free, gluten-free cookie, but I have not tested this. If you try it please comment and let me know how they turned out and what brand of non-dairy butter you used.

    Baking Tip: How to Rescue Hard Brown Sugar

    Brown sugar hardens when its natural molasses dries out, but it's easy to bring it back to soft, scoopable life for baking needs:

    • Fast Method (10-20 seconds) - Break the sugar into chunks, place in a microwave-safe bowl, cover with a damp paper towel, and heat in 10-second bursts until softened. Use immediately.
    • Overnight Method (Best for long-term) - Place the sugar in an airtight container with a slice of apple, a piece of fresh bread, or a dampened (not wet) terracotta sugar saver. It will rehydrate overnight and stay soft.
    • Keep it soft long-term - Store brown sugar in a truly airtight container with a sugar saver-or replace the apple slice or bread every few days to maintain moisture.

    How to Make Almond Flour Chocolate Cookies

    Cocoa powder, almond flour, and baking soda in a fine sieve for sifting into a bowl.
    1. Add almond flour, cocoa powder, espresso powder, baking soda, and salt to a fine sieve
    Sifted cocoa powder, flour, and dry ingredients for chocolate almond flour cookies in a stainless bowl.
    1. Shake the dry mix through by hitting the edge of the sieve on your opposite hand, until no lumps remain.
    Brown sugar, sugar, and butter in a glass bowl for creaming into a cookie dough.
    1. Add both sugars and soft butter to another medium bowl.
    Creaming butter and sugar, adding vanilla, for cookie dough in a glass bowl.
    1. Beat well with a hand mixer on high speed (creaming) until soft and fluffy, then beat in the egg and extracts.
    Chocolate almond flour cookie dough ready for portioning and baking.
    1. Add the dry ingredients to the creamed mixture and mix on low speed just until combined. The dough is stiff and feels a bit gritty due to the almond flour.
    Chocolate cookie dough balls on a parchment lined baking sheet with a cookies scoop.
    1. Chill the dough for 45 minutes in the refrigerator. Pre-heat oven to 350°F, line a sheet pan with parchment. Scoop the dough, roll into 1 ½" balls with a #50 cookie scoop (easiest) or tablespoon.
    Baked chocolate almond flour cookies on a baking sheet cooling.
    1. Bake 14-15 minutes until edges are set and center still a bit soft. Cool cookies on the tray for 10 minutes as they are fragile when hot, then move to a wire rack in a single layer for complete cooling.
    A round wire cooling rack piled with chocolate cookies.

    Chocolate for breakfast? Why not, with this chocolate banana smoothie.

    Serving, Storing & Freezing

    Serve almond flour chocolate cookies slightly warm or at room temperature. They're rich and chocolatey on their own, or lovely with coffee, tea, or a glass of cold milk (dairy or non-dairy both play nicely here).

    Storing

    Store baked chocolate cookies in an airtight container at room temperature for up to 3 days, or refrigerate for up to 7 days. Because almond flour cookies are more delicate than wheat-based cookies, refrigeration helps them hold their shape longer, especially in warm kitchens.

    Freezing cookies

    Freeze fully cooled cookies in a single layer, then transfer to an airtight container or freezer bag for up to 2 months. Thaw at room temperature or warm briefly in a low oven to refresh.

    Freezing cookie dough

    This dough should freeze well but I have not tested it. Scoop into portions, freeze solid, then store in a freezer bag for up to 2 months. Bake from frozen, adding 1-2 extra minutes to the baking time.

    Recipe FAQs

    Are these cookies gluten-free?

    Yes. Almond flour is naturally gluten-free, making these gluten-free chocolate cookies, a great option for everyone. They are a flourless cookie.

    Can I use almond meal instead of almond flour?

    You can, but the texture will be slightly coarser and the cookies a bit more rustic. Finely ground almond flour produces the best, smoothest cookie texture.

    Can I use a sugar substitute?

    Sugar substitutes might work, but results vary, and I have not tested this option. Granulated monk fruit/allulose blends tend to perform better than erythritol, which can create a dry or cooling effect. With cookies, sugar is more than sweetness-it contributes to structure, spread, crisp edges, moisture retention, browning, and that classic chewy bite which are not the same with sugar substitutes.

    Do these almond flour chocolate cookies need to cool before eating?

    Yes. Before eating they must cool 10 minutes on the baking sheet because they are fragile when hot, and set as they cool. Then go right ahead!

    More Cookie Recipes

    Here are a few more cookie recipes for year round enjoyment, all gluten-free and no one would ever know it.

    • A plate of golden sugar sprinkled ginger cookies with more cooling on a wire rack.
      Soft & Chewy Gluten-Free Ginger Cookies
    • A stack of crunchy cookies on a counter with a glass of milk and cookies cooling behind.
      Cranberry Oatmeal Cookies Recipe (gluten-free)
    • A round white plate piled with chocolate chip meringue cookies.
      Forgotten Cookies (chocolate chip meringues)
    • sand tart cookies
      Old Fashioned Sand Tarts Cookie Recipe

    Did You Make This Recipe?

    If you make these almond flour chocolate cookies, please leave a comment. I love to hear from you and your comments are helpful to other readers as well. I hope you enjoyed them! Thanks for supporting my site. Please leave a star rating too.

    📖 Recipe

    Chocolate almond cookies with crinkled tops and sugar sprinkles.

    Almond Flour Chocolate Cookies

    Sally Cameron
    A simple irresistible chocolate cookie with a chewy center, lightly crisp edges, and a crackled sparkly top, made with almond flour for naturally gluten-free cookies.
    No ratings yet
    Prevent your screen from going dark
    Print Recipe Pin Recipe
    Prep Time 10 minutes mins
    Cook Time 15 minutes mins
    chilling time 45 minutes mins
    Total Time 1 hour hr 10 minutes mins
    Course Cookies, Dessert
    Cuisine American
    Servings 12 Yield 24 cookies
    Calories 205 kcal

    Equipment

    • Hand mixer
    • 1-2 Rimmed baking sheet half sheet size
    • Parchment paper
    • Wire cooling rack
    • Fine sieve
    • #50 cookie scoop (aka disher)

    Ingredients
      

    • 1 ¾ cups super-fine blanched almond flour
    • ¼ cup Dutch-process cocoa powder or blend of cocoa powders
    • ½ - ¾ teaspoon espresso powder optional but really good!
    • ½ teaspoon baking soda
    • ¼ teaspoon sea salt
    • 6 tablespoons unsalted butter room temperature, very soft
    • ½ cup light brown sugar lightly packed
    • ¼ cup granulated sugar
    • 1 large egg
    • 1 teaspoon vanilla extract
    • ¼ teaspoon almond extract optional

    Instructions
     

    Sift the dry ingredients

    • Place the almond flour, cocoa powder, espresso powder, baking soda, and salt in a sieve over a medium bowl and sift the dry ingredients through until there are no more lumps.

    Cream the butter and sugars

    • In a separate bowl, beat the soft butter, brown sugar, and granulated sugar until light and fluffy, 1-2 minutes in high speed. Add the egg and extracts and mix on low speed just until blended in.

    Add dry ingredients

    • Add the dry mixture to the creamy and mix on low until blended. The dough is stiff and fees a bit gritty due to the almond flour.

    Chill dough

    • Chill the dough for 45 minutes for slightly thicker cookies and better shape.

    Scoop & bake

    • Preheat oven to 350°F. Line a sheet pan with parchment. Scoop the dough into 1½-tablespoon balls. Using a #50 cookie scoop is best. Roll the balls in sugar for a sparkly top after baking.

    Cooling cookies

    • Bake 14-15 minutes. The edges should look set, and the centers still soft and a bit puffed and crackled. Cool cookies on the tray for 10 minutes before moving as they are fragile when hot, then move to a wire rack for full cooling.

    Notes

    Here is the cocoa powder I use, King Arthur Triple Cocoa Blend, and their espresso powder as well.
    Storing
    Store baked cookies in an airtight container at room temperature for up to 3 days, or refrigerate for up to 7 days.
    Freezing cookies
    Freeze fully cooled cookies in a single layer, then transfer to an airtight container or freezer bag for up to 2 months. Thaw at room temperature or warm briefly in a low oven to refresh.

    Nutrition

    Calories: 205kcalCarbohydrates: 18gProtein: 4gFat: 14gSaturated Fat: 4gPolyunsaturated Fat: 0.3gMonounsaturated Fat: 2gTrans Fat: 0.2gCholesterol: 31mgSodium: 104mgPotassium: 49mgFiber: 2gSugar: 14gVitamin A: 197IUCalcium: 48mgIron: 1mg
    Tried this recipe?Let us know how it was with a comment and leave a star rating!

    Green Enchilada Sauce with Tomatillos

    01/22/2026 by Sally Cameron 3 Comments

    tomatillo salsa verde

    Homemade green enchilada sauce made with fresh tomatillos is bright, tangy, and so much better than anything from a jar. This easy tomatillo enchilada sauce comes together in about 30 minutes-just chop, simmer, and blend. It's the classic sauce for enchiladas verdes, but it's just as good spooned over tacos, chicken, eggs, and roasted vegetables. Make a batch and freeze it in portions so you always have a stash of green enchilada sauce ready to go.

    jars of freshly made tomatillo salsa verde (tomatillo sauce)  on a counter.

    Yes, you can grab tomatillo enchilada sauce off the shelf, but homemade is a different story-brighter, fresher, and done in about 30 minutes. A quick chop, a gentle simmer, and a spin in the blender, and you've got a sauce you can freeze in portions and use anytime you want enchiladas verdes. But don't stop at chicken enchiladas, it's good on so many things!

    [feast_advanced_jump_to]

    Why You'll Love Green Enchilada Sauce

    • Fast and easy - A quick chop, simmer, and blend and it's ready in about 30 minutes.
    • Fresh, bright flavor - Tomatillos bring a tangy, zesty kick you don't get from a jar.
    • Customizable heat - Keep it mild or turn it up with your favorite chiles.
    • So many uses - Perfect for enchiladas verdes, tacos, eggs, this easy chicken recipe, bowls, over omelets, and more (see the list below).
    • Freezer-friendly - Make a batch now and freeze portions for fast meals later.

    Use this tomatillo sauce over these grilled shrimp tacos. Skip takeout tacos and make these!

    Chef's tip: Buying tomatillos. When buying tomatillos, peel back a bit of the paper and look for a smooth flesh and bright green color. Don't buy any with black spots or shriveled areas. While they look like green tomatoes, they are a different fruit (they are fruit not vegetable).

    Ingredients You'll Need

    Tomatillos, onion, chili peppers, garlic and spices for making green enchilada sauce in prep bowls.
    • Tomatillos - They come in green, yellow, and even purple. I use green tomatillos with their papery husks for the classic, bright flavor and color.
    • Chiles - Anaheim adds mild, green flavor; jalapeño adds mild-to-medium heat. Adjust the jalapeño to taste.
    • Onion - Adds savory depth and a little natural sweetness as it simmers.
    • Garlic - Fresh cloves give the cleanest, best flavor.
    • Liquid - I use water for a fresh, pure tomatillo flavor, but chicken broth or vegetable broth works too for a slightly richer sauce.
    • Spices - Ground cumin adds warmth; ground coriander is optional for a subtle citrusy note.
    • Oregano - Use dried oregano for convenience, or Mexican oregano if you have it for a more authentic flavor.
    • Arrowroot starch - Optional thickener at the end if you want a more sauce-like consistency. (Cornstarch works too, but arrowroot stays a bit silkier.)

    Please see the recipe card for measurements, salt, and pepper.

    My favorite thing to do with this tomatillo enchilada sauce is make this easy Salsa Verde Chicken with boneless, skinless breasts. Dinner in under 30 minutes! Add rice and you're ready.

    Substitutions and Variations

    • Try different tomatillos - Green is classic, but yellow or purple tomatillos work too (color and flavor will vary slightly).
    • Make it hotter - Swap the jalapeño for a serrano pepper (or use two jalapeños).
    • Pepper swap - If you can't find Anaheim, use a poblano (or other mild green pepper). Both are mild; poblano is a little deeper and more earthy.
    • Make it creamy - Blend in a little sour cream/Greek yogurt/crema after cooling slightly (for enchiladas verdes).

    Use this green enchilada sauce to make a terrific tomatillo soup with either leftover chicken or turkey, and pinto beans. Fast and hearty!

    How to Make Green Enchilada Sauce

    two bowls on the counter, one with peeled green tomatillos and the other with the husks.
    1. Peel tomatillos and wash off the sticky coating. Discard the husks.
    Chopped green tomatillos ready to make enchilada sauce
    1. Roughly chop the tomatillos into quarters or sixths.
    Chopping green chili pepper and deseeding them.
    1. Slice chili peppers lengthwise, de-seed, remove white membrane, and chop.
    Ingredients for green enchilada sauce in a dutch oven ready for simmering, with spices, onions.
    1. Add tomatillos, onions, spices, salt, chili peppers, and garlic to the pot.
    Cooked green enchilada sauce ready to be pureed.
    1. Bring almost to a boil, turn down to low, cover with a lid, simmer on low for 15-20 minutes until falling apart.
    Pureed green tomatillo sauce in a blender container.
    1. Carefully add hot enchilada sauce to a blender container, tight lid on, pulse to refine, chunky or smooth. Do in two batches with a smaller blender.

    Chef's Tip: Thicken Green Enchilada Sauce Right in the Blender: For a green enchilada sauce with a little more body, I thicken it right in the blender. With the sauce still hot, add 1 tablespoon arrowroot starch directly to the blended sauce and pulse until smooth. It thickens almost immediately and evenly-no slurry needed. This gives the sauce enough body to cling to tortillas and fillings without tasting heavy or starchy.

    A pot of finished green tomatillo sauce with a ladle ona marble counter.

    Chef's Tip: Safely Handling Chili Peppers - If you're heat sensitive or want to protect your hands, wear disposable kitchen gloves while trimming and deseeding chili peppers. Once you're done, discard the gloves and wash your hands thoroughly before touching anything else. This is especially important if working with hotter chili peppers. Hotter chiles contain higher concentrations of capsaicin and related compounds, responsible for chili pepper heat and that lingering "burning" sensation on skin and eyes. For chili pepper heat ratings, go to go to the source, Scoville.org

    Serving Suggestions

    12 Ways to Use Tomatillo Sauce

    • As a sauce: Over grilled or baked fish like cod, halibut, or salmon, shrimp or scallops.
    • Use it as a marinade: Use tomatillo sauce as a marinade for chicken, pork, or fish to infuse them with a bright, tangy flavor before grilling or roasting.
    • Make green chicken enchiladas (Enchiladas Suizas).
    • Chips and salsa! My great weakness.
    • Make dips: Combine the tomatillo sauce with cream cheese or Greek yogurt to create a creamy dip for chips, crackers, or fresh vegetables.
    • Add a spoonful to top a bowl of chili.
    • Rice and grain bowls: Stir the sauce into cooked rice, quinoa, or couscous to add moisture and flavor.
    • Use it with Huevos Rancheros instead of the more traditional red enchilada sauce.
    • Pour it with eggs - poached, scrambled eggs, or over omelets for a lift of flavor.
    • Use it with any kind of tacos as the sauce.
    • Alongside baked nachos with cheese.
    • Serve aside grilled flank steak for a Mexican style dinner.

    Storing and Freezing

    Tomatillo sauce is good for 4-5 days. If you're not going to use it up, freeze it in jars labeled with the date and volume (like 8 ounces or 1 cup portions). Souper Cubes work terrific for freezing sauces.

    Jars are freshly made tomatillo sauce ready for the ridge or freezer.

    Green Enchilada Sauce Recipe FAQs

    What is the difference between tomatillo sauce, green enchilada sauce, and salsa verde?

    The terms are often used interchangeably as they are both green Mexican-style sauces made from tomatillos and chilies. It can be prepared either raw or cooked, each method offering distinct flavors and textures.

    How can I adjust the spiciness of my tomatillo sauce?

    The spiciness of tomatillo sauce can be customized by using different types and amounts of chili peppers. For a milder sauce, use fewer peppers and remove their seeds and membranes, which contain most of the heat. For a spicier version, include more peppers or choose hotter varieties like serrano or jalapeño peppers.

    Can I substitute green tomatoes for tomatillos in the sauce?

    Not really. Green tomatoes and tomatillos are different fruits with different flavors. Tomatillos have a tart, citrusy taste, whereas green tomatoes are more acidic and less fruity.

    More Mexican Inspired Recipes

    If you're making tacos, skip the packaged seasoning with crazy high sodium and make your own with my homemade taco seasoning blend.

    • spicy grilled shrimp tacos
      Grilled Baja Shrimp Tacos with Avocado Sauce
    • Taco meat in a cast iron pan with fixings for tacos around it.
      Ground Meat Taco Recipe (or ground turkey)
    • chicken tomatillo soup
      Tomatillo Soup (with Chicken or Turkey)
    • Close up of Mexican chicken soup in a white bowl.
      Mexican Chicken Tortilla Soup Recipe

    ⭐️Did You Make This Recipe?

    If you make this green enchilada sauce sauce, please add your comment. I appreciate your feedback and enjoy hearing from you. If you loved it, please give it a 5-star rating! They really help other readers. Thanks for supporting my site!

    📖 Recipe

    tomatillo salsa verde

    Green Enchilada Sauce (Tomatillo Sauce)

    Sally Cameron
    A tangy, green Mexican-inspired sauce that usually tops chicken enchiladas but works in so many ways. See post for ideas. Freezes beautifully for breakfasts, snacks and dinners. Note - the arrowroot starch makes a thicker sauce but it's optional.
    5 from 1 vote
    Prevent your screen from going dark
    Print Recipe Pin Recipe
    Prep Time 10 minutes mins
    Cook Time 20 minutes mins
    Total Time 30 minutes mins
    Course salsa, Sauce
    Cuisine Mexican
    Servings 15 yield 5-6 cups
    Calories 29 kcal

    Equipment

    • blender

    Ingredients
      

    • 2 ½-3 pounds green tomatillos
    • 1 medium onion
    • 1 large Anaheim chili pepper
    • 1 large jalapeno chili pepper
    • 2 large garlic cloves chopped
    • 1 cup water
    • 2 teaspoons ground cumin
    • 1 ½ teaspoons dried oregano
    • 1 teaspoon ground coriander
    • ½ teaspoon sea salt
    • 1 tablespoon arrowroot starch optional

    Instructions
     

    Prep tomatillos, onions, chilies

    • Remove paper husks from the tomatillos, wash and chop them. Roughly chop the onion. Split the chiles in half lengthwise, remove seeds and membrane, then chop. Peel and smash the garlic cloves.

    Cook the enchilada sauce

    • Add everything to a medium (4-5 quart) saucepan with the water, cumin, oregano, coriander, and salt. Bring to a boil then turn down to low. Cover and simmer with a lid on for approximately 15-20 minutes, until it all falls apart and gets very soft.

    Puree and portion

    • Carefully pour hot salsa into a blender. Fix the lid on tightly and pulse briefly for a few seconds to puree as thick or fine as you want. If your blender is smaller, do this in two batches.
      Use as is (warm) or cool and refrigerate, or portion and freeze. Salsa will last 5 days in the refrigerator or several months in the freezer. To thicken, see note below.

    Notes

    How to Thicken Green Enchilada Sauce

    If you prefer a slightly thicker green enchilada sauce with more body, you can thicken it right in the blender. With the sauce still hot, add 1 tablespoon of arrowroot starch directly to the blended sauce and pulse until smooth. It thickens almost immediately and evenly, without the extra step of making a slurry.
    Arrowroot also holds up much better through freezing and thawing, keeping the sauce smooth and stable. Cornstarch can break down after freezing, making sauces watery or separated.

    Nutrition

    Serving: 0.333cupCalories: 29kcalCarbohydrates: 6gProtein: 1gFat: 1gSaturated Fat: 1gSodium: 92mgPotassium: 217mgFiber: 2gSugar: 3gVitamin A: 103IUVitamin C: 11mgCalcium: 13mgIron: 1mg
    Tried this recipe?Let us know how it was with a comment and leave a star rating!

    Green Chicken Enchiladas Recipe

    08/23/2010 by Sally Cameron 5 Comments

    Chicken enchiladas

    If you love real Mexican food-not the drive-through kind-this green chicken enchiladas recipe is for you. This chicken enchiladas recipe starts with my homemade green enchilada sauce, tender shredded chicken, and plenty of melted cheese. It's the dish I used to order at Mexican restaurants all the time, until I created my own healthier, from-scratch version that we now make at home.

    Chicken enchiladas

    Why Make This Green Chicken Enchiladas Recipe

    To make this recipe faster, roast the chicken and prepare the sauce a day or two ahead, then assemble and bake when you are ready for dinner. For the chicken, roast, cool then shred the meat.

    Using leftover chicken from either a whole roast chicken or roast chicken breasts works great and is usually what I do. You can also use a store rotisserie chicken. 

    Homemade Tomatillo Sauce: Salsa Verde

    A staple in Mexican cuisine, fresh tomatillos look like green tomatoes covered with a papery husk and have a tart flavor. For the sauce I use fresh diced tomatillos, diced onions and spices simmered for 20-30 minutes.

    Buy bright green firm fruit. Remove the husks and rinse off the light sticky film. I make this sauce ahead and freeze it, handy for whipping up a batch of enchiladas. If this is too much work (it's REALLY is easy!), by a jarred sauce like Trader Joe's Salsa Verde.

    tomatillo salsa verde
    Homemade tomatillo sauce, salsa verde.

    Roast Chicken Options

    Sunday dinner is usually whole roast chicken on my menu plan, so I have leftover shredded chicken for enchiladas, tacos, salad, etc. Another option is to get a couple of bone-in chicken breasts and roast them, then shred the meat. Directions are in the recipe for this option.

    Another option is to buy a store roasted chicken and shred the meat. Once the is chicken ready and the sauce made it's just assemble and bake when you are ready to eat.

    How to Steam Tortillas and Assembling the Enchiladas

    One thing about corn tortillas is that they break when you roll them. The secret I found is steaming them lightly first, then they roll without breaking. Here are ways to steam tortillas:

    • Use a large pot with a folding steamer rack, without the center handle. Wrap a stack of tortillas in a clean kitchen towel and steam until soft and pliable. Placing the stack in a microwave safe bag helps.
    • Use a bamboo steamer set over a large pot of simmering water.
    • Use a steam oven
    • Wrap tortillas in damp paper towels or damp clean kitchen towel and microwave for a minute or until just soft and pliable.

    When assembling enchiladas I add sweet corn kernels for more texture and flavor. Frozen corn works just fine, and I use roasted corn when I can find it. You can also skip the corn.

    Basket of green tomatillos.
    Basket of green tomatillos.

    Tortilla Options

    Corn tortillas are traditional for chicken enchiladas and good if you eat gluten-free. I prefer organic corn tortillas because they are not GMO. Read labels for added ingredients like gums and choose one without if possible.

    Another option we enjoy is cassava tortillas. They are pretty fragile when making enchiladas but they taste great and are lighter than corn.

    Next time you feel like good Mexican food, look no further than your own kitchen.

    📖 Recipe

    chicken enchiladas | AFoodCentricLife.com

    Green Chicken Enchiladas

    Sally Cameron
    This is a client and family favorite recipe. Do it in steps by roasting the chicken breast and shredding the meat a day ahead or buying a store roasted chicken and shreding the meat. Make the sauce a day ahead as well or use a jarred salsa verde like Trader Joes. Before dinner, just assemble and bake.
    5 from 1 vote
    Prevent your screen from going dark
    Print Recipe Pin Recipe
    Prep Time 40 minutes mins
    Cook Time 40 minutes mins
    Total Time 1 hour hr 20 minutes mins
    Course Main Course
    Cuisine Mexican
    Servings 4
    Calories 817 kcal

    Ingredients
      

    • 3 3 ½ cups shredded cooked chicken rotisserie
    • 4-5 cups tomatillo sauce recipe link below or store bottled
    • 1 cup frozen corn kernels thawed
    • ¼ cup chopped cilantro leaves plus more for garnish if desired
    • ¼ cup chopped green onions plus more for garnish if desired
    • 8 corn tortillas
    • 8 ounces shredded Mexican cheese blend
    • Salt and pepper to taste

    Instructions
     

    To Make the Sauce

    • Combine tomatillos, onion, jalapeno, garlic, water, oregano and spices in a medium saucepan. Bring almost to a boil, turn down heat to low, cover with a lid and cook until tomatillos are broken down and saucy, about 20 minutes.
    • Add cooked tomatillos to a blender and blend briefly to smooth it out. When blending hot liquids, take precaution. Fill blender only half full, place lid on top and a towel on top of the lid. Blend on low speed for a few seconds. Do in two batches for safety. Use tomatillo sauce immediately or cool completely and refrigerate for up to 4 days or freeze for several months.

    To Roast the Chicken

    • Pre-heat the oven to 375°F. Cover a rimmed baking sheet with parchment or foil. Place chicken breasts on the baking sheet and season with salt and pepper. Roast in oven until chicken reaches 160-165 degrees, about 30-40 minutes. Remove from oven and cool.  If you are going to complete the enchiladas now, turn the oven down to 350°F degrees. When chicken is cool enough to handle, remove skin and shred meat. You should have about 3 ½ cups. Save any extra for chicken salad or soft tacos.

    Assemble Enchiladas

    • In a large bowl, mix shredded chicken, corn, cilantro, green onions and about ½ cup of the tomatillo. Season with salt and pepper to taste.
    • Steam tortillas briefly to soften them making them easier to roll. Fill a large pot with a few inches of water. Place a steamer rack without the center handle in the pot. The water should reach just the bottom of the steamer. Place a lid on the pot and over medium heat heat until steam is coming out from under the lid. Add the tortillas and steam for approximately 4 minutes or until softened. See note at end for other ideas to steam tortillas.
    • Assemble the enchiladas. Place one cooked tortilla on a plate. Top with 1 tablespoon of tomatillo sauce, then about ⅓ cup of chicken mixture on top, then sprinkle with cheese. Roll enchilada and place in the prepared baking dish seam side down. Complete with the rest of the tortillas. Top the enchiladas with sauce (you may not need it all) and sprinkle with cheese. 

    Bake Enchiladas

    • Bake enchiladas covered with foil for 30 minutes, until cheese is melted and the enchiladas are hot throughout, 165°F. Take the foil off the last few minutes. To serve, garnish with a dollop of sour cream and a sprinkle of cilantro if desired.

    Notes

    How to steam tortillas.
    1. Use a large pot with a folding steamer rack, without the center handle.
    2. Use a bamboo steam set over a large pot of simmering water.
    3. Use a steam oven
    4. Wrap tortillas in damp paper towels and microwave for a minute or until just soft and pliable.
    Nutrition calculation does not include the tomatillo sauce as it would include the entire batch of sauce.  For salsa verde/tomatillo sauce nutrition numbers please see the post. ⅓ cup serving has 29 kcals. 

    Nutrition

    Calories: 817kcalCarbohydrates: 31gProtein: 74gFat: 44gSaturated Fat: 17gPolyunsaturated Fat: 7gMonounsaturated Fat: 16gTrans Fat: 0.3gCholesterol: 228mgSodium: 625mgPotassium: 833mgFiber: 5gSugar: 3gVitamin A: 749IUVitamin C: 2mgCalcium: 459mgIron: 3mg
    Tried this recipe?Let us know how it was with a comment and leave a star rating!

    Chicken Bone Broth (Homemade)

    01/15/2026 by Sally Cameron 17 Comments

    Golden chicken bone broth in glass jars with carrots, celery, and parsley, cooling on the counter.

    If you've never made chicken bone broth at home, this is the place to start. Meaty chicken parts and bones simmer low and slow with classic vegetables and herbs, creating a rich, golden, gelatin-rich broth with a silky body you won't get from a carton. Make a big batch once, freeze it in jars, and you'll have instant upgrade power for soups, stews, risotto, and sipping.

    Jars of golden chicken bone broth on a wire cooling rack.

    Homemade chicken bone broth is easy to make. Once everything is in the pot, it mostly takes care of itself while the broth gently simmers and your house fills with that "something good is happening" smell. There's little babysitting-just check the water level occasionally adding boiling water as needed, then strain and chill. I'll walk you through the simple step-by-step process so you can keep jars of this gelatin-rich chicken bone broth recipe in your freezer for soups, stews, and sipping.

    [feast_advanced_jump_to]

    Why Make Chicken Bone Broth

    • Control the ingredients - You decide exactly what goes in, especially the salt. I make bone broth without salt, so you can season each recipe later instead of being stuck with a salty boxed broth.
    • No preservatives or additives - Just chicken, vegetables, herbs, and water. No "natural flavors," no MSG, and no mystery ingredients.
    • Richer flavor and nutrition - A long, gentle simmer extracts deep chicken flavor and plenty of gelatin, creating a gelatin-rich chicken bone broth with a silky texture you don't get from most store-bought broth.
    • Make once, use for weeks (freezer-friendly) - Cook a big batch, cool it, portion into jars or containers, and freeze. You'll have homemade broth ready for chicken soup, risotto, cooking grains-or sipping straight when you want "warm mug therapy."

    Making risotto, like this pumpkin risotto, is a favorite way to use good homemade chicken bone broth. It adds rich flavor.

    Chef's Tip - Is it Chicken Broth or Chicken Stock?
    People use "broth" and "stock" interchangeably, but traditionally there's a difference. Broth is made with meaty chicken pieces (often with vegetables) and may be seasoned for sipping. Stock is made mostly from bones, simmered longer, and typically left unsalted because it's a cooking building block. I use a hybrid method-meaty chicken pieces plus bones (like backs) and chicken feet for collagen/gelatin, along with vegetables and herbs-so you get deep flavor and that gelatin-rich body. Call it broth or stock-either works here.

    Any soup recipe using broth, like this Greek avgolemono chicken soup, gains extra flavor from homemade broth.

    Ingredients You'll Need

    Raw chicken parts and feet, herbs, carrot, onion, and celery for bone broth.
    • Chicken - Use a whole cut-up organic chicken or a mix of bone-in thighs and legs. Adding chicken feet gives the broth extra collagen and body. Ask your butcher if they sell chicken backs or other chicken bones. The feet may look a little creepy, but they help your broth set like jello.
    • Onion - Adds sweetness and depth, use brown or yellow onions, but not red (color).
    • Celery - Brings fresh, savory flavor and round out the classic broth base.
    • Carrots - Add gentle sweetness and helps give the broth its beautiful golden color.
    • Parsley - Stems and leaves add a fresh, herbal note and help brighten the flavor of a long-simmered broth.
    • Bay leaf - Use one or two bay leaves, fresh or dried, to add subtle, earthy depth.
    • Peppercorns - Whole black peppercorns season the broth gently as it simmers without making it spicy or muddy like ground pepper can.
    • Vinegar - Apple cider vinegar or white vinegar help extract minerals from the bones. Lemon juice or white wine work as well but are not quite as acidic.

    Please see the recipe card for exact measurements. Don't add salt to the broth-season the dish you're using it in instead. If you plan to sip it, add a pinch of salt to your mug after it's done.

    Chef's Note - Should I Peel the Onions for Chicken Bone Broth?
    For the broth, you can leave onion skins on or peel them-both work. Skins add deeper golden color and a slightly more complex, rustic flavor (just wash well), while peeled onions give a paler broth with a cleaner, milder taste. Onion skins also contain beneficial plant compounds (like quercetin), but they can occasionally add a faint bitter or astringent edge depending on the onions and simmer time. Bottom line: choose skins-on for color and depth, peeled for a cleaner finish.

    How to Make Chicken Bone Broth

    Chop onion, carrot, and celery roughly.
    1. Roughly chop the onion, carrot, celery.
    Add chicken with most skin removed, along with vegetables, herbs, vinegar, and peppercorns to pot.
    1. Remove as much skin from the chicken as possible, add everything to the pot and cover with cold water.
    Skimming impurities from chicken broth while it is simmering.
    1. As the broth heats up, impurities rise to the surface. Skim with a spoon and discard until it stops forming.
    Almonst finished deep golden chicken broth in a pot still with the vegetables.
    1. As the broth simmers over the hours, the water level will drop. Keep an electric tea kettle of hot water ready and add water as needed. Don't worry, it won't dilute the broth.
    Straining finished chicken broth through a mesh colander into a clean pot.
    1. Strain finished broth through a mesh colander. Discard spent bones, meat, and aromatics.
    Chilling a pot of golden bone chicken bone broth in an ice bath in the sink.
    1. Chill the strained chicken bone broth in a sink ice bath, in a clean pot, until 70°F or lower before refrigerating (covered) until the next day.

    In the morning, skim the solidified fat off the top. Use your chicken broth within three days or freeze in portions. Freeze in muffin tins for small measures, canning jars, mason jars, and Souper Cubes for easy stacking.

    Chef's Tip - For Even Clearer Broth
    For a slightly clearer broth, you can start with just the chicken, water, and vinegar. Bring it to a gentle simmer, skimming off the foam as it happens, then add the vegetables and herbs and continue simmering. Most of the time I add everything at once (as you see in the photos) because it's faster and still makes a delicious, golden broth.

    Bone Broth Tips & Troubleshooting

    • Simmer; don't boil - Keep your broth at a low simmer. Boiling or stirring creates cloudy broth. Just let it bubble away.
    • Skim the "scum" - The scum that forms when first simmering is simply impurities being released from bones and meat. Skim off and discard until it stops. Skimming gives you get a cleaner-tasting, clearer broth.
    • Adding vinegar - A little vinegar (1-2 tablespoons) helps release collagen and minerals from the bones so more goodness ends up in your broth. Add 20-30 minutes before simmering. Optional but beneficial. Lemon juice and white wine also work.
    • Low and slow - A low, slow simmer for a long duration (12 to 20 hours), is the primary driver of nutrient extraction and flavor (with or without vinegar).
    • Broth didn't gel - It's still perfectly usable, but if you want that nice jiggly texture when it's cold, next time add collagen-rich parts like chicken feet (the best), wings, or backs, and be sure you're keeping the broth at a gentle simmer long enough.
    • Strain gently - Use a fine-mesh strainer and let the broth drip through without pressing on the solids. Pressing can push sediment into your nice clear broth.
    • Cool down quickly - Use an ice bath to cool below 70°F before refrigerating.
    • Degrease - The next morning, scrape off the gelled fat from the top of the broth, then portion and refrigerate or freeze, with labels and dates.
    • No extra sink for ice bath - Use a cooler partially filled with ice and cold water, or a large bucket.

    Using Chicken Bone Broth

    Storage & Freezing

    Store chicken broth in the refrigerator, tightly covered and use within 4-5 days. For longer storage, freeze in jars or silicone freezer molds. Properly cooled and frozen, it keeps well for about 3 months. Label and date your containers so you actually use them. I freeze in 3 cup, 1 cup and ½ cup portions for different needs.

    Chicken Broth FAQs

    Should I add salt to my bone broth?

    In short, no. I recommend keeping bone broth unsalted. That way you control the seasoning when you use it in recipes and you won't end up with overly salty soups or sauces. Taste and season with salt when you're cooking with the broth, not when you're making it.

    How long should I simmer chicken bone broth?

    For the best flavor and body, I like to cook chicken bone broth at a very gentle simmer on the stovetop for 12-20 hours. Keep the heat low so you see just an occasional lazy bubble rather than a hard boil. This helps extract collagen and flavor without turning the broth cloudy. This recipe is scaled to make about 1 gallon (16 cups) of broth, which is an ideal big batch to cool and freeze in portions for the time invested.

    Why is my bone broth cloudy?

    Cloudy broth is usually from boiling too hard, not skimming the initial foam, or stirring a lot as it cooks. It's still perfectly safe and tasty-it just won't be as clear. To keep broth clearer, bring it up to a gentle simmer slowly, skim the scum early, and avoid boiling.

    What if my bone broth doesn't gel when chilled?

    Don't worry-broth that doesn't gel is still full of flavor and nutrients. It just means there wasn't quite as much collagen. Next time, add more collagen-rich parts (like feet, wings, or backs) and simmer a bit longer. You can still reduce a non-gelling broth on the stovetop to intensify flavor.

    Do I have to use organic chicken?

    Use the best quality chicken that fits your budget. I prefer organic or pasture-raised chicken for broth because you're extracting so much from the bones and skin over many hours of cooking. But if that isn't available, use what you can find-homemade broth from a conventional chicken is still far better than most boxed broth.

    Recipes Using Chicken Broth

    Chicken broth is the foundation of so many great soups, stews, and dishes like risotto. Try a few of these or check out the soup recipes index page for more ideas!

    • Ribollita in a gray pot.
      Italian Ribollita Soup (Ribollita Toscana)
    • A bowl of Greek avgolemono chicken soup with fresh dill in a white bowl.
      Greek Avgolemono Soup Recipe (Lemon Chicken Soup)
    • golden risotto Milanese with peas
      Saffron Risotto (Risotto Milanese)
    • A gray bowl of pumpkin risotto with a golden spoon and sage leaves.
      Creamy Pumpkin Risotto With Sage

    Did You Make Broth?

    If you make chicken bone broth, please leave a comment and let me know. I love hearing from you and your comments also help other readers. And please leave a start rating. Thanks for supporting my site.

    📖 Recipe

    Golden chicken bone broth in glass jars with carrots, celery, and parsley, cooling on the counter.

    Homemade Chicken Bone Broth

    Sally Cameron
    Making your own chicken broth is so much better than store bought. Although the simmer time is 12-24 hours, it's easy and mostly hands-off. The longer the simmer the more gelatinous your broth will be. Freeze for soups, stews, sauces, risottos and many uses.  
    4 from 3 votes
    Prevent your screen from going dark
    Print Recipe Pin Recipe
    Prep Time 20 minutes mins
    Cook Time 20 hours hrs
    Cooling 1 hour hr
    Total Time 21 hours hrs 20 minutes mins
    Course Soup
    Cuisine American
    Servings 16 8-ounce serving, Yield 4 quarts
    Calories 7 kcal

    Equipment

    • 10-12 quart stockpot
    • Tea kettle regular or electric
    • Mesh colander

    Ingredients
      

    • 5 pounds chicken pieces and parts (thighs, legs, wings, backs) or whole chicken plus parts
    • 1 pound chicken feet or 1 more pound chicken pieces (optional)
    • 2 large celery ribs roughly chopped
    • 2 medium carrots scrubbed, roughly chopped
    • 1 medium onion roughly chopped
    • 1 large dried bay leaf
    • 1 handful parsley leaves and stems
    • ½ teaspoon black peppercorns
    • 6 sprigs fresh thyme
    • 1-2 tablespoons apple cider vinegar
    • 4 quarts filtered water
    • Extra boiling water as needed

    Instructions
     

    How to Cut up a Whole Chicken

    • If using a whole chicken, break it down into pieces with a sharp French knife, Chef's knife, or cleaver.  Cut off the leg and thigh pieces and cut them in half at the joint, then cut off the wings. Next, cut through the center breast bone of the chicken, splitting the body into two halves. Cut the breasts free and cut them in half. What's left is the body. Cut that in half crosswise. Poultry shears also help break it down more easily. Remove excess skin.

    Start the Broth

    • Add the chicken pieces to a large stock pot, about 10-12 quarts. Cover with cold water and bring to a simmer. As the chicken simmers, impurities will begin to rise to the top. It looks like a gray foamy scum. Skim it off and discard. Continue to skim and discard until its mostly gone.

    Long Simmer the Broth

    • Add the vegetables, peppercorns, thyme and vinegar. Keep the pot at a low simmer (just a few bubbles) for 20-24 hours, adding boiling water from a kettle as the water level gets low. The longer you simmer, the better the broth.

    Strain and Chill the Broth

    • Strain out the spent vegetables, meat, bones, and cool the broth in a large clean stainless steel pot in a sink filled with ice and water. Place a small rack or trivet under the pot to speed cooling. Stir occasionally to assist cooling. Cool to 70°F or below before covering and refrigerating. Refrigerate overnight.

    Use and Freezing

    • In the morning, skim off the solidified fat. Use broth within 3-4 days (refrigerated) or portion and freeze in small containers, labeled, for up to three months.

    Notes

    Cooling tip: Use stainless steel or glass for cooling-metal helps broth cool faster. Avoid plastic, which insulates and slows cooling (and hot liquids + plastic aren't a great combo). Cool quickly for best food safety. 

    Nutrition

    Serving: 8ouncesCalories: 7kcalCarbohydrates: 2gProtein: 1gFat: 1gSaturated Fat: 1gCholesterol: 1mgSodium: 18mgPotassium: 34mgFiber: 1gSugar: 1gVitamin A: 1283IUVitamin C: 1mgCalcium: 12mgIron: 1mg
    Tried this recipe?Let us know how it was with a comment and leave a star rating!

    Easy Baked Crab Cakes (with canned crab)

    08/16/2011 by Sally Cameron 4 Comments

    baked crab cakes

    A plate of baked crab cakes with a big green salad and a glass of chilled rose wine make for a wonderful impromptu summer dinner.  Sometimes I bake my crab cakes instead of pan-frying them. They are always a hit at my house and for catered parties.

    baked crab cakes
    Baked crab cakes on a plate with greens and sauce.

    As I cook most every night we rarely eat out. When we do, one of our favorite place makes fantastic crab cakes. While restaurants often use sweet pacific Dungeness crab, at insane prices a pound (when you can find it), it's a little pricey for an every day dinner. Good thing is you can make them at home for a lot less.

    [feast_advanced_jump_to]

    Canned Crab

    For homemade crab cakes, I use jumbo lump pasteurized crab available in tubs and cans. It's a lot more affordable than Dungeness. For far less you can enjoy crab cakes at home whenever the mood strikes.

    Appetizer or Full Size

    A pound of crab will make about 8-9, 2 ½ ounce crab cakes that will serve 2-4 people. It also makes about 18 mini-sized cocktail crab cakes for easy entertaining. Many recipes use Saltine crackers and I do too, but specifically the non-fat crackers. They do not contain any partially hydrogenated oils, a healthier choice.

    These days I use homemade gluten-free breadcrumbs or GF saltines.

    Spices

    Old Bay seasoning is traditional and Phillips Seafood Seasoning is good but not easy to find. I now make my own spice blend with smoked paprika, cumin, celery seed and other spices.

    The best thing about making your own spice blend is that you can adjust it to your taste preference. See this link for a homemade Old Bay recipe.

    Trick for Perfect Shape

    To get perfectly formed and portioned crab cakes I use a metal ring mold. For dinner size use a 2 ¼" (5.7cm) across the bottom edge.

    For cocktail size, use a smaller one, about 1″ - 1 ¼"" in diameter. My cutter set has 16 concentric circles. You can get similar sets on Amazon or in kitchen and restaurant supply stores.

    Formed crab cakes on a tray with parchment.

    Instructions

    Drain juices from the crab. Mix together Dijon mustard, dry mustard, egg, (mayonnaise and seasoning. Add to the crab and mix gently adding the crumbs.

    Pack the crab in the ring lightly but firmly. Put fingers in the center of the crab and gently lift off the ring. Place the crab cakes on a rimmed baking sheet lined with parchment or wax paper. 

    Cover with plastic film and refrigerate until ready to bake. They can be made several hours ahead.

    Formed crab cakes coated in crumbs.

    Bake

    To bake, coat the crab cakes with toasted breadcrumbs gently pressing the crumbs on. Place on a rimmed baking sheet topped with a wire rack and bake. The wire rack provides air circulation around the crab cakes so they get crisp. Bake until golden brown and hot.

    To Serve

    Serve with your favorite sauce; tartar sauce, cocktail sauce or make your own. I mix mayo (Vegenaise), finely chopped shallot, lemon zest and juice, capers, fresh chopped dill and parsley.

    With a crisp exterior from toasted breadcrumbs and a tender interior, these crab cakes are hard to beat.

    Another Seafood Appetizer

    For another easy seafood appetizer, make the roasted garlic shrimp. They were a standard appetizer at my catered parties and always disappeared quickly.

    📖 Recipe

    crab cakes | afoodcentriclife.com

    Baked Crab Cakes

    Sally Cameron
    For prefect crab cakes and portion control, use a ring mold to shape them. For entree size use a 2 ¼" (5.7cm) ring. For mini or cocktail size, use a smaller one, about 1″ - 1 ¼"". 
    5 from 1 vote
    Prevent your screen from going dark
    Print Recipe Pin Recipe
    Prep Time 15 minutes mins
    Cook Time 15 minutes mins
    Chill time 45 minutes mins
    Total Time 1 hour hr 15 minutes mins
    Course Appetizer
    Cuisine American
    Servings 6
    Calories 247 kcal

    Ingredients
      

    • 3 slices sandwich bread each white, whole wheat or gluten-free
    • 2 teaspoons olive oil sub melted coconut oil, avocado oil
    • 1 pound pasteurized jumbo lump crabmeat
    • 6-7 tablespoons finely crushed non-fat Saltine crackers*
    • 2 tablespoons finely chopped chives
    • 1 tablespoon Dijon mustard
    • 2 teaspoons dry mustard
    • 1 large egg
    • 4 tablespoons Mayonnaise or Vegenaise
    • 2-3 teaspoons Old Bay or Phillips Seasoning or your own spice blend
    • Salt and pepper to taste

    Instructions
     

    For Homemade Bread Crumbs

    • Pre-heat oven to 325 degrees. Trim crusts from bread and tear into pieces. In a food processor fitted with steel blade, place bread and process to fine crumbs. Add 2 teaspoons oil and pulse to evenly combine. Place breadcrumbs on a rimmed baking sheet in a single layer and bake until golden brown, about 8-10 minutes. Cool.

    Crab Cakes

    • Drain any juices from the crab. Place crab in a medium bowl. Toss crab with Saltine crumbs and chives. Start with 6 tablespoons of cracker crumbs. If it seems wet, add another tablespoon.
    • In a small bowl mix together Dijon mustard, dry mustard, egg, Vegenaise (or mayonnaise) and seasoning. Add to the crab and mix gently. Taste and add more seasoning if you prefer.
    • With ring mold, pack in crab gently but firmly and smooth the top. Place crab cakes on a rimmed backing sheet lined with wax paper or parchment. Cover with plastic film and chill for 30-60 minutes, or several hours.
    • When ready to bake, pre-heat oven to 450 degrees. Gently coat crab cakes with toasted breadcrumbs. Place crab cakes on a rimmed baking sheet topped with a wire rack. Spray the rack with non-stick spray. Bake crab cakes until golden brown and hot, about 12 minutes.

    Notes

    To crush Saltines finely use a food processor or place in a Ziploc style bag and crush with a rolling pin. The non-fat variety do not have an partially hydrogenated oils.

    Nutrition

    Calories: 247kcalCarbohydrates: 18gProtein: 17gFat: 11gSaturated Fat: 2gCholesterol: 104mgSodium: 605mgPotassium: 245mgFiber: 1gSugar: 1gVitamin A: 89IUVitamin C: 3mgCalcium: 111mgIron: 2mg
    Tried this recipe?Let us know how it was with a comment and leave a star rating!

    Pan Seared Halibut with Miso Butter

    02/11/2014 by Sally Cameron 4 Comments

    Miso butter topped halibut on a bed of black rice in a gray bowl.

    Here is an easy and elegant halibut dish prepared in a snap. Pan seared halibut with miso butter. Make the rice ahead of time and re-heat, prep the asparagus in a minute to roast. You will have a healthy dinner on the table in just minutes. The savory miso-butter sauce is delicious as well as versatile. That perfect combination of sweet, savory, and umami all in one bite.

    Pan seared halibut with miso butter sauce in gray bowl atop forbidden black rice sprinkled with chopped chives.

    If your only experience with miso is the golden soup at a sushi bar, prepare to be amazed. With a savory, umami flavor, there is much more you can do with miso like this miso butter. Try it with fish or seared scallops. Here, I've paired it with fresh pan-seareed halibut. Other firm white fish works as well such as cod.

    [feast_advanced_jump_to]

    Why You'll Like This Recipe

    • It's simple, fast, and healthy.
    • Use the miso butter with other fish and seafood such as shrimp and scallops.
    • A great meal for a busy week.

    Here's another easy halibut recipe served with a lemon-caper vinaigrette.

    Recipe Ingredients

    • Fish: Choose a fresh white fish such as halibut, cod. Monkfish and sea bass work too.
    • Garlic: Use granulated or powdered garlic.
    • Miso: Use what is called sweet white miso. It's the most mild miso flavor and easy to find.
    • Butter: Unsalted dairy butter or plant-based stick butter.
    • Oil: Just a little for the pan, use extra virgin olive oil, extra virgin coconut oil, or a healthy neutral oil.
    • Liquid: Dry sake, dry white wine, vegetable broth, or fish broth.

    Please see the recipe card for measurements, salt, and black pepper.

    Chef's note: What is miso? Miso is a centuries-old, traditional Japanese seasoning, double fermented from whole soybeans into a paste. Miso is a living, fermented food containing natural digestive enzymes and other probiotic microorganisms which aid in digestion. Find it in the refrigerated dairy area of your grocery store and buy organic. If you eat gluten-free, be sure to read the label. Some miso is fermented with grain.

    Recipe Instructions

    Season fresh halibut fillets (or other white fish) with black pepper and granulated garlic. You won't need salt as miso is salty. Sear quickly in a non-stick pan with a little coconut oil until a golden crust is achieved. Turn fish over and spread with half of a sweet white miso and butter combination. You can use coconut butter or dairy butter. One clarification - use oil for the pan and butter with the miso for the paste/sauce.

    Splash in a bit of dry sake, white wine, or vegetable broth. Quickly cover pan with a lid and turn heat to low. The miso-butter melts over the top as the fish quickly finishes cooking, another 3-4 minutes. Cooking times will depend on the thickness of your fish fillets.

    Golden halibut in a gray bowl on black rice with miso butter sauce.

    Serving Suggestions

    Serve halibut over black rice or quinoa with a side of fresh roast asparagus or steamed snap or snow peas. Create a sauce using the miso butter. Remove the fish to a plate and whisk with the pan juices to create a sauce. Alternatively toss the extra miso with hot rice.

    More Seafood Recipes

    For more recipes with fish and shellfish, please check out the recipes page for fish and seafood.

    • Close up of a platter of salmon filets with lemon and herbs on a table.
      How to Make Steamed Salmon
    • baked lemon shrimp scampi
      Easy Baked Shrimp Scampi
    • Seared scallops with white wine
      Scallops with White Wine Sauce
    • Roast halibut with tomatoes.
      Baked Halibut with Roasted Cherry Tomatoes

    ⭐️Did You Make This Recipe?

    If you make pan seared halibut with miso butter, please add your comment. I appreciate your feedback and enjoy hearing from you. If you loved it, please give it a 5-star rating! They really help other readers.

    📖 Recipe

    Miso butter topped halibut on a bed of black rice in a gray bowl.

    Pan Seared Halibut with Miso Sauce

    Sally Cameron
    Sweet white miso and either coconut butter or dairy butter make an incredible savory sauce for topping seared fish. Its a quick, easy and healthy recipe that works with halibut or other firm, white fish filets, as well as seared scallops. Serve with Forbidden black rice and a green vegetable such as roast asparagus or steamed snap or snow peas.
    5 from 3 votes
    Prevent your screen from going dark
    Print Recipe Pin Recipe
    Prep Time 10 minutes mins
    Cook Time 10 minutes mins
    Total Time 20 minutes mins
    Course Entree, fish
    Cuisine Asian
    Servings 4
    Calories 239 kcal

    Equipment

    • Non-stick pan with lid

    Ingredients
      

    • 1 ¼ pounds halibut filet or other white fish
    • ½ teaspoon ground black pepper
    • ½ teaspoon granulated garlic
    • 2 tablespoons sweet white miso  soft at room temperature
    • 2 tablespoons unsalted butter dairy or coconut, soft at room temperature
    • 2 teaspoons coconut oil for the pan
    • ½ cup dry sake white wine, vegetable or fish broth

    Optional Garnish

    • 1 tablespoon chopped chives

    Instructions
     

    • Cut fish into four equal portions and season with black pepper and granulated garlic. Mix together miso and butter into a smooth paste.
    • Heat a non-stick pan over medium heat and add coconut oil. Place fish top side down into pan and sear until a golden crust forms. Turn fish over and spread half of the miso-butter paste on top of the filets. Splash in the sake or broth and quickly cover the pan with a lid. Fish will steam finish in 2-4 minutes depending on the thickness as the miso butter melts on top. Fish is done when a digital thermometer reads 145°F.
    • When fish is done, remove to a plate and keep warm. Use other half of miso butter to whisk with pan juices into a sauce or toss with hot rice.

    Nutrition

    Calories: 239kcalCarbohydrates: 3gProtein: 28gFat: 10gSaturated Fat: 6gPolyunsaturated Fat: 1gMonounsaturated Fat: 2gTrans Fat: 0.2gCholesterol: 85mgSodium: 416mgPotassium: 667mgFiber: 1gSugar: 1gVitamin A: 311IUVitamin C: 0.4mgCalcium: 21mgIron: 1mg
    Tried this recipe?Let us know how it was with a comment and leave a star rating!

    Oven Baked Chicken Wings

    01/13/2026 by Sally Cameron 2 Comments

    platter of oven baked chicken wings piled high with a buffalo ranch dressing in a small bowl.

    Oven baked chicken wings are my go-to when I want wings that are crispy, well-seasoned, and hard to resist-without air frying or firing up the grill. Baked at high heat, they cook evenly and develop that roasted skin with crispy edges wing lovers love. Season them with my homemade dry rub (or your own) for big flavor, or keep it classic with salt and pepper-either way, these wings are perfect for a crowd, game day, or an easy weeknight dinner.

    A platter of crisp seasoned oven baked chicken wings with carrots, celery and sauces.

    Whenever I roast a whole chicken, I'm the person who "quality checks" (devours) the wings before the carving even starts. These oven baked chicken wings are perfect for Super Bowl spreads and game day, but they're just as great for weekend hangouts, cookouts, or any night you want something fun and unfussy. Add buffalo sauce or Buffalo Ranch Dip, plus blue cheese, celery, and carrots, and you're ready to serve.

    [feast_advanced_jump_to]

    Why You'll Love These Oven Baked Chicken Wings

    • Easy party wings - Feeds a crowd, scales up fast, no messy frying.
    • No fryer, no grill, no drama - Just an oven, sheet pan, and wire rack.
    • Sauce options - Serve with buffalo sauce on the side, buffalo ranch dressing, or blue cheese dressing.
    • Crispy wings - High heat roasting, crisp skin, and juicy meat.

    Chef's Tip - Baking Soda vs. Baking Powder for Crispy Wings
    Baking soda increases the surface pH of chicken skin, which boosts browning and helps wings get crispy in the oven. Baking powder contains baking soda plus added acids and starch; it can add crispness, but the results are different and can taste slightly "off" if you use too much. For crispy baked chicken wings, use baking soda sparingly and measure it as written.

    Ingredients You'll Need

    A bowl of raw chicken wings, oil, spices, and baking soda to make oven wings.
    • Chicken wings - See buying notes below for chicken wing options.
    • Seasoning - Use my spiced dry rub blend, your favorite rub, classic salt & pepper, or lemon pepper.
    • Oil - Helps the wings brown evenly and blends. Use a neutral healthy oil or avocado oil spray.
    • Baking soda - A small amount mixed into the dry rub helps dry the skin and promotes crispier oven-baked wings. Baking soda, not powder.

    Please see the recipe card for measurements, salt, and pepper.

    Chef's Tip - Buying Chicken Wings
    Most stores sell "party wings," a mix of flats and drumettes, but they're often on the small side and skimpy on meat. I prefer to buy whole wings and cut them at the joint myself with sturdy kitchen shears (poultry shears). You'll get larger, meatier pieces this way. Some stores also sell just flats or just drumettes, so choose the style you like and check what's available at your local market.

    How to Make Oven Baked Chicken Wings

    Pre-heat the oven to 425°F. Set a wire rack over a rimmed baking sheet lined with parchment for easier clean up.

    Cutting whole chicken wings into flats and drumettes with kitchen shears for baked wings.
    1. For whole wings, cut them apart at the joint with poultry shears, and snip the little inside wing shape of fat.
    Drying chicken wings well on paper towels.
    1. Dry the wings really well with paper towels.
    Chicken wing parts being oiled before seasoning, in a glass bowl.
    1. Toss wings with 2 teaspoons of oil or use avocado spray, and lightly spray.
    Chicken wing flats and drumettes seasoned with dry rub before baking.
    1. Mix the dry tub and baking soda, then toss the wings with the seasoning or shake in a zip bag to coat.
    Party wings ready for baking arranged on a wire rack over a sheet pan.
    1. Arrange chicken wings on a lightly sprayed wired rack, nice side down first.
    Oven baked chicken wings finished baking to a crisp golden brown.
    1. Bake chicken wings at 425°F for 35-50 minutes, flipping once at 20-25 minutes. Start checking at 35 minutes. Wings are done when they're deeply browned and crisp and register 180-200°F internally.

    Serving Suggestions

    Pile the baked wings onto a platter and serve with your favorite buffalo sauce, buffalo ranch or blue cheese dressing, plus crisp celery and carrot sticks. This keeps the wings crispy (the whole point) and lets everyone choose their heat level. If you'd rather sauce them, lightly brush a few wings and leave the rest plain so you've got options for all your guests.

    Can I make these wings ahead of time?
    They're best fresh out of the oven, but you can make wings ahead and reheat baked wings to keep them crispy. Reheat on a wire rack in a 350°F oven until hot and crisp again, about 15-20 minutes. Avoid the microwave-it softens the skin.

    Recipe FAQs

    How do you get oven baked chicken wings crispy?

    Dry the wings very well with paper towels, bake them on a wire rack so air can circulate, and use high heat. A small amount of baking soda mixed into the seasoning boosts browning and helps the skin crisp-just measure it and use it sparingly.

    Do I have to use baking soda?

    No. It helps wings crisp and brown more deeply, but they'll still be good without it-just a little less crisp.

    Can I use whole wings instead of flats and drumettes?

    Yes. Whole wings are often meatier and can be baked as-is or cut at the joint into drumettes and flats with kitchen shears. Larger wings may need a few extra minutes-cook until deeply browned and 180-200°F internally.

    How many wings should I plan per person?

    Plan on about ½ pound per person for appetizer/party wings. Three pounds serves about 6 people; four pounds serves about 8, depending on appetites. For a meal, figure ¾ pound - 1 pound per person.

    How long do you bake chicken wings at 425°F?

    At 425°F, wings typically take 35-50 minutes, flipping once at 20-25 minutes.

    More Great Appetizer Recipes

    From garlicky baked shrimp and homemade smoked salmon, to deviled eggs and artichoke dip, check out the appetizer recipe index page for more ideas!

    • A small appetizer plate of golden baked shrimp on wooden skewers with cocktail sauce.
      Simple Baked Shrimp With Lemon Garlic Marinade
    • Flaked smoked salmon from a pellet grill on a serving board with lemons.
      Smoked Salmon on a Pellet Grill
    • deviled eggs 2022
      Best Deviled Eggs Recipe (Step by Step)

    📖 Recipe

    platter of oven baked chicken wings piled high with a buffalo ranch dressing in a small bowl.

    Oven Baked Chicken Wings

    Sally Cameron
    Crispy-skinned and irresistible, oven baked chicken wings are great for game days, holidays, parties, and just plain fun.
    5 from 1 vote
    Prevent your screen from going dark
    Print Recipe Pin Recipe
    Course Appetizer
    Cuisine American
    Servings 4 as an appetizer
    Calories 296 kcal

    Equipment

    • 1 Rimmed baking sheet half sheet size
    • 1 Wire cooling rack
    • Parchment paper for easier clean-up, or use aluminum foil

    Ingredients
      

    Chicken wings

    • 2 pounds chicken wings SEE NOTES BELOW
    • 3 tablespoons your favorite dry rub recipe link for my rub is below
    • 1 ½ teaspoons baking soda
    • 2 teaspoons neutral high heat oil or avocado oil spray
    • ½ teaspoon salt **if the rub is salt-free

    Instructions
     

    Get ready to bake

    • Pre-heat the oven to 425°. Line a baking sheet with parchment or foil, place a wire rack on top.

    Trim wings

    • If you purchased whole wings, trim off the wing tips with poultry shears or kitchen shears, then cut them at the joint to separate. Also trim that that little wing-shaped piece of fat inside the "v". Next, pat wings totally dry with paper towels.

    Season wings

    • Combine the dry rub and the baking soda.m Add salt if the rub does not have salt. Add dry wings to a medium bowl and toss lightly with oil or avocado spray. Toss with the spice mixture. Alternatively add to a zip bag, and toss with the spices to coat. Wings don't need a heavy coating, just an even one.
    • Lay wings flat on the wire rack leaving some room for air circulation. Start wings "pretty side" down so they finish skin-side up for the best browning and presentation.

    Bake wings

    • Bake until deeply browned and crisp, 35-50 minutes, turning every 20-25 minutes. Ovens vary, so start checking at 35 minutes. Wings are done when they register 180°F-200°F internally. For a little extra shine at the end, give them a quick, light spray of avocado oil (optional).

    To serve wings

    • Pile wings on a platter and serve with carrot sticks, celery sticks, radishes, and other veggies, plus buffalo sauce and my Buffalo Ranch Dip, or blue cheese dressing.

    Notes

    For making the wings ahead, they're best fresh out of the oven, but you can reheat them on a wire rack in a hot oven until crisp again. Avoid the microwave-it softens the skin.
    Buying chicken wings: Most stores sell "party wings," a mix of flats and drumettes, but they're often on the small side and skimpy on meat. I prefer to buy whole wings and cut them at the joint myself with sturdy kitchen shears (poultry shears). You'll get larger, meatier pieces this way. Some stores also sell just flats or just drumettes, so choose the style you like and check what's available at your local market.
    Scalable formula per 1 lb wings for a crowd:
    • 1½ tablespoon dry rub
    • ¾ teaspoon baking soda
    • light oil spray (or ½-1 teaspoon oil)


    Nutrition

    Calories: 296kcalCarbohydrates: 3gProtein: 23gFat: 21gSaturated Fat: 6gPolyunsaturated Fat: 5gMonounsaturated Fat: 9gTrans Fat: 0.2gCholesterol: 94mgSodium: 504mgPotassium: 311mgFiber: 2gSugar: 1gVitamin A: 2766IUVitamin C: 1mgCalcium: 27mgIron: 2mg
    Tried this recipe?Let us know how it was with a comment and leave a star rating!

    Greek Avgolemono Soup Recipe (Lemon Chicken Soup)

    01/06/2026 by Sally Cameron Leave a Comment

    A bowl of Greek avgolemono chicken soup with fresh dill in a white bowl.

    This Greek avgolemono soup recipe is a classic, nourishing Greek lemon chicken soup-perfect for cold winter days with bright lemon flavor. Avgolemono is finished with eggs and lemon juice gently tempered with hot broth, then whisked back into the pot. The result is a wonderfully creamy texture without a drop of cream, with its signature velvety body and pale golden color. Add tender orzo (gluten-free if you like) and a shower of fresh dill.

    Greek lemon chicken soup, called avgolemono, in a white bowl with lemon slice and fresh dill.

    I fell in love with avgolemono at a little soup spot years ago. One spoonful and I was hooked. I've always loved lemon (my two trees happily prove the point), and this Greek lemon chicken soup shows lemon at its best: brightening the broth, lifting the flavors, and balancing savory chicken. The creamy texture comes from tempered eggs, not dairy, and fresh dill adds that final Greek note. Finish it with orzo-gluten-free or traditional-and you've got a bowl that truly satisfies.

    [feast_advanced_jump_to]

    What Makes Greek Avgolemono Soup Special

    • Bright, lemony flavor - Wakes up classic chicken soup.
    • Nourishing and satisfying - Protein + broth + orzo = comfort.
    • Creamy without cream - Thanks to the egg-lemon tempering method.
    • Easy & adaptable - Gluten-free orzo option.
    • Uses leftover chicken - Perfect for roast chicken leftovers or rotisserie chicken.

    For another terrific chicken soup, try this chicken vegetable soup recipe.

    Ingredients You'll Need

    Ingredients for Greek avgolemono soup in prep bowls on the counter.
    • Chicken - Cooked, shredded chicken breast (or rotisserie) keeps this fast and easy.
    • Onion - Part of the aromatic flavor base.
    • Celery - Adds savory, earthy depth and classic soup aroma.
    • Carrot - Brings natural sweetness and balance to the lemon.
    • Garlic - For flavor and a subtle savory backbone.
    • Broth - Use low-sodium chicken broth, homemade broth is best.
    • Lemon - The signature bright acidity that makes avgolemono what is is.
    • Eggs - Create the soup's silky, creamy texture when tempered into hot broth.
    • Fresh dill - Adds that unmistakable Greek finish; fresh is worth it here.
    • Orzo - Rice shaped pasta. Gives the soup substance; use regular or gluten-free orzo as needed.

    Please see the recipe card for measurements, salt, and pepper.

    Try this recipe to make easy roast chicken breast for the soup! Cook once eat twice, dinner one night and soup the next.

    Substitutions & Variations

    • Using raw chicken instead: If you prefer, you can simmer a 1-1¼ pounds bone-in, skinless chicken breast directly in the broth until cooked through, then shred and return to the pot. This adds flavor but takes a little longer. Cut the breast in half crosswise for faster cooking. After cooking, remove bones and shred, then add back to the pot.
    • Swap the orzo for cooked rice, either white or brown, or another tiny pasta shape.

    If you love lemon like I do, try this lemon blender marinade for chicken. It's one of my go-to recipes.

    Chef's Tip - Tempering: Keeping Avgolemono Silky
    Whisk the eggs and lemon juice together until smooth. Then temper: slowly drizzle in about 1 cup of hot broth while whisking constantly to gently warm the mixture. Once it's warm and fluid, whisk it back into the pot off heat (or on very low). Don't let the soup boil after adding the egg-lemon mixture-gentle heat keeps it creamy and velvety and not curdled or scrambled.

    How to Make Avgolemono Soup

    Cooked orzo pasta in a sieve over a bowl being rinsed and drained.
    1. Cook orzo, drain and rinse in cool water, toss with a tiny bit of olive oil. Best to cook it separately.
    Sautéing onions and garlic in a dutch oven.
    1. Saute onions in olive oil until soft, 3-4 minutes on med-low, then add garlic for 1 minute longer.
    Onion, carrots, celery , and garlic cooking in a large pot.
    1. Add the carrot and celery and cook until softened, 3-4 minutes.
    A pot of golden chicken broth with cooked vegetables for a soup base.
    1. Add the broth and simmer 5 minutes to blend flavors.
    Whisking eggs and lemon juice together in a glass bowl.

    5. Whisk 2 whole eggs + 1 egg yolk with lemon juice until smooth.

    Tempering eggs, broth and lemon juice together with a silver whisk.

    6. Slowly whisk in 1-2 cups of hot chicken broth (called tempering) so they do not scramble when added to the soup.

    Pouring egg-broth-lemon juice mixture into the sop base.

    7. Add the tempered eggs into the soup and stir.

    A golden creamy soup being cooked for Greek avgolemono soup.

    8. Stir soup until smooth over low heat. Do not boil or it might scramble.

    Shredded chicken breast being added to avgolemono lemon chicken soup.

    9. Stir in the chicken and orzo.

    A bowl of Greek avgolemono chicken soup with fresh dill in a white bowl.

    10. Garnish with fresh chopped dill and a little extra lemon and enjoy!

    Serving Suggestions

    Avgolemono soup is best served warm, garnished with fresh herbs like parsley or dill, and can be accompanied by toasted garlic bread or a light Greek salad. Serve with lemon wedges for a more lemony taste if preferred.

    Storing Greek Lemon Chicken Soup

    Store leftovers in an airtight container in the refrigerator for up to 3 days. Reheat gently over low heat-do not boil as it will effect the silky texture and the tempered egg-lemon mixture.

    Can avgolemono soup be frozen?
    Freezing lemon chicken soup is not recommended. The egg-lemon mixture can separate and become grainy when thawed.

    Lemon Chicken Soup FAQs

    What is avgolemono soup?

    Avgolemono is a traditional Greek soup finished with a mixture of eggs and lemon juice that's gently tempered with hot broth, creating a silky, creamy texture without any cream.

    Why didn't my avgolemono turn creamy?

    The egg-lemon mixture likely wasn't tempered slowly enough, or the soup was too hot. Whisk the eggs and lemon together, slowly add hot broth to warm them, then stir back into the soup over low heat. Do not boil after adding.

    Can avgolemono soup be made ahead?

    Yes. For best results, make the soup base ahead and store it without the pasta. Add the cooked orzo and gently reheat just before serving to keep the texture light and silky.

    Can I add more lemon?

    Yes. Lemon flavor varies by preference and by the acidity of the lemons themselves (such as Meyer lemon vs Eureka). Taste and adjust with more lemon juice at the end if needed.

    More Great Soup Recipes!

    From creamy smooth soups to hearty options that are almost a meal themselves, check out the soups recipe index for more inspiration!

    • A bowl of creamy, golde leek and potato soups garnished with croutons and olive oil.
      Leek and Potato Soup (No Cream)
    • A dutch oven full of chicken minestrone soup with a bowl on the side.
      Hearty Chicken Minestrone Soup
    • A gray bowl of chunky leek mushroom soup with a spoon beside bowl.
      Creamy Leek and Mushroom Soup Recipe
    • Gray bowl with bean and kale soup topped with parmesan and basil.
      Hearty Tuscan White Bean Soup

    Did You Make This Recipe?

    If you make this Greek avgolemono soup recipe, please comment and let me know how you liked it. I love hearing from you and your comments are enjoyed by other readers. And please leave a star rating! Thanks for supporting my site.

    📖 Recipe

    A bowl of Greek avgolemono chicken soup with fresh dill in a white bowl.

    Greek Avgolemono Soup Recipe (Lemon Chicken Soup)

    Sally Cameron
    No ratings yet
    Prevent your screen from going dark
    Print Recipe Pin Recipe
    Course Soup
    Cuisine Greek
    Servings 6 Yield 2 quarts
    Calories 280 kcal

    Equipment

    • Large Dutch oven or soup pot 5 ½ - 6 quarts

    Ingredients
      

    • 1-1 ½ cups cooked orzo pasta GF or regular, note below
    • 2 tablespoons extra virgin olive oil
    • 1 cup chopped onion
    • 2 large garlic cloves finely chopped and smeared to a paste or microplaned
    • ½ cup finely chopped celery
    • ½ cup finely chopped carrot
    • 5 cups good quality chicken broth, low sodium preferably homemade
    • 1 large bay leaf fresh or dried
    • 2 cups shredded cooked chicken 11 ounces
    • 3 large eggs use 2 whole eggs + 1 extra yolk
    • 3-4 tablespoons fresh squeezed lemon juice
    • 1 ½ - 2 tablespoons fresh chopped dill
    • ½ teaspoon sea salt
    • ¼ teaspoon black pepper optional

    Instructions
     

    Cook the pasta

    • Start by cooking the orzo according to package directions. Drain and rinse under cool water to stop the cooking process and remove excess starch. Save for adding to the soup, adding a tiny bit of olive oil to the pasta so it does not stick together in a clump.

    Start the soup: cook the vegetables

    • Heat olive oil in the pot over medium heat, cook the chopped onion until soft, 3-4 minutes. add the garlic and cook 1 more minute. Add the celery and carrot and cook until soft, 3-4 minutes.

    Add the broth

    • Add 4 cups of broth to the pot and the bay leaf. Simmer for 5-10 minutes to blend the flavors and heat the broth. Add the salt (taste first as broth salt levels vary widely unless homemade). Turn the heat down to low before tempering the eggs (so they do not scramble).

    Temper the eggs

    • Whisk 2 whole eggs plus the 3xtra yolk until light and frothy, then whisk in lemon juice. While whisking constantly, slowly drizzle in 1-2 cups hot broth until the mixture is very warm. Reduce heat to low, then slowly pour the egg-lemon mixture back into the pot while stirring. After adding the egg-lemon, keep heat on LOW and do not boil/simmer.

    Add the chicken and pasta to serve

    • Add the shredded chicken and cooked orzo; heat gently until warmed through. Do not boil or get the soup too hot (because of the eggs).

    Make any adjustments

    • Taste and adjust with more lemon juice, salt and pepper. Remove bay leaf before serving. If you want a more brothy soup add the last 1 cup of broth (or more). Add the dill to each bowl before serving for the best flavor.

    Notes

    Cooking the orzo separately keeps the soup light and silky and makes leftovers much better the next day.
    Rinse pasta after cooking: You can rinse the cooked orzo under cold water to stop the cooking process and remove excess starch, which helps prevent it from clumping in the soup.
    Add pasta at the End: Stir the pre-cooked orzo into the soup just before serving, only heating it through for a few minutes, to ensure the best texture. Do not boil the soup after adding the delicate egg-lemon (avgolemono) mixture, as this could cause the eggs to curdle. 
    Orzo doubles or triples in quantity from the raw volume. Wheat generally triples and the gluten-free generally doubles. So ½ cup of wheat orzo = 1 ½ cups of cooked orzo, and ¾ cup of GF orzo = 1 ½ cup cooked. Determine how much you want to add, based upon how brothy you want the soup.

    Nutrition

    Serving: 1.5cupsCalories: 280kcalCarbohydrates: 22gProtein: 22gFat: 12gSaturated Fat: 3gPolyunsaturated Fat: 2gMonounsaturated Fat: 6gTrans Fat: 0.01gCholesterol: 128mgSodium: 339mgPotassium: 440mgFiber: 2gSugar: 3gVitamin A: 1984IUVitamin C: 6mgCalcium: 47mgIron: 2mg
    Tried this recipe?Let us know how it was with a comment and leave a star rating!

    Shrimp Tom Yum Soup

    04/11/2014 by Sally Cameron Leave a Comment

    Thai shrimp soup called Tom Yum in bowls with shrimp, jalapenos, cilantro, and limes.

    Perfumed with aromatic lemongrass and ginger, bright with fresh lime, and warmed by a touch of jalapeño heat, this is my version of classic Thai shrimp tom yum soup. It's beautiful in the bowl and even better on the spoon, and it comes together in under 30 minutes for a quick but healthy meal. Make it mild or make it spicy-either way, it's light, fresh, and seriously delicious.

    Brothy shrimp Tom Yum soup in rustic bowls with chile peppers, vegetables, and limes.
    Thai Shrimp Soup

    When the days are chilly, gray, or just plain dreary, there's nothing like a bowl of something warm and fragrant. I first fell in love with this soup in culinary school, training with a Singaporean chef who taught me how simple ingredients-lemongrass, ginger, lime, chiles-can create incredible depth of flavor without feeling heavy. This version keeps all of that freshness and lightness, but is streamlined for home cooks: healthy, naturally gluten-free, and easy enough to make on a weeknight.

    [feast_advanced_jump_to]

    Shrimp Tom Yum Soup Highlights

    • Light but full of flavor - Bright lemongrass, ginger, lime, and a little chile heat give you big flavor.
    • Quick and weeknight-friendly - Ready in about 30 minutes, so it fits into a busy day.
    • Fresh and healthy - Naturally gluten-free, broth-based, and packed with lean protein and vegetables.
    • Easy to customize - Make it mild or spicy and add extra veggies if you like-very forgiving and flexible.

    If you enjoy these flavors, you might also like my lemongrass chicken recipe.

    Ingredients You'll Need

    • Coconut oil - pairs well with Thai flavors, use cold pressed virgin coconut oil.
    • Lemongrass - Perfumes the soup with bright, citrusy aroma.
    • Garlic - Builds a savory backbone and deepens the flavor.
    • Ginger - Grated fresh ginger adds warm, peppery zing and lifts the whole soup.
    • Jalapeño - Seeded and finely chopped for gentle, adjustable heat.
    • Broth - Chicken or vegetable broth, good-quality or homemade broth makes a big difference.
    • Shrimp - Medium shrimp, cleaned and deveined, add lean protein. If frozen, thaw fully and pat dry.
    • Mushrooms - Shiitakes, for umami depth and a tender, "meaty" texture.
    • Roma tomatoes - Seeded and chopped small to add gentle acidity, sweetness, and color.
    • Snow peas - Add fresh green crunch.
    • Limes - Zested and juiced; perfumes the broth and provides the classic sour note of Tom Yum.
    • Fish sauce - Optional but recommended for salty, savory Thai-style umami and depth.
    • Cilantro - Chopped fresh leaves stirred in at the end for herbal brightness and color.

    Please see the recipe card for measurements.

    Substitutions and Variations

    • No shitake mushrooms - Use white or brown (cremini) mushrooms.
    • Spicier - Use hotter peppers such as serrano or of course, Thai chilies.
    • Milder soup - Use half a jalapeño (or skip it).

    Chef's Tip - How to Work With Lemongrass
    Lemongrass is a pale green stalk used a lot in Thai and Vietnamese cooking. It has an exotic, lemony scent with a hint of ginger, like nothing else. You'll usually find it in the produce section near the herbs, or in Asian markets. To use it, trim off the root end and any tough outer layers (if not pre-trimmed), then use the tender inner part. For this soup, the easiest method is to grate it on a Microplane so it almost melts into the broth-no fibrous pieces, just fragrant, citrusy flavor in every spoonful.

    How to Make Shrimp Tom Yum Soup

    1. Sauté aromatics - Warm coconut oil in a pot, then gently cook the lemongrass, garlic, ginger, and jalapeño until fragrant.
    2. Simmer the broth - Add the chicken or vegetable broth, bring to a simmer, and let the flavors infuse for a few minutes.
    3. Add shrimp and veggies - Stir in the shrimp, mushrooms, tomatoes, and snow peas and cook just until the shrimp turn pink and the vegetables are tender.
    4. Finish the soup - Remove from the heat and add lime zest and juice, fish sauce (if using), and cilantro.
    5. Taste and serve - Adjust lime and heat to your liking, then ladle into bowls and serve with extra lime on the side.
    Thai shrimp soup called Tom Yum in bowls with shrimp, jalapenos, cilantro, and limes.
    Thai Shrimp Soup

    Chef's Tip - Buying and Using Fish Sauce
    If you've never cooked with fish sauce, it can be a little foreign to a Western palate. It smells a bit strong and "fishy" in the bottle, but in the soup it adds salty, savory umami and a deep, rounded flavor you can't quite get any other way. Start with a small splash, taste, and add more only if you like. Use a good-quality Vietnamese fish sauce (the best brand is Red Boat) made with just anchovies and salt, found in the Asian foods aisle.

    Serving Tom Yum

    Serve Shrimp Tom Yum Soup hot in low, wide bowls so you get a little of everything in each spoonful-broth, shrimp, mushrooms, and veggies. I like to garnish with extra cilantro and lime wedges at the table so everyone can adjust the sourness to their taste. For a more filling meal, serve it with a side of steamed jasmine rice or a simple green salad.

    Storing and Re-Heating

    This soup is best enjoyed freshly made because shrimp can easily overcook when reheated. If you do have leftovers, refrigerate them in an airtight container for up to 1 day and reheat very gently over low heat just until the shrimp are warmed through-do not boil. I don't recommend freezing this soup, as the shrimp and vegetables lose their texture.

    If you know ahead of time that you'll want leftovers, you can cook the broth and vegetables first, then add the shrimp only to the portions you're serving and keep the extra broth separate in the fridge. Add fresh shrimp and simmer just a few minutes when you reheat.

    Two bowls of Thai shrimp soup on a wooden table with a small bowl of lime wedges.
    Thai Shrimp Soup

    Recipe FAQs

    Can I use frozen shrimp?

    Yes. Frozen shrimp work well here-just thaw them completely in the refrigerator and pat them dry before adding to the soup. They'll cook quickly in the hot broth.

    Can I make this soup ahead?

    You can make the broth and vegetables a day ahead, then cool and refrigerate. For the best texture, add the shrimp and snow peas when you reheat the soup just before serving so they don't overcook.

    What can I use instead of fish sauce?

    If you don't want to use fish sauce, you can add a splash of tamari or coconut aminos for a gentler umami flavor, then adjust the salt to taste. The soup will still be delicious-just a little less "classic" in its Thai flavor profile.

    If You Make This Soup

    Please leave me a comment, I love hearing from you and how you enjoyed Tom Yum. Your comments help other readers too. Thanks for supporting my site!

    📖 Recipe

    Tom Yum Thai Soup With Shrimp

    Sally Cameron
    Yum is what you will say and when make this easy Thai-inspired soup called Tom Yum. Colorful, flavorful, easy and healthy, it's a light soup, nice for lunch or dinner. This recipe doubles easily. 
    5 from 1 vote
    Prevent your screen from going dark
    Print Recipe Pin Recipe
    Prep Time 10 minutes mins
    Cook Time 10 minutes mins
    Total Time 20 minutes mins
    Course Soup
    Cuisine Asian, Thai
    Servings 4
    Calories 302 kcal

    Equipment

    • A large pot for the soup

    Ingredients
      

    • 1 tablespoon unrefined coconut oil
    • 2 tablespoons finely grated lemongrass use a microplane
    • 3-4 large garlic cloves finely chopped
    • 2 tablespoons finely grated ginger
    • 1 jalapeño pepper seeded and chopped fine
    • 2 quarts chicken or vegetable broth 8 cups, preferably homemade
    • 1 pound medium shrimp cleaned and deveined
    • 8 ounces shitake mushrooms white or brown will work, thinly sliced
    • 2 large Roma tomatoes seeded and chopped small
    • 8 ounces snow peas quarter pound, sliced thin crosswise
    • 2 limes zested and juiced
    • 2-3 teaspoons fish sauce optional
    • 1 tablespoon chopped cilantro leaves

    Instructions
     

    • Heat oil in a medium pot over medium low heat.  And add lemongrass, garlic, ginger and chili pepper. Cook until softened and fragrant,  about 2 minutes.
    • Add broth and bring to a boil. Turn broth down to low (simmer) and add shrimp, mushrooms, tomatoes, and snow peas. Simmer until shrimp turn pink and vegetables are tender, just a few minutes. Add lime juice and zest, fish sauce and cilantro. Serve in low wide bowls.

    Notes

    • If you are heat sensitive use half the chili and serve some fresh to be added if you want more heat.
    • If you are a chili head and love heat, buy fresh Thai chiles instead of jalapeños, but be careful!
    • To make this a heartier soup, add cooked brown rice or udon noodles in the bottom of the bowl and pour broth, shrimp and vegetables over the top.

    Nutrition

    Calories: 302kcalCarbohydrates: 23gProtein: 37gFat: 9gSaturated Fat: 5gCholesterol: 286mgSodium: 1506mgPotassium: 1043mgFiber: 5gSugar: 7gVitamin A: 1226IUVitamin C: 66mgCalcium: 237mgIron: 6mg
    Tried this recipe?Let us know how it was with a comment and leave a star rating!

    Ham and Cheese Frittata

    12/23/2025 by Sally Cameron Leave a Comment

    A golden cheesy frittata in a cast iron skillet sprinkled with parmesan and chopped parsley.

    This ham and cheese frittata is an easy, oven-baked frittata that comes together in minutes and bakes up golden and full of flavor. Naturally gluten-free and protein-packed, it's perfect for brunch, weekend guests, meal prep, or a fast dinner. One bowl, one skillet, zero fuss-and you can easily customize the cheese and fillings.

    A golden puffed ham and cheese frittata in a cast iron skillet with parmesan on the side.

    Because my husband's favorite omelet is ham and cheese, I created this easy ham and cheese frittata recipe to take those same classic flavors and turn them into something shareable, sliceable, and effortless. Whisk everything together, pour it into a cast-iron skillet, and let the oven do the work. It's the perfect answer when you want the comfort of an omelet but need to feed more than one person-especially on busy mornings or holiday weekends.

    [feast_advanced_jump_to]

    Ham and Cheese Frittata Highlights

    • Prep-ahead friendly - Dice the ham, grate the cheese, and cook any vegetables ahead so all you have to do is whisk, assemble, and bake.
    • One-pan convenience - Cook, bake, and serve from the same oven-safe skillet for easy cleanup.
    • Crowd-pleasing - Familiar flavors, pretty presentation, and satisfying protein make it a hit with family or guests.

    What You'll Need

    Ham and cheese frittata ingredients in prep bowls on a counter.
    • Eggs - The base of all frittatas for a tender, custardy structure.
    • Half-and-half - Adds richness and keeps the eggs soft and creamy. Whole milk works too. Skip low fat to avoid a rubbery or watery frittata.
    • Olive oil or unsalted butter - Used for sautéing the aromatics and preventing sticking; butter adds richness, olive oil keeps it lighter.
    • Leek - Mild, sweet onion flavor that enhances the eggs without overpowering the ham and cheese. Shallot works too, or finely chopped white onion.
    • Ham - Savory, salty bites throughout the frittata; ideal for using leftover holiday ham or a good-quality ham steak. Check it's GF if needed.
    • Cheddar cheese - Classic melty flavor that pairs perfectly with ham. Buy a block and grate it yourself.
    • Gruyère cheese - Adds nutty depth, great melt, and keeps the flavor rich.
    • Fresh herbs - Parsley adds color and freshness in the filling.

    Please see thee recipe card for measurements, salt and pepper.

    Substitutions and Variations

    • Cheese - Try Fontina or goat cheese for a tangy twist.
    • Meat swaps- Change up the flavor with chopped cooked chicken sausage, turkey sausage, or even crumbled cooked bacon.
    • Add veggies - Add a cup of chopped broccoli, broccolini, or asparagus, cooked or blanched first, not raw.

    Chef's Tip - Choose the Right Pan for a Tender Frittata
    Use a 10-12 inch cast-iron (I use a 10"), non-stick, or ceramic-coated skillet for the most reliable results. Stainless steel sticks easily-even with butter-so it's not ideal for frittatas. A smaller pan yields a thicker frittata with a slightly longer bake time; a larger pan produces a thinner one that cooks more quickly.

    How to a Make a Ham and Cheese Frittata

    Cast iron skillet with chopped leeks cooking in butter on thte stovetop.
    1. Saute thinly sliced leek in butter until soft, 2-3 minutes. Do not brown them.
    Pink diced ham steak aded to a skillet of sauteing leeks for a frittata.

    2. Add the diced ham and stir.

    Building layers of a frittata vegetables base now adding green chopped parsley.

    3. Add the chopped parsley.

    Cast iron pan showing orange and white grated cheese layer for a frittata.

    4. Layer on the cheddar and gruyere cheese.

    A glass bowl of eggs white and yolks with a whisk on a marble counter.

    5. Whisk the eggs until smooth.

    Whisking together eggs and half and half for a custard in a glass bowl with silver whisk.

    6. Add the half and half.

    Pouring whisked eggs over vegetables and cheese in a black fry pan.

    7. Pour the egg mixture over the vegetables, ham, and cheese.

    A golden frittata in a cast iron skillet going into the oven topped with parmesan cheese.

    8. Sprinkle the top with parmesan cheese and place in the oven to bake.

    Ham and cheese frittata in a cast iron skillet on the stovetop.

    9. Bake until golden and puffed, 35-40 minutes at 350°F.

    Chef's Tip - How to Tell When a Frittata Is Done
    A frittata is done when the center is just set but still looks moist-not wet or jiggly. The edges will be lightly golden and slightly puffed, and the top will no longer appear shiny. If you gently nudge the pan, the middle should move as one soft piece rather than wobbling like liquid. Remember, it will continue to firm as it rests, so avoid over-baking or the eggs can turn rubbery. If you prefer a creamier texture or plan to make the frittata ahead and re-heat, bake on the lower end of the time range so it stays more custardy after reheating.

    Make Ahead Frittata Prep

    Make your morning easier by prepping the components up to 2 days ahead of time.

    • Dice the ham steak.
    • Grate the cheeses.
    • Clean and chop the leek.
    • Blanch and chop any veggies if using.

    Store each ingredient separately in airtight containers in the refrigerator, then assemble and bake just before serving for the best texture and lift. When ready to bake, simply sauté the leek, add the broccolini and sausage, sprinkle on the cheese, pour in the custard, and bake.

    A slice of ham and cheese frittata on a plate with orange wedges and salad.

    Serving Suggestions

    Ham and cheese frittata is satisfying on its own, but it pairs beautifully with:

    • Roasted red potatoes or Dutch baby yellow potatoes.
    • A simple green salad with a light vinaigrette.
    • Fresh berries, melon, or citrus, or a combination fruit salad.
    • Toast or carrot cake muffins.

    Storage and Leftovers

    Cool frittata completely, then store slices in an airtight container in the refrigerator for up to 3 days.

    Recipe FAQs

    Can I use pre-shredded cheese?

    You can, but freshly grated cheese melts more smoothly and gives the frittata a creamier texture. Pre-shredded cheeses often contain anti-caking starches that may keep the cheese from melting evenly.

    What kind of ham works best?

    Any fully cooked ham is fine: leftover holiday ham and a ham steak, diced work great. Thicker deli slices can work too. Avoid honey-glazed varieties as they tend to be sweet.

    Can I add vegetables?

    Absolutely. Sauté any vegetables first to remove excess moisture - great options include bell peppers, spinach, onions, mushrooms, or asparagus. Add them to the pan before the egg mixture.

    Can I make this ahead of time?

    Yes. A ham and cheese frittata is great for making ahead. Let it cool, then cover and refrigerate for up to 3 days. You can reheat individual slices in the microwave on low power, or warm larger portions in a 300°F oven until just heated through. It's also delicious at room temperature, which makes it perfect for holiday brunches, meal prep, or busy weekday mornings.

    How to reheat a frittata?

    To reheat the frittata, place in a 300°F oven until warmed through. If your frittata was baked until fully firm and golden on top, it may reheat a bit drier. Covering it with foil helps preserve moisture.

    More Breakfast Recipes

    From puffy dutch baby pancakes, to crispy light waffles, irresistible muffins, and an easy breakfast casserole, there are breakfast recipes to make your mornings worth getting up!

    • Dutch baby oven pancakes
      Gluten-Free Dutch Baby (German Pancakes)
    • Close up of crispy golden waffles with blueberries, raspberries, strawberries.
      Gluten Free Waffles
    • carrot cake muffins
      Gluten-Free Carrot Cake Muffins (dairy-free)
    • A piece of golden baked breakfast casserole with eggs on a plate with a fork and dollop of sour cream on top.
      Gluten Free Breakfast Casserole Recipe

    If You Make This Recipe

    If you enjoy this ham and cheese frittata, please comment and let me know. I love to hear from you. Did you make your own variation? Tell me about it, and it helps other readers too. And please give it a ⭐. Thanks for supporting my site.

    📖 Recipe

    A golden cheesy frittata in a cast iron skillet sprinkled with parmesan and chopped parsley.

    Ham and Cheese Frittata

    Sally Cameron
    This ham and cheese frittata is a flavorful, protein-packed dish. It's easy to make ahead and perfect for breakfast, brunch, or a light dinner, and easily prepped ahead. Leftovers reheat well. Serve it up with fruit and muffins for a terrific start to the day.
    No ratings yet
    Prevent your screen from going dark
    Print Recipe Pin Recipe
    Prep Time 15 minutes mins
    Cook Time 35 minutes mins
    Total Time 50 minutes mins
    Course Breakfast, Brunch, Dinner, lunch
    Cuisine American
    Servings 6
    Calories 335 kcal

    Equipment

    • 10 ½" Cast iron skillet well seasoned

    Ingredients
      

    • 1 cup thinly sliced leek or ½ cup chopped shallot or white onion
    • 1 tablespoon unsalted butter
    • 4 - 6 ounces cooked ham, diced small ham steak or leftover holiday ham
    • 1 tablespoon fresh chopped Italian parsley
    • 1 cup grated cheddar buy a block, grate yourself
    • ½ cup grated gruyere cheese
    • 10 large eggs
    • ½ cup half and half
    • ¼ teaspoon sea salt
    • ¼ teaspoon black pepper
    • ¼ cup grated parmesan cheese 1 ounce, to top frittata

    Instructions
     

    • Pre-heat the oven to 350°F.

    Prep the leek

    • Slice the dark green tops off the leek and discard, use only the light green and white part. Slice in half lengthwise and run under cold water to remove and grit or sand. Lay flat on a cutting board and chop into thin pieces.

    Grate the cheese

    • With a hand grater or food processor, grate the cheeses.

    Cook the leeks

    • In a 10-12 inch well-seasoned cast iron skillet or oven-safe sauté pan, melt the butter over medium to medium-low heat. Add the leek and cook 3-4 minutes until softened. Don't brown it. Turn heat down if needed.

    Make the frittata

    • Add the chopped ham to the skillet, stirring to combine and warm through. Sprinkle the Cheddar and Gruyère evenly over the top, then the parsley.
    • In a medium bowl, whisk the eggs, half-and-half, salt, and pepper until smooth. Pour the custard evenly over the filling. Top with Parmesan for a golden crust after baking.
    • Transfer the skillet to the oven and bake 30-40 minutes, until the center is just set and the top is lightly browned. Let the frittata rest 5-10 minutes before slicing. Serve warm or at room temperature.

    Notes

    Grating your own cheddar cheese is the best option, as pre-grated cheese has anti-caking agents but do what works best for you. 
    Substitutions and Variations
    • Cheese - Try Fontina or goat cheese for a tangy twist.
    • Meat swaps- Change up the flavor with chopped cooked chicken sausage, turkey sausage, or even crumbled cooked bacon.
    • Add veggies - Add a cup of chopped broccoli, broccolini, or asparagus, cooked or blanched first, not raw.
    Leftovers and Storing
    Cool frittata completely, then store slices in an airtight container in the refrigerator for up to 3 days. Reheat gently in a 300°F oven until warmed through. 

    Nutrition

    Calories: 335kcalCarbohydrates: 5gProtein: 24gFat: 24gSaturated Fat: 12gPolyunsaturated Fat: 2gMonounsaturated Fat: 7gTrans Fat: 0.1gCholesterol: 365mgSodium: 939mgPotassium: 266mgFiber: 0.3gSugar: 2gVitamin A: 1213IUVitamin C: 9mgCalcium: 361mgIron: 2mg
    Tried this recipe?Let us know how it was with a comment and leave a star rating!

    Creamy Lemon Tahini Salad Dressing

    01/08/2026 by Sally Cameron 2 Comments

    creamy tahini salad dressing

    Sturdier salad greens need creamy dressings that cling-and that's exactly why I created this creamy lemon tahini salad dressing. It's especially good on hearty greens like kale and romaine, and it also doubles as a simple tahini sauce for fish, chicken, or shrimp. Make a batch on Sunday and you're halfway to a fast, terrific salad all week.

    Creamy tahini dressing being poured.

    I originally created this lemon tahini salad dressing for a curly kale and chickpea salad, and quickly realized it deserved its own spotlight. This creamy tahini dressing works on almost any hearty greens-kale, romaine, shredded Brussels sprouts-and it doubles as a silky lemon tahini sauce for chicken, fish, or roasted vegetables. It's a delicious change from the simple French vinaigrette I often make.

    [feast_advanced_jump_to]

    Why You'll Enjoy Lemon Tahini Dressing

    • Creamy and bright - Nutty tahini balanced with tangy fresh lemon juice.
    • Clings to sturdy greens - Perfect for kale, romaine, and hearty chopped salads.
    • Multi-purpose - Works as a salad dressing and a simple tahini sauce for chicken, fish, or shrimp.
    • Make-ahead friendly - Mix a batch and you're set for quick lunches and easy dinners all week.
    • Simple pantry ingredients - Tahini, lemon, garlic, and olive oil-nothing fancy, big flavor.

    Chef's Tip - What Is Tahini?
    Tahini is sesame seed paste, made similar to how peanuts are made into peanut butter. You may know it as an ingredient in Mediterranean hummus, but it's also excellent in dressings and sauces. Tahini has a mild, nutty flavor. I prefer raw, untoasted tahini. If the oil separates and rises to the top (totally normal), stir it back together with a sturdy spoon or table knife until smooth. Viscosity varies by brand.

    Ingredients You'l Need

    Lemon tahini dressing ingredients in prep bowls on a marble counter.
    • Extra-virgin olive oil - The base of the dressing, adding richness and a silky texture.
    • Tahini - Sesame seed paste that gives this lemon tahini dressing its creamy body and nutty, toasty flavor.
    • Lemon juice - Freshly squeezed for bright acidity and a clean citrus lift.
    • Unseasoned rice vinegar - Mild, slightly sweet vinegar that adds gentle acidity without overpowering; use all lemon juice instead if you prefer.
    • Tamari or soy sauce - Adds saltiness and savory depth; use tamari or coconut aminos to keep the dressing gluten-free.
    • Balsamic vinegar - Just enough for a subtle sweetness and extra depth of flavor.
    • Sweetener - 2-3 teaspoons maple syrup, honey, or no-sugar honey to balance the tanginess; adjust to taste or omit for a less sweet dressing.
    • Garlic - One large clove, finely chopped and smeared or microplaned, for sharp, aromatic backbone.

    Substitutions and Variations

    • No rice vinegar - If you don't have unseasoned rice vinegar, substitute white wine vinegar or champagne vinegar.
    • No soy - Swap coconut aminos for the tamari, or use the San-J No-Soy Tamari (it's delicious).

    Chef's tip - Adjusting Tahini Dressing Thickness
    Tahini can vary widely in thickness and color depending on the brand and how finely the sesame seeds are ground. I prefer thicker tahini, which yields a creamier, more substantial dressing. Some brands are more fluid, resulting in a thinner consistency. To thicken, try more tahini paste, a starch like cornstarch, arrowroot starch, or tapioca starch, a spoonful of nut butter, or a thickener like mashed chick peas or a spoonful or greek yogurt. Dijon helps emulsify but it will also change the flavor a bit. Another option, just a ¼ teaspoon xanthan gum. To thin, add a little more lemon juice or water.

    How to Make Lemon Tahini Dressing

    Dressing in a small blender.
    1. Blend the base: Add tahini, olive oil, lemon juice, rice vinegar, balsamic, soy sauce or tamari, garlic, and optional sweetener to a blender and blend smooth.
    2. Thin and season: If too thick, add a little water or lemon juice, a teaspoon or two at a time, until the lemon tahini dressing is pourable and creamy. Taste and adjust salt (or more soy sauce), or sweetness.
    3. Chill: Transfer to a jar and refrigerate. The dressing will thicken as it chills; whisk in a splash of water if needed to loosen before serving.

    Chef's tip - To make the garlic blend in smoothly, chop the cloves as finely as possible and then using the back of your knife, smear it into a smooth paste (photo below), or use a microplane zester.

    Smearing chopped garlic into a paste on a cutting board.

    Serving Suggestions

    I created this creamy lemon tahini dressing for salads, but it's also a terrific tahini sauce drizzled over grilled or roasted chicken, fish, or roasted vegetables like cauliflower, carrots, or broccoli. It's really versatile and so easy. And it doubles easily to make more for a crowd.

    For an other recipe using tahini, try this roasted red bell pepper hummus recipe. Great for snacks and entertaining.

    Storage

    Store creamy tahini dressing in a glass jar or airtight container in the refrigerator for to 5-7 days. It will thicken as it chills, so whisk in a teaspoon or two of cold water (or extra lemon juice) until it's pourable again.

    If it separates, just shake or whisk to re-emulsify. Because this dressing is made with fresh lemon juice and garlic, I don't recommend freezing it-the texture turns grainy and the flavor isn't as fresh.

    A curly kale salad with chickpeas and creamy tahini dressing.

    Recipe FAQs

    Can I make lemon tahini dressing ahead of time?

    Yes. Lemon tahini dressing can be made ahead and stored in the refrigerator for 3-5 days in an airtight container.

    Is this dressing gluten-free?

    Yes, as long as you use tamari or gluten-free soy sauce.

    Will the dressing thicken as it sits?

    It may thicken slightly as it chills, but consistency mostly depends on the tahini used.

    More Dressing Recipes

    If you enjoy homemade dressings, here are a few more easy, flavorful recipes to try next, from a simple basic vinaigrette, to creamy

    • A small glass pitcher of buffalo ranch dressing ready to pour over salad greens.
      Buffalo Ranch - Homemade Dip and Dressing
    • Small glass jar on a kitchen counter of French vinaigrette with salad behind.
      French Vinaigrette (Classic Homemade Dressing Recipe)
    • A bowl of homemade caesar dressing with spoon.
      Caesar Salad Dressing Without Anchovies
    • Easy Green Goddess Dip (and dressing)


    If You Make This Recipe

    Please leave a comment! I love to hear from youa dn your comments help other readers too. A star rating is helpful as well. Thanks for supporting my site.

    📖 Recipe

    creamy tahini dressing pouring onto salad | AFoodCentricLife.com

    Creamy Lemon Tahini Salad Dressing

    Sally Cameron
    A rich and creamy salad dressing made with sesame seed paste, called Tahini. Shake it in a jar or use a blender. It will last a week in the fridge. Great over study greens like kale and romaine. Recipe doubles easily.
    5 from 1 vote
    Prevent your screen from going dark
    Print Recipe Pin Recipe
    Prep Time 5 minutes mins
    Total Time 5 minutes mins
    Course condiment, Dressing
    Cuisine American
    Servings 6 Yield ¾ cup
    Calories 182 kcal

    Equipment

    • Regular or small blender or use a jar and a tight fitting lid

    Ingredients
      

    • 6 tablespoons extra virgin olive oil
    • 3 tablespoons tahini
    • 2 tablespoons lemon juice
    • 1 tablespoon unseasoned rice vinegar or use lemon juice
    • 1 tablespoon low sodium tamari or soy sauce sub coconut aminos
    • 1 tablespoon Balsamic vinegar
    • 2-3 teaspoons maple syrup or honey or no-sugar honey
    • 1 large garlic clove finely chopped and smeared or microplaned

    Instructions
     

    • Place all ingredients in a jar with a tight-fitting lid and shake well until smooth and creamy. Alternatively, blend on low speed until emulsified. If the dressing is too thick, whisk or blend in cool water or more lemon juice, 1 teaspoon at a time, until it reaches your desired consistency.

    Notes

    The thickness of the final dressing will vary depending on the brand of tahini; some are very thick and others more pourable.
    Lemon tahini dressing keeps for 5–7 days in the refrigerator in an airtight container. Stir or shake before using, as it may thicken or separate slightly as it sits.

    Nutrition

    Serving: 2tablespoonsCalories: 182kcalCarbohydrates: 5gProtein: 2gFat: 18gSaturated Fat: 2gPolyunsaturated Fat: 3gMonounsaturated Fat: 12gSodium: 100mgPotassium: 58mgFiber: 0.4gSugar: 3gVitamin A: 6IUVitamin C: 3mgCalcium: 14mgIron: 0.5mg
    Tried this recipe?Let us know how it was with a comment and leave a star rating!

    Italian Pot Roast (Stracotto)

    01/01/2026 by Sally Cameron Leave a Comment

    Rich red sauce with pot roast nestled into the vegetables and herbs on a gray plate.

    Italian pot roast-known in Italy as stracotto (or brasato)-is a slow-braised beef dish that takes everything you love about pot roast and makes it deeper, richer, and more aromatic. If cozy American pot roast is your comfort zone, this Italian version is the next step: beef gently braised in red wine, tomatoes, and herbs until it's fall apart tender and full of flavor. I'll show you how to make stracotto step by step. It's also an excellent make-ahead dinner for weekends or company.

    Italian pot roast, called stracotto, with chunks of meat and red sauce on a gray platter.

    Serve stracotto over creamy polenta, mashed potatoes, buttered fettuccine, or with crusty bread to catch every drop of sauce-Italian comfort food at its best. Stracotto means "overcooked," in the best possible way: slow-braised until melt-in-your-mouth tender. This Italian pot roast gently simmers in red wine, tomatoes, and aromatics, becoming deeply flavored-and even better the next day.

    [feast_advanced_jump_to]

    Why Make Italian Pot Roast

    • Big flavor, low effort - Quick prep, then the Dutch oven and low heat do the work.
    • Melt-in-your-mouth beef - Long, slow braising turns a tough cut tender and juicy.
    • Comfort food with Italian flair - A pot roast recipe with red wine, tomatoes, garlic, and herbs.
    • Great for make-ahead - Stracotto tastes even better the next day and freezes well.

    For another long-braised meaty dish, try my red-wine braised short ribs.

    What is Stracotto?

    Stracotto is a traditional Italian braised beef recipe cooked slowly at a low temperature until tender and richly flavored. While similar in technique to American pot roast, stracotto is defined by Italian ingredients like red wine, tomatoes, garlic, and herbs, which give it a more aromatic, savory profile. American pot roast often leans toward a gravy-and-vegetable braise with potatoes. It's a rustic, comforting dish designed to be cooked patiently, tasting even better the next day.

    Ingredients You'll Need

    Ingredients for Italian stracotto (pot roast) in prep bowls on the kitchen counter.
    • Beef - Boneless chuck roast is my first choice for stracotto because it becomes tender and flavorful with slow braising. (See options below.)
    • Carrots - Add natural sweetness and tender texture.
    • Onions - A key aromatic that builds a deep, savory base for the braise.
    • Celery - Rounds out the soffritto (veggie base) and adds earthy flavor.
    • Herbs - Rosemary, thyme, and bay leaves are classic in Italian braises.
    • Tomatoes - Use good-quality canned Italian tomatoes, preferably San Marzano, for bright flavor and gentle acidity to balance the richness of the beef.
    • Tomato paste - Deepens the color, flavor, and adds umami richness.
    • Wine - A dry Italian red such as Chianti, Sangiovese, or Barolo gives the braising liquid its signature depth. Buy a decent bottle you can drink, and freeze the rest for making it again or with red wine braised short ribs. Freezing works great.
    • Broth - Choose a good beef broth (refrigerated or frozen) for clean, rich flavor. Avoid overly salty bouillon cubes and pastes with poor quality ingredients.
    • Garlic - Essential in Italian cooking and adds deep, aromatic flavor to the braise.
    • Olive oil - For searing the beef and sautéing the vegetables.
    • Red pepper (optional) - A pinch of crushed red pepper flakes adds subtle warmth.
    • Parsley - Fresh chopped parsley to sprinkle on before serving.
    • Balsamic vinegar - A splash of the good stuff adds richness and depth at the end.

    Please see recipe card for measurement, salt and pepper.

    For a fast and easy Italian dinner, try this one-pan Italian chicken thighs recipes.

    Chef's Tip - Best cuts of beef for Stracotto
    Pot roast can be made with several cuts of beef. For a leaner pot roast, choose brisket or round, including rump roast, bottom round, or eye-of-round. Some may not shred and will be better sliced. But the classic-and my favorite choice-is a well-marbled chuck roast. It has just the right balance of fat and connective tissue to become incredibly tender with long, slow braising.

    Substitutions and Variations

    • No wine version - Use the same amount of beef broth plus 1 to 2 tablespoons of balsamic vinegar or red wine vinegar per cup of wine, and a little worcestershire sauce. This helps mimic the richness of wine without alcohol.
    • Mushroom - For extra depth, add sautéed cremini mushrooms for meaty texture, or a small handful of rehydrated dried porcini for woodsy richness.
    • Parmesan rind trick - Toss a used Parmesan rind into the pot while braising for an extra layer of umami. Freeze rinds and save for dishes like stracotto, soups, and sauces.

    For a rich, meaty ragu for pasta, make this braised beef short rib ragu recipe, fantastic over pasta. Leftovers freeze great.

    Chef's Tip - Why You Should Tie a Pot Roast: If your chuck roast is uneven or has loose flaps, tie it with kitchen twine before searing. A neatly shaped roast browns more evenly, turns easily in the pot, and braises more uniformly. It also helps the meat stay intact for slicing-even though it will still be fall-apart tender when finished.

    How to Make Italian Pot Roast

    Pre-heat the oven to 325°F.

    a raw red chuck roast on a plate on the counter.
    1. After unwrapping the roast, take a good look at it and assess if it needs tying. This one does, most do.
    A tied raw chuck roast ready for seasoning and cooking.
    1. Tie the roast with kitchen twine to main shape during cooking and season wel with salt and pepper on all sides.
    Searing a chuck roast until brown on all sides in a dutch oven.
    1. In A dutch oven or other heavy pot, sear the pot roast until nicely browned on all sides.
    A nicely browned roast of beef on a plate waiting for next steps in the process.
    1. Remove the seared roast to a plate, and continue the recipe.
    Chopped onion sautéing in a pot in olive oil.
    1. Saute the onion in olive oil until soft about 3 minutes on medium low heat. Then add garlic and cook 1 minute longer.
    Cooking Italian sofritto, carrots, onion and celery for a pot roast.
    1. Add the carrot and celery and cook until softened, another 3-4 minutes, stirring.
    Red wine reducing in a large pot with vegetables to create a braising base.
    1. Add the red wine and cook until reduced by half the volume.
    Pot roast added to a pot of broth, reduce wine and vegetables for cooking.
    1. Add the pot roast back to the pot and add enough beef broth to come up ½ way to ⅔ the way up the roast. Add the herbs and cover with a lid. Braise the roast for 2 ½ - 3 hours turning over at the halfway point. When done a fork will easily go into the roast. Taste and season with salt and pepper if needed.
    Rich red sauce with pot roast nestled into the vegetables and herbs on a gray plate.

    When the Italian pot roast is done, remove to a plate, cut the strings, then pull the meat apart into chunks (for chuck roast). Remove any bits of connective tissue. If using another cut of beef, you might be able to slice it. Arrange on a platter and cover with sauce. Discard herb stems.

    Serving and Storing Stracotto

    Every chuck roast cooks a little differently depending on its shape and marbling. Some will yield very clean chunks of meat, while others have natural seams of connective tissue that you simply remove as you go. All are delicious.

    To serve, spoon the sauce into shallow, wide bowls, add chunks or slices of the beef, and finish with a sprinkle of chopped fresh parsley for color and fresh, garden flavor.

    Italian pot roast is wonderful over wide pasta noodles, creamy Parmesan polenta, or riced mashed potatoes, with extra sauce spooned over the top. A side of simply cooked greens or a crisp salad balances the richness nicely.

    • To refrigerate - Cool completely, then store the meat and sauce together in an airtight container for up to 4 days.
    • For freezing - Freeze in portions with plenty of sauce for up to 3 months. I like to freeze in individual or dinner-sized portions for easier reheating.
    • For reheating - Warm gently on the stovetop over low heat in a Dutch oven or other heavy pot, or in a 325°F oven, until heated through to 165°F. Add a splash of broth or water if needed to loosen the sauce.

    About the Extra Sauce (It's a Bonus!)

    This recipe makes more sauce than you'll need for four servings of meat, as that is part of braising. Italian braises are known for their deeply flavored, abundant sauces. Save every drop. The leftover sauce is incredible:

    • Tossed with pappardelle or rigatoni for a next-day pasta.
    • Used as a base to braise chicken thighs.
    • Blended smooth for a rustic, rich tomato-wine pasta sauce.

    Don't think of it as "extra." Think of it as your next meal already made.

    Recipe FAQs

    What cut of beef is best for pot roast?

    The best cut is chuck roast because it has great marbling and becomes tender after slow braising. Brisket, short ribs, or bottom round also work, but chuck roast is the most traditional and foolproof option.

    How long should I braise stracotto?

    Stracotto (Italian pot roast) is best when braised low and slow for 2 ½ - 3/12 hours depending on the size of the piece, until the beef is fall-apart tender.

    Should I cut the beef before cooking?

    No, for the best texture, sear the whole chuck roast first (tie if needed to maintain shape), then braise it whole. Once it's fall-apart tender, pull it into large chunks for serving instead of shredding. This keeps the meat juicy and satisfying while soaking up the rich sauce.

    Can I make Italian Pot Roast in a slow cooker?

    Yes. Sear the beef first as usual, then cook on low for 8-10 hours or high for 5-6 hours until the beef is fall apart tender.

    Did You Make This Recipe?

    If you try this Italian pot roast recipe, I'd love to hear from you! Leave a comment below and let me know how it turned out. If you enjoyed it, a 5-star rating helps others find and love this recipe too. Your feedback is always appreciated!

    📖 Recipe

    Rich red sauce with pot roast nestled into the vegetables and herbs on a gray plate.

    Italian Pot Roast (Stracotto) Recipe

    Sally Cameron
    A tender, slow-braised Italian pot roast cooked with red wine, tomatoes, herbs, and classic soffritto mix. This rustic, deeply flavorful dish becomes melt-in-your-mouth tender after a long, gentle braise. Serve with polenta, mashed potatoes, or buttered pasta to soak up the savory sauce.
    No ratings yet
    Prevent your screen from going dark
    Print Recipe Pin Recipe
    Prep Time 30 minutes mins
    Cook Time 3 hours hrs
    Total Time 3 hours hrs 30 minutes mins
    Course Dinner, Entree, Main Course
    Cuisine Italian
    Servings 4 to 6 servings
    Calories 527 kcal

    Equipment

    • Large dutch oven I use a 5 ½ quart

    Ingredients
      

    • 2 ½ pounds boneless chuck roast
    • 1 teaspoon sea salt
    • ¾ teaspoon ground black pepper
    • 1 ½ tablespoons extra virgin olive oil
    • 1 ½ cup chopped onion 1 medium onion
    • ¾ cup chopped celery 2-3 ribs
    • ¾ cup chopped carrots 2-3
    • 1 28-ounce can whole peeled San Marzano tomatoes crushed with your hands
    • 1 ½ cups dry red wine preferably Italian such as Barolo, Chianti, or Sangiovese.
    • 1 cup beef broth
    • 3 large fresh garlic cloves
    • 2 bay leaves fresh or dried
    • 3 sprigs fresh thyme
    • 3 sprigs fresh rosemary

    Optional ingredients

    • 2 teaspoon balsamic vinegar
    • 1 small parmesan rind
    • 1 tablespoon fresh chopped Italian parsley

    Instructions
     

    Season and sear the beef

    • If your chuck roast has loose flaps or an irregular shape (very common with this cut), tie it with kitchen twine in 3-5 places to create a more uniform shape This helps the meat sear evenly, hold together during the long braise, and cook at the same rate. Don't worry about making it perfect - just a few snug loops are enough to keep the roast compact.
    • Pat the beef dry with paper towels. Season generously on all sides with salt and pepper. Heat a large Dutch oven over medium-high heat and add olive oil to lightly coat the bottom. When hot, add the roast and sear until deeply browned on all sides, 3-4 minutes per side. Transfer the beef to a plate.

    Sauté the aromatics

    • Reduce the heat to medium. Add a little more olive oil if the pot looks dry. Add the onions and sauté until softened and starting to turn golden, 5-7 minutes, scraping up any browned bits. Add the carrots and celery and cook a few more minutes until slightly tender. Stir in the garlic and cook just until fragrant, about 30 seconds.

    Caramelize the tomato paste

    • Stir in the tomato paste, coating the vegetables. Cook 2-3 minutes, stirring often, until the paste darkens slightly and smells sweet and caramelized. This builds depth of flavor in the sauce.

    Deglaze with wine

    • Pour in the red wine and stir, scraping up all the browned bits from the bottom of the pot. Let the wine simmer and reduce by half, 3-5 minutes.

    Add tomatoes, broth, and herbs

    • Add the crushed tomatoes, beef broth, rosemary, thyme, and bay leaves. Tie the herbs together with a string if you'd like for easier removal. Stir to combine and bring the mixture just up to a simmer. Taste the liquid and adjust the seasoning with a little more salt and pepper if needed-it should be well seasoned but not too salty.

    Return the beef to the pot

    • Nestle the seared beef (and any juices on the plate) back into the pot, turning it once so it's coated in the sauce. The liquid should come half way or two thirds up the sides of the roast.

    Braise in the oven

    • Cover the Dutch oven with a tight-fitting lid and transfer to a 325°F oven. Braise for 2½ to 3 hours, turning the roast once halfway through, until the meat is very tender and a fork slides in easily. Start checking around the 2½-hour mark.

    Reduce the sauce if needed

    • Transfer the beef to a plate and tent with foil. Remove the herb stems and bay leaves. If your sauce looks thin, place the pot over medium heat and gently simmer 5-10 minutes to reduce. If it's already glossy and thick enough, no reduction is needed. Taste and adjust seasoning, and add a splash of good balsamic vinegar if you'd like to brighten the sauce and sprinkle with fresh chopped Italian parsley.

    Slice and serve

    • Once the meat is tender, it naturally separates into sections. You may see a few thin, stringy seams of connective tissue-simply pull them out as you chunk the roast. This is normal with chuck and ensures the meat stays beautifully tender.
      Return pieces to the pot or arrange on a warm platter and spoon the sauce and vegetables over the top.
    • Serve with creamy polenta, mashed potatoes, buttered fettuccine, or with crusty bread for soaking up the sauce.

    Notes

    Yield - Chuck roast loses about 25%-35% of its weight during cooking due to fat rendering and moisture loss. A 2 ½-pound raw chuck roast will yield approximately 1.75 pounds of cooked beef, serving 4-5.
    Note on broth: The amount of broth you need will depend on the size and depth of your Dutch oven. The goal is for the braising liquid to come halfway to two-thirds up the side of the roast. I use a 5½-quart Le Creuset, which typically requires about 1 cup broth for a 2½-pound roast. Larger Dutch ovens (such as a 7-quart) may need more liquid, while smaller pots, such as the 4 ½-quart may need less. Adjust as needed to reach the correct level.
    About chuck roasts: Chuck can look very different from one roast to another. Some pieces are neatly uniform and well-trimmed, others are irregular with loose flaps or more external fat. Both types work. If your roast has loose sections, tie it with kitchen twine so it holds together evenly during searing and braising.
    If there are large exterior fat caps, trim them lightly, but leave the internal marbling and connective seams—those melt during the long braise and make the beef tender and flavorful.

    Nutrition

    Calories: 527kcalCarbohydrates: 13gProtein: 40gFat: 28gSaturated Fat: 11gPolyunsaturated Fat: 2gMonounsaturated Fat: 15gTrans Fat: 1gCholesterol: 137mgSodium: 1002mgPotassium: 933mgFiber: 2gSugar: 4gVitamin A: 4249IUVitamin C: 10mgCalcium: 79mgIron: 5mg
    Tried this recipe?Let us know how it was with a comment and leave a star rating!

    Antipasto Skewers (Easy Italian Appetizer)

    12/18/2025 by Sally Cameron Leave a Comment

    A platter of antipasto skewers with olives, cheese, salami, and artichoke heart for appetizers.

    Who doesn't love food on sticks and skewers? They're fun to make, fun to serve, and perfect for year-round entertaining as party appetizers. These antipasto skewers deliver all the best flavors of a classic antipasto platter in one easy-to-eat bite-rich salami, creamy mozzarella, bright tomatoes, savory olives, and tangy artichoke hearts. Finished with a drizzle of dressing, they're impossible to resist.

    Colorful antipasto skewers on fancy star-topped picks drizzled with Italian dressing.

    Antipasto skewers are perfect for a casual wine night or for a holiday appetizer spread, when you don't have time to build a fancy board. These skewers also travel well for picnics and potlucks, and they're one of my favorite answers to the always-stressful question, "What should I bring to a party?" Easy to assemble, easy to transport, and guaranteed to disappear fast.

    [feast_advanced_jump_to]

    Why You'll Like Antipasto Skewers

    • Make-ahead appetizer - No cooking, just simple assembly.
    • Perfect for parties & potlucks - Portable, mess-free, and always a hit.
    • Fresh, bold flavor in every bite - Creamy, savory, briny, and bright.
    • Customizable for any crowd - Swap meats, cheeses, or veggies with ease.
    • Works year-round - For holidays, wine nights, game days, and summer gatherings.

    For another fun appetizer on a stick, make these simple Caprese Skewers with a basil pesto vinaigrette.

    Ingredients You'll Need

    Ingredients for antipasto skewers in prep bowls ready for assembly.
    Ingredients for homemade Italian dressing ready to be combined and shaken.
    • Meat - Thinly sliced dry Italian salami (so they can be folded).
    • Cheese - Mozzarella balls, get the small bite-size called ciliegene.
    • Green olives - Buy pitted castelvestrano olives, they are delicious.
    • Black olives - Buy pitted Kalamata olives.
    • Tomatoes - Use small grape or cherry tomatoes.
    • Artichoke hearts - Buy whole and cut yourself or buy quarters. Use water-packed and dress at serving (and some of the marinated ones don't taste good).
    • Tear drop peppers (optional) - These tiny sweet and tangy peppers add a nice pop of color and flavor to antipasto skewers. Sometimes called Sweetie Drops.
    • Parsley (optional) - Fresh chopped parsley to garnish the platter for more color.
    • Dressing - Use bottled or homemade Italian dressing. See photo above or recipe card.

    Picks - Get fun, 5" holiday themed food picks on Amazon and at party stores.

    Substitutions and Variations

    • Make it meatless: Swap marinated sun-dried tomatoes or roasted peppers for the salami for a bold, savory vegetarian option.
    • Switch up the protein: Use another Italian meat such as coppa or prosciutto for a lighter, more delicate skewer.
    • Change the cheese: Try cubes of Monterey Jack, white cheddar, or provolone for a different flavor profile.
    • Add herbs - A fold fresh basil leaf looks and tastes great (but they can wilt).

    For a refreshing summer skewer, make these melon skewers or fruit kabobs.

    How to Make Antipasto Skewers

    A tray set up to assemble antipasto skewers with fancy picks and all ingredients.
    1. Prep the ingredients - Drain the mozzarella balls, olives, artichoke hearts well so the skewers don't become slippery or watery. Wash tomatoes. Quarter artichoke hearts if needed.
    2. Assemble the skewers - Thread the ingredients onto each pick in this order for balance and visual appeal: Olive > artichoke heart > folded salami > tomato > mozzarella > olive. Add a tear drop pepper at the end or a basil leaf if using (somewhere in the middle, folded). Build them as you prefer.
    3. Repeat with remaining ingredients - Arrange the finished skewers on a serving platter in a single layer or in neat rows.
    4. Chill until ready to serve - Cover and refrigerate for up to 24 hours then drizzle or brush with the Italian dressing and serve. Chopped parsley adds a nice touch.
    5. Italian dressing - Place all ingredients in a jar and shake well. Refrigerate until using.
    Golden Italian salad dressing in a jar with a silver whisk.

    Serving Suggestions

    • Serve chilled to cool-room temperature.
    • Drizzle lightly with Italian dressing or pesto vinaigrette just before serving. For the pesto vinaigrette, simple dilute basil pesto with a little olive oil and maybe some lemon juice until fluid enough to drizzle. Use homemade basil pesto or purchased.
    • Arrange on a platter in neat rows, singly or stacked, or fanned for easy grabbing.
    A small plate stacked with antipasto skewers with star tops and dressing.

    Make-Ahead & Storage

    • Assemble up to 24 hours ahead.
    • Store covered and refrigerated.
    • Drizzle the dressing just before serving.
    • Best served chilled to cool room temperature.

    Leftovers: Antipasto skewers keep well refrigerated for up to 2 days. For best texture, store covered and undressed, then add dressing just before serving.

    Recipe FAQs

    How far ahead can I make antipasto skewers?

    You can assemble them up to 24 hours in advance. Store covered in the refrigerator and drizzle with dressing just before serving.

    Should I dress the skewers ahead of time?

    No - for the best texture and appearance, wait to drizzle the dressing until just before serving. This keeps the mozzarella and tomatoes from becoming watery.

    How many antipasto skewers should I plan per person?

    Plan on 2-3 skewers per person for a party with other appetizers, and 4-5 per person if they're part of a light meal.

    Are antipasto skewers gluten-free?

    Yes, as written these skewers are naturally gluten-free. Just double-check your meats and marinated ingredients to be sure.

    Did You Make Antipasto Skewers?

    If you made these for a party or gathering, tell me about it! Please leave a comment and a ⭐ rating. Thanks for supporting my website.

    More Easy Appetizers

    Antipasto skewers are a natural addition to any appetizer board and pair beautifully with a mix of creamy, savory dips and spreads for effortless entertaining.

    • A bowl of whipped ricotta cheese dip with endive leaf in for scooping.
      Whipped Ricotta Cheese (Dip or Spread)
    • Closeup of mushroom pate in a white ramekin with a spoon.
      Classic French Mushroom Duxelle
    • A white bowl of roasted red pepper hummus to serve as an appetizer.
      Roasted Red Bell Pepper Hummus Recipe

    Please Leave a Comment

    If you make these antipasto skewers, please tell me about it! Did you make them for a party? I love to hear from you and your comments help other readers too. Thanks for supporting my site.

    📖 Recipe

    A platter of antipasto skewers with olives, cheese, salami, and artichoke heart for appetizers.

    Antipasto Skewers

    Sally Cameron
    These antipasto skewers are an easy, no-cook Italian appetizer made with salami, mozzarella, tomatoes, olives, and marinated artichokes-perfect for entertaining year-round. Sued bottled Italian dressing or homemade, recipe included.
    No ratings yet
    Prevent your screen from going dark
    Print Recipe Pin Recipe
    Prep Time 10 minutes mins
    Cook Time 0 minutes mins
    Total Time 10 minutes mins
    Course Appetizer
    Cuisine Italian
    Servings 6 yield 12 - 2 per person
    Calories 246 kcal

    Equipment

    • 12 Fancy food picks

    Ingredients
      

    Antipasto skewers

    • 4 ounces thin dry salami 24 slices
    • 12 small cherry or grape tomatoes
    • 12 mini mozzarella balls ciliegene are the perfect size
    • 12 green pitted olives castelvestrano are the best
    • 12 pitted black olives kalamata
    • 6 artichoke hearts water packed or marinated, halved
    • ¼ cup Italian dressing bottled or homemade

    Homemade Italian dressing (makes ½ cup)

    • ⅓ cup extra virgin olive oil
    • 1 ½ tqblespoons vinegar white wine, champagne, or apple cider
    • ½ tablespoon finely grated Parmesan cheese
    • ½ teaspoon Dijon mustard
    • ½ teaspoon dried Italian seasoning blend
    • ⅛ teaspoon garlic powder
    • ⅛ teaspoon onion powder
    • 1 pinch sea salt
    • 1 pinch ground black pepper
    • 1 pinch sugar or monk fruit honey or agave syrup
    • 1 pinch red chili flakes piza pepper

    Instructions
     

    Prep ingredients

    • Drain enough mozzarella balls for the number you are making (leave the rest stored in the brine). Same for olives and artichoke hearts so the skewers don't become slippery or watery. Wash tomatoes. Quarter artichoke hearts if needed.

    Assemble the skewers

    • Thread the ingredients onto each pick in this order for balance and visual appeal: Olive > artichoke heart > folded salami > tomato > mozzarella > olive. Add a tear drop pepper at the end or a basil leaf if using (somewhere in the middle, folded). Build them as you prefer.

    Arrange on platter and chill

    • Cover and refrigerate for up to 24 hours then drizzle or brush with Italian dressing and serve. Chopped parsley adds a nice touch.

    For the Italian dressing

    • Place all ingredients in a jar and shake well. Refrigerate until using.

    Notes

    The Italian dressing, whether homemade or bottled, is not included in the nutritional calculation as what you use can vary.

    Nutrition

    Serving: 2Calories: 246kcalCarbohydrates: 2gProtein: 15gFat: 21gSaturated Fat: 7gPolyunsaturated Fat: 1gMonounsaturated Fat: 5gCholesterol: 35mgSodium: 722mgPotassium: 159mgFiber: 1gSugar: 1gVitamin A: 346IUVitamin C: 5mgCalcium: 214mgIron: 0.4mg
    Tried this recipe?Let us know how it was with a comment and leave a star rating!

    Soft & Chewy Gluten-Free Ginger Cookies

    12/16/2025 by Sally Cameron 2 Comments

    A plate of golden sugar sprinkled ginger cookies with more cooling on a wire rack.

    If you love big ginger flavor and soft, chewy cookies, you'll love these gluten-free ginger cookies. They're everything a classic ginger cookie should be: light and tender when you bite in, perfectly chewy, with warm spices, deep molasses, and crackled tops-and no one will guess they are gluten-free. There's an easy dairy-free option too.

    A plate of freshly bake crackly ginger cookies with sparking sugar with milk.

    These gluten-free ginger cookies are soft, tender, melt-in-your-mouth spice cookies with delicate crackled tops and a classic flavor that's pure nostalgia. They're a natural fit for holiday cookie baking, but simple enough to enjoy year-round. The dough comes together quickly with basic pantry ingredients, chills briefly, then bakes into soft, crackly-topped drop cookies-no rolling or cutting required. Easy enough for a weeknight and special enough for holiday gifting.

    [feast_advanced_jump_to]

    What Makes These Ginger Cookies So Good

    • Soft, chewy texture - Tender centers with lightly crisp, crinkled tops, like classic bakery ginger cookies.
    • Easy drop-cookie dough - No cutting. Just mix, scoop, roll in sugar, and bake.
    • Warm ginger-molasses flavor - Bold ginger, warm spices, and deep molasses sweetness in every bite.
    • Gluten-free (and no one will know) - The texture is so good that most people won't believe these are gluten-free.
    • Perfect for holidays and beyond - Great for gluten-free Christmas cookie trays and gifting, but simple enough to bake any time you're craving a cozy cookie.

    For another absolutely terrific and easy cookie recipe, try these almond flour chocolate cookies.

    Ingredients You'll Need

    Flour, sugar, molasses, spices, and more ingredients to make ginger cookies.
    • Unsalted butter - Provides richness and that soft, chewy cookie texture. DF option below.
    • Light brown sugar - Adds moisture and caramel notes that pair great with ginger.
    • Granulated sugar - For the classic crinkly tops and encourages gentle spreading.
    • Molasses - The heart of ginger cookie flavor, brings warmth, color, and chew. Use unsulfured molasses. Most stores only carry blackstrap, it works fine and gives a strong bold flavor vs. a milder molasses. Both work.
    • Egg - Binds and gives structure to the dough.
    • Vanilla extract - Softens and rounds out the spice.
    • Gluten-free all-purpose flour - A 1:1 blend, I bake with King Arthur GF M4M.
    • Baking soda - For proper spread and the signature crackle.
    • Baking powder - Just a touch of lift for lighter centers.
    • Spices - Ground ginger, cinnamon, nutmeg, and a pinch of clove.
    • Coarse sugar (optional) - For rolling cookie balls before baking for a crinkly, sparkly finish, try turbinado sugar, demarara sugar, or a coarse sugar.

    Please see the recipe card for measurements, and salt.

    Chef's Tip - How Soft Should Butter Be for Cookies
    For the best creaming and cookie texture, your butter should be truly soft, not just slightly cool. It should press easily with a fingertip and look smooth and pliable. I often set the butter out the night before so it's ready to cream properly with the sugar in the morning. Too-firm butter won't aerate well and can lead to thicker, less crinkly cookies. Avoid softening butter in the microwave, as it can melt unevenly and ruin the texture.

    Substitutions and Variations

    • For dairy-free ginger cookies - Use stick-style plant butter, not soft tub spreads. Earth Balance Buttery Sticks, Country Crock Plant Butter, Violife Plant Butter, Trader Joe's Vegan Butter, and Miyoko's all bake with good flavor and reliable structure.

    Chef's Tip - Why Creaming Butter & Sugar Matters
    Creaming butter and sugar properly whips tiny air pockets into the dough, which helps cookies bake up lighter with better spread and texture. Beat for 2-3 minutes, until the mixture looks pale, fluffy, and slightly increased in volume-not just blended. Under-creamed dough leads to denser cookies with less crinkle.

    How to Bake Gluten-Free Ginger Cookies

    Cookie tips - For rolling the dough into balls before coating in sugar, wear food-safe gloves, then roll right after chilling. The warmth from your hands softens the dough quickly, making it harder to handle. Gloves keep the dough cooler and much easier to work with, and keep your hands cleaner. For even portioning and cookies size, use a #40 cookie scoop or a #50 cookie scoop (about 1 ½ tablespoons).

    Preheat the oven to 350°F. Line a baking sheet with parchment paper.

    Creaming brown sugar and butter until light and fluffy in a glass bowl.
    1. With an electric hand mixer, cream the butter and brown sugars and granulated sugar until light and fluffy, 3 minutes.
    Adding molasses, egg, and vanilla to gluten-free ginger cookie batter.
    1. Add the molasses, egg, and vanilla, until smooth and creamy.
    Beating batter for ginger cookies until smooth.
    1. Whip the creamed butter and sugar now with molasses and egg until fluffy and smooth.
    Adding flour and spices to cookie batter for Christmas cookies.
    1. Add the flour, baking soda, and powder, spices, and salt.
    Finished gluten-free ginger cookie dough in a glass bowl ready to chill.
    1. Blend the batter until well combined and smooth on medium speed. Dough is ready to chill, covered, for 30-45 minutes in the refrigerator.
    Balls of ginger cookie dough on a parchment lined baking sheet.
    1. Portion cookie dough, roll into balls then roll in sugar. Place balls on the cookies sheet. Bake at 350°F for 12-13 minutes. They will still be a bit soft.
    A tray of golden baked ginger cookies cooling on the counter.

    Chef's Tip - The Best Liner for Baking Ginger Cookies: Parchment vs. Silpat:
    For the best spread and browning, bake ginger cookies on parchment-lined baking sheets, not silicone baking mats. Parchment allows the dough to spread naturally and crisp at the edges, while Silpat tends to limit spread and produces thicker, softer cookies (unless that is what you want). Grab a pack of the pre-cut sheets and you'll never know how you lived without them!

    A plate of gold gluten-free ginger cookies with cracked tops and sparkling sugar sprinkles.

    How to Store & Freeze Ginger Cookies

    • Room Temperature - Store baked cookies in an airtight container at room temperature for up to 4 days. They stay soft and chewy.
    • Freeze Baked Cookies - Freeze fully cooled cookies in a freezer-safe container with parchment between layers for up to 2 months. Thaw at room temperature.

    Freeze the Dough - Scoop the chilled dough into balls, freeze solid, then store in a freezer bag for up to 2 months. Bake from frozen, adding 1-2 extra minutes to the bake time.

    Recipes FAQs

    Can I make these cookies ahead of time?

    Yes. The dough can be made up to 2 days ahead and kept refrigerated. Scoop and bake straight from the fridge, adding an extra minute if needed.

    Can I freeze the cookie dough?

    Absolutely. Scoop the ginger cookie dough into balls, freeze until firm, then store in a freezer bag for up to 2 months. Bake from frozen and add 1-2 minutes to the bake time. Another option for freezing, use a silicone cookie dough freezer tray.

    Why didn't my cookies spread?

    This usually means the butter was too cold, the dough was over-chilled, or the flour was slightly over-measured. Let the dough warm for 5-10 minutes and try again. Baking on parchment (not Silpat) also helps.

    How do you keep gluten-free cookies soft?

    The key to soft gluten-free cookies is balancing moisture and bake time. This recipe uses a mix of brown sugar and molasses, which both help the cookies stay tender. Avoid overbaking-pull the cookies from the oven when the centers still look slightly soft, as they'll finish setting on the baking sheet. Storing them in an airtight container once cooled also helps maintain their chewy texture.

    More Cookie & Treat Recipes

    Crispy, chewy, crackly, or chocolatey, pick your favorite and give some of these cookie recipes a try.

    • A stack of crunchy cookies on a counter with a glass of milk and cookies cooling behind.
      Cranberry Oatmeal Cookies Recipe (gluten-free)
    • A round white plate piled with chocolate chip meringue cookies.
      Forgotten Cookies (chocolate chip meringues)
    • sand tart cookies
      Old Fashioned Sand Tarts Cookie Recipe
    • Bark bites on a round display plate for serving.
      Chocolate Bark Recipe (bark bites)

    If You Make These Cookies

    Please leave a comment and let me know how they came out! I love hearing from you and your comments help other readers too. And please leave a ⭐ rating. Thanks for supporting my site!

    📖 Recipe

    A plate of golden sugar sprinkled ginger cookies with more cooling on a wire rack.

    Gluten-Free Ginger Cookies

    Sally Cameron
    Soft, chewy, tender ginger cookies with bold flavor that happen to be gluten-free, and you'd never guess. With that classic ginger and molasses flavor and texture that's irresistible.
    5 from 1 vote
    Prevent your screen from going dark
    Print Recipe Pin Recipe
    Course Cookies, Dessert
    Cuisine American
    Servings 12 Yield about 24 cookies
    Calories 220 kcal

    Equipment

    • Half sheet baking tray
    • Parchment paper
    • Hand mixer
    • #40 disher/cookie scoop optional but super handy
    • Food handle gloves

    Ingredients
      

    • ½ cup unsalted butter **at room temperature
    • ½ cup light brown sugar
    • 2 tablespoons granulated sugar
    • ¼ cup molasses mild, medium, or blackstrap
    • 1 large egg
    • 1 teaspoon vanilla extract
    • 1 ⅔ cups GF flour blend I use King Arthur M4M
    • ½ teaspoon baking powder
    • ¼ teaspoon baking soda
    • 1 teaspoon ground ginger
    • ½ teaspoon cinnamon
    • ⅛ teaspoon nutmeg
    • ¼ teaspoon salt

    Instructions
     

    Cream butter and sugar

    • With a hand mixer, beat the room temperature butter and sugar until light and fluffy, 2-3 minutes on high speed. Add the molasses, egg, and vanilla, and beat another minute.

    Add dry ingredients

    • Add the flour, baking powder, baking soda, spices, and salt, and mix on medium speed just combined, 1-2 minutes. Dough will be stiff. Refrigerate dough for 30-45 minutes (not overnight).

    Bake cookies

    • Pre-heat the oven to 350° (standard bake). Line a half sheet baking pan with parchment.
    • With food handler gloves and using a #40-#50 cookie scoop (1 ½ tablespoons), portion the cookie dough, the. with your hands, gently roll the portion into a ball, then into a small bowl of sugar to coat the outside.
    • Place the sugared cookie balls on the baking sheet and bake for 12 minutes, until the edge are set, the center is still a bit soft. They will set further upon cooling. Allow to cool 5-10 minutes on the cookie sheet then remove to cool fully on a wire rack.

    Notes

    For dairy-free ginger cookies - Use stick-style plant butter, not soft tub spreads. Earth Balance Buttery Sticks, Country Crock Plant Butter, Violife Plant Butter, Trader Joe's Vegan Butter, and Miyoko's all bake with good flavor and reliable structure.
    Storing Cookies - Store baked cookies in an airtight container at room temperature for up to 4 days. They stay soft and chewy.
    Freezing Baked Cookies – Freeze fully cooled cookies in a freezer-safe container with parchment between layers for up to 2 months. Thaw at room temperature.

    Nutrition

    Calories: 220kcalCarbohydrates: 34gProtein: 2gFat: 8gSaturated Fat: 5gPolyunsaturated Fat: 0.5gMonounsaturated Fat: 2gTrans Fat: 0.3gCholesterol: 36mgSodium: 101mgPotassium: 143mgFiber: 1gSugar: 16gVitamin A: 259IUVitamin C: 0.01mgCalcium: 40mgIron: 1mg
    Tried this recipe?Let us know how it was with a comment and leave a star rating!

    Chocolate Panna Cotta

    12/11/2025 by Sally Cameron 1 Comment

    Glass cup of dark chocolate panna cotta with whipped cream and chocolate shavings.

    Chocolate panna cotta proves that dessert doesn't need to be complicated or difficult to be luxurious. A handful of ingredients come together into something silky and deeply chocolatey, with a melt-in-your-mouth texture that feels special even in a small portion. It's a modern take on a classic Italian panna cotta-no eggs, no baking, and no fuss. Just gently warm the dairy, melt the chocolate, bloom the gelatin, and let the refrigerator do the rest. Dairy-free option too!

    A spoonful of silky chocolate panna cotta with whipped cream on a silver spoon with chocolate sprinkles.

    This chocolate panna cotta recipe is an ideal make-ahead dessert for entertaining. Each guest gets their own individual serving, it looks elegant on the table, and it requires absolutely no last-minute attention (aside from a dollop of whipped cream). It's perfect for Christmas, Easter, Valentine's Day, birthdays, or any dinner party when you want something rich, silky, and indulgent without spending the entire evening in the kitchen.

    [feast_advanced_jump_to]


    Why You'll Love Chocolate Panna Cotta

    • Silky, luxurious texture - Softly set and velvety, it melts on your tongue instead of feeling heavy or dense.
    • Simple, few ingredients - Just basic pantry and fridge staples (plus good chocolate) come together in a surprisingly easy dessert.
    • Make-ahead friendly - You can prepare it a day or two in advance, so dessert is completely done before guests arrive.

    And if you love panna cotta, try my vanilla panna cotta recipe, topped with berries.

    Ingredients You'll Need

    Heavy cream, chocolate, milk, vanilla, and sugar for making chocolate panna cotta.
    • Heavy cream - The foundation of panna cotta. It creates that silky, luxurious texture and gives the dessert its rich mouthfeel. Same as heavy whipping cream.
    • Whole milk - Lightens the cream so the panna cotta isn't heavy. It softens the richness while keeping a smooth, delicate set.
    • Good chocolate - Choose 60-72% cacao for a balanced, deeply chocolatey flavor. Lower percentages taste sweeter; higher percentages can get too intense and mute the dessert's silkiness.
    • Sugar - Just enough to balance the chocolate's bitterness. You're not making chocolate pudding-this dessert should taste cocoa-forward, not overly sweet.
    • Gelatin - The key to that soft texture. I prefer leaf gelatin for clarity and a smoother set (see notes below), but powdered gelatin works perfectly fine.
    • Vanilla - A touch rounds out the chocolate and adds warmth without competing with it.
    • Espresso powder (optional) - Intensifies chocolate flavor and adds depth. It won't taste like coffee; it simply makes the chocolate taste more chocolate.

    Chef's Note: Leaf Gelatin vs Powdered Gelatin
    Leaf gelatin (also called sheet gelatin) and powdered gelatin both set panna cotta; they're just used a little differently. Leaf gelatin dissolves very cleanly and gives a silky, restaurant-style set, which is why many chefs prefer it (as do I). To use it, soften the sheets in cold water for 5 minutes, gently squeeze out the water, then melt them into the warm dairy. Powdered gelatin is more widely available and easy to measure-sprinkle it over cold water to bloom before adding it to warm liquids. For this recipe, you can use either (but try the leaf!).

    Substitutions and Variations

    To change up this recipe for chocolate panna cotta, try:

    • No sugar - replace the sugar with granulated monk fruit/allulose blend.
    • Dairy-free option - Replace the heavy cream with full-fat canned coconut milk and the whole milk with unsweetened almond or cashew milk. The gelatin still sets the panna cotta beautifully.

    Chocolate for breakfast works too, in this chocolate banana smoothie.

    Chef's Tip For the Silkiest Texture
    Heat the cream just until steaming, not boiling. Boiling damages the gelatin's setting power and dull the chocolate's flavor.

    How to Make Chocolate Panna Cotta

    Forms of dark chocolate on a white cutting board.
    1. Whatever form of chocolate you have, chop it into small pieces unless it is already in a small shape.
    melting dark chocolate in a stainless steel bowl with a red spatula.
    1. Over a double boiler of simmering water, slowly melt chocolate until smooth.
    Pouring sugar into a small pot of heavy cream and milk for panna cotta.
    1. Add cream and milk to a small pot with the sugar, over medium low heat, stir until sugar is melted. heat to steaming but NOT boiling.
    Soaking leaf gelatin in cold water to soften.
    1. Add leaf gelatin to cold water to cover, soak 5 minutes. If using powder gelatin, sprinkle over cold water to bloom, 5-10 minutes until spongy, then it will dissolve in the hot cream.
    Adding softened gelatin to warm cream in a pot.
    1. Squeeze water out of leaf gelatin, add to hot cream and stir to fully blend until smooth. For powdered gelatin, add the sponge to the cream and stir smooth.
    1. Stir in melted chocolate until smooth, then pour through a fine sieve into a pouring container.
    Glass ramekins of chocolate
 panna cotta on a small sheet tray to set up.

    7. Allow to cool a few minutes, then pour into ramekins or other vessels. Place on a sheet tray and refrigerate until chilled and set, a few hours to overnight.

    A glass ramekin of chocolate panna cotta with whipped cream and chocolate shavings.

    Serving Suggestions

    Serve chocolate panna cotta simply with whipped cream on top and some chocolate shavings or sprinkles. Use a fine grater or a microplane zester to get the fine shavings, or use a vegetable peeler.

    How long does chocolate panna cotta last in the refrigerator? It keeps well for up to 3 days, tightly covered.

    And for another chocolate dessert idea, try this spiked hot chocolate on a cold night.

    Recipe FAQs

    Why didn't my panna cotta set?

    This usually happens if the gelatin wasn't properly bloomed, if the dairy mixture was too hot when the gelatin was added, or if too little gelatin was used. Chocolate also slightly softens the set, so correct gelatin ratio matters.

    Is panna cotta the same as chocolate mousse?

    No-panna cotta is gelatin-set, has no eggs, and traditionally is unmolded but can be prepared to not be unmolded (easier), while chocolate mousse is aerated and lighter due to whipped cream or egg foam.

    How long does panna cotta take to set?

    Depending on the gelatin ratio you're using, if following my recipe, panna cotta sets in about 4-5 hours. Chilling overnight chilling is best.

    Can I unmold this panna cotta?

    This recipe is intentionally designed to be served in cups or glasses, not unmolded. It has a soft, spoonable texture, which is what makes it so luxurious. If you want to unmold panna cotta onto a plate, you would need to increase the gelatin - but that produces a firmer, more gelatin-forward texture. For best flavor and mouthfeel, I recommend serving this one right in the dish.

    More Recipes With Chocolate

    If you love chocolate, here are a few more recipes to try, from bit-sized chocolate bark that's fun to make, to a decadent chocoalte tart, spiked hot chocolate (and a kids version too), or classic chocolate brownies.

    • Bark bites on a round display plate for serving.
      Chocolate Bark Recipe (bark bites)
    • Chocolate Tart With Hazelnut Crust
      Decadent Chocolate Ganache Tart
    • Glass mug of hot chocolate with whipped cream.
      Easy Spiked Hot Chocolate
    • Gluten-free brownies with melted chocolate in a square pan after baking.
      Fudgy Gluten-Free Chocolate Brownies

    Did You Make Chocolate Panna Cotta?

    If so, please let me a comment and let me know how you enjoyed it. I love hearing from you and comments help other readers as well. Thanks for supporting my site.

    📖 Recipe

    Glass cup of dark chocolate panna cotta with whipped cream and chocolate shavings.

    Chocolate Panna Cotta

    Sally Cameron
    Rich, silky, light textured and totally indulgent, chocolate panna cotta is super easy to make and is made ahead for the perfect dessert for chocolate lovers.
    5 from 1 vote
    Prevent your screen from going dark
    Print Recipe Pin Recipe
    Prep Time 18 minutes mins
    Cook Time 0 minutes mins
    Total Time 18 minutes mins
    Course Dessert
    Cuisine Italian
    Servings 6
    Calories 497 kcal

    Equipment

    • 6 6-ounce glass or ceramic ramekins, of glasses.

    Ingredients
      

    • 1 ¾ cups heavy whipping cream
    • ¾ cup whole milk
    • 2 ½ leaves silver leaf gelatin (170 bloom strength) or 2 ½ teaspoons gelatin powder
    • 5 ounces 60%-72% dark chocolate
    • ¼ - ⅓ cup sugar
    • 1 teaspoon vanilla extract
    • ¼ teaspoon espresso powder optional

    Optional garnishes

    • ½ cup heavy whipping cream to top panna cottas
    • extra chocolate for chocolate shavings or use sprinkles
    • Fresh raspberries

    Instructions
     

    Bloom leaf Gelatin

    • Cut the gelatin sheets to fit in a small bowl and cover with cold water for 5-7 minutes until softened. Squeeze water out to use before adding to hot milk and cream, then stir in until smooth (it melts in).

    (or) Blooming powdered gelatin

    • Sprinkle the gelatin evenly over ¼ cup cold water. Let it stand 5-10 minutes until fully hydrated and spongy. Once bloomed, gently heat just until melted (a few seconds in the microwave or over very low heat), then whisk into your warm cream base.

    Melt Chocolate

    • Place chopped chocolate in a heatproof bowl. Melt slowly over a double boiler, or melt carefully on low power in a microwave.

    Heat Cream & Milk

    • In a medium saucepan, combine heavy cream, milk, and sugar. Warm over medium heat until sugar dissolves and mixture is steaming (do not boil). If using espresso powder, whisk it in now.

    Add Gelatin

    • Add the prepared gelatin to the hot cream mixture and stir until smooth. Turn off heat.

    Add chocolate and vanilla

    • Add the chocolate and stir until smooth, then add the vanilla.

    Strain & Pour

    • Strain mixture through a fine-mesh sieve into a measuring container, then divide evenly into 6 small ramekins, espresso cups, or dessert glasses (6 oz each).

    Chill

    • Cover lightly with plastic wrap and refrigerate at least 4 hours, preferably overnight, until set. Top with whipped cream if desired.

    Notes

    Serving Suggestions
    • Top with lightly sweetened whipped cream and chocolate shavings.
    • Add fresh berries for a burst of color and acidity.
    • Drizzle with salted caramel or raspberry coulis for extra indulgence.
    Chef's Note: Leaf Gelatin vs Powdered Gelatin - Leaf gelatin (also called sheet gelatin) and powdered gelatin both set panna cotta; they're just used a little differently.
    Leaf gelatin dissolves very cleanly and gives a silky, restaurant-style set, which is why many chefs prefer it (as do I). To use it, soften the sheets in cold water 5-7 minutes, gently squeeze out the excess, then add to the warm dairy (they melt in).
    Powdered gelatin is more widely available and easy to measure-sprinkle it over cold water to bloom before adding it to warm liquids.

    Nutrition

    Calories: 497kcalCarbohydrates: 23gProtein: 5gFat: 43gSaturated Fat: 27gPolyunsaturated Fat: 2gMonounsaturated Fat: 11gTrans Fat: 0.01gCholesterol: 105mgSodium: 41mgPotassium: 302mgFiber: 3gSugar: 18gVitamin A: 1371IUVitamin C: 1mgCalcium: 114mgIron: 3mg
    Tried this recipe?Let us know how it was with a comment and leave a star rating!

    Roast Beef Tenderloin (Center-Cut Chateaubriand)

    01/24/2011 by Sally Cameron 7 Comments

    beef tenderloin on a plate.

    Roast beef tenderloin (center-cut chateaubriand) is the ultimate special-occasion centerpiece-buttery-tender, elegant, and surprisingly simple when you know the method. Choose one of two reliable approaches: a classic sear-then-roast for a steakhouse crust, or an easy slow-roast for an even rosy interior. Either way, you'll get clear pull temperatures, timing cues, and beautifully juicy slices-no guesswork required.

    beef tenderloin on a plate.

    A friend recently asked how to make roast beef tenderloin, and my answer surprised her: it's more of a method than a recipe. Start with the right cut (a center cut, often labeled chateaubriand), season simply, and cook to temperature. Once you do it this way, you'll feel confident making tenderloin for holidays and dinner parties with glowing praise from your guests and no stress.

    [feast_advanced_jump_to]

    Why You'll Love Roast Beef Tenderloin

    • Two methods, both great results- classic seared exterior or slow-roasted for even doneness.
    • No guesswork - you'll nail rare-to-medium every time, chart included.
    • Holiday-worthy, not complicated - looks fancy, cooks like a dream.
    • Sauce options if you want them - cognac-Dijon and horseradish cream are easy upgrades.

    For another fantastic and flavorful beef dish, make these red wine braised beef short ribs.

    Chef's Tip - What is Chateaubriand?
    Chateaubriand is the center cut of the beef tenderloin. It's the most evenly shaped, tender portion, making it perfect for roasting and slicing into beautiful, uniform pieces. When you ask your butcher for a center cut, you're essentially asking for a chateaubriand.

    Ingredients You'll Need

    A tied center-cut piece of beef tenderloin with seasonings on the side.
    • Center-cut beef tenderloin (chateaubriand) - the evenly shaped middle section for uniform roasting and pretty slices.
    • Kosher salt + black pepper - essential seasoning; simple is best on a premium cut.
    • Olive oil - helps seasoning adhere and supports browning for the seared method.
    • Granulated garlic (slow-roast option) - adds savory depth when you're not building flavor through a hard sear.
    • Herb sprigs (optional) - Fresh sprigs of herbs such as tarragon, rosemary, and thyme are nice slipped under the ties of the slow-roasted beef tenderloin for added flavor.

    See the recipe card for exact amounts. Optional sauce ingredients (Cognac-Dijon or Horseradish Cream) are listed there as well.

    For another terrific tenderloin recipe (that's more budget friendly), try this roast pork tenderloin with a creamy Dijon mustard sauce.

    Choosing the Best Beef Tenderloin

    For a special occasion dinner, start with the best beef you can find. I buy mine from a trusted butcher or reputable market and am never disappointed with the quality. A good butcher will trim the roast (saving you work) and cut exactly the piece you want.

    • Ask for a center cut (chateaubriand) for even cooking and beautiful slices.
    • Plan on about 8 ounces of uncooked meat per person.
    • If any silver skin (the tough tendon) remains, have your butcher trim it, or remove it yourself at home with a sharp knife. It is not good to eat.
    • If you buy your meat at a warehouse store, look for an already trimmed center-cut beef tenderloin. Buying a whole tenderloin in cryovac packaging makes it hard to see the cut clearly, and breaking it down yourself takes time, skill, and results in quite a bit of waste (18%-30%). Unless you're comfortable working with a whole tenderloin, it's best to choose the trimmed version for ease and consistency.

    How to Roast Beef Tenderloin (Choose Your Method)

    You need kitchen twine, a heavy pan like a cast iron skillet, a rimmed baking sheet, wire rack, instant-read digital thermometer, and either aluminum foil or parchment.

    • Get the chill off - For either method, get the chill off that beautiful piece of beef for more even roasting and better results. Let it sit out on the counter for about an hour. Don't worry, it's a food safe practice.
    • Tie the beef - Tying helps the roast beef keep its shape and roast evenly. Tie it with individual pieces of butchers string or tie it with one long piece, whichever is easiest for you. After tying, rub sparingly with a little olive oil then season liberally with sea salt and freshly ground black pepper. Add a little granulated garlic powder for the slow-roasting method only.
    A tied and seasoned beef tenderloin just starting the searing process in a cast iron pan.

    Method #1: Sear First, Oven Finish (Steakhouse Style)

    Pre-heat the oven to 400 degrees. In preparation for roasting your tenderloin, cover a rimmed baking sheet with foil or parchment. Place a wire rack on top. Next, heat a pan like a cast iron skillet or other heavy pan over medium-high heat.

    Sear the Roast

    Sear the beef tenderloin by placing the beef in the hot pan, searing on all sides and briefly both ends, turning as a rich brown crust is achieved. Turn your ventilation system on as searing can create a lot of smoke and steam.

    Beef tenderloin searing in a cast iron pan on the stove getting a nice browned crust.

    Roasting and Finishing

    After the roast is seared, transfer the beef to the wire rack on the baking sheet and finish in the oven. This helps for fast, even roasting. If you don't have a wire rack, just place the beef on the pan.

    Roast to the temperature that you want, checking the chart below. Use a digital thermometer to cook to temperature. Wireless thermometers like a Meater work great, or if your oven comes with an internal probe use that.

    Method #2: Slow-Roasted Beef Tenderloin Only (No Sear)

    Pre-heat the oven to 325°F. The lower temperature is a gentler way of roasting. You get that even pink color all of the way through the beef tenderloin with no gray edge from searing. It takes longer, and timing can vary significantly depending on the size and shape of the tenderloin. For best results, cook by internal temperature, not time, and begin checking early.

    A tied beef tenderloin with added sprigs of fresh green tarragon.

    After tying the tenderloin, place fresh herb springs under the ties, then place the tied roast beef on the baking sheet and roast to temperature. With the lower temperature, figure it will rise 5°F while resting.

    Internal Temperatures for Beef Tenderloin

    There are many factors involved in roasting timing, such as temperature, how long the meat was seared, and the thickness of the piece. Just watch it as you don't want to over cook this beautiful piece of meat.

    Beef tenderloin is very lean, with little marbling or fat to protect it from overcooking - which is why it's best served rare to medium and why careful temperature monitoring is so important.

    DonenessPull from Oven at…Final Temp After Resting
    Rare115–120°F125–130°F
    Medium-Rare120–125°F130–135°F
    Medium130–135°F135–145°F
    Medium-Well140–145°F145–150°F
    Well Done150°F+155°F+ (not recommended)

    Because of something called carry over cooking, your roast beef will continue to warm and the temperature rise a few more degrees after removing it from the oven. Here's a great article on steak temperatures.

    If you're going to make the cognac Dijon pan sauce, don't wash the pan! Set it aside until you're ready to make the sauce.

    Chef's Tip - Rest Beef Tenderloin Before Slicing
    The temperature of beef tenderloin continues to rise 5-10°F after you remove it from the oven. For best results, rest loosely covered with aluminum foil before slicing. This keeps the meat warm and helps redistribute juices for a more tender result, while the loose tent prevents the crust from getting soggy. If you slice without resting the juice may drain away leaving you with dry roast beef. Lastly, remove the twine, slice and enjoy.

    Optional Sauces for Roast Beef Tenderloin

    Cognac Dijon Sauce

    For a quick and easy pan sauce, start with cognac and creme fraiche or cream. The inspiration for the sauce recipe is from Chef Dorie Greenspan. I add a little fresh chopped tarragon and a little good Dijon mustard for my version of classic French bistro flavors. Use the pan in which you seared the beef tenderloin. Directions are in the recipe card.

    Creamy Horseradish Sauce

    Make a creamy horseradish sauce by whipping heavy cream and creme fraiche together and adding a however much horseradish you like. Season with salt and white pepper.

    • Combine ½ cup creme fraiche and ½ cup heavy whipping cream in a bowl and whip with a hand mixer on medium-low until it is thick and creamy.
    • Stir in 2-4 tablespoons horseradish, to your taste (drained if juicy before adding).
    • Add a little fresh lemon juice (½ teaspoon or so), salt, white pepper and either chopped chives or chopped fresh tarragon (optional).

    You know what else this sauce is terrific for? Salmon: steamed salmon, grilled, or pan seared salmon.

    Serving Suggestions

    Roast beef tenderloin is beautiful and impressive served on a platter with the slices slightly overlapping, allowing guests to choose their own pieces. Of course you can serve several slices on individual plates with side dishes if preferred.

    Leftovers work for breakfast with eggs or in a sandwich for lunch and will keep up to 4 days covered in an airtight container.

    Side Dishes

    What sides go well with beef tenderloin? Glad you asked. Try these easy side dishes for your beef masterpiece:

    • Riced mashed potatoes.
    • Cauliflower puree (low carb option).
    • Scalloped potatoes (aka potato gratin).
    • Green beans almandine.
    • Broccolini.
    • A terrific salad.

    Beef Tenderloin FAQs

    Should you sear beef tenderloin before roasting?

    It depends on the style of the recipe. You can sear then roast, as in this recipe, or you can do a slow-roasted beef tenderloin with or without the sear. step. Both are terrific, just a bit different.

    What temperature should beef tenderloin be cooked to?

    Beef tenderloin is best served rare to medium for maximum tenderness and flavor. Pull it from the oven between 115-135°F, depending on your preferred doneness, then let it rest for 15-20 minutes. The temperature will rise another 5-10°F as it rests. See the doneness chart above for exact pull and final temperatures.

    Is beef tenderloin the same as chateaubriand?

    Not exactly. Beef tenderloin is the whole cut, while chateaubriand refers to the center cut portion - the most tender, evenly shaped part, perfect for roasting. For this recipe, I recommend using chateaubriand for the best presentation and even cooking.

    More Elegant Recipes

    When you want to switch it up and still serve a special main dish, try these delicious recipes.

    • A golden crusted pork rib roast on a gray platter with fresh green parsley.
      Pistachio Crusted Pork Rib Roast
    • Pork tenderloin with creamy mustard sauce close up with a serving fork.
      Roast Pork Tenderloin with Dijon Mustard Sauce
    • crispy seared duck breast
      Pan Seared Duck Breast
    • Wine braised beef short ribs with sauce and vegetables in a pan.
      Red Wine-Braised Short Ribs Recipe

    Did You Make This Recipe?

    If you make this center-cut roast beef tenderloin please add your comment. I appreciate your feedback and enjoy hearing from you. If you loved it, please give it a 5-star rating! They really help other readers.

    📖 Recipe

    beef tenderloin on a plate.

    Center-Cut Beef Tenderloin (Chateaubriand)

    Sally Cameron
    When purchasing beef tenderloin I always ask for a center cut, figuring 8 ounces per person of uncooked weight. Buy the best beef you can from a quality butcher and you won't be disappointed. And if you have leftovers, great for the next day.
    5 from 1 vote
    Prevent your screen from going dark
    Print Recipe Pin Recipe
    Prep Time 10 minutes mins
    Cook Time 20 minutes mins
    Total Time 30 minutes mins
    Course Main Course
    Cuisine American
    Servings 4
    Calories 270 kcal

    Equipment

    • Kitchen twine
    • Digital thermometer
    • Rimmed baking sheet
    • Cast iron skillet or other heavy similar pan large enough to comfortably fit the roast

    Ingredients
      

    Beef

    • 1 ½ pounds beef tenderloin preferably center cut, trimmed of all silverskin
    • ½ teaspoon Kosher or sea salt
    • ½ teaspoon Ground black pepper
    • 1 tablespoon Olive oil ghee, or avocado oil

    Cognac-Dijon Cream Sauce (optional)

    • ⅓ cup cognac or brandy
    • ½ cup creme fraiche
    • 1 tablespoon Dijon mustard
    • 2 teaspoons fresh chopped thyme or tarragon

    Instructions
     

    Pre-heat oven and prep

    • Remove the beef from the refrigerator and allow to stand on the counter for 45-60 minutes to get the chill off. You will get better roasting results. Tie the tenderloin with kitchen twine at about 1″ intervals to help maintain it's shape and roast evenly. Liberally sprinkle all sides with kosher salt and pepper. Rub with olive oil. Pre-heat oven to 400 degrees.

    Sear the beef

    • Cover a rimmed baking sheet with foil, top with a wire rack and set aside. Place a heavy skillet or fry pan over medium-high heat. When the pan is very hot, place the beef in the pan and sear on all sides, turning when a nice brown crust forms. After sides are seared, turn briefly on the ends to sear them as well. Place beef on the wire rack and set the pan aside. DO NOT WASH IT.

    Roast the beef

    • Place seared beef on the wire rack in the oven and roast until the beef reaches an internal temperature of 125 degrees for rare or 130-135 for medium-rare and 140-145 for medium with a digital thermometer. Test at about 18-20 minutes and roast longer if needed.
      When I do a 1 ½ pound piece in my convection oven it takes about 18 minutes. Timing will depend on how long you sear the meat and your oven.

    Resting time

    • Remove beef from the oven and allow to rest in a warm place for 15-20 minutes. This gives you time to make a sauce or finish up your side dishes. Remove the twine, slice and enjoy.

    Cognac-Dijon Cream Sauce (optional)

    • Using the pan in which you seared the beef tenderloin, return the pan to medium heat. Pour off any fat, leaving the browned bits of meat.
    • Off the heat, add the cognac then return pan to the heat and stir, scraping up the browned bits stuck to the bottom. This is called deglazing the pan. Allow the cognac to cook down for a minute or two, then whisk in creme fraiche. When it is smooth, add the Dijon and tarragon. Taste and adjust the flavors with salt and pepper if needed, but it may not need a thing.

    Notes

    For the alternative sauce (or do both!) here is the horseradish cream sauce recipe. 
    • Combine ½ cup creme fraiche and ½ cup heavy whipping cream in a bowl and whip with a hand mixer on medium-low until it is thick and creamy.
    • Stir in 2-4 tablespoons horseradish, to your taste.
    • Add a little fresh lemon juice (½ teaspoon or so), salt, white pepper and either chopped chives or chopped fresh tarragon (optional).
    Nutrition calculation does not include the optional sauces. 

    Nutrition

    Calories: 270kcalCarbohydrates: 0.2gProtein: 52gFat: 4gSaturated Fat: 0.5gPolyunsaturated Fat: 0.4gMonounsaturated Fat: 3gSodium: 291mgPotassium: 4mgFiber: 0.1gSugar: 0.003gVitamin A: 1IUCalcium: 1mgIron: 0.1mg
    Tried this recipe?Let us know how it was with a comment and leave a star rating!

    Simple Baked Shrimp With Lemon Garlic Marinade

    11/13/2013 by Sally Cameron Leave a Comment

    A small appetizer plate of golden baked shrimp on wooden skewers with cocktail sauce.

    Welcome the simplicity and versatility of this baked shrimp to your recipe collection. America's most popular seafood, shrimp are a surefire crowd-pleaser. Serve them as a classic shrimp cocktail for a get together, tuck them into tacos, toss them with pasta and sauce, top a bowl of risotto or a salad, or simply serve with veggies. Baked shrimp is your go-to solution for busy weeknights and entertaining too. It's quick and easy, try these!

    A small plate of garlic baked shrimp on skewers with lemon wedges and cocktail sauce.

    I made this baked shrimp recipe for years when catering parties for clients and still do for dining at home. Baked shrimp has great flavor, is easy, and everyone always loves them. I often use them as an appetizer and serve with homemade cocktail sauce, but there is much more you can do with them.

    [feast_advanced_jump_to]

    Why You'll like This Recipe

    • It's fast and easy - not much work for a big return.
    • It's versatile for serving ideas.
    • Frozen thawed shrimp or pick up thawed shrimp at the market.

    If you love shrimp, try this easy oven baked shrimp scampi. It's one of our favorites.

    Recipe Ingredients

    • Shrimp: Wild shrimp are my choice over farmed. Use larger size shrimp, 13-15 size or 16-20 size, depending on your intended use. In a hurry, buy them peeled and deveined. To save money, buy them shell-on and peel them yourself. Frozen is fine, but thaw fully first.
    • Garlic: For that savory, pungent, aromatic punch of flavor.
    • Olive oil: Use a nice extra virgin, fruity olive oil. Flavored olives oils work too.
    • Lemon juice: Get fresh lemons and squeeze for fresh juice,
    • Paprika: Either smoked or regular paprika work for baked shrimp. The smoked paprika gives them a little smoky flavor. If you like it spicy, use sharp paprika.

    Please see the recipe card for measurements, salt and pepper. For another seasoning option, toss shrimp with olive oil and my all-purpose homemade dry rub, then bake.

    Substitutions and Variations

    • For a south-of-the-border flavor, add a ½ teaspoon of ground cumin, a pinch or two of chipotle for some heat, and fresh squeezed lime juice in place of the lemon. Sometimes I'll splash in a little tequila.

    Recipe Instructions

    • Step 1: Mix the simple shrimp marinade.
    • Step 2: Marinate the shrimp for 20-30 minutes on the counter.
    • Step 3: Bake the shrimp on a foil covered baking tray.
    • Step 4: Ready to serve. If you wold like, skewer the shrimp so they are easier for guests to pick up and eat. Small bamboo picks work great.

    Chefs Tips for Buying Shrimp

    I generally use large shrimp, the 16-20 size, for this recipe, but you can use smaller shrimp, like the 21-25 size. The baking time will be faster and they are less expensive. Watch your baking time and don't over cook. Shrimp are pink and opaque when done and the raw gray color is gone.

    Most shrimp are frozen shortly after catch. Buy them thawed at the seafood counter or thaw yourself from the freezer. Thawing overnight in the refrigerator is best, but if you forgot, use the quick thaw method (below) to get them ready.

    Chef's Note: For a helpful guide on buying shrimp, please follow this link to Seafood Watch by the Monterey Bay Aquarium. Their guide will help you to make wise choices at the store or fish market.

    How to Quick Thaw Shrimp

    Submerge the airtight package in cold water (NOT warm water!) and change the water every 30 minutes. The shrimp thaw pretty fast, should be no more than an hour. If the package floats on top of the water, place a plate on top of the package to keep the package submerged.

    Raw marinated shrimp arranged on a foil covered baking tray.

    Chef's Tip: Marinating shrimp. When you have an acid such as lemon juice or lime juice in the shrimp marinade, you do not want to marinate them long, as the acidity begins to cook the shrimp (that's how ceviche is made). A short marinade of 20-30 minutes is all you need to add flavor.

    Serving Suggestions

    • Try them to top risotto , black rice, brown rice, or white rice.
    • Chill and use for a shrimp salad with avocado and raspberries.
    • Tucked into tortillas for easy shrimp tacos.
    • Use for a classic shrimp cocktail. For catering parties, I skewer them onto small bamboo picks and pile them on a platter so finger stay clean, served with homemade cocktail sauce or your favorite jarred cocktail sauce.
    • Try them with creamy guacamole, salsa or other sauces, depending on what you are in the mood for.
    • For an easy Italian dinner, toss with roasted tomato marinara or this quick tomato pasta sauce and serve over pasta, add big tossed green salad.
    • Serve over herbed cauliflower rice for a delicious low-carb dinner.
    A small appetizer plate of golden baked shrimp on wooden skewers with cocktail sauce.

    Recipe FAQs

    What is the best way to cook shrimp?

    Shrimp are so versatile and easy to cook, there is not one best way but many terrific ways. Shrimp can be boiled, baked, roasted, simmered in sauce, pan roasted, grilled, poached, sautéed, fried, or broiled all with great success. Just watch your timing and don't over-cook them.

    How do you know when shrimp is done baking?

    Shrimp are done when they turn pink and are just opaque. Timing depends on the size of the shrimp. Large shrimp take a little longer than smaller shrimp, but none of them take very long. One shrimp tip: don't walk away while they are cooking, as they cook quickly and you don't want them rubbery and over-done. For large shrimp, turn them over half way through the cooking process.

    What temperature and time should I bake shrimp at?

    Bake shrimp from 350°F to 425°F (which is more roasting than baking). For a grill, grill shrimp on medium heat. Which ever temperature you choose, the key is to watch the shrimp for doneness as they cook quickly. The higher the temperature, the faster the cooking time. Also the smaller the shrimp, the faster the cooking time. Most shrimp take only minutes to cook, from 5-10.

    How do I prevent baked shrimp from becoming overcooked and rubbery?

    Simple! Watch your timing. Don't walk away from shrimp or get distracted when they are cooking. Shrimp are done when they just turn pink and opaque, and that grayish raw color is gone. For most shrimp it helps to turn them after a few minutes to insure they are equally done on both sides. When done, remove the pan or dish from the heat source immediately.

    Baked garlic shrimp on a plate for serving as an appetizer.

    More Recipe Ideas With Shrimp

    For another tasty shrimp recipe, try these wrapped in Prosciutto and grilled. Make the either long for an entree or short for appetizers.

    • baked lemon shrimp scampi
      Easy Baked Shrimp Scampi
    • quick coconut curry shrimp
      Coconut Shrimp Curry (Quick Dinner)
    • Thai shrimp soup called Tom Yum in bowls with shrimp, jalapenos, cilantro, and limes.
      Shrimp Tom Yum Soup
    • shrimp fra diavolo
      Spicy Shrimp and Pasta (Shrimp Fra Diavolo)

    ⭐️Did You Make This Recipe?

    If you make this recipe, please add your comment. I appreciate your feedback and enjoy hearing from you. If you loved it, please give it a 5-star rating! They really help other readers.

    📖 Recipe

    A small appetizer plate of golden baked shrimp on wooden skewers with cocktail sauce.

    Baked Shrimp

    Sally Cameron
    Baked shrimp are easy and versatile. See servings ideas in the recipe notes below. For shrimp, I use the 16-20 size but you can use a smaller size. Your baking time will be faster the smaller they are. This serves about 6 as an appetizer or 3-4 if used as an entree.
    5 from 1 vote
    Prevent your screen from going dark
    Print Recipe Pin Recipe
    Prep Time 5 minutes mins
    Cook Time 7 minutes mins
    Marinate time 20 minutes mins
    Total Time 32 minutes mins
    Course Appetizer, Entree
    Cuisine American
    Servings 6 for appetizers, 4 for entree
    Calories 121 kcal

    Equipment

    • Microplane zester optional to finely zest garlic
    • Rimmed baking sheet

    Ingredients
      

    Lemon garlic marinade

    • 3 large garlic cloves and zested with a microplane
    • 3 tablespoons olive oil
    • 3 tablespoons lemon juice
    • 1 ½ teaspoons smoked paprika or regular paprika
    • ⅛ teaspoon sea salt
    • ⅛ teaspoon ground black pepper

    Shrimp

    • 1 pound large shrimp thawed if frozen, peeled and deveined

    Instructions
     

    Make marinade

    • To make marinade, chop the garlic very fine and smear it into a paste with the back of your knife. Another way is to use a microplane zester. Works like a charm. Add the garlic, olive oil, lemon, paprika, salt and pepper to a bowl and whisk until smooth or add to a jar and shake well.
    • Scrape the marinade into a bowl or zip bag, add shrimp, and turn to coat them well. Allow shrimp to marinate at room temperature for 20-30 minutes.
    • Pre-heat oven to 400°F. Place shrimp in a single layer on a foil lined baking sheet. Bake 5-7 minutes, depending on the size of your shrimp. Shrimp will turn pink and opaque when they are done. Turn them over at the halfway point, especially for larger shrimp. Don't over bake them!

    Notes

    Serving Ideas: 
    • Chill shrimp and use for an appetizer with cocktail (or other) sauce.
    • Serve warm over rice, risotto, or pasta.
    • Make a shrimp salad with fresh tossed greens and a vinaigrette.
    • Tuck into corn tortillas for tacos, add salsa, cheese, cabbage, squeeze lime over them.
    • If you are making this in volume for a party and doubling or tripling the recipe, make the marinade in the food processor. 

    Nutrition

    Calories: 121kcalCarbohydrates: 2gProtein: 10gFat: 8gSaturated Fat: 1gPolyunsaturated Fat: 1gMonounsaturated Fat: 5gTrans Fat: 0.01gCholesterol: 95mgSodium: 477mgPotassium: 111mgFiber: 0.2gSugar: 0.3gVitamin A: 383IUVitamin C: 3mgCalcium: 45mgIron: 0.3mg
    Tried this recipe?Let us know how it was with a comment and leave a star rating!

    Gluten Free Lasagna (no boil noodles)

    12/09/2025 by Sally Cameron 10 Comments

    lasagna | AFoodCentricLife.com

    Gluten-free lasagna is pure comfort food, cheesy, hearty, and baked until golden and bubbling. This version uses gluten-free no-boil, oven-ready noodles (no precooking required) and a rich tomato sauce with ground chicken sausage for extra protein and flavor. It's cozy, family-friendly, and every bit as satisfying as the classic lasagna you remember-just without the gluten. And no one will know it's gluten-free.

    A big slice of lasagna with layers of cheese and sauce on a white plate.

    This recipe has been one of my tried-and-true favorites for more than 15 years. I first made it with wheat no-boil noodles, then set it aside after going gluten-free. When gluten-free no-boil noodles finally came to market, I brought back my easy lasagna just the way I loved it-this time fully gluten-free. This version is written and tested specifically for gluten-free no-boil noodles, with a slightly more fluid sauce and layering method that keeps the pasta tender and the slices beautifully structured.

    [feast_advanced_jump_to]

    Why You'll love Gluten-Free Lasagna

    • No-boil, lighter feel - Gluten-free oven-ready noodles require no precooking, and bake up a bit lighter than traditional boiled pasta. Easier too!
    • Saucy, cheesy comfort - Cozy layers of ricotta, mozzarella, and sausage tomato sauce baked until bubbly and golden.
    • Gluten-free that feels "normal" - Tender, satisfying texture that eats like classic lasagna.

    For another filled pasta recipe, try these stuffed pasta shells.

    Chef's Tips: Gluten-Free No-Boil Noodles Need More Sauce - Gluten-free no-boil lasagna noodles (aka oven-ready noodles) behave differently than wheat. They're more absorbent and hydrate faster as they bake, so more hydration is needed. If the sauce is too thick, the noodles will pull moisture from it and the lasagna can bake up dry or with stiff edges. For this recipe, the sauce will be a bit more fluid than you might expect for traditional lasagna. That extra moisture is what helps the gluten-free noodles bake up tender.

    Ingredients You'll Need

    Ingredients for lasagna sauce with sausage, onions, tomatoes, herbs, garlic, and wine.
    Ingredients for gluten-free lasagna filling with ricotta, parmesan, egg, herbs, and noodles.

    Lasagna Sauce

    • Olive oil - Helps bloom the aromatics and soften onions without burning.
    • Onion + garlic - Aromatic foundation for depth.
    • Fennel seed (optional) - Echoes classic Italian sausage flavor.
    • Chicken sausage - Choose cooked Italian sausage, adding protein, richness, and savory depth.
    • Dry wine (optional) - Red or white, adds acidity and roundness; cooks down and disappears, leaving flavor.
    • Crushed tomatoes - The backbone of the sauce. Their texture hydrates no-boil noodles better than thick puree.
    • Strained tomatoes (passata) - Pure strained tomatoes that add extra moisture for the gluten-free no-boil noodles without diluting flavor. Look for boxed Pomi, or order passata online if your store doesn't carry it.
    • Herbs - Use dried Italian blend seasoning, or a blend of basil and oregano.
    • Red pepper flakes - for a little heat and subtle kick.
    • Bay leaf - Adds a savory depth of flavor.

    Please see the recipe card for measurements, salt, pepper.

    Chef's Tip: Passata vs American Tomato Sauce
    Passata (like boxed Pomi) is pure Italian strained tomatoes-smooth, with no skins, seeds, or added seasonings. It's looser than tomato sauce, so it adds the extra hydration gluten-free no-boil noodles need without watering down the flavor. Standard tomato sauce is cooked down, thicker, and often seasoned with salt, herbs, or sugar. Using passata keeps the sauce clean, balanced, and designed for no-boil noodles to cook beautifully.

    Filling, Noodles, Cheese

    • Ricotta - Creamy, mild, and perfect for building structure between layers.
    • Parmesan - Umami + salt; sharpens the ricotta's mildness.
    • Fresh herbs - Basil + oregano lift richness with brightness.
    • Egg - Binds the filling so slices hold.
    • Gluten-free no-boil lasagna noodles - I tested with Barilla Oven-Ready GF Noodles.
    • Mozzarella - Use low-moisture mozzarella in a block or log and grate it yourself. It melts smoothly without making the lasagna watery. Skip fresh mozzarella packed in brine-that style holds too much moisture for this recipe.
    • Parmesan - Finishes the lasagna with savory depth and gentle browning.

    Please see the recipe card for measurements, salt, black pepper, and red pepper.

    Chef's Tip - Why Freshly Grated Cheese Matters: Better Melt
    Pre-grated cheeses contain anti-caking additives that interfere with melting and can create a slightly gritty texture. For the best melt, clean flavor, and creamy layers, use freshly grated cheese instead. It does make a difference.

    Substitutions and Variations

    • If you can't find passata (Pomi):
      • Best option - Blend canned whole or crushed tomatoes until smooth, then press through a fine-mesh strainer to remove skins and seeds. This behaves much like passata.
      • Other alternative - Use plain canned tomato sauce with no added herbs or sugar. It will still give the gluten-free no-boil noodles the hydration they need.

    How to Make Gluten-Free Lasagna

    You'll need an 8"x8" or 9"x9" (2/1 2 - 3" deep) casserole dish. Get your sauce and ricotta mix done before starting to build the lasagna.

    Up Front Tip

    For gluten-free no-boil noodles, the sauce will be a little looser than you might be used to. As you layer, make sure every noodle has some sauce touching both sides, and keep the ricotta sandwiched between saucy layers instead of pressing it directly onto dry noodles. The lasagna may look slightly more fluid going into the oven, but the gluten-free noodles drink up that extra moisture as they bake, so you end up with a tender, saucy, gluten-free lasagna.

    Ground sausage in a food processor workbowl.
    1. Pulse chopped sausage in a food processor or chop fine by hand.
    Sautéing onions and herbs in a stainless steel pot.
    1. Cook onions in olive oil until soft, then add garlic, 1 minute, then seasonings and wine. Cook wine down by half.
    Cooking ground sausage and onions in a pot for lasagna sauce.
    1. Stir in ground sausage.
    Bright red lasagna sauce with tomatoes, sausage, onions, and herbs.
    1. Add both tomatoes, swirling a little water around in the can of tomatoes and adding. Simmer 30 minutes then cool sauce if making ahead.
    Ricotta cheese filling for lasagna in a glass bowl.
    1. Mix the ricotta, egg, herbs, and Parmesan, salt & pepper for filling.
    Building lasagna with sauce and noodles in a white square baking dish.
    1. Begin assemble of layers. Add ⅔ cup sauce to the baking baking dish. Add 2 noodles.
    Gluten free lasagna layer with oven ready noodles, and sauce, with ricotta cheese topping.
    1. Add a little more sauce to the noodles, then ⅓ of the filling mixture.
    More layering for making gluten-free lasagna with noodles, ricotta, and sauce in a white casserole.
    1. Spread the ricotta filling evenly, add a bit more sauce on top.
    Grate mozzarella cheese on top of noodles and sauce for lasagna.
    1. Add ⅓ of the mozzarella. Now repeat these steps for 4 layers ending with noodles on top.
    Top layer of a gluten-free lasagna dish ready for baking topped with parmesan cheese.
    1. Cover the last set of noodles with the remaining sauce and Parmesan cheese. See recipe card for bake ahead, and bake right away directions.

    Baking Gluten-Free Lasagna (Now or Make-Ahead)

    Bake Right After Assembly

    • Preheat oven to 375°F.
    • Cover dish tightly with foil and spray the underside with oil.
    • Place on a rimmed baking sheet if full to the edge.
    • Bake 45 minutes covered, then uncovered 15 minutes longer until bubbly and golden.
    • Test noodles with a paring knife in the center.
    • If still firm, bake another 10-15 minutes until fully tender.
    • Lasagna should reach 165°F, but tender noodles determine doneness with gluten-free.
    • Rest 20-30 minutes before slicing.

    Make-Ahead and Bake Later (Up to 24 Hours)

    Lasagna can be made 1-4 hours in advance and refrigerated to bake later or up to 24 hours ahead. Sauce must be cooled (70°F) before assembly.

    • Remove the dish from the refrigerator 1 hour ahead and unwrap.
    • When ready to bake, pre-heat the oven to 375°F.
    • Bake 45 minutes covered.
    • Uncover and bake 15-20 minutes more, until bubbly and golden.
    • If noodles feel firm when pierced with a paring knife or your thermometer, bake 10-15 minutes longer until they are tender.
    • Lasagna should reach 165°F, but tender noodles determine doneness with gluten-free.
    • Rest 20-30 minutes before slicing.

    Freezing Lasagna

    Many people like to freeze lasagna for make-ahead meals, and Barilla says it works on the box. However, I have not tested freezing this recipe.

    If you need freezer-friendly meals, you may freeze unbaked gluten-free lasagna at your discretion-just know that I am not 100% sure at the results.

    If you freeze it, thaw 24 hours in the refrigerator, then follow baking directions.

    The finished casserole.

    Serving Suggestions

    Gluten-free lasagna is a complete meal on its own. Pair it with a big tossed green salad and a simple balsamic vinaigrette. If you'd like to round it out further, add a batch of gluten-free garlic toast for the perfect comfort-food dinner.

    Storage

    Gluten-free lasagna will keep for up to 4 days in the refrigerator when tightly covered. Reheat in a 350°F oven, covered with foil, until the center reaches 165°F. Individual portions can also be reheated in the microwave until hot. It reheats great!

    Recipe FAQs

    Do gluten-free no-boil noodles really work?

    Yes! Today's gluten-free no-boil noodles bake up beautifully, just like the traditional wheat version, but they do require more hydration in the sauce. They keep the process faster and lighter with no precooking required. It's all I use!

    Can I make this recipe ahead of time?

    Absolutely. Assemble the lasagna in the morning, cover, and refrigerate until baking. Add a few extra minutes of oven time if it's going in cold from the fridge. If you can let it stand at room temperature for awhile before baking, that helps. Bake to 165°.

    Can I use regular tomato sauce instead of passata?

    Passata (or Pomi strained tomatoes) is my first choice because it's just smooth, pure, strained tomatoes and keeps the flavor of the sauce clean. If you can't find it, you can blend and strain canned tomatoes for a similar result. In a pinch, you can use plain canned tomato sauce with no added herbs or sugar.

    More Italian Inspired Recipes

    From stuffed shells, to a hearty classic Tuscan soup, or an easy one-pan chicken dinner, try some of these Italian-inspired dishes. And that ragu? Delicious.

    • Stuffed shells with kale and ricotta
      Pasta Shells Stuffed With Ricotta
    • Ribollita in a gray pot.
      Italian Ribollita Soup (Ribollita Toscana)
    • A round pan of golden chicken thighs in red sauce with rosemary on the side.
      One Pan Italian Chicken Thighs
    • A gray bowl of twirled pasta topped with a beef short rib ragu, parsley, and a little parmesan.
      Braised Beef Short Rib Ragu

    Did You Make This?

    If you make gluten-free lasagna, please let me know how it came out for you and how you enjoyed it. I love to hear from you and other readers appreciate it too. And consider leaving a star rating please. Any questions, I am here to help.

    📖 Recipe

    lasagna | AFoodCentricLife.com

    Gluten Free Lasagna

    Sally Cameron
    Gluten free lasagna is pure comfort food-cheesy, hearty, and baked until golden and bubbling. No-boil noodles make making lasagna easier, faster, and lighter to eat than heavier traditional pasta noodles.
    5 from 4 votes
    Prevent your screen from going dark
    Print Recipe Pin Recipe
    Prep Time 30 minutes mins
    Cook Time 1 hour hr 30 minutes mins
    Total Time 2 hours hrs
    Course Entree
    Cuisine Italian
    Servings 6
    Calories 455 kcal

    Equipment

    • 8"x8" or 9"x9" deep casserole dish 2 ½" - 3" deep, straight sides, ceramic or stoneware
    • 4-5 quart pot for sauce
    • Food Processor to grind sausage, or use a chefs knife and chop by hand

    Ingredients
      

    Sauce

    • 1 tablespoon olive oil
    • ½ medium onion chopped
    • 3 large garlic cloves chopped fine
    • ¾ teaspoon ground fennel seed or wild fennel pollen
    • 6 ounces pre-cooked chicken sausage usually 2 links
    • ⅓ cup dry wine, red or white optional
    • 1 bay leaf
    • 1 ½ teaspoon dried Italain seasoning blend or combo oregano and basil
    • 28 ounces crushed tomatoes preferably san marzano
    • ½ cup pure strained Italian tomatoes called passata or Pomi in the box (same)
    • ½ teaspoon kosher salt
    • ¼ teaspoon ground black pepper
    • 1 pinch red pepper flakes optional

    Filling

    • 15 ounces whole milk ricotta cheese
    • ⅓ cup freshly grated Parmesan cheese
    • ¼ cup fresh finely chopped basil leaves or 1 tablespoon dried
    • 2 tablespoons fresh finely chopped oregano leaves or ¾ tablespoon dried
    • 1 large egg
    • ½ teaspoon kosher salt
    • ¼ teaspoon ground black pepper

    Noodles and Cheese

    • 6 ounces gluten-free no-boil lasagna noodles (oven-ready) 8 noodles
    • 8 ounces grated low-moisture mozzarella block or log grate it yourself, skip pre-grated
    • ⅔ cup freshly grated Parmesan cheese to top the lasagna

    Instructions
     

    Sauce

    • Chop the sausage into chunks. In the bowl of a food processor, pulse the sausage chunks until fairly finely, about 12 pulses.
    • Heat olive oil in a large saucepan (4-5 quarts) over medium heat.  Add onion and cook until softened, stirring, about 3 minutes. Add garlic and cook 1 minute, then add the Italian seasoning blend, fennel, and wine. Simmer until the wine is reduced by half.
    • Add ground sausage, both tomatoes, salt and peppers. Swirl a little water in the crushed tomato can to wash it out and pour into the pan. Simmer for 30 minutes. Set aside and cool.
      Note - If making the lasagna ahead and refrigerating overnight, cool the sauce below 70°, then assemble the lasagna. The fastest way is using an ice bath in the sink as you would to cool chicken broth.

    Filling

    • In a large mixing bowl combine the ricotta, Parmesan, herbs, egg and seasoning.  Set aside.

    Layer the lasagna (4 layers)

    • If serving right away. Pre-heat the oven to 375°F degrees. 
    • Spread ⅔ cup of sauce in the bottom of the pan. Add 2 noodles, then top with ⅓ of the ricotta mixture, a little sauce, and ⅓ of the mozzarella. Repeat this layering two more times (noodles, ricotta, sauce, mozzarella). For the top layer, place the final 2 noodles, cover with the remaining sauce, and finish with Parmesan.

    To Bake Now

    • Spray a piece of foil with nonstick spray and cover the baking dish. Bake at 375°F for 45 minutes. Uncover and bake 15 minutes more, until the top is lightly golden and bubbly. Check the internal temperature-it should read 165-170°F.
      If the noodles still feel firm when pierced: loosely re-cover, lower the oven to 350°F, and bake 10–15 minutes more until tender.
      Rest: Let stand 20-30 minutes before slicing and serving for the cleanest cuts.

    To Bake for Later

    • Spray a piece of foil with nonstick spray and tightly cover the baking dish. Refrigerate for up to 24 hours.
      About 1 hour before baking, remove the dish from the refrigerator to take off the chill. Preheat the oven to 375°F and follow the same baking directions as above.

    Notes

    If you need a double batch, I highly recommend you bake it using 2 - 8x8 or 9x9 casseroles instead of one large batch. It is easier and you get nicer slices.
     

    Nutrition

    Calories: 455kcalCarbohydrates: 23gProtein: 29gFat: 28gSaturated Fat: 14gPolyunsaturated Fat: 1gMonounsaturated Fat: 8gTrans Fat: 0.003gCholesterol: 125mgSodium: 1340mgPotassium: 827mgFiber: 7gSugar: 7gVitamin A: 1193IUVitamin C: 14mgCalcium: 729mgIron: 12mg
    Tried this recipe?Let us know how it was with a comment and leave a star rating!

    Easy Salsa Verde Chicken (green salsa chicken)

    09/17/2018 by Sally Cameron Leave a Comment

    A gray platter of sals verde chicken breasts with tomatillo sauce, grated cheese and chopped cilantro.

    Get dinner on the table fast with this easy stovetop Salsa Verde Chicken! Tender boneless, skinless chicken breasts simmer in a bright, tangy tomatillo sauce. A sprinkle of Jack cheese, fresh cilantro or parsley, and toasted pumpkin seeds adds the perfect finishing touch. Ready in under 30 minutes, this dish is great for meal prep-serve it as-is, then shred the leftovers for incredible salsa verde chicken tacos.

    A cast iron pan filled with salsa verde chicken with pumpkin seeds and cilantro.

    With either a jar of purchased salsa verde or a batch of homemade in the fridge or freezer, getting a tasty and healthy dinner on the table takes no time. This salsa verde chicken recipe is the perfect example. With jars of my tomatillo salsa verde recipe in the freezer, all you need is a package of boneless, skinless chicken breasts and cheese to get a great dinner on the table fast.

    [feast_advanced_jump_to]

    Why You'll Love Salsa Verde Chicken

    • Fast and easy - Dinner done in 30 minutes.
    • Simple ingredients -
    • Use homemade salsa verde or store bought.

    Ingredients You'll Need

    • Oil: Use extra virgin olive oil or avocado oil as healthy cooking fats.
    • Chicken: Boneless, skinless chicken breasts.
    • Salsa verde: It's sometimes called tomatillo salsa, tomatillo sauce, or green sauce. It super easy to make and freeze ahead, or buy a store brand (Trader Joe's, Herdez).
    • Cheese: Jack cheese is mild and buttery, or a packaged, grated Mexican cheese blend.
    • Fresh herbs: For garnish, fresh cilantro or Italian parsley (optional).
    • Pumpkin seeds: Called pepitas or green pumpkin seeds. Use them raw or toasted. Toasting takes just minutes and adds nice crunch and flavor (optional).

    For measurements please see the recipe card, salt, and pepper.

    Chef's tip: Toasting pepitas (green pumpkin seeds) is so easy and quick! Make them yourself in minutes. They add great flavor to not just salsa verde chicken, but to salads, soups, and more (like snacking). Plus they are good for you! Here's how to toast pepitas. Bake a batch and keep them around for quick use.

    Substitutions and Variations

    • Use a mild red enchilada sauce in place of the salsa verde. Makes another nice recipe to change things up, and use cheddar cheese.
    • Use boneless, skinless chicken thighs instead of chicken breasts.
    • Cheese options - Mozzarella and Manchego cheese work well too.

    Chef's tip: Optimally, get your chicken breasts out of the refrigerator 45-60 minutes ahead of time to get the chill off and for more even cooking and best results.

    How to Make Chicken Salsa Verde

    Step 1: Season boneless, skinless chicken breasts with salt and ground black pepper and cook on one side until golden in a little oil. When the chicken breasts are golden (about 3-4 minutes), flip them over, pour on the sauce, and cover with a lid.

    Chicken breasts in a cast iron pan browning.

    Step 2: Turn the heat down and simmer for 10-12 minutes or until chicken breasts are 160°F internally when measured with a digital thermometer. Timing might be a minute or two longer depending on the size of your chicken breasts and how cold they are out of the fridge.

    Chef's tip: Homemade salsa verde takes about 25 minutes to make. Make it ahead and freeze some. It's a simple recipe. Just simmer and puree briefly in a blender. Have it ready for a quick dinner or to serve with eggs, omelets, grilled shrimp, or baked or grilled fish.

    What to Serve with Salsa Verde Chicken

    To serve salsa verde, sprinkle with grated Jack cheese and chopped fresh cilantro. Add a side green salad and some brown rice on the side. Another good side dish is pinto beans, or try this Mexican-style rice with vegetables.

    Leftovers make a great lunch or shred extra chicken and use for salsa verde enchiladas or tacos. For dairy-free and paleo skip the cheese.

    For another easy boneless, skinless chicken recipe you can make ahead, try these chicken parchment packets with vegetables.

    salsa verde chicken breasts | afoodcentriclife.com

    Recipe FAQs

    Can I use a different protein instead of chicken?

    Instead of chicken, use a thick white fish filet. Cook the fish until it reaches 145°F when measured with a digital thermometer. It's delicious with salsa verde.

    How should I store leftover salsa verde chicken?

    Packed in an airtight container, leftover salsa verde chicken lasts up to 4 days in the refrigerator. It's a great make-ahead dinner to save for during a busy week and freezes well.

    To re-heat, get it out of the refrigerator about an hour ahead of time, then heat in a 350°F oven covered wtih aluminum foil until the chicken reaches 165°F. How long depends on how cold it was to start. Plan on at least 30 minutes or longer. Once it's hot, it's easy to keep warm until serving.

    Can I Use Salsa Verde Chicken in Tacos or Burritos?

    Yes! Shred leftover chicken and use in tacos or burritos for a terrific second meal or lunch. It's so good you might want to make extra.

    Four chicken breasts on  a gray platter with salsa verde sauce, cheese, and herbs.

    More Chicken Recipes to Try

    • Crispy golden air fryer chicken cutlets on a gray serving platter.
      Air Fryer Chicken Cutlets
    • A platter of sliced glazed teriyaki chicken with broccoli, carrots and zucchini.
      Teriyaki Chicken Thighs Recipe
    • Sliced and whole smoked chicken breasts on a gray serving plate.
      Easy Smoked Chicken Breast
    • Platter of grilled chicken breasts with herbs.
      Easy Blender Lemon Chicken Marinade

    Did You Make This Recipe?

    If you make this chicken salsa verde, please add your comment. I appreciate your feedback and enjoy hearing from you. If you loved it, please give it a 5-star rating! They really help other readers.

    📖 Recipe

    A gray platter of sals verde chicken breasts with tomatillo sauce, grated cheese and chopped cilantro.

    Salsa Verde Chicken (green salsa chicken)

    Sally Cameron
    Make dinner in 20 minutes with these easy salsa chicken breasts. Boneless, skinless chicken breasts, tomatillo salsa (salsa verde), grated cheese. Toasted pumpkin seeds are optional. Make the salsa ahead and refrigerate or freeze or use jarred sauce. For dairy-free, skip the cheese. For best results allow your chicken to stand at room temperature, unwrapped, for about 30 minute to get the chill off. This recipe halves easily for two servings and freezes well too.
    5 from 1 vote
    Prevent your screen from going dark
    Print Recipe Pin Recipe
    Prep Time 3 minutes mins
    Cook Time 15 minutes mins
    Total Time 18 minutes mins
    Course Main Course
    Cuisine Mexican, Southwestern
    Servings 4
    Calories 319 kcal

    Equipment

    • Cast iron skillet or similar pan with a lid

    Ingredients
      

    • 1 tablespoon olive oil
    • 1 ½ - 2 pounds boneless, skinless chicken breasts
    • ¼ teaspoon sea salt
    • ¼ teaspoons ground black pepper
    • 1 ½ cups tomatillo salsa verde (jarred or homemade) recipe on this site, or bottled
    • 2-3 ounces grated Jack cheese sub mozzarella, mexican blend, or grated manchego

    Optional Garnishes

    • 2 teaspoons chopped cilantro or Italian parsley
    • 1 tablespoon toasted pumpkin seeds recipe on this site

    Instructions
     

    • Heat the oil in a 10" cast iron skillet or other heavy pan over medium heat. Lay the chicken breasts smooth side up and sprinkle evenly with the salt, pepper and garlic. When pan is hot, add the chicken smooth side down and cook until this side is golden, about 3 minutes. 
    • Turn the chicken over, pour the sauce over the top, put a lid on the pan and turn heat to medium low. Simmer chicken for 10-12 minutes or until a digital thermometer reads 160° when inserted in the thickest part. Sprinkle with cheese, pumpkin seeds and cilantro and serve. The cooking time could vary depending on how cold your chicken is when you start.

    Notes

    If you don't have time to make the sauce, use a jarred sauce like Traders Joes Salsa Verde. Click here for my easy recipe, which freezes well. 
     

    Nutrition

    Calories: 319kcalCarbohydrates: 6gProtein: 40gFat: 13gSaturated Fat: 4gPolyunsaturated Fat: 2gMonounsaturated Fat: 4gTrans Fat: 1gCholesterol: 121mgSodium: 1037mgPotassium: 837mgFiber: 1gSugar: 5gVitamin A: 694IUVitamin C: 5mgCalcium: 116mgIron: 1mg
    Tried this recipe?Let us know how it was with a comment and leave a star rating!

    Chicken Vegetable Soup Recipe

    01/12/2024 by Sally Cameron 10 Comments

    A finished pot of chicken vegetable soup ready to eat on a table.

    This chicken vegetable soup recipe is richly flavored, satisfying, and truly nourishing-healthy comfort food that warms you from head to toe on chilly days. Tender chicken, fresh vegetables, herbs, and savory chicken broth come together for a pot of soup that's not just good, it's great. I'll show you exactly how to make it, plus how to freeze it for later. This recipe is naturally gluten-free friendly and dairy-free.

    A big pot of homemade chicken vegetable soup ready to serve.

    I've been making some version of this chicken vegetable soup recipe most of my life. Over the years it's become a true healthy kitchen staple-classic flavors, tender chicken, and flexibility. Stir in pasta or rice if you want something more substantial, or keep it light and naturally gluten-free.

    [feast_advanced_jump_to]

    Why You'll Love Chicken Vegetable Soup

    • Healthy and hearty - A cozy, brothy soup loaded with vegetables and tender chicken, without feeling heavy.
    • Flexible chicken options - Make it with a raw bone-in chicken breast for maximum flavor, or use leftover or rotisserie chicken when you're short on time.
    • Great for leftovers - The soup reheats beautifully for easy lunches and it freezes well for future "I don't feel like cooking" nights.
    • Gluten-free friendly - Use gluten-free pasta (or skip the pasta for lower carb).
    • Stovetop or slow cooker - Cook it on the stovetop in about 35 minutes or let the slow cooker do the work on busy days.

    For more terrific soups using leftover chicken, try my Mexican chicken tortilla soup recipe or this hearty chicken minestrone soup.

    Ingredients You'll Need

    Ingredients for chicken vegetable soup ready for cooking.
    • Chicken: use raw chicken. For best results, use bone-in chicken as the bone adds flavor to the soup. You can also use leftover shredded chicken from baked chicken breasts or rotisserie chicken.
    • Olive oil: My go-to cooking oil but you can use avocado oil or a healthy neutral cooking oil like this. Don't use standard vegetable oil (it's not healthy).
    • Celery: one of the must have vegetables for cooking soup, plus it's an overlooked nutritional powerhouse.
    • Carrot: adds vegetable sweetness, part of the flavorful vegetable base for soups and many other dishes.
    • Aromatics: Onion and leek for great flavor. The combination of both is nice.
    • Garlic: for flavor and it's good for you! Use fresh garlic.
    • Fresh herbs: thyme, bay leaf (dried is fine), and fresh parsley add wonderful garden flavor and color. Tarragon is nice too.
    • Broth: homemade chicken broth is best. If you prefer, use frozen, canned or boxed broth. Be sure to read the labels for unhealthy ingredients and sodium levels.

    Please see the recipe card for measurements, salt and black pepper.

    Need another option? Try this easy Instant Pot Chicken Soup Recipe. Done in 30 minutes.

    Chef's tip: For chicken broth (or chicken stock), homemade is healthiest and most flavorful broth. If you have an Instant Pot or pressure cooker, try my fast chicken broth recipe. Or make a batch of long cooking chicken bone broth. Both have great flavor. Make batches and freeze in portions. Need to buy it? Look in the freezer section for good store-bought chicken broth options and be sure to read labels for sodium levels and ingredients. Go with low-sodium chicken broth brands.

    Substitutions and Variations

    Try these options for making chicken vegetable soup for your family.

    • Chicken thighs - Use boneless, skinless thighs if you prefer dark meat. Trim extra fat, cook in the soup, then shred. They add rich, savory flavor.
    • Boneless chicken breasts or tenders - Use about ¾-1 pound. Simmer gently, then shred or cube.
    • No fresh thyme? - Use dried thyme or dried Italian seasoning, one of my go-to dried herb blends. Start with about ⅓ as much as fresh and adjust to taste.
    • Pasta (optional) - For best results, cook pasta separately and add it to bowls when serving. Keeps the broth clear and prevents over-soft noodles, especially with gluten-free pasta.
    • Rice - Brown or white rice both work. Add cooked rice (or frozen rice) at the end and warm through.
    • More veggies - Stir in chopped cooked green beans or other favorite vegetables.
    • Umami boost - Add a small Parmesan rind while the soup simmers, then remove before serving.

    For another terrific hearty soup, try this turkey and wild mushroom soup. Make it with leftover turkey or use leftover chicken.

    Chef's Tip: What not to use. For a healthier soup skip the jars or cubes of bullion like a famous "better than" processed paste, unless you are ok with eating stuff like sugar, corn syrup solids, hydrolyzed soy protein, dried whey (dairy), "flavoring" (whatever that is), food starch, disodium inosinate and guanylate. Read the ingredients, then toss it. You and your soup don't need it.

    How to Make Chicken Vegetable Soup

    A pot of vegetables starting to cook for chicken soup.
    Step 1: Over medium heat, add oil to a heavy pot pot and saute the chopped vegetables.
    Sautéing vegetables for chicken vegetable soup in a dutch oven.
    Step 2: Cook until the vegetables are softened, then add garlic, and herbs.
    Raw chicken breast in a pot of broth and vegetables cooking soup.
    Step 3: Add the broth and split chicken breast to the pot.
    Chicken breast finished cooking in a soup pot for chicken soup.
    Step 4: Use tongs to remove cooked chicken breast from the top.
    Adding elbow macaroni pasta to a soup pot.
    Step 5: If using pasta add now.
    Shredding chicken breast with forks in a glass pie plate.
    Step 6: Shred the chicken.
    Adding shredded chicken to a soup pot.
    Step 7: After pasta is done, add the chicken back to the pot and stir. Soup is ready.

    Slow Cooker Option

    For busy days, this soup cooks beautifully in a slow cooker. The flavors stay bright and the chicken turns tender and easy to shred.

    1. Sauté the aromatics first - In a skillet (or with the saute function of your slow cooker), warm the olive oil and cook the onion, celery, carrots, and leek over medium heat until softened, about 8-10 minutes. Add the garlic and cook 30-60 seconds. Transfer everything to the slow cooker.
    2. Add remaining ingredients - Stir in the thyme, bay leaf, salt, pepper, chicken broth, and the whole bone-in chicken breast (skin removed).
    3. Cook - Cover and cook on Low for 5-6 hours or High for 2½-3 hours, until the chicken is fully cooked (165°F).
    4. Shred and finish - Remove the chicken, shred the meat, and return it to the slow cooker. Add parsley. Taste and adjust seasoning.
    5. If adding pasta - Cook pasta separately on the stovetop and stir it into the soup at the end. Slow cookers don't reliably cook pasta evenly and can turn it mushy. You can also swap the past for cooked rice.

    Serving Chicken Vegetable Soup

    Serve chicken vegetable soup hot all by itself or with a crusty roll or garlic toast. If you need more, add a side leafy green salad with a tasty homemade Italian dressing. For a lift of flavor, serve with lemon wedges for a squeeze of fresh lemon juice.

    Storage and Freezing

    Leftover soup keeps in the refrigerator for 3-4 days. To freeze soup for later use, freeze in portions (12-16 ounces is good) in airtight containers for 2-3 months (labeled and dated). For storage, I use these silicone freezer containers or other airtight containers. They work great.

    An individual bowl of chicken vegetable soup with a pot behind it.

    Recipe FAQs

    Can I make a gluten-free or dairy-free version of chicken vegetable soup?

    If you are using store purchased broth, be sure it's labeled gluten-free chicken broth or there will be gluten. Sometimes it is hard to tell by the labels without research so don't risk it if you need to be gluten-free. The best option is make homemade broth where you control the ingredients. If adding pasta, use gluten-free pasta. If you're making a creamy version of the soup, skip the dairy or try a plant-based milk or cream, although the level of creaminess may be different.

    What vegetables are best for chicken vegetable soup?

    The best vegetables for chicken vegetable soup is the classic combination of onion, carrot, and celery to start. Other vegetables to add are chopped leeks for more flavor. Parsnips, which look like white carrots, are good too. If you like to add more green to the soup, add chopped green beans, baby spinach leaves or finely chopped kale towards the end of cooking. Another delicious option is chopped fennel, one of my favorites.

    Can I add pasta or rice to make it more filling?

    To make chicken soup more filling, add cooked rice or a small cooked pasta such as elbow macaroni. Another option is adding cubed potatoes, cooking until tender. I like gold potatoes as they don't fall apart like the drier russet potatoes. Save those for mashed potatoes.

    Can I use rotisserie chicken?

    Yes. Add shredded cooked chicken in the last 10-15 minutes so it doesn't dry out.

    More Chicken Soup Recipes

    For more soup recipes, checkout the soups and stews page. Homemade soups are welcome almost anytime of year.

    • Close up of Mexican chicken soup in a white bowl.
      Mexican Chicken Tortilla Soup Recipe
    • A bowl of chicken rice soup with herbs in a white bowl.
      Easy Instant Pot Chicken Rice Soup Recipe
    • chicken tomatillo soup
      Tomatillo Soup (with Chicken or Turkey)
    • Instant pot chicken broth
      Easy Instant Pot Chicken Broth

    ⭐️Did You Make This Recipe?

    If you make this chicken vegetable soup, please add your comment. I appreciate your feedback and enjoy hearing from you. If you loved it, please give it a 5-star rating! They really help other readers.

    📖 Recipe

    A finished pot of chicken vegetable soup ready to eat on a table.

    Homemade Chicken Vegetable Soup Recipe

    Sally Cameron
    Classic and comforting, nothing is better than homemade chicken vegetable soup. Make it in a about an hour, even less if you use leftover over roast shredded chicken and pre-cooked pasta. To make this gluten-free, use brown rice pasta.
    5 from 3 votes
    Prevent your screen from going dark
    Print Recipe Pin Recipe
    Prep Time 15 minutes mins
    Cook Time 35 minutes mins
    Total Time 50 minutes mins
    Course Entree, Main Course, Soup
    Cuisine American
    Servings 4 servings
    Calories 228 kcal

    Equipment

    • Large soup pot like a Dutch oven

    Ingredients
      

    • 2 tablespoons olive oil
    • 1 ¼ cups chopped onion half a large
    • 1 ¼ cups chopped celery 2-3 ribs
    • 1 ¼ cups chopped carrots 2-3 carrots
    • 1 cup chopped leek pale green parts only, 1 medium
    • 2-3 cloves garlic chopped fine
    • 2 teaspoons minced fresh thyme or ¾ teaspoon dried thyme
    • 1 bay leaf
    • ¼ teaspoon Kosher or sea salt or more for your taste preference
    • ¼ teaspoon Black pepper
    • 6 cups chicken broth, low sodium or homemade 48 ounces
    • 1 large bone-in chicken breast 1 pound
    • 1 tablespoon fresh parsley finely chopped

    Optional

    • ¾ cup elbow macaroni pasta: GF or wheat optional

    Instructions
     

    • Add oil to a large pot over medium heat. When hot, add the onion, celery, carrots, and leek. Cook until the vegetables are softened, about 12 minutes. Watch your heat so the vegetables don't burn or cook too quickly. If needed, turn the heat down. Stir in the garlic, and cook another 30−60 seconds. Add thyme, bay leaf, salt, and pepper.
    • Remove skin and extra fat from chicken breast. Cut chicken breast crosswise through the bone into two pieces with a chef's knife. Add the broth and the chicken breast to the pot. Bring to almost a boil, turn down to low, add a lid to the pot and simmer until chicken is cooked through, about 15 minutes (to 165°F).
    • Remove the chicken from the pot. Add the pasta (if using), turn the heat up a little and simmer until pasta is tender. Time depends on your pasta (about 10 minutes).
      When the chicken is cool enough to handle, shred the meat and add back to the pot when the pasta is done. Remove the bay leaf. Add parsley. Ladle into warm bowls to serve.

    Notes

    Optional adds:
    • Add pasta, GF or wheat, elbow macaroni is a great size.
    • Add cooked rice, white or brown.
    • Add small cubed gold potatoes where I add the pasta option and cook until tender. 
    • Add a can of rinsed and drained white beans, such as small white beans, cannellini beans, or great northern beans. 
    • Or skip it all together for a simple chicken vegetable soup.
    For low sodium, use  homemade broth, as you do not add salt to homemade broth, and skip or limit salt in the recipe. Add a little lemon juice for a lift of flavor in place of salt. Even low sodium chicken broth has a lot of sodium. 
     

    Nutrition

    Calories: 228kcalCarbohydrates: 18gProtein: 18gFat: 11gSaturated Fat: 2gPolyunsaturated Fat: 1gMonounsaturated Fat: 6gTrans Fat: 0.01gCholesterol: 29mgSodium: 364mgPotassium: 814mgFiber: 3gSugar: 6gVitamin A: 7344IUVitamin C: 14mgCalcium: 76mgIron: 2mg
    Tried this recipe?Let us know how it was with a comment and leave a star rating!

    Tomatillo Soup (with Chicken or Turkey)

    12/04/2025 by Sally Cameron 4 Comments

    chicken tomatillo soup

    This fresh and brightly flavored tomatillo soup is one of my go-to fast meals. It comes together in about 30 minutes, has a clean, lively tang from tomatillos, and works beautifully with either chicken or turkey, and more protein from creamy pinto beans. It's simple, nourishing, naturally gluten-free, and the perfect soup for when I want something healthy and satisfying.

    A pot of chicken tomatillo soup with a ladle and diced avocado for garnish.

    I shortcut this tomatillo soup recipe (some call it salsa verde soup) with a good tomatillo salsa verde, so you get big flavor with very little effort. I usually use my homemade version (it freezes beautifully), but a bright, tangy store-bought salsa works too. After a quick sauté of onion, celery, mild green chili, jalapeño, and garlic, you add the salsa, broth, beans, and chicken or turkey and let everything simmer together. The flavors are terrific.

    [feast_advanced_jump_to]

    Why You'll Enjoy This Easy Tomatillo Soup

    • Fast - On the table in about 30 minutes. A hearty, satisfying soup, no long simmer.
    • Nourishing - Comforting and cozy, yet light and full of feel-good ingredients.
    • Mexican-Style Flavor - Tomatillo salsa verde and warm spices give this soup bright, vibrant flavor in every spoonful.
    • Flexible - Make it with chicken or leftover turkey, homemade or store-bought salsa verde, and whatever garnishes you have on hand.
    • Stovetop or Slow Cooker - Sauté the aromatics, then let the slow cooker or stovetop do the rest. It's a true weeknight lifesaver.

    For another terrific chicken and beans soup with south-of-the-border flavors, try this Mexican chicken tortilla soup.

    Ingredients You'll Need

    Ingredients for tomatillo soup in prep bowls, pinto beans, broth, spice, onion, chicken and chilies.

    Tomatillo Soup

    • Tomatillo salsa verde - The star of the soup. Use my homemade tomatillo salsa verde (a simple cooked tomatillo sauce I keep in the freezer) or a bright, tangy jarred version (Trader Joe's or Herdez) for big flavor with almost no effort.
    • Shredded chicken or turkey - A perfect use for leftover roast chicken or turkey; rotisserie chicken works too.
    • Broth - Low or no-sodium chicken broth or turkey broth so you can control the seasoning; homemade if you have it.
    • Olive oil - For sautéing and building a savory base.
    • Onion - Finely chopped so it softens quickly and melts into the broth.
    • Celery - Adds gentle flavor and backbone to the soup.
    • Anaheim chili - A mild green chile that brings flavor without too much heat, a poblano or "long green chili" works too.
    • Jalapeño pepper - Seeded and finely chopped for a little kick; add more or less depending on your spice preference.
    • Garlic - Freshly chopped cloves add warmth and aromatic depth.
    • Ground cumin - Earthy and essential for that classic Mexican-style profile.
    • Ground coriander - Adds a citrusy, floral note that balances the tomatillo.
    • Ancho chili powder - Deep, mellow chili flavor without extra heat.
    • Pinto beans - They add creaminess, extra protein, and make the soup more substantial.

    Optional Toppings

    • Avocado, cilantro, lime wedges, crushed tortilla chips, or a spoonful of Greek yogurt all make great toppings.

    Please see the recipe card for measurements, salt, and pepper.

    Chef's Tip - Tomatillo salsa, salsa verde, or sauce? You must read the labels.
    If you're not using homemade tomatillo sauce, tomatillo products are named all kinds of ways: salsa verde, tomatillo salsa, tomatillo sauce, and sometimes even green enchilada sauce. For this soup, what matters is that it's a green, tomatillo-based sauce with a clean ingredient list-not the exact wording on the label. Tomatillos should be listed first, along with onion, chilies, garlic, and salt. Smoother sauces melt into the broth; chunkier ones add more body, so use the texture you enjoy in soup. Skip green chili enchilada sauces that don't list tomatillos and are mostly water, starches, oils, and vague "natural flavors."

    To make a fast broth for soup, use my Instant Pot recipe for chicken broth. It's done in 3 hours vs. 20+ for a bone broth.

    tomatillo salsa verde in jars.

    Substitutions and Variations

    • Use ground chicken or turkey - Brown it in a little olive oil before adding the aromatics. Perfect when you don't have shredded chicken or turkey on hand.
    • Swap the pinto beans - Black beans, red kidney beans, or cannellini beans all work; each will change the texture slightly but keep the soup hearty.
    • Make it vegetarian - Use vegetable broth instead of chicken or turkey broth. Add extra beans and a diced zucchini (or two) to make it more filling.
    • Adjust the heat - For a spicier soup, keep some jalapeño seeds or add a serrano pepper. For a milder version, use all mild green chiles (like Anaheim) and omit the jalapeño.
    • Add corn - A cup of frozen or canned corn kernels adds sweetness, color, and extra texture.

    If you enjoy Mexican flavors, try this grilled flank steak, Mexican style, It's great on the grill.

    How to Make Tomatillo Soup (Stovetop)

    Chopping fresh green chili peppers on a black cutting board.
    1. Slice chilies in half, remove ribs and seeds, and chop small.
    Sautéing onion, celery, and green chilies in a dutch oven for tomatillo soup.
    1. In a soup pot or dutch oven over medium to medium low heat, saute onion, celery, and chilies in olive oil until soft, 3-5 minutes.
    Adding spices to a pot of sautéing vegetables as a soup base.
    1. Stir in garlic, cook 1 minutes, then stir in spices and cook until fragrant, 2-3 minutes, stirring.
    Adding tomatillo sauce to a pot of sautéd vegetables, with a wooden spoon.
    1. Stir in the tomatillo sauce (salsa).
    Adding shredded chicken and pinto beans to a soup pot making tomatillo soup.
    1. Add the beans and shredded chicken or turkey and stir.
    Deep brown turkey broth pouring into a soup pot of soup with a wooden spoon in the back.
    1. Add the broth and heat until hot over low heat, allowing the flavors to blend, about 15-20 minutes. Taste and adjust seasoning with salt and pepper.
    A rustic pottery bowl of chicken tomatillo soup with pinto beans and cilantro.

    Slow Cooker Instructions (Instant Pot or Traditional)

    Note: For the Instant Pot Slow Cook mode, use a glass lid if you have one. The pressure lid will work, but it traps more moisture and can slow cooking.

    1. Sauté the aromatics - Use the Sauté function on your 6-quart Instant Pot (or a skillet on the stove) to cook the onion, celery, Anaheim chili, jalapeño, garlic, and spices in olive oil until softened.
    2. Switch to slow cook - If you sautéed in the Instant Pot, turn off Sauté and switch to Slow Cook mode. If you used a skillet, transfer the aromatics to your slow cooker.
    3. Add the remaining ingredients - Stir in the tomatillo sauce, broth, pinto beans, salt, and pepper.
    4. Slow cook - Cook on low for 4-6 hours or high for 2-3 hours, until the flavors have melded and the vegetables are tender.
    5. Add the chicken or turkey near the end - Stir in the shredded chicken or turkey during the last 20-30 minutes so it warms through but stays tender.
    6. Taste and adjust - Taste the soup and add more salt, pepper, or a squeeze of lime juice to brighten the flavors before serving. Garnish as desired.

    How to Serve Tomatillo Soup

    For me, this soup isn't complete without a few fresh toppings. Try one or a mix of these:

    • Chopped cilantro - My first choice. It brightens the whole bowl.
    • Flat-leaf parsley - A good option if you're not a cilantro fan.
    • Diced avocado - Buttery, creamy, and a nice contrast to the tangy broth.
    • Grated Jack or Mexican blend cheese - Adds a little richness and melt.
    • Tortilla chips or strips - For crunch and a little "taco-soup" feel.
    • Lime wedges - A squeeze of lime at the table really wakes up the flavors.

    Serve the soup with a simple green salad on the side and you've got an easy lunch or dinner. It also reheats beautifully, so you can make it ahead when you have time and just warm it up when you're ready to eat.

    Leftovers

    This soup keeps well for up to 3 days in the refrigerator and also freezes beautifully. Store it in an airtight container and reheat gently on the stove, adding a splash of broth if needed.

    Chicken soup, ready to serve in a pot.

    Recipe FAQs

    How spicy is tomatillo soup?

    Mild to medium, depending on the salsa verde and the chilies you choose. Anaheim, Poblano, and Long Green chilies are all mild. Jalapeno has some heat. IIf you're sensitive, remove seeds and ribs of the jalapeno first. If you want more heat, add an extra jalapeño or use a hotter pepper like a serrano.

    Does tomatillo soup freeze well?

    Very well. Cool completely, portion in airtight containers, and freeze for 2-3 months. Add fresh lime juice after reheating to brighten the flavor.

    Can I thicken the soup?

    Yes, there are a few easy ways. If you'd like it more stew-like, add another can of beans, extra chicken or turkey, or both. If you want the broth itself thicker, make a cornstarch slurry by whisking equal parts cornstarch and water (start with about 2 tablespoons cornstarch and 2 tablespoons water). Stir it into the simmering soup and cook for 1-2 minutes more until the broth slightly thickens. Another gentle thickening trick is to mash a small portion of the beans before adding to the pot. It gives the broth a creamier body without adding anything extra.

    How do I make the soup less acidic?

    Tomatillo soup naturally has a bright, tangy profile. If it tastes too sharp, simmer it a little longer to let the flavors mellow. A touch of sweetness (honey, sugar, or monk fruit) balances acidity without making the soup sweet. You can also add richness: extra beans, shredded chicken or turkey, diced avocado, or a little grated cheese on top. Fat and protein naturally soften acidity and bring everything into balance.

    More Great Soup Recipes

    Looking for more soup ideas? These are always a hit. And for more ideas, please chcke out the soups recipe index, where I am always adding more.

    • Ribollita in a gray pot.
      Italian Ribollita Soup (Ribollita Toscana)
    • Navy bean soup with ham and vegetables.
      Instant Pot Navy Bean Soup Recipe (with ham)
    • The deep colors of beef barley soup in a white bowl with herbs.
      Beef Barley Vegetable Soup
    • Close up of Mexican chicken soup in a white bowl.
      Mexican Chicken Tortilla Soup Recipe

    Please Leave a Comment!

    If you make this tomatillo soup, please leave me a comment and a star rating. I love hearing from you and your comments help other readers too. Thanks for supporting my site!

    Originally published 12-04-2014.

    📖 Recipe

    Tomatillo Soup with Chicken (or turkey)

    Sally Cameron
    This hearty tomatillo soup with Mexican flavors is easy to make with leftover roast chicken or turkey and a few things from the pantry. It holds well in the refrigerator for a few days, so make it ahead. It works great with leftover Thanksgiving turkey. Another option, use a pound of ground and browned turkey. Serves 4 generously, 6 for a little smaller portions.
    5 from 1 vote
    Prevent your screen from going dark
    Print Recipe Pin Recipe
    Prep Time 10 minutes mins
    Cook Time 25 minutes mins
    Total Time 35 minutes mins
    Course Soup
    Cuisine Mexican
    Servings 4 Yield about 2 ½ qts
    Calories 344 kcal

    Equipment

    • A large soup pot like a 5 ½ quart dutch oven

    Ingredients
      

    • 2 tablespoons olive oil
    • 1 cup finely chopped onion
    • ½ cup finely chopped celery
    • 1 Anaheim chili chopped fine
    • ½ jalapeno chili pepper seeded and finely chopped
    • 3-4 garlic cloves finely chopped
    • 2 teaspoons ground cumin
    • 1 teaspoon ground coriander
    • ¾ teaspoon ancho chili powder
    • 3-4 cups tomatillo salsa verde **notes below
    • 2-3 cups low sodium chicken or turkey broth preferably homemade
    • 12-16 ounces shredded roast chicken or turkey 2-3 cups
    • 2 15 ounce cans pinto beans rinsed and drained
    • ½ cup corn kernels optional
    • ¾ teaspoon sea salt to taste
    • ¼ teaspoon ground black pepper

    Optional Garnishes

    • 1-2 tablespoons chopped cilantro or parsley
    • 4 ounces grated Jack cheese or Mexican blend
    • ½ avocado quartered and diced

    Instructions
     

    • Heat olive oil in a large 4-5 quart pot or Dutch oven over medium low heat. Add onion, celery and both chilies. Cook, stirring until soft, about 3 minutes. Add garlic and cook 1 minute more. Add cumin, coriander and ancho chili pepper and cook another 3-5 minutes to allow spices to bloom.
    • Turn heat up to medium and add salsa, chicken broth, chicken and beans. Heat soup until hot, about 20 minutes. Serve with cilantro, cheese and avocado if desired. Leftovers keep 3 days in the refrigerator or freezes.

    Notes

    • Use ground chicken or turkey - Brown it in a little olive oil before adding the aromatics. Perfect when you don't have shredded chicken or turkey on hand.
    • Swap the pinto beans - Black beans, red kidney beans, or cannellini beans.
    • Make it vegetarian - Substitute vegetable broth. Add extra beans and zucchini.
    • Adjust the heat - For a spicier soup, keep some jalapeño seeds, add a serrano pepper. For a milder version, omit the jalapeño.
    • Add corn - A cup of frozen or canned corn kernels adds sweetness and color.
     
    Tomatillo salsa verde – Use my easy to make homemade tomatillo salsa verde, or a jarred version such as Trader Joe’s or Herdez. Be sure to read labels. The first ingredient should be tomatillos. See the Chef's tip box in the post for more details on buying.
    Nutritional calculation does not include optional garnishes or corn.

    Nutrition

    Calories: 344kcalCarbohydrates: 20gProtein: 26gFat: 17gSaturated Fat: 3gPolyunsaturated Fat: 2gMonounsaturated Fat: 8gCholesterol: 64mgSodium: 1840mgPotassium: 831mgFiber: 2gSugar: 13gVitamin A: 1302IUVitamin C: 14mgCalcium: 51mgIron: 2mg
    Tried this recipe?Let us know how it was with a comment and leave a star rating!

    Leek and Potato Soup (No Cream)

    12/02/2025 by Sally Cameron Leave a Comment

    A bowl of creamy, golde leek and potato soups garnished with croutons and olive oil.

    Leek and potato soup without cream is a classic soup you'll find on French family tables. Called Potage Parmentier, this silky smooth soup is gently sweet from the leeks and naturally creamy from gold potatoes. It's comfort food in a bowl. Traditionally finished with cream, this version is so creamy you can skip the cream - though you can certainly add it back if you prefer. Make leek and potato soup dairy-free or vegan if desired.

    Bowls of pale golden creamy leek and potato soup with croutons and chives.

    What makes leek and potato soup so special is its simplicity. Just leeks, potatoes, broth, and a few aromatics turn into a bowl that's deeply comforting, gently sweet from the leeks, and naturally creamy from the potatoes. If you're looking for a leek and potato soup without cream, this version gives you that classic French texture and flavor with a lighter, more everyday feel.

    [feast_advanced_jump_to]

    Why You'll Love Leek and Potato Soup (no cream)

    • Classic made lighter - A naturally creamy leek and potato soup without cream.
    • Adaptable - Keep it dairy-free, or add cream or coconut milk for extra richness.
    • Simple ingredients - Leeks, potatoes, broth, and aromatics - nothing fussy.
    • Healthy potato leek soup - Silky, satisfying, and perfect for a lighter, cozy meal.

    For another simple, rich soup, make a pot of this black bean and pumpkin soup, a reader favorite recipe (and mine too).

    Ingredients You'll Need

    Ingredients for leek and potato soup prepped on a counter.
    • Leeks - Look for medium sized, firm leeks with bright green tops and plenty of usable white/light green stalk (the most tender part). You'll have to buy more to make up for the dark green tops to get enough pale green lower leek.
    • Gold potatoes - Creamy texture, buttery flavor, and golden color. They blend into a naturally silky soup without cream. Potato notes below.
    • Butter - Unsalted butter to cook leeks, but olive oil, avocado oil, or plant butter all work.
    • Garlic - Adds depth and savoriness to balance the sweetness of the leeks.
    • Broth - Chicken broth provides body, flavor and the liquidity to puree, vegetable broth works for vegans, homemade gives the best flavor.
    • Coconut milk (optional) - Full-fat canned coconut milk gives richness and creaminess without dairy, but this soup is rich and creamy just with the potatoes. Heavy cream is good too, of course, if you enjoy dairy.
    • Fresh thyme - Classic pairing with leeks and potatoes, gives herbal depth. Use dried thyme if needed.
    • Bay leaf - For a subtle depth of flavor.
    • White wine - Optional, but a splash for deglazing enhances flavors.
    • Lemon - Brightens and balances the earthy-sweet soup, added right before serving.

    Please see the recipe card for measurements, salt and pepper.

    Chef's Tip - Best Potatoes for Leek and Potato Soup
    Yellow/gold potatoes are the best choice
    . They have a naturally creamy, buttery flavor and just enough starch to break down smoothly without turning gluey. They also give the soup a warm golden color. Russets are higher in starch and break down completely, but can turn gluey (or grainy) if over-blended, producing a paler, less flavorful soup. Red or waxy potatoes hold their shape too well and won't puree into a silky texture, making them less ideal, unless you prefer a chunkier, rustic soup.

    For a fast meal, try this easy tomato soup from canned tomatoes. You probably have the ingredients in your pantry. Add a grilled cheese sandwich for a classic lunch or dinner.

    Substitutions and Variations

    • Fully dairy-free version - Make it a dairy-free potato leek soup with vegetable broth and coconut milk or alternative such as unsweetened non-dairy cream alternative, such as oat cream, cashew cream, or almond cooking cream.
    • Prefer dairy? - Stir in some cream or half-and-half, or swirl Greek yogurt for tang and added protein.
    • Texture - Puree until silky smooth, or leave part of it chunky for a more rustic style.

    For another wonderful soup recipe try this creamy leek and mushroom soup.

    Chef's Tip on peeling potatoes: To peel or not to peel? It depends on your texture goal. Gold potato skins are thin, tender, and nutrient-rich-leaving them on adds fiber and a more rustic look. For a smooth, silky purée, peel them first (I do). For a chunkier, rustic soup, keep the skins; they blend down softly but give a little texture and a deeper flavor.

    How to Make Leek and Potato Soup

    This method creates a creamy potato leek soup without cream, thanks to the starch in the gold potatoes.

    Rinsing split leeks under cold water in a sink.
    1. Trim dark green tops and root ends of leeks, split and rinse under cold water to clean any grit or dirt.
    Prep work of split leeks, then chopping crosswise into pieces on a white cutting board.
    1. Lay leeks flat and chop crosswise into small pieces.
    A glass bowl of chopped gold potatoes for leek and potato soup.
    1. Peel and chop potatoes into small pieces.
    Sauteing chopped leeks in butter in a dutch oven on the stovetop.
    1. Add leeks and cook gently over medium low heat in butter without browning, stirring, 8-10 minutes until soft and glossy.
    Adding thyme and bay leaves to the pot of cooking potatoes and leeks.
    1. Stir in garlic, thyme, and bay leaf; cook 1 minute until fragrant. Add the wine and simmer 1-2 minutes to reduce (optional).
    Adding chopped gold potatoes to a pot of simmering broth and vegetables for soup.
    1. Stir in potatoes to coat well; season with salt. Cover with lid and cook on med-low 7-8 minutes to start them softening and absorbing the aromatics.
    A simmering pot of leek and potato soup without cream.
    1. Pour in 3 cups broth, just to cover. Cover and simmer on med-low to low until potatoes are very tender when pierced with the tip of a paring knife, 10-15 minutes. Uncover and simmer a few minutes more to reduce and thicken.
    Pureed leek and potato soup without cream in a blender container.
    1. Remove bay leaf, puree soup in two batches (if needed) in a blender or in the pot with an immersion blender. Add coconut milk or cream if using (optional). Taste and adjust seasoning, add lemon juice.

    Chef's Tip: Creaminess Without Heavy Cream. You don't need heavy cream to get a velvety texture. Full-fat canned coconut milk adds luxurious body with less heaviness and no obvious coconut flavor - just a smooth, clean finish that lets the leeks shine. Yukon Gold potatoes contribute natural creaminess, so the soup tastes rich and satisfying even without coconut milk or cream. Add either only if you prefer extra richness.

    Serving Leek and Potato Soup

    A simple garnish can transform this humble soup into something special:

    • Fresh chives or parsley for color and brightness.
    • Crisp bacon for a salty, smoky crunch.
    • A drizzle of good olive oil (try lemon or herb-infused).
    • A swirl of sour cream, Greek yogurt, or dairy-free yogurt for tang.
    • Garlicky homemade croutons.
    • Freshly grated Parmesan for a savory finish.

    Serve with a nice tossed green salad with a tangy French vinaigrette and maybe some crisp garlic toast for a terrific, satisfying meal.

    Storing & Freezing

    Cool soup completely, then refrigerate in an airtight container for up to 4 days. The flavor deepens overnight. It also thickens overnight, so reheat gently over medium-low heat, adding a splash of broth or water to loosen the texture as it warms if needed.

    For longer storage, freeze up to 3 months in portioned containers or freezer bags. Thaw overnight in the refrigerator. Avoid boiling to preserve its silky texture.

    Recipe FAQs

    What potatoes are best for potato leek soup?

    Yukon Gold potatoes give the smoothest, silkiest texture. Russets work too but can turn gluey if over-blended.

    Can I make it ahead?

    Absolutely. The flavor improves overnight. Cool and refrigerate for up to 4 days, then reheat gently to keep it silky.

    How do I make it vegan?

    Use olive oil instead of butter (or plant butter), vegetable broth, and coconut milk (or none at all-the potatoes give natural creaminess).

    How do I make this soup dairy-free or vegan?

    Use olive oil instead of butter and choose vegetable broth. Add coconut milk for richness or leave it out for the lightest version.

    Can you make potato leek soup creamy without cream?

    Yes. Yukon Gold potatoes puree into a naturally velvety texture, so the soup becomes creamy without any cream or dairy. While classic Potage Parmentier is traditionally finished with cream, this version is naturally creamy on its own.

    More Creamy Easy Soup Recipes

    Looking for more creamy soup recipes? Try some of these easy options. And check out the soup recipe index page for more soup recipes.

    • A gray bowl of fennel and white bean soup with olive oil and fried shallots.
      Creamy Fennel Soup With White Beans
    • Creamy squash and apple soup in a gray bowl with pumpkin seeds and chives.
      Creamy Butternut and Apple Soup
    • roasted red pepper soup
      Roasted Red Pepper Soup (sheet pan recipe)
    • creamy cauliflower soup
      Curried Cauliflower Soup

    If You Make Leek and Potato Soup

    Please let me know how you enjoyed it! I love hearing from you and your comments help other readers too. And if you would, please give it a ⭐ rating. Thanks for supporting my site.

    📖 Recipe

    A bowl of creamy, golde leek and potato soups garnished with croutons and olive oil.

    Leek and Potato Soup (No Cream)

    Sally Cameron
    This luxurious soups is simple, rich, and creamy but no cream! The creaminess comes from the pureed potatoes and leeks, but you can add coconut milk or a little cream if you prefer. The flavors are even better the next day. Makes four generous 16-ounce servings or six smaller 12-ounce servings as a starter or lighter meal.
    No ratings yet
    Prevent your screen from going dark
    Print Recipe Pin Recipe
    Prep Time 15 minutes mins
    Cook Time 45 minutes mins
    Total Time 1 hour hr
    Course Appetizer, Soup
    Cuisine American, French
    Servings 6 Yield 2 quarts soup
    Calories 321 kcal

    Equipment

    • 5 ½ quart Dutch oven or other large, heavy similar pot

    Ingredients
      

    • 2 tablespoons unsalted butter
    • 2 pounds leeks buy extra to make up for the dark green tops that are discarded
    • 2 ounces dry white wine optional
    • ½ teaspoon sea salt
    • 2 pounds gold potatoes
    • 2-3 lrge garlic cloves
    • 2 teaspoons chopped fresh thyme leaves or 1 teaspoon dried
    • 1 large bay leaf
    • 3-4 cups low sodium chicken broth sub vegetable broth
    • ½-3/4 cup canned coconut milk or dairy heavy cream optional
    • 1 lemon, juiced optional
    • ¼ teaspoon white pepper for no black specks

    Optional garnishes (per bowl)

    • 1 teaspoon chopped chives
    • 1 tablespoon croutons, GF or not recipe on this site
    • 1 teaspoon drizzled olive oil
    • 2 teaspoons crisp crumbled bacon

    Instructions
     

    Prep vegetables

    • Trim off the dark green tops and a thin slice of root from the leeks. Split lengthwise and rinse under cold water to remove any grit. Pat dry, then slice crosswise into thin pieces. Peel (or not) and cut potatoes into ¾-1-inch chunks.

    Saute the leeks

    • Melt butter in a large heavy pot (5½-qt Dutch oven) over medium-low heat. Add leeks and cook gently, without browning, stirring as needed, 8-10 minutes until soft and glossy. Stir in garlic, thyme, and bay leaf; cook 1 minute until fragrant. (Optional) Add the wine and simmer 1-2 minutes to reduce.

    Add potatoes

    • Stir in potatoes to coat well; season with salt. Cover and cook on low 7-8 minutes to start them softening and absorbing the aromatics.

    Add broth and simmer

    • Pour in 3 cups broth-just to cover. Bring to a gentle simmer, cover, and cook on low until potatoes are very tender when pierced with the tip of a paring knife, 10-15 minutes. Uncover and simmer a few minutes more to slightly reduce and thicken. Remove the bay leaf.

    Finish and puree soup

    • Off heat, purée with a blender or immersion blender in the pot until velvety (or blend half the soup and return it for a rustic texture). Adjust thickness with extra warm broth if needed. Season to taste with additional salt, a little white pepper, and a small squeeze of lemon to brighten.

    Enrich (optional)

    • For extra silkiness, stir in ½-¾ cup full-fat canned coconut milk, plant-based cream substitute, heavy cream, or half-and-half off heat. Garnish as desired.

    Notes

    • Allergic to coconut milk? - Use an unsweetened non-dairy cream alternative, such as oat cream, cashew cream, or almond cooking cream.
    • Prefer dairy? - Stir in some cream or half-and-half, or swirl Greek yogurt for tang and added protein.
    • Texture - Puree until silky smooth, or leave part of it chunky for a more rustic style.

    Nutrition

    Serving: 1.5cupCalories: 321kcalCarbohydrates: 53gProtein: 8gFat: 10gSaturated Fat: 7gPolyunsaturated Fat: 1gMonounsaturated Fat: 2gTrans Fat: 0.2gCholesterol: 10mgSodium: 273mgPotassium: 1101mgFiber: 7gSugar: 8gVitamin A: 2677IUVitamin C: 59mgCalcium: 126mgIron: 5mg
    Tried this recipe?Let us know how it was with a comment and leave a star rating!

    French Cheese Puffs (Gougeres)

    04/24/2012 by Sally Cameron 13 Comments

    gougere cheese puffs

    French cheese puffs (gougères) are light, airy, and irresistibly cheesy. Made with classic pâte à choux dough-the same base used for cream puffs and profiteroles-these savory bites are surprisingly easy to make. Traditionally made with Gruyère, I often use Parmesan and a sprinkle of fresh chives for a flavorful twist. Serve them warm from the oven for cocktail hour, brunch, or alongside a glass of wine. And yes-this recipe works with either all-purpose flour or a gluten-free blend.

    A plate of golden gougere, the famous French cheese puffs on small plates with glasses of red wine.

    I still remember making gougères (goo-ZHAIR) for the first time. It was funny how the dough looked a little strange as it came together-then it baked up beautifully. Total triumph. Pâte à choux has a reputation for being finicky, but don't let that deter you. If you can stir and pipe (or scoop) dough, you can make these French cheese puffs-it's easier than it looks.

    [feast_advanced_jump_to]

    Why You'll Love French Cheese Puffs

    • Light, airy, and cheesy - Classic pâte à choux turns into crisp, puffed bites with a tender center.
    • Easier than they look - Simple technique, big payoff (and very impressive for guests).
    • Make-ahead friendly - Bake ahead or freeze and rewarm for easy entertaining.
    • Gluten-free option - Works with all-purpose flour or a good gluten-free blend.

    Chef's tip: What are gougères?
    Gougères are French cheese puffs made from pâte à choux (the same dough used for cream puffs), baked until light, airy, and cheesy. Serve them simply or open them up and stuff them for a savory or sweet dish.

    Ingredients You'll Need

    • Butter - Use unsalted butter so you control the salt level of the finished cheese puffs. I prefer a higher-butterfat, European-style butter.
    • Milk - Whole milk is best for richness, but lower-fat milk works in a pinch.
    • Flour - This recipe works with either all-purpose flour or a gluten-free flour blend.
    • Eggs - Use standard large eggs.
    • Cheese - Traditionally gougères use Gruyère, but I often use finely grated Parmesan for extra savory flavor (hello, Parmesan puffs).
    • Herbs - Finely chopped green chives add a mild oniony flavor and a little color. Optional, but a lovely addition.

    For measurements and quantities, please see the recipe card.

    Substitutions and Variations

    • Try different herbs - Swap chives for finely chopped Italian parsley, thyme, or tarragon.
    • Change the cheese - Gruyère is the classic French choice, but sharp cheddar works well too (hello, cheddar cheese puffs). Comté is another great option if you want to stay French.
    • Use water instead of milk - You can make pâte à choux with water instead of milk. The puffs will be slightly less rich, but they still work beautifully.

    Chef's testing notes: I tested three types of flour: organic white whole wheat flour, organic whole wheat pastry flour, and a gluten-free blend called Cup4Cup flour. All three came out great. Pastry flour is a soft wheat which contains less gluten and provides a more tender baked good. Additionally, I've included a homemade GF blend in the recipe notes.

    How to Make French Cheese Puffs (Gougeres)

    The formal name for this pastry dough is choux (shoo) pastry or pate a choux (pot-ah-shoo). Bring milk and butter to a boil, dump in flour, and stir like mad until the dough pulls away from the side of the pan. Add eggs, one at a time and again, stir like mad until they are well incorporated and the dough smooths out. It's like magic.

    The process of making pate a choux dough, stovetop.

    The pastry will look odd while you stir. At first it looks curdled and slippery from the eggs and you wonder if it will come together. Suddenly it does, and forms a smooth pastry dough.

    Pate a choux dough in a stainless steel pan, almost finished, being stirred with a wooden spoon.

    Add cheese and chives, then stir some more.  You'll have a thick, savory dough to portion out and bake.

    Finished pate a choux dough in a stainless steel pan with cheese and chives.

    I've piped them and dropped dollops with spoons in the past. Now I use what's called a disher.

    Chef's tool tip: Call them dishers (the professional term) or cookie scoops, this is a terrific little tool I can't live without in my kitchen. I have 5-6 sizes of them in various sizes for various tasks. They make portion control and handling ingredients easy. For small puffs I use a #40 disher that is 1 ½" across. For truly bite-sized puffs, use the #60 disher.

    Using a disher tool or cookie scoop to portion dough on to a parchment lined baking sheet for baking.

    Notes for Gluten-Free Bakers

    This recipe works well with a good gluten-free 1:1 flour blend. I've tested it with Cup4Cup, and it turns out great-the process is the same, but the puffs may not rise quite as high as the wheat version. For best results, bake at 350°F until golden; timing will vary by oven, but plan on about 20-25 minutes. King Arthur and Bob's Red Mill gluten-free blends also work well.

    If they seem a little moist inside, let them sit on the tray with the oven off and the door cracked for a few minutes to dry slightly.

    Serving Suggestions

    Gougères (French cheese puffs) are perfect with a glass of wine and make an easy, elegant nibble for appetizer hour. Make them bite-sized for cocktails or slightly larger for brunch or parties.

    For entertaining, you can slice them in half and fill them with a savory cheese spread or whipped herbed cheese.

    For another terrific cocktail nibble, try these sweet and spicy roasted maple cashews.

    Storage and Freezing

    Storage - Keep well wrapped at room temperature for up to 2 days. For best texture, warm briefly in the oven before serving.

    Freezing - After baking, freeze the puffs on a sheet tray. Once frozen, transfer to a freezer-safe bag or container, label and date, and freeze for up to 2 months. Rewarm from frozen in a 325°F oven until hot and crisp.

    Recipe FAQs

    Do gougères need to be served warm?

    They're best warm, but they're still good at room temperature. For the best texture, rewarm briefly in the oven before serving.

    Why didn't my cheese puffs puff?

    Most often it's one of these: the dough needed a little more drying in the pan, the eggs were added too quickly, or the oven temperature was off. Also avoid opening the oven early, which can cause deflation.

    Can I fill gougères?

    Absolutely. Slice and fill with whipped herbed cheese, pimento cheese, smoked salmon spread, or a savory mousse for parties.

    More Appetizer Recipes

    If you're putting together an appetizer spread, here are a few more savory favorites-perfect for cocktail hour, holidays, and easy entertaining. Try these crowd-pleasers next, from elegant mushroom duxelles to baked brie and stuffed mushrooms.

    • A platter of antipasto skewers with olives, cheese, salami, and artichoke heart for appetizers.
      Antipasto Skewers (Easy Italian Appetizer)
    • Closeup of mushroom pate in a white ramekin with a spoon.
      Classic French Mushroom Duxelle
    • A round wheel of baked brie cheese with a fruit and nut topping, with apples, pears, and crostini.
      Easy Baked Brie with Jam Appetizer
    • Spinach stuffed mushrooms on a gray serving plate with melted parmesan on top, with parsley.
      Spinach Stuffed Mushrooms With Parmesan Cheese

    If You Make French Cheese Puffs

    Please leave me a comment and let me know how you did! I love to hear form you and your comments help other readers too. Thanks for supporting my site.

    📖 Recipe

    gougere | afoodcentriclife.com

    French Cheese Puffs (Gougeres)

    Sally Cameron
    5 from 1 vote
    Prevent your screen from going dark
    Print Recipe Pin Recipe
    Prep Time 15 minutes mins
    Cook Time 25 minutes mins
    Total Time 40 minutes mins
    Course Dessert
    Cuisine French
    Servings 12
    Calories 174 kcal

    Equipment

    • Baking sheet
    • Baking parchment
    • #40 disher (looks like an ice cream scooper with a spring handle) optional or piping bag

    Ingredients
      

    • 2 ounces unsalted butter
    • ½ cup milk
    • ½ cup gluten-free flour blend or white whole wheat flour
    • 1 pinch sea salt
    • 2 large eggs
    • 2 ounces finely grated Parmesan cheese plus extra to top if desired
    • 1 tablespoon finely chopped chives

    Instructions
     

    • Ready all ingredients and tools before you start as this goes quickly. Pre-heat oven to 400° for wheat flour or 350° for gluten-free flours. Line a rimmed baking sheet with parchment paper.
    • Place butter in a medium saucepan and melt over low heat. When butter is melted, add the milk, turn heat to high and bring to a boil. When the milk and butter get to a full boil, dump in the flour and salt all at once. Turn heat down to medium-low and stir like mad with a wooden spoon. Stir, beat and fold until the dough pulls away from the sides of the pan, 1-2 minutes. Move the dough to a medium bowl and cool 2 minutes, stirring occasionally.
    • Add eggs, one at a time to the bowl, stirring like mad after each one until completely incorporated. It will look like a slimy mess for the first minute but keep stirring. The dough will come together. Lastly stir in the cheese and chives.
    • With a #40 disher, piping bag with plain tip or tablespoon, drop portions of pastry onto parchment lined baking sheets. Sprinkle a little extra Parmesan on top if desired. Bake for 20-25 minutes or until golden brown. Check the puffs early and watch them as ovens and timing vary. Allow puffs to stand for a few minutes after baking. Serve immediately or cool completely and place in an airtight container. Puffs can be made a day ahead and served at room temperature or warmed in the oven for a few minutes.

    Notes

    Flour Options:

    I've made gougeres with white whole wheat, whole wheat pastry, gluten-free flour blend or homemade gluten-free blend (see note at end). I prefer organic flours for baking.

    Homemade GF Flour Blend

    If you want to blend your own GF flour, here is my recipe for using with gougeres. With a digital scale, weigh out 40 grams brown rice flour, 35 grams sweet rice flour, 25 grams quinoa flour, 20 grams cornstarch and 24 grams tapioca flour.
    Whisk together until well blended. You can do it all in one bowl using the tare feature. I used all Bobs Red Mill flours. This makes enough for several batches of gougeres. 
    Use 72 grams for whole wheat pastry flour or gluten-free flour blend.
     

    Nutrition

    Serving: 2Calories: 174kcalCarbohydrates: 9gProtein: 7gFat: 13gSaturated Fat: 7gPolyunsaturated Fat: 1gMonounsaturated Fat: 4gTrans Fat: 0.3gCholesterol: 91mgSodium: 190mgPotassium: 66mgFiber: 1gSugar: 1gVitamin A: 455IUVitamin C: 0.3mgCalcium: 156mgIron: 1mg
    Tried this recipe?Let us know how it was with a comment and leave a star rating!

    Gluten Free Cornbread Stuffing

    11/20/2025 by Sally Cameron 5 Comments

    An oval baking dish of golden cornbread dressing with cranberries and veggies, and a silver serving spoon.

    Gluten free cornbread stuffing delivers classic Thanksgiving flavor-without any gluten and without sacrificing that cozy, savory, herb-packed goodness everyone expects. Made with golden cornbread cubes, aromatic vegetables, and a hint of sweetness from dried cranberries, this gluten-free stuffing is both traditional and naturally delicious. Serve it with turkey, ham, roast pork, or beef, and completely make-ahead friendly, keeping your holiday prep calm and organized.

    Golden cornbread dressing with cranberries and aromatic veggies in an oval casserole dish with silver spoon.

    For a crowd with mixed dietary needs, this is a perfect stuffing (or dressing) choice as my gluten-free cornbread stuffing recipe tastes exactly like the classic. Skip the boxes and bake a loaf of my easy no-flour gluten-free cornbread a day or two ahead. It's a simple one-bowl recipe. Then cube and dry it, and you're halfway to a festive, satisfying classic side everyone will love.

    [feast_advanced_jump_to]

    Why You'll Enjoy Gluten-Free Cornbread Stuffing

    • Make-ahead ease - Bake and dry the cornbread up to two days in advance, prep the veggies, so things go faster.
    • Classic, savory flavor - All the cozy dressing vibes with aromatics and herbs.
    • Holiday workhorse - Pairs with turkey, ham, roast pork, or beef.
    • Dressing or stuffing? - Traditionally stuffing is cooked inside the bird and dressing on the side, but cooking it on the side is easier and more food-safe. Today terms are interchangeable.

    If you prefer a traditional herbed dressing, here's my old fashioned family recipe made gluten-free (and no one would ever know).

    Chef's Tip on GF cornbread: When baking gluten free cornbread for stuffing and testing different grinds of cornmeal, I found that using a medium-grind cornmeal (not coarse or polenta) creates a finer, tighter crumb that holds together nicely for the dressing while staying tender once baked, but I've done both!

    Ingredients You'll Need

    Prepped ingredients for making cornbread dressing on a kitchen counter.
    • Cornbread - Bake ahead and dry into cubes so it soaks up flavor. Use a medium grind cornmeal for gluten free dressing.
    • Onion - Yellow, brown, or white; builds that classic savory base.
    • Celery - Adds gentle crunch, and a touch of moisture.
    • Fennel - Subtle anise note that brightens and lifts the richness.
    • Unsalted butter - Unsalted butter lets you control the sodium. Olive oil works, too.
    • Garlic - For depth of flavor.
    • Dried cranberries - Sweet-tart pops of color and contrast (optional).
    • Fresh herbs - Parsley, thyme, and sage for holiday flavor, marjoram, and savory work well too.
    • Egg - Light binder so the cubes hold together.
    • Milk - Dairy or use unsweetened plant milk (almond or oat).
    • Broth - A little chicken broth or turkey broth adds moisture and savory flavor.

    Please see recipe card for measurements, including salt and pepper.

    Substitutions and Variations

    • For vegan or no-dairy - Substitute olive oil or plant-based butter, and try unsweetened, unflavored oat milk or almond milk.
    • Dried herbs - If you can't get fresh herbs use dried herbs at ⅓ to ½ the amount.
    • Egg-free substitution - 1 tablespoon of chia seeds mixed with 3 tablespoons of water and let them hydrate for 1-2 minutes or use a ¼ cup of carbonated water.

    Chef's Tip: For softer bites, soak dried cranberries in hot water for 5-10 minutes, then drain well before adding.

    How to Make Gluten-Free Cornbread Stuffing

    You can make cornbread dressing in steps, starting ahead a few days and finishing on Thanksgiving Day or Christmas Day. Prep ahead tip: make the cornbread, slice, and bake dry the day before. Reserve in an airtight container untiil ready to make dressing.

    Slicing a loaf of cornbread into cubes for gluten free cornbread dressing to be dried.
    1. Pre-heat the oven to 250°F. Slice the cornbread into approximately ¾" cubes.
    Homemade cornbread cubes on a baking sheet with parchment
    1. Line a baking tray with parchment and add cornbread cubes in a single layer. Bake until dry, about 1 hour.
    Onion, celery, fennel, and leeks sautéing in a large round pan inbutter.
    1. Melt butter over medium heat in a large wide skillet or fry pan and add onion, fennel, leek, and celery.
    Mixed green and white vegetables soft from cooking in butter and ready for next step.
    1. Cook, stirring, until soft, 7-10 minutes, do not brown them. Turn down heat if needed
    Adding thyme and herbs to a pan of softly cooked vegetables making dressing.
    1. Stir in the garlic, herbs, salt and pepper, cook another minute to blend flavors.
    Adding cornbread cubesm eggm and milk to a pan of sautéed veggies for cornbread dressing.
    1. Add the cornbread cubes, then the milk, beaten egg, and broth. Stir gently to coat well. Stuffing should feel moist but not wet.
    Golden gluten-free cornbread dressing ready to be baked in an oval white casserole dish. on the stovetop.

    Pour the dressing into a buttered or oiled 2 quart casserole baking dish and bake covered with foil at 350°F for 35-40 minutes. If you prefer a more traditional cornbread dressing texture (golden brown top), uncover, turn up the heat to 400°F, and bake an additional 15 minutes.

    Cornbread Dressing Make-Ahead Tips

    • Dry the cornbread early - Bake 1-2 days ahead, cube, and dry in a 250°F oven for 45-60 minutes, stirring once. Cool and store airtight until needed.
    • Prep aromatics the day before - Chop leek, celery, fennel, and onion; store covered in the fridge. Mince garlic fresh for best flavor.
    • Assemble ahead (best method) - Sauté aromatics; toss with herbs, cranberries, and cornbread cubes. Whisk egg + liquid (milk or broth), fold in gently, transfer to a buttered 2-3 qt dish, cover, and refrigerate up to 24 hours.
    • Bake day-of from cold - Pull the dish out 45 minutes before baking. Bake covered at 350°F for 35-40 minutes, then uncover 10-15 minutes to crisp the top. If starting very cold, add 5-10 minutes to the covered time. Center should read 165°F.
    • Moisture control - Mixture should feel evenly damp, not soggy. Prefer extra-moist? Drizzle in a bit more milk or warm broth before baking.
    • Reheat - If baked ahead, reheat covered at 350°F until hot, then uncover 5-10 minutes to re-crisp. If edges seem dry, drizzle 2-4 Tbsp. warm milk or broth around the sides before reheating.

    Chef's Tip - Refreshing Stuffing Before Serving
    IIf your gluten free cornbread stuffing sits for a while before dinner (up to about 2 hours in a warming drawer or low oven), it can dry out a bit as it holds. Just before serving, check the texture: if it looks a little dry, drizzle on a few tablespoons of warm broth (or a mix of broth and melted butter), gently toss, and return it to the oven for 5-10 minutes. It will rehydrate beautifully and taste freshly baked.

    Serving Suggestions

    Gluten-free cornbread stuffing is terrific aside roast turkey, roast beef, and a baked ham or pork roast. It's not just for holidays but any day, and leftovers are great. Try them with scrambled eggs for a savory satisfying breakfast.

    Place leftover dressing into an airtight container, label and date. It's good for up to 4 days. I've not tried freezing it because there is never any left!

    A casserole of gluten-free cornbread stuffing ready to serve with silver spoon.

    Recipe FAQs

    Can I make gluten free cornbread stuffing ahead of time?

    Yes. Assemble the stuffing, cover, and refrigerate for up to 24 hours. Add a splash of warm broth before baking if it looks dry. Bake as directed, adding 10-20 extra minutes if chilled.

    How do I keep free stuffing from getting mushy?

    This is why I add the drying step for the cornbread cubes, so they hold their structure. Fold gently, don't over-mix, and add broth ad milk gradually-you want the cubes hydrated but not soggy.

    Can I make this stuffing dairy-free?

    Yes. Use olive oil or vegan butter and choose vegetable broth and plant milk such as unsweetened, unflavored oat or almond. The recipe turns out just fine without dairy.

    Can I add sausage or meat?

    Absolutely-brown ½-1 pound of Italian sausage, breakfast sausage, or ground turkey and mix it into the stuffing before baking.

    Can I use packaged cornbread stuffing cubes?

    Most packaged cornbread stuffing mixes are not gluten free, and the texture can be quite dry or crumbly. Since gluten free cornbread is so simple to make, I recommend using homemade GF cornbread cubes for the best flavor and structure in this gluten free cornbread stuffing.

    More Thanksgiving and Holiday Recipes

    For another gluten-free dressing or stuffing recipe, try my traditional herbed bread stuffing recipe.

    • A bowl of burnished roasted Brussels sprouts glazed with Balsamic.
      Brussels Sprouts with Balsamic Vinegar
    • A glass of creamy pumpkin mousse dusted with cinnamon with a gold spoon.
      Pumpkin Mousse (Easy No-Bake Dessert)
    • A brining bag with a whole turkey inside with herb rub on a cutting board.
      How to Dry Brine Turkey Tutorial
    • Classic herbed bread stuffing in white casserole ready to serve.
      Gluten Free Thanksgiving Stuffing Recipe

    If You Make Gluten Free Cornbread Stuffing

    Please let me know and leave a comment. They help other readers and I love hearing from you, and please leave a ⭐ if you can. Thanks for supporting my site!

    Gluten-free cornbread dressing was originally published 12-12-2012 and is now updated.

    📖 Recipe

    An oval baking dish of golden cornbread dressing with cranberries and veggies, and a silver serving spoon.

    Gluten-Free Cornbread Stuffing

    Sally Cameron
    Gluten-free cornbread dressing loaded with aromatic vegetables, fresh herbs, and optional dried cranberries. Perfect with roast turkey, chicken, ham, or beef. Make the cornbread 1-2 days ahead, then assemble and bake day-of (or bake ahead and reheat). Prep vegetables in advance and refrigerate to save time. Note at end for vegan & dairy-free options.
    5 from 1 vote
    Prevent your screen from going dark
    Print Recipe Pin Recipe
    Prep Time 20 minutes mins
    Cook Time 22 minutes mins
    Oven time 40 minutes mins
    Total Time 1 hour hr 22 minutes mins
    Course Side Dish
    Cuisine American
    Servings 6 to 8 depending on other sides
    Calories 285 kcal

    Equipment

    • 12" skillet or fry pan

    Ingredients
      

    • 1 recipe gluten free cornbread (easy recipe on this site) 1 ¼ pounds dry cubes or 7 cups
    • 1 cup chopped leek ½ a medium
    • 1 cup chopped onion ½ medium
    • ¾ cup chopped celery 2 ribs
    • ¾ cup chopped fennel 1 small
    • 3 tablespoons unsalted butter sub olive oil or plant-based butter
    • 2-3 large garlic cloves finely chopped or zested
    • ½ cup dried cranberries soaked in hot water
    • 2 tablespoons fresh chopped parsley
    • 2 teaspoons fresh chopped thyme
    • 2 teaspoon fresh chopped sage
    • 1 egg beaten
    • ½ cup milk sub almond or oat milk
    • ½ cup broth, chicken or turkey
    • ¾ teaspoon salt
    • ¼ teaspoon ground black pepper

    Instructions
     

    Soak the cranberries

    • If using, soak the dried cranberries in hot water to cover for 10 minutes, then drain and dry.

    Dry cornbread cubes

    • Pre-heat the oven to 250°F. Line a half sheet baking pan with parchment. Cut cornbread into slices ½″ wide, then cut pieces into small cubes, ¾" in size. Bake breads cubes until dry but tender, about 1 hour.

    Cook the aromatics & vegetables

    • In a large saute pan (12") over medium heat, melt the butter. Add the leek, onion, celery and fennel and cook until the vegetables are soft and translucent, about 7-10 minutes, stirring. Do not brown, turn heat down if needed, and keep the veggies juicy. Add the garlic and sauté another 1 minute. Add salt and pepper.
    • Add the herbs and the dried cornbread cubes and mix in gently. Add the soaked and drained cranberries, then beaten egg, milk, and broth. Mix gently but thoroughly. Stuffing mix should feel moist but not soggy.

    Bake dressing

    • Spoon dressing into a 2 quart buttered or oiled casserole or gratin dish. Cover with foil. Bake in a pre-heated 350 degree oven for 35-40 minutes, then uncover, turn up the heat to 400°F, and bake an additional 15 minutes for a golden top.

    Hot holding before serving

    • If the dressing will sit before serving, keep it covered and expect a bit of moisture loss. For make-ahead or holding, taste first add up to ½ cup extra liquid (milk or broth) before baking, or spoon a few tablespoons of warm broth over the top before reheating to keep it tender. Taste and adjust to your preferred texture.

    Notes

    For vegans or dairy-free, use plant milk, plant butter or olive oil, and an egg replacer such as a flax egg or a chia egg:
    • flax egg - 1 T ground flax meal with 3 T warm water, let it stand 5-15 minutes.
    • chia egg - 1 T white chia with 3 T warm water, let it stand 5-15 minutes.
    Texture note: Cornbread dressing varies by preference. Some like it softer and more moist, others enjoy a lightly crisp top. Adjust your uncovered baking time—or finish briefly under the broiler if your casserole dish is broiler safe—for the texture you love best. 

    Nutrition

    Serving: 2Calories: 285kcalCarbohydrates: 41gProtein: 8gFat: 10gSaturated Fat: 3gPolyunsaturated Fat: 0.4gMonounsaturated Fat: 1gTrans Fat: 0.2gCholesterol: 40mgSodium: 770mgPotassium: 268mgFiber: 5gSugar: 17gVitamin A: 639IUVitamin C: 10mgCalcium: 69mgIron: 1mg
    Tried this recipe?Let us know how it was with a comment and leave a star rating!

    The Best Smoked Salmon Dip Recipe

    05/17/2020 by Sally Cameron 16 Comments

    Creamy salmon dip on an appetizer tray with crackers and cucumber chips.

    This smoked salmon dip is my go-to recipe for both casual snacking and entertaining. Smooth, creamy, and packed with flavor, it comes together in minutes using a food processor. A touch of horseradish adds zing, smoked paprika enhances the smoky richness, and fresh lemon juice brightens every bite. Perfect with crackers, crudités, this versatile spread is a total party pleaser and a must-make recipe!

    Creamy pale oraange smoked salmon dip on a tray with cucumber slices and crackers.

    If smoky flavors and smoked salmon are your favorites, this smoked salmon dip is for you! Ready in just 5 minutes, simply toss everything into a food processor, puree, and adjust the flavors to your liking-done! I created this recipe nearly 20 years ago, and it remains a timeless favorite for good reason. Give it a try!

    [feast_advanced_jump_to]

    Why You'll Like This Recipe

    • Takes minutes with a food processor.
    • It's always a crowd pleaser.
    • Make it ahead.

    If you love salmon, try this steamed salmon for a fast and easy entree.

    Recipe Ingredients

    I keep these ingredients in the refrigerator and make a batch of smoked salmon dip when needed. The recipe can easily be halved for a small batch or doubled for a crowd.

    Ingredients for smoked salmon dip in glass prep bowls on a gray counter.
    • Smoked salmon: Buy plain wild smoked salmon (no extra seasoning or seeds) in flat little packages.
    • Cheeses: Cottage cheese and cream cheese, block type.
    • Horseradish: Buy the prepared style in a jar in the refrigerated section of the market.
    • Lemon: Fresh lemon juice give the salmon dip a lift of flavor and brightness.
    • Paprika: Buy smoked paprika to play along with the smoked flavor of the salmon. If you can't find it, use regular paprika.

    Substitutions and Variations

    • Fresh dill adds a nice fresh flavor and fronds can be used for garnish (optional).
    • For more kick, add a little ground chipotle powder (which is smoky), hot sauce, or cayenne pepper.

    For another easy addition to an appetizer spread, try this baked feta cheese.

    Recipe Instructions

    Making smoked salmon dip is so simple!

    Smoked salmon, cottage and cream cheeses, spices, and horseradish in a food processor workbowl.
    Step 1: Add all ingredients to a food processor.
    Creamy orange smoked salmon dip in the bowl of a food processor.
    Step 2: Puree until smooth. Taste and add more spices, lemon, or horseradish if desired.

    Serving Suggestions

    Use smoked salmon dip for everything from everyday snacking to casual entertaining and holiday gatherings. Watching the big game with the gang? Whip up a batch of this dip. Friends coming over? Invited over and asked to bring an appetizer? You get it. It works for almost every occasion.

    Serve smoked salmon dip in a bowl along with cool cucumber slices, crackers, baguette slices, bell pepper strips, raw zucchini sticks, or endive leaves.

    Make it ahead: Salmon dip will keep 3-4 days tightly covered in an airtight container and refrigerated.

    For another terrific salmon recipe, try this easy sesame salmon recipe.

    How to Upscale It

    Smoked salmon dip piped onto a crostini.

    If you want to go upscale for a party (maybe for holidays), use a piping bag with a star tip. Using a piping bag is also a great way to hold it in the refrigerator.

    Find reusable piping bags here, or disposable piping bags here, and star tips for the piping bags here.

    Pipe onto cucumber slices, into endive spears, in little baked phyllo cups or onto crostini. Use lemon zest, capers, red onion and fresh dill as garnish and beautiful flair.

    Creamy salmon dip on an appetizer tray with crackers and cucumber chips.

    Recipe FAQs

    What are good accompaniments for smoked salmon dip?

    For what to serve with smoked salmon dip try cucumber slices, strips of bell pepper, crackers, toasted crostini. Endive leaves make good dippers if the dip is soft enough.

    What seasonings work well in smoked salmon dip?

    Good seasonings for smoked salmon dip include smoked paprika to go along with the smoked salmon flavor, fresh lemon juice to brighten the flavor, prepared horseradish to give it some kick. For heat, add hot sauce or chipotle. Fresh chopped dill adds not only complementary flavor but a little color that is also nice for a garnish.

    Can I make smoked salmon dip ahead of time?

    If you're planning smoke salmon dip for a party, make it a day ahead and refrigerate in an airtight container.

    More Terrific Appetizer Recipes

    For another seafood-based appetizer (always a hit at catered parties) try these mini baked crab cakes.

    • Closeup of mushroom pate in a white ramekin with a spoon.
      Classic French Mushroom Duxelle
    • Easy Green Goddess Dip (and dressing)
    • caprese skewers
      Easy Caprese Skewers with Basil Vinaigrette

    ⭐️Did you Make This Recipe?

    If you make smoked salmon dip, please add your comment. I appreciate your feedback and enjoy hearing from you. If you loved it, please give it a 5-star rating! They really help other readers.

    📖 Recipe

    Creamy salmon dip on an appetizer tray with crackers and cucumber chips.

    Easy Smoked Salmon Dip

    Sally Cameron
    If you enjoy smoked salmon, you will love this easy smoked salmon dip. Whips together in minutes for appetizers and snacking. Serve with raw veggies, crispy crostini or crackers. Endive leaves make good dippers too. This is a party size recipe with a 3-cup yield. Recipe halves easily for a smaller group.
    5 from 1 vote
    Prevent your screen from going dark
    Print Recipe Pin Recipe
    Prep Time 10 minutes mins
    Total Time 10 minutes mins
    Course Appetizer, Snack
    Cuisine American
    Servings 9 servings
    Calories 149 kcal

    Ingredients
      

    Smoked Salmon Dip

    • 8 ounces smoked salmon
    • 8 ounces cottage cheese
    • 8 ounces cream cheese
    • 2 tablespoons horseradish
    • 1 lemon, juiced
    • 2 teaspoons smoked or regular paprika
    • 1 tablespoon chopped fresh dill or 1 teaspoon dried
    • ½ teaspoon smoked or regular ground black pepper

    Garnish Options

    • Capers, drained
    • finely diced red onion
    • Smoked paprika
    • lemon zest
    • dill fronds

    Instructions
     

    • Place all ingredients in the bowl of a food processor and puree until smooth.
    • Refrigerate overnight or until ready to serve.

    Notes

    For serving, place in a bowl for spreading and dipping surrounded by your choice of veggies, crackers or crostini.

    Nutrition

    Calories: 149kcalCarbohydrates: 4gProtein: 9gFat: 11gSaturated Fat: 6gPolyunsaturated Fat: 1gMonounsaturated Fat: 3gCholesterol: 36mgSodium: 371mgPotassium: 140mgFiber: 1gSugar: 2gVitamin A: 621IUVitamin C: 7mgCalcium: 55mgIron: 0.5mg
    Tried this recipe?Let us know how it was with a comment and leave a star rating!

    Originally published March 4, 2013

    Easy Smoked Salsa (pellet grill recipe)

    06/23/2024 by Sally Cameron 3 Comments

    Smoked salsa in a tall jar and a small serving glass cup with corn chips

    Time to up your homemade salsa game by making smoked salsa. Slow smoking the tomatoes, jalapeños, garlic, and onions takes salsa to the next level. Smoking infuses the salsa with a lightly smoky flavor that tastes so good! Skip the store stuff and make fresh smoked salsa. Only have a gas grill? Use a smoker accessory or a smoke tube. Notes included.

    A tall jar of homemade salsa with tomatoes, onions, peppers with chips.

    If you have a pellet grill and love to smoke all kind of foods, here is a recipe to add to your smoking file: my smoked salsa recipe. Great fresh flavor from red ripe tomatoes, garlic, onion, jalapeno peppers, tang from lime juice and garden goodness from cilantro.

    [feast_advanced_jump_to]

    Why You'll Like This Recipe

    • Smoked salsa is easy, delicious, and versatile for snacking and serving.
    • A great use of red ripe summer tomatoes.
    • Simple fresh ingredients.
    • This is a mild smoked salsa but you can make it as hot as you want.
    • No pellet grill? See notes for gas grills in FAQs.

    Might as well make some smoked queso dip too! Great for parties and potlucks.

    Smoked Salsa Ingredients

    Tomatoes, onion, garlic and ingredients for smoked salsa on a silver tray.
    • Tomatoes: Choose what fresh tomatoes look best at the store. Roma tomatoes (aka plum tomatoes) are my top choice for their meatiness, but vine ripened red tomatoes and beefsteak tomatoes are other good options.
    • Onion: Use yellow onion, brown, red onion, sweet onions, or white onion.
    • Chili peppers: Jalapeño peppers keep smoked salsa mild, but you can make it spicier. Check out the Scoville page for heat ratings on different types of peppers.
    • Garlic: Use fresh whole garlic cloves.
    • Lime juice: For that needed bright tang.
    • Fresh herbs: Fresh cilantro is traditional for great garden flavor.

    Please see the recipe card for measurements, salt, and black pepper.

    Substitutions and Variations

    • If you are a cilantro hater, use Italian parsley. Fresh oregano is another great choice and common in Mexican cuisine. Use both!
    • The hotter the better? For hot salsa, use whatever hot chilis you prefer, like serrano peppers, thai chilies, etc. If you are crazy, use habanero peppers. Not me!
    • Try making smoked salsa with heirloom tomatoes, with all of their beautiful colors.

    Chef's tip on working with chili peppers: Many people think the heat of a chili pepper is in the seeds, but it's really in the inner white membrane. To tame the heat of chilis, quarter the peppers top to bottom and slice out the seeds and membrane. Another tip, use disposable kitchen food preparation gloves to protect your hands from the sting of hot chilis. And if you don't, do not touch your eyes after working with chili peppers!

    Recipe Instructions

    Equipment Notes

    First, be sure you are starting with a cleaned, filled pellet grill. I use a premium pellet grill blend of hickory, cherry, hard maple, and apple for smoked veggies.

    You also need a grill basket with holes to allow the smoke and heat through without your ingredients falling through the grill grates. They are inexpensive and give better results than a sheet pan or disposable aluminum pan.

    Step 1: Quarter the peppers lengthwise and slice out the jalapeno seeds and white membrane (for milder salsa).
    Step 2: Quarter the tomatoes, cut up onion, peel garlic, add to a grill basket.
    A black grill basket filled with tomatoes, onions, garlic and peppers for smoked salsa.
    Step 3: Fire up the pellet grill to 250°F and smoke the salsa ingredients for 1 ½ hours.
    Red salsa pureed in a food processor workbowl.
    Step 4: Add smoked ingredients and process salsa by pulsing in food processor to desired consistency.
    Straining smoked tomato salsa from sieve into a bowl.
    Step 5: Strain salsa of extra juice for a thicker smoked salsa, then add the fresh lime juice and herbs.

    Chef's tip: If you do not have a food processor, use a blender to refine the salsa. Do the smoked salsa in several batches and just pulse to chop. Don't over-puree or you will have gazpacho (soup) instead of salsa. No blender? Chop it all finely by hand.

    A glass bowl of smoked red tomato salsa surrounded by corn chips in a round plate.

    Serving Suggestions

    What dishes pair well with smoked salsa? Enjoy smoked salsa anyway you would regular salsa or salsa verde:

    • Serve it with tacos like these grilled shrimp tacos.
    • Use it to make egg dishes a lot more fun and tasty.
    • Use it to top or aside fish or chicken as a sauce.
    • Your favorite chips, guacamole, and smoked salsa? Of course!
    • With grilled meats like this Mexican-inspired grilled flank steak.
    A tall glass jar of red tomato smoked salsa with onions, herbs, and peppers.

    Recipe FAQs

    What types of wood chips are best for smoking salsa?

    Many people like the strong flavor that hickory, mesquite, or pecan pellets give food but these hardwoods can be overpowering on their own for vegetables. For smoked salsa, try a fruitwood such as cherry or apple, or use a blend of woods including fruit wood. Be sure what you choose is 100% hardwood with no fillers or low quality, cheaper woods.

    Can I make smoked salsa without a smoker or pellet grill?

    To make smoked salsa without a smoker or pellet grill (on a gas grill), use a grill accessory to add smoke, such as a smoke tube or smoker box. Depending on the size of the holes, fill the smoke tube with either wood chips or wood pellets. Light wood on fire with a small propane torch or butane torch. Some gas grills come with smoking attachments, so follow the manufacturers instructions.

    How should I store smoked salsa?

    Smoked salsa can be stored in an airtight container in the refrigerator for up to a week.

    Is smoked salsa suitable for freezing?

    While fresh salsa is best, smoked salsa can be frozen. Be aware that the texture will change after freezing and thawing, and you may need to drain it of excess juice as the tomatoes thaw.


    More Salsa and Sauce Recipes

    Fresh sauces and salsa make everyday dishes more flavorful and delicious. All of these recipes are easy, have fun making them fresh at home instead of buying.

    • Bowl of bright tropical colored pineapple mango salsa.
      Fresh Pineapple Mango Salsa Recipe
    • tomatillo salsa verde
      Green Enchilada Sauce with Tomatillos
    • A glass jar of deep red homemade bbq sauce.
      Gluten-Free BBQ Sauce Recipe

    ⭐️Did You Make This Recipe?

    If you make this smoked salsa recipe, please add your comment. I appreciate your feedback and enjoy hearing from you. If you loved it, please give it a 5-star rating! They really help other readers.

    📖 Recipe

    Smoked salsa in a tall jar and a small serving glass cup with corn chips

    Smoked Salsa (pellet grill)

    Sally Cameron
    Elevate your sals game by making it on a pellet grill! Lightly smoky flavor adds to what ever you are serving it with.
    5 from 1 vote
    Prevent your screen from going dark
    Print Recipe Pin Recipe
    Prep Time 15 minutes mins
    Cook Time 1 hour hr 30 minutes mins
    Total Time 1 hour hr 45 minutes mins
    Course condiment, salsa, Sauce
    Cuisine Mexican
    Servings 9 Yield 3 cups
    Calories 28 kcal

    Equipment

    • Grill basket or grill tray with holes

    Ingredients
      

    • 2 pounds Roma tomatoes or other meaty tomatoes
    • 1 medium onion yellow, white, brown, or red
    • 4 garlic cloves
    • 2 jalapeno peppers or more for spicier salsa
    • ¼ cup cilantro leaves sub parsley and oregano
    • 1-2 limes juiced
    • ¼ teaspoon sea salt or more
    • ⅛ teaspoon black pepper optional

    Instructions
     

    • Be sure the pellet grill is full of pellets of choice and set temperature to 250°F. Set to super smoke or smoke plus.
    • Wash and quarter the tomatoes, chop the onion into small wedges. Slice the peppers lengthwise and slice out the seeds and white membrane (optional). Chop the peppers into large pieces. Peel garlic cloves and leave them whole.
      Add all of the vegetables to a grill basket or tray and smoke for 90 minutes.
    • Remove the grill tray from the smoker and add the ingredients to a food processor. Pulse to refine salsa to your preferred texture. Drain the salsa through a fine mash sieve to remove extra juice, then add the chopped herbs, lime juice, and salt. Taste the salsa and adjust salt if desired.

    Notes

    Smoked salsa notes:
    • For spicier salsa use more jalapeños or use chiles with higher heat such as serrano peppers. 
    • Without a food processor, pulse in batches in a blender, being careful not to totally puree the salsa. 
    • Without a blender, chop the smoked vegetables finely by hand on a large cutting board. 

    Nutrition

    Serving: 0.33cupCalories: 28kcalCarbohydrates: 7gProtein: 1gFat: 0.2gSaturated Fat: 0.04gPolyunsaturated Fat: 0.1gMonounsaturated Fat: 0.04gSodium: 71mgPotassium: 280mgFiber: 2gSugar: 3gVitamin A: 907IUVitamin C: 21mgCalcium: 18mgIron: 0.4mg
    Tried this recipe?Let us know how it was with a comment and leave a star rating!

    Chocolate Banana Smoothie

    02/16/2024 by Sally Cameron 2 Comments

    two chocolate smoothies in glasses on an antique tray.

    This healthy chocolate banana smoothie is like a chocolate milkshake that powers up your morning. It increases energy, balances mood, boosts your brain, and helps you sail through daily stress. Ready for a dose of chocolate goodness? Grab your blender and let's fix those chocolate cravings in a healthy way.

    Creamy chocolate smoothies in glasses topped with banana slices and cacao nibs.

    I've been drinking smoothies for more than twenty five years and continually come up with new recipes to keep breakfast interesting. This chocolate smoothie not only tastes like it's too good for breakfast but provides more than just tasty protein.

    [feast_advanced_jump_to]

    Why You'll Like This Recipe

    • Easy to make, healthy smoothie that tastes amazing.
    • Powers up your morning or post-workout routine.
    • Healthy ingredients.

    Want to make more healthy smoothies? Here's a guide to making healthy smoothies that really breaks down how to make smart choices.

    Recipe Ingredients

    Here's what you need to make a healthy chocolate banana smoothie.

    Ingredients for a chocolate smoothie on a gray counter.
    • Chocolate: Unsweetened raw cacao powder or unsweetened cocoa powder provide great chocolatey flavor and health benefits.
    • Milk: Use what works best for you, either a plant milk like hemp milk, oat milk, almond milk, coconut milk, or regular milk.
    • Healthy fats: A tablespoon of coconut MCT oil is terrific, or a little canned coconut milk for rich smoothness.
    • Flaxseed: An excellent way to add protein and fiber but you can't use it whole. It must be ground, and fresh ground is best. If you don't want to go through that, use a quality brand like this that is cold-milled to preserve nutrients. I grind mine right before using with this little grinder.
    • Ground maca powder: Optional, but for energy and balanced stress levels. It's an adaptogenic herb from Peru. This is my secret ingredient. Add it to easy overnight oats with chia seeds too.
    • Cinnamon: a little ground cinnamon is a nice flavor blend with the chocolate (optional).
    • Sweetener: Try a little maple syrup, sugar-free maple syrup, plain sugar-free simple syrup, or chocolate stevia drops depending on your taste buds.
    • Banana: Helps make a creamy drink, adds sweetness, and a rich source of potassium and B6.
    • Protein powder: Choose what type of protein powder works best for you in terms of grams of protein you need. Read labels carefully for potential unwanted ingredients. A good rule is the shorter the ingredient list, the better. Buy unflavored and unsweetened and add yourself for better control.

    See recipe card for measurements.

    Chef's tip: About bananas. Choose greenish bananas for lower sugar levels and resistant starch, a type of starch than functions more like fiber. Ripe bananas have more sugar. For frozen banana, peel and chop the banana into chunks and freeze on a small sheet pan in a single layer. When frozen, store in a zip bag for using in smoothies. They are like banana ice cubes!

    Substitutions and Smoothie Variations

    • Want a little crunchy garnish? Sprinkle the top with raw cacao nibs.
    • Want a chocolate peanut butter smoothie? Swap the coconut oil for a tablespoon or two of creamy peanut butter. Cashew butter, almond butter, and sunflower seed butter all work too!
    • Swap the flaxseeds for chia seeds. Try a tablespoon or two to start as chia thickens upon standing.
    • Skip the banana and add a little avocado.
    • Add a little vanilla extract.
    • For a simple chocolate smoothie use just milk, cacao, banana, protein powder, and a little sweetener.

    Chef's note: What is maca? Maca is an adaptogenic herb that help the body manage environmental stress. Research on maca is in early stages, but reports show maca may help increase energy and stamina, balance hormones, plus reduce stress and anxiety. With a caramel-y flavor, its a terrific add for smoothies, overnight oats with chia, and Greek yogurt.

    Maca powder in a bowl and spoon on a marble .

    Recipe Instructions

    Simply add all ingredients for this chocolate banana smoothie to a high-speed blender and blend until smooth. If you want an icy cold smoothie, add a couple of ice cubes.

    Another option is a personal size blender like this model complete with a smoothie container. I use mine to make salad dressings too like this creamy lemon tahini dressing.

    Is it Cacao or Cocoa?

    Is it cocoa or cacao? Cocoa and cacao are different but start from the same source; the cacao tree with a chocolatey but different flavor. Cacao is raw and minimally processed so retains more nutrients. It's a little bitter flavor wise. Cocoa powder is milder and more processed, like what you bake with.

    The health benefit from cacao is from from a type of phytonutrient called flavanols. Published studies show that consuming cocoa flavanols improves cardiovascular function and lessens the burden on the heart that comes with the aging. It also helps lowers blood pressure, improve blood flow to the brain and heart, and prevent blood clots. If that isn't good news for chocolate lovers I don't know what is!

    Cacao adds important minerals such as magnesium, manganese, chromium, phosphorus, iron, potassium, zinc, and copper.

    White round platter with a glass of hemp seed milk, a pitcher, and hemp seeds.

    Chef's tip: For homemade milks that are better then the store and easy to make from your pantry, try my homemade almond milk and homemade hemp milk in photo above).

    Protein Powder Notes

    Protein powder makes it easy to add protein to your smoothie. It's best to choose unflavored, unsweetened powder with minimal additives.

    There are many options available today from whey and egg white protein powder to plant-based protein powder options. Read the labels for a clean product looking for additives, fake flavors, and added sweeteners that you may not want.

    For more suggestions, read this post on How to Choose a Protein Powder and alternatives to powders for adding protein.

    Servings Suggestions

    Enjoy a chocolate banana smoothie right after blending for the best flavor and texture. If you're taking on the go, store in an insulated bottle and shake before you consume to re-blend if needed. Garnish with a sprinkle of cacao nibs, a few banana slices, a little shredded unsweetened coconut, or hemp seeds.

    This chocolate smoothie recipe makes one serving. It works good for after school snacks as well as breakfast meal replacement or a post-workout re-fuel.

    Chocolate smoothies with cacao nibs.

    Recipe FAQs

    How do I make a chocolate smoothie without added sugar

    For a no added sugar smoothie, start with unsweetened milk. Dairy milk contains natural sugars, 13 grams in an 8-ounce glass of low fat milk. To lower sugar, switch out to an unsweetened plant milk. They are delicious for making smoothies. For example, homemade, unstrained almond milk is creamy and makes a terrific smoothie with only 1 gram of natural sugar.

    Be sure to choose an unsweetened protein powder, and if using fruit, choose low sugar fruit like berries and use only a small amount. One other tip for low sugar smoothies, use monk fruit to sweeten instead of maple syrup or honey.

    What kind of milk should I use for a chocolate smoothie

    A variety of milks work well in a chocolate smoothie, all adding their own flavor nuances. Try different ones to see what you like best, then occasionally trade them out and do something new. Try almond milk, hemp milk, coconut milk, cashew milk, organic soy milk, and dairy milk. Rice milk works but as it is so thin and flavorless it doesn't add much as these other milks do.

    Can I use chocolate syrup for the chocolate flavor?

    Simply put, no. Don't use chocolate syrup for a chocolate smoothie. It's best and healthiest to use raw cacao powder or unsweetened cocoa powder for the chocolate flavor.

    The famous chocolate syrup in the brown bottle contains high fructose corn syrup, corn syrup, sugar, water, cocoa, preservatives, salt, mono and diglycerides, Polysorbate 60, xanthan gum, and artificial vanilla flavor. Do you really want that in a healthy smoothie? I don't think so.

    More Healthy Smoothie Recipes

    • Hawaiian green smoothie
      Green Detox Smoothie Recipe
    • Tropical Mango Green Smoothie
      Green Smoothie Recipe with Mango
    • Creamy orange pumpkin pie smoothie in a glass with a silver straw.
      Pumpkin Smoothie (Healthy & Easy)
    • chocolate blueberry smoothie
      Chocolate Blueberry Smoothie (high protein)

    ⭐️Did you Make This Recipe?

    If you make this recipe, please comment, and let me know, I enjoy hearing from you. If you loved it, please give it a 5 star rating! They really help other readers.

    📖 Recipe

    chocolate maca smoothie | AFoodCentricLife.com

    Healthy Chocolate Banana Smoothie Recipe

    Sally Cameron
    Chocolaty, creamy and good for you, this smoothie will get your day started right with raw cacao powder for heart and brain health, and maca to help your body adapt to what they day throws at you.
    5 from 1 vote
    Prevent your screen from going dark
    Print Recipe Pin Recipe
    Prep Time 5 minutes mins
    Total Time 5 minutes mins
    Course smoothie
    Cuisine American
    Servings 1 serving
    Calories 384 kcal

    Equipment

    • High speed blender

    Ingredients
      

    • 1 ¼ cups almond milk preferably homemade
    • 2 tablespoons raw cacao powder
    • 2 tablespoons ground flaxseed
    • 1 tablespoon coconut MCT oil
    • 1 tablespoon ground maca powder
    • ½ teaspoon ground cinnamon
    • 1 small greenish banana
    • 1 scoop protein powder of choice see notes below
    • 2 teaspoons monk fruit (for no sugar) See notes below

    Optional Garnishes

    • 1 tablespoon raw cacao nibs
    • 1 tablespoon unsweetened coconut thread
    • 2-3 slices banana

    Instructions
     

    • Add all ingredients into a blender and blend until smooth and creamy.
    • If you prefer a cold smoothie, add a couple of ice cubes. Garnish as desired.

    Notes

    Protein powder makes it easy to add protein to your smoothie. Choose unflavored, unsweetened powder with no additives. You can also use hemp seeds, chia seeds and other plant-based options to add protein. 
    Substitutions:
    • Swap 2 tablespoons of canned coconut milk for the MCT oil, adds nice creamy richness. 
    For sweeteners:
    • I use a monk fruit simple syrup for sweetness with no added sugar. You can also use maple syrup or honey but they add their own flavor. Granular mink fruit works too, or chocolate stevia drops. 

    Nutrition

    Calories: 384kcalCarbohydrates: 60gProtein: 34gFat: 13gSaturated Fat: 2gPolyunsaturated Fat: 6gMonounsaturated Fat: 3gCholesterol: 50mgSodium: 459mgPotassium: 882mgFiber: 14gSugar: 17gVitamin A: 148IUVitamin C: 11mgCalcium: 577mgIron: 5mg
    Tried this recipe?Let us know how it was with a comment and leave a star rating!

    Please Note:  Some links are affiliate links which means I may earn a small commission if you buy the item at no extra cost to you. These small sales are how I keep the site up and running. Thanks for your support!

    Raspberry Shrub (Sugar-Free Mocktail Recipe)

    11/25/2025 by Sally Cameron Leave a Comment

    Raspberry shrub vinegar drink with fresh raspberries and mint with ice in a tumbler.

    This raspberry shrub is a tangy, refreshing mocktail made with raspberry vinegar, sparkling water, and a touch of natural sweetness. Sometimes called a "drinking vinegar," it's bright, fizzy, and completely alcohol-free-perfect for hot days, festive holidays, and giving guests a delicious non-alcoholic option.

    Raspberry shrub vinegar drink with fresh raspberries and mint with ice in a tumbler.

    I first discovered shrubs years ago when I began collecting flavored vinegars - some from artisan German makers like Vom Fass, others from more affordable finds online. That led me to experiment with raspberry vinegar, sparkling water, and natural sweeteners, creating a simple raspberry shrub recipe (also called a vinegar drink) that's ideal for today's mocktail trend. While it might sound crazy it is totally refreshing!

    [feast_advanced_jump_to]

    Why You'll Love This Raspberry Shrub Mocktail

    • Light & refreshing - A tangy, cooling drink that's alcohol-free.
    • Sugar-free option - Naturally sweetened with stevia or monk fruit no heavy sugar syrups.
    • Festive & versatile - Perfect for holidays, parties, or Dry January.
    • Mocktail or cocktail - Enjoy with sparkling water or add a splash of spirits.

    Start your day with a raspberry smoothie before you enjoy a raspberry shrub.

    Ingredients You'll Need For a Shrub

    • Raspberry vinegar - The star of this mocktail. Look for high-quality raspberry vinegar with no additives. I like Organic Raspberry Vinegar (easy to find online) and Vom Fass Star Raspberry Vinegar for a more artisanal option.
    • Sparkling water - Use a mineral water like San Pellegrino or Gerolsteiner for extra bubbles and a crisp finish.
    • Sweetener - Raspberry-flavored liquid stevia gives natural sweetness without sugar. You can also experiment with honey or monk fruit simple syrup if you prefer.
    • Fresh mint - More than garnish - it adds a cool, refreshing lift that makes the drink shine.
    • Fresh raspberries (optional) - For garnish. They make the drink festive and beautiful, especially for parties or holidays).

    Please see the recipe card for measurements.

    Chef's Tip - A Quick History of Shrubs
    Shrubs, also called drinking vinegars, have a long global history. In old English recipes, they were often mixed with spirits and citrus. In early America, vinegar was used instead of citrus to preserve berries and fruits before the days of refrigeration. These tangy drinks fell out of fashion for decades, but were revived by chefs and bartenders in the 2010s - often with sugar syrups. This raspberry shrub skips the heavy sugar and keeps the tradition light, refreshing, and simple.

    How about raspberries in a salad? Try this grilled shrimp salad with raspberries and avocado.

    Substitutions and Variations

    • Flavored vinegars - Swap raspberry vinegar for blueberry, blackberry, or even pomegranate vinegar for a different fruity twist.
    • Sweeteners - If you don't use stevia, try a monk fruit-based simple syrup, honey, or agave. Start with a small amount and adjust to taste.
    • Herbal notes - Fresh basil, rosemary, or thyme can add an aromatic layer that pairs beautifully with vinegar-based drinks.
    • Make it a cocktail - Try a splash of gin, vodka, or sparkling wine for an adult version.
    A blue carton of bright red fresh raspberries on a wood counter.

    How to Make a Raspberry Shrub

    Most shrub recipes start with a pound of fruit and two cups of sugar, cooked into a heavy syrup. That's delicious, but far too sweet for my taste - it's basically jam in a glass. This raspberry shrub mocktail skips the sugar syrup and infusing step, keeping it light, quick, and much healthier.

    Adding raspberry to a drink glass with ice to make a shrub vinegar drink.
    1. Fill a tall glass with ice. Add 2 tablespoons raspberry vinegar.Drop in 3-4 flavored stevia drops (or simple syrup).
    Adding sprakling water to a glass of ice and raspberry vinegar to make a shrub vinegar mocktail.
    1. Top with sparkling water (I use San Pellegrino). Garnish with mint and fresh raspberries.
    A finished raspberry shrub ready to enjoy topped with fresh mint and raspberries.

    Serving Suggestions

    This raspberry shrub mocktail is refreshing on its own, but you can serve it in different ways:

    • Summer cooler - Mix with crushed ice and fresh herbs for a light, fruity slush.
    • Mocktail spritzer - Classic: shrub + sparkling water over ice with mint.
    • Holiday party drink - Garnish with mint and raspberries for a festive red-and-green look.
    • Cocktail base - Add a splash of gin, vodka, or sparkling wine if you want an adult twist.
    A raspberry shrub vinegar mocktail on a gray wood counter with fresh berries and mint.

    Recipe FAQs

    What is a shrub drink?

    A shrub is a tangy, sweet-tart drink made from fruit, vinegar, and sweetener. It can be mixed with sparkling water for a mocktail or with spirits for a cocktail.

    Can I make a shrub without sugar?

    Yes. Many traditional shrubs use fruit syrups loaded with sugar, but this version uses flavored stevia instead for a lighter, sugar-free option.

    What kind of vinegar is best for shrubs?

    Fruit vinegars like raspberry, blueberry, or pomegranate are delicious. Apple cider vinegar is a classic choice for tang, while balsamic adds depth

    Do shrubs have benefits?

    Shrubs aren't a health drink per se, but vinegar can aid digestion and the low-sugar base makes it a healthier alternative to sodas or sweet cocktails.

    More Recipes With Berries

    Love berries? Here are more fresh, flavorful ways to enjoy them, from smoothies, to breakfast parfaits, and desserts.

    • A bright pink berry smoothie with fresh raspberries inside the glass.
      Raspberry Smoothie
    • a single glass of strawberry panna cotta with berries and mint.
      Easy Strawberry Panna Cotta with Strawberry Sauce
    • Four lemon posset custard dessert cups topped with fresh berries.
      Easy Lemon Posset Recipe
    • A single yogurt breakfast parfait with layers of fruit, granola, and yogurt.
      How to Make Greek Yogurt Parfaits

    Did You Make This Recipe?

    If you make a raspberry shrub, please let me know how you enjoyed it. I appreciate hearing from you and your comments help other readers.

    📖 Recipe

    Raspberry Shrub | AFoodCentricLife.com

    Raspberry Shrub Mocktail

    Sally Cameron
    Cool and refreshing without added sugar or alcohol, use good quality raspberry vinegar and chilled sparkling water. For the sweetness without sugar, use Sweet Drops in berry flavor, by Sweet Leaf.
    5 from 1 vote
    Prevent your screen from going dark
    Print Recipe Pin Recipe
    Prep Time 2 minutes mins
    Cook Time 0 minutes mins
    Total Time 2 minutes mins
    Course Beverage, Drinks
    Cuisine American
    Servings 1 serving
    Calories 10 kcal

    Ingredients
      

    • Ice to fill a glass
    • 2 tablespoons raspberry vinegar
    • 12 ounces sparkling water like San Pellegrino
    • 3-4 drops flavored liquid stevia drops Sweet Leaf Sweet Drops
    • 2 sprigs fresh mint optional garnish, but adds flavor
    • 4-5 fresh raspberries optional garnish

    Instructions
     

    • Fill glass with ice, pour raspberry vinegar over the ice cubes.
    • Add a few drops of the berry flavored liquid stevia and fill the glass with the sparkling water. Stir, and top with the mint and raspberries.

    Notes

    Don't skip the mint. It's not just for looks. It adds wonderful flavor. And mint is so easy to grow in warm months. Get a pot going in your backyard, porch, balcony or kitchen window.

    Nutrition

    Calories: 10kcalCarbohydrates: 1gProtein: 1gFat: 1gPolyunsaturated Fat: 1gMonounsaturated Fat: 1gSodium: 73mgPotassium: 41mgFiber: 1gSugar: 1gVitamin A: 3IUVitamin C: 2mgCalcium: 21mgIron: 1mg
    Tried this recipe?Let us know how it was with a comment and leave a star rating!

    Nantucket Cranberry Pie

    11/18/2025 by Sally Cameron Leave a Comment

    A slice of nantucket cranberry pie on a plate topped with whipped cream, whole cake behind.

    Simple to make, gorgeous to serve, and impossible to resist, this Nantucket Cranberry Pie will steal your heart. Despite the name, there's no pastry crust-this easy cranberry pie bakes like a rustic cake with a jammy cranberry layer, a tender almond-kissed crumb, and toasted walnuts and pecans for crunch. It's one bowl, one pan, no mixer-simple winter baking that elicits smiles at your holiday table.

    A slice of cranberry nantucket pie with stiff whipped cream on top, with a silver fork on a plate.

    I came across this vintage cranberry pie idea while researching cranberry desserts and developed my own version. It's the winter cousin of my summer cherry cake-an easy, one-pan, and fruit-first style, dressed for Thanksgiving and Christmas. My taste testers asked for the recipe on the spot. Serve warm with powdered sugar or a scoop of vanilla-and save a slice for breakfast.

    [feast_advanced_jump_to]

    Cranberry Nantucket Pie Highlights

    • One bowl, one pan - No mixer, no fuss; weeknight-easy, holiday-worthy.
    • GF/DF flexible - Works with AP flour or a 1:1 GF blend; dairy-free swaps are simple.
    • Fruit-first & nostalgic - Jammy cranberries with a tender buttery crumb.

    What to top this beautiful cranberry pie with? How about a scoop of homemade vanilla bean ice cream?

    Chef's Tip: Why It's Called a "Pie" - Despite the name, there's no pastry crust here. This cranberry Nantucket pie bakes like a rustic cranberry cake or torte. The word "pie" reflects old English usage, when many baked dishes (sweet or savory) carried the name (think shepherd's pie). Early New England cooks kept it, and the vintage charm suits this homey, fruit-forward holiday dessert (and a slice is even good for breakfast).

    Ingredients You'll Need

    Ingredients for a Nantucket cranberry pie in prep bowls on the counter.
    • Cranberries - Fresh cranberries give this cranberry cake its bright, jammy, seasonal flavor.
    • Nuts - A mix of pecans and walnuts adds warm, toasty flavor and a little crunch in every bite.
    • Sugar - Sweetens the tart cranberries and balances the fruit-forward flavor.
    • Extracts - Vanilla for warmth and just a hint of almond extract for a subtle bakery-style note.
    • Butter - Unsalted butter for rich flavor and a tender crumb. Plant-based butter works beautifully for a dairy-free version.
    • Orange - Fresh orange zest adds a fragrant, citrus lift that complements the cranberries.
    • Eggs - Bind the batter and create a soft, cake-like texture.
    • Flour - Use either a GF blend (I use King Arthur 1:1) or all purpose flour.
    • Almond flour - Just a few tablespoons for tenderness and a delicate nutty note. Optional but it's a great addition.
    • Baking powder - Helps the cake rise gently for a light, tender crumb.

    Please see the recipe card for measurements and salt.

    Substitutions and Variations

    • No oranges - Use a ¼ teaspoon culinary grade orange oil for the orange flavor.
    • Reduced sugar - Use part granular monk fruit/allulose blend (but it browns more).
    • No almond flour - Replace it with the same amount of regular or gluten-free flour.

    If you love cranberries, try my version of whole berry cranberry sauce, with added pomegranate seeds for color and flavor.

    Chef's Tip: Bake it in a Springform Pan - Traditionally a cranberry pie was baked in a deep-dish pie plate, but for best results use a 9-inch springform pan. It releases cleanly and gives you neat slices with those jewel-bright cranberries showing around the edge. The straight, taller sides support this shallow fruit-forward cake so it bakes with the right height and structure.

    How to Make a Nantucket Cranberry Pie

    Golden melted butter in a small stainless steel pan.
    1. Melt the butter over low heat, the cool a few minutes.
    Toasting walnuts and pecans in a black iron skillet.
    1. Toast the nuts in a skillet or fry pan over medium-low heat, about 5 minutes. They are done when you smell them, don't burn them.
    Chopped nuts on a black cutting boards with a chef's knife.
    1. Chop the nuts and cool.
    Cranberries, nuts, sugar, and orange zest mixed in a round pan.
    1. Combine the cranberries, nuts, sugar, zest, and salt and add to the pan. Pat in a level layer.
    Whisking eggs and sugar in a glass bowl with vanilla extract.
    1. Whisk eggs and sugar until smooth. Add the vanilla and almond extract.
    Mixing batter for a Nantucket cranberry pie in a glass bowl with silver whisk.
    1. Whisk in the cooled butter until smooth, then add the flour, almond flour, baking powder, and salt. Whisk until it's a smooth thick batter.
    Pouring a thick cake better over the top of fresh cranberries, sugar, and nuts for a cranberry cake.

    7. Pour the batter over top of the cranberries and nuts.

    A Nantucket cranberry cake ready to bake in a springform pan.

    8. Smooth the batter out evenly. Berries may or may not show. Bake cranberry pie for 35-45 minutes, until the top is golden and a metal cake tester or thin skewer comes out clean when inserted in the center of the pie.

    A golden baked cranberry nantucket pie on a cooling rack on the counter.

    9. Cool the cake in the pan for 15 minutes, then run a think knife or metal spatula around the inside of the pan, release the spring, then cool the cake on a wire rack.

    A nantucket cranberry pie on a plate, with a slice out, cranberries beside

    Serving Nantucket Cranberry Pie

    This fresh cranberry pie shines warm, when the cranberries are jammy and the crumb is tender. A dusting of powdered sugar is classic, but it's also wonderful with:

    • A scoop of my homemade vanilla ice cream.
    • Lightly sweetened whipped cream (or coconut cream for DF).
    • Crème fraîche for a tangy contrast.

    And leftovers for breakfast are divine, as a friend informed me! For another easy, one pan cake, try this lemon olive oil cake, made with cornmeal.

    Storing

    This easy cranberry dessert keeps well for 1-2 days at room temperature. The juicy cranberries and nut crumb keep it wonderfully tender and jammy. Like many fruit-forward bakes, it softens as it sits.

    • Best within: 1-2 days.
    • Room temp storage: Lightly covered.
    • Refrigerate if keeping longer than 2 days and bring to room temperature before serving (but it's even good cold, trust me).
    • Heat briefly in a 300°F oven for ~10 minutes of desired to warm (avoid microwaving).

    Freezing

    Freezing isn't recommended - the fresh cranberries release moisture when thawed and the delicate crumb becomes too soft.

    A slice of nantucket cranberry pie on a plate topped with whipped cream, whole cake behind.

    Recipe FAQs

    What is a Nantucket cranberry pie?

    Despite the name, this isn't a traditional pie with a pastry crust. It bakes like a rustic cranberry cake/torte - jammy cranberries and toasted nuts on the bottom with a tender, buttery batter baked over the top.

    Why is it called a "pie" if there's no crust?

    Early New England recipes used the word "pie" more broadly for baked dishes, similar to shepherd's pie. This vintage cranberry dessert kept the name, even though it behaves more like a cake.

    Can I make this Nantucket cranberry pie gluten-free?

    Yes - use a 1:1 gluten-free flour blend and keep the almond flour. The almond flour adds tenderness and helps mimic traditional cake texture.

    Can I use frozen cranberries?

    Fresh cranberries work best. Frozen cranberries release extra moisture and can change the texture and bake time, so they're not recommended for this recipe.

    More Holiday Dessert Recipes

    Besides this wonderful holiday cranberry dessert, try a silky chocolate or pumpkin mousse, or a pumpkin tart, or even classic creme brulee. Special desserts make a holiday meal even more memorable.

    • A glass of creamy pumpkin mousse dusted with cinnamon with a gold spoon.
      Pumpkin Mousse (Easy No-Bake Dessert)
    • Pumpkin tart
      Pumpkin Tart (Gluten-Free Almond Flour Crust)
    • Chocolate Tart With Hazelnut Crust
      Decadent Chocolate Ganache Tart
    • Vanilla bean creme brulee in white ramekins on a wire rack.
      Vanilla Crème Brûlée (Easy No-Stovetop Method)

    Last Step! Did You Make This Recipe?

    If you tried it, I'd love to hear how it went. Your comments (and ⭐️ star ratings) help other readers know what to expect, and help me keep creating high quality, free recipes for you.

    📖 Recipe

    A slice of nantucket cranberry pie on a plate topped with whipped cream, whole cake behind.

    Nantucket Cranberry Pie

    Sally Cameron
    Sweet, jammy cranberries and crunchy nuts under a tender batter top-this Nantucket cranberry "pie" bakes in one pan (springform) and eats like a rustic cake. Perfect for Thanksgiving or Christmas. Top with whipped cream or vanilla ice cream.
    No ratings yet
    Prevent your screen from going dark
    Print Recipe Pin Recipe
    Prep Time 30 minutes mins
    Cook Time 45 minutes mins
    Total Time 1 hour hr 15 minutes mins
    Course Dessert
    Cuisine American
    Servings 8
    Calories 497 kcal

    Equipment

    • 9" springform pan
    • parchment rounds or paper
    • Large mixing bowl
    • flexible spatula
    • Chef's knife

    Ingredients
      

    • ¾ cup unsalted butter 6 ounces, or sub plant butter sticks
    • 2 ounces raw walnuts ¼ cup
    • 2 ounces raw pecans ¼ cup
    • 8 ounces raw fresh cranberries 2 cups
    • ⅓ cup sugar
    • ½ teaspoon orange zest ½ an orange
    • 1 pinch sea salt
    • 2 large eggs
    • 1 cup sugar
    • 1 teaspoon vanilla extract
    • ¼ teaspoon almond extract
    • 1 cup GF flour blend or all purpose flour, I use King Arthur flours
    • 3 tablespoons almond flour or sub more flour
    • ½ teaspoon baking powder
    • ½ teaspoon fine sea salt

    Optional garnish (either one)

    • 1 cup heavy whipping cream
    • 1 quart vanilla ice cream

    Instructions
     

    Prepare pan, pre-heat oven

    • Butter the side of a 9" springform pan and line with a parchment round to fit the bottom. Pre-heat the oven to 350°F.

    Melt butter

    • Add butter to a small pan over low heat and melt, then cool for 5 minutes before using in the batter.

    Toast the nuts

    • In a medium skillet or fry pan over medium-low heat, toast the nuts for 5 minutes or until fragrant. Watch so they do not burn. Cool and chop.

    Make cranberry base

    • In a medium bowl toss the raw whole cranberries with sugar, orange zest, and salt, then add chopped nuts. Pour into the springform pan and pat level.

    Make the batter

    • Whisk eggs and sugar until smooth. Add the vanilla and almond extract. Whisk in the cooled butter until smooth, then add the flour, almond flour, baking powder, and salt. Whisk until it's a smooth thick batter.
    • Pour the batter over the cranberries and smooth with a spatula. Bake for approximately 35-45 minutes, until the top is lightly golden and glossy, and a metal cake tester or thin skewer comes out clean when inserted in the center of the pie.
    • Remove pie from the oven and cool 15 minutes. Run a thin bladed knife or flexible metal spatula around the inside edge of the pan to loosen the pie, then release the spring. Serve warm or at room temperature dusted with powdered sugar or a scoop of vanilla ice cream.

    Notes

    I recipe tested with part monk fruit and allulose blend to reduce sugar, and while it tastes good, the cake browns much more deeply and the texture is a little different. If you opt to replace part of the sugar, start watching the cake early to avoid over-browning. I preferred the version with all sugar, and while it's a good amount of sugar, it is a holiday dessert after all. Just enjoy!

    Nutrition

    Calories: 497kcalCarbohydrates: 55gProtein: 5gFat: 30gSaturated Fat: 12gPolyunsaturated Fat: 6gMonounsaturated Fat: 9gTrans Fat: 1gCholesterol: 92mgSodium: 198mgPotassium: 122mgFiber: 3gSugar: 35gVitamin A: 622IUVitamin C: 4mgCalcium: 49mgIron: 1mg
    Tried this recipe?Let us know how it was with a comment and leave a star rating!

    Brussels Sprouts With Pancetta (Stovetop)

    11/13/2025 by Sally Cameron Leave a Comment

    Rund bowl of golden green Brussels sprouts with pancetta, herbs, and shallots ready for serving.

    Brussels sprouts with pancetta is always a hit holiday side dish - caramelized sprouts, crispy pancetta, sweet shallots, and fresh thyme all cooked in one skillet. A side dish that's simple, savory, and completely irresistible. The perfect mix of easy and delicious for your Thanksgiving feast or with a roast chicken or pork roast any time of year.

    White bowl of tender Brussels sprout with crisp pancetta, herbs, and shallots.

    I've made these sautéed Brussels sprouts with pancetta many a holiday season and in between. The method is simple: render the pancetta until crisp, then pan roast the sprouts in the flavorful fat until they brown and the centers turn tender. Add herbs and aromatics. The result? Brussels sprouts with a salty-sweet balance and amazing flavor you'll love.

    [feast_advanced_jump_to]

    Brussels Sprouts with Pancetta Highlights

    • Big flavor - Salty pancetta + sweet shallot + thyme = irresistible.
    • Holiday-ready - Pairs perfectly with turkey, chicken, pork roast, or salmon.
    • Make-ahead friendly - Prep sprouts, dice pancetta, mince shallot 1-2 days ahead.

    Ingredients You'll Need

    Brussels sprouts, pancetta, broth, herbs, and oil to make Brussels Sprouts with Pancetta.
    • Brussels sprouts - Buy loose if possible so you can choose similar sizes; bagged works in a pinch. Skip stalks if the sizes are mixed (risks uneven cooking).
    • Pancetta - Diced pancetta is easiest; sliced works if don't mind chopping yourself. Renders flavorful fat and adds salty depth.
    • Shallot - Gentle, sweet flavor that melts into the glaze without overpowering the sprouts.
    • Garlic - Fresh cloves for warm, aromatic flavor.
    • Thyme - Fresh thyme brings earthy balance; dried works in a pinch.
    • Olive oil - Extra-virgin olive oil to supplement pancetta drippings.
    • Broth - Low-sodium chicken, turkey, or vegetable broth to steam-finish and lightly glaze the sprouts.

    Please see the recipe card for measurements, salt, and pepper.

    Chef's Tip - Choosing Brussels Sprouts:
    Buy loose sprouts when you can so you can select for size and freshness. Skip the stalks. They are fun, but the sprouts often vary hugely in size, so cook unevenly. If they look pretty even in size, they are nice and fresh but again, it's hard to know how much you are really buying in poundage. Choose firm, tightly closed sprouts of similar size for consistent results; avoid yellowing leaves or soft spots. When prepping, some require very little peeling, some a bit more.

    Substitutions and Variations

    • Pancetta swaps - Try smoked bacon for a heartier flavor, or chopped prosciutto for a delicate, crisp finish.
    • Nuts: Toasted hazelnuts, slivered almonds, walnuts, pr pine nuts add a nice crunch.
    • Herbs: Swap thyme for rosemary, sage, or a sprinkle of Italian parsley before serving.
    • Add a sweet note: A drizzle of aged balsamic or pomegranate molasses gives a lovely contrast.
    • Umami flavor - Finish with grated Parmesan for depth.

    How to Make Brussels Sprouts with Pancetta

    You'll need a wide skillet or fry pan (12"-13") to make these sauteed Brussels.

    Trimming and cutting Brussels sprouts prepping for cooking.
    1. Trim root end of the Brussels sprouts, remove any bad outer leaves, the slice in half through the root end.
    Brown the diced pancetta in a wide shallow pan until crisp and most fat has rendered out.
    1. Add pancetta to a hot pan on the stovetop over medium heat and brown until crisp and most of the fat has rendered.
    With slotted spoon, remove the pancetta to a plate or tray line with paper towels to drain excess fat.
    1. Remove pancetta to layers of paper towels on a plate or tray, leaving some fat and the browned bits in the pan.
    Halved Brussels sprouts browning in a white pan on sthe stovetop.
    1. Add a tablespoon of oil to the pan, place half the sprouts cut side down. Brown, adding a little more oil if needed and the pan is dry. Remove to a bowl and repeat, browning the rest of the sprouts.
    Browned and glossy Brussels sprouts in a wide white skillet.
    1. Add all of the caramelized sprouts back to the pan.
    Browned sprouts with pink shallots and galic cooking in a pan.r
    1. Add shallots and cook 2 minutes, medium to medium-low heat, stirring, then add garlic for another 30 seconds.
    A wide shallow pan with a glass lid, with green vegetables inside on stovetop.
    1. Add broth and cover with a lid. Cook Brussels sprouts until tender when pierced with the top of a paring knife, 3-5 minutes depending on size.
    Cooked Brussels sprouts with pancetta and herbs in a pan.
    1. Remove lid, add thyme and pancetta, stir through until hot.
    Rund bowl of golden green Brussels sprouts with pancetta, herbs, and shallots ready for serving.

    Serving Brussels Sprouts with Pancetta

    Serve these savory, golden-edged Brussels sprouts straight from the skillet while they're hot and caramelized. They shine alongside roasted chicken or turkey, seared steak, or salmon, but are equally at home on a holiday table with mashed potatoes and gravy.

    For a finishing touch, try one of these accents to elevate flavor and texture:

    • A squeeze of fresh lemon to brighten.
    • A drizzle of balsamic glaze for sweet tang.
    • Freshly grated Parmesan or pecorino.
    • Toasted hazelnuts or almonds for crunch.
    • A sprinkle of extra fresh herbs (thyme, parsley, or chives).

    Storage & Reheating

    Store leftover Brussels sprouts in an airtight container in the refrigerator for 3-4 days. To reheat, warm them in a skillet over medium heat with a splash of broth or a drizzle of olive oil to refresh them and bring back that tender-crisp texture.

    They can also be reheated in the air fryer at 350°F for 3-4 minutes to revive the edges and keep them from getting soggy.

    Freezing isn't recommended - the sprouts tend to turn mushy once thawed, and you lose the lovely texture you worked to build in the pan.

    Recipe FAQs

    Do I need to blanch Brussels sprouts before cooking?

    No. For skillet or roasted versions, there's no need to blanch. Cooking them directly in the pan (with a splash of broth to steam briefly) gives better flavor and texture.

    Can I use bacon instead of pancetta?

    Yes-use smoked bacon instead, it's a perfect swap if you can't get pancetta.

    Why are my Brussels sprouts bitter?

    Bitterness usually comes from overcooking. Stop when they're just tender when pierced and bright green, with golden edges. A touch of salt or acid (like balsamic or lemon) balances any natural bitterness.

    Can I make Brussels sprouts with pancetta ahead of time?

    They're best cooked fresh, but you can prep up to 1-2 days ahead: trim and halve the Brussels sprouts, slice the shallots, chop thyme, and render the pancetta (refrigerate each separately). If you need to cook ahead, par-cook the Brussels sprouts until just tender with light color, cool, and refrigerate. Before serving, finish in a hot skillet with a splash of broth and a little olive oil if needed.

    More Vegetable Side Dishes for the Holidays

    Looking for fresh, flavorful sides to round out your Thanksgiving or Christmas menu? Try one of these easy vegetable dishes - simple for the cook, special on the table. And don't save them just for the holidays!

    • A gray bowl of air fryer butternut sqhuas with pepitas and sage leaves with gray napkin.
      Air Fryer Butternut Squash
    • A bowl of bright green beans almondine with toasted buttered almonds.
      Fresh Green Beans Almondine Recipe
    • roasted carrots with thyme
      Maple Roasted Carrots (Easy Glazed Carrots Recipe)
    • Baby dutch yellow potatoes wtih herbs and Parmesan cheese.
      Buttery Baby Dutch Yellow Potatoes

    If You Make This Recipe

    Please let me know by commenting if you made Brussels Sprouts with pancetta. I love hearing from you and comments help other readers. And please, give it a star rating. Thanks!

    📖 Recipe

    Rund bowl of golden green Brussels sprouts with pancetta, herbs, and shallots ready for serving.

    Brussels Sprouts with Pancetta

    Sally Cameron
    Savory and tender, these caramelized Brussels sprouts with pancetta, shallots, and fresh thyme are a terrific side dish for roast chicken, roast turkey at the holidays, or just abut any main dish.
    No ratings yet
    Prevent your screen from going dark
    Print Recipe Pin Recipe
    Prep Time 20 minutes mins
    Cook Time 30 minutes mins
    Total Time 50 minutes mins
    Course Side Dish, vegetables
    Cuisine American
    Servings 6
    Calories 225 kcal

    Equipment

    • large, wide saute or fry pan 12" - 13" pan

    Ingredients
      

    • 4 ounces cubed pancetta
    • 2 pounds fresh Brussels sprouts choose larger ones if possible
    • ½ cup sliced shallots about 2 medium
    • 3 tablespoons extra virgin olive oil
    • ¼ teaspoon sea salt
    • ¼ teaspoon ground pepper optional
    • ½ cup low sodium chicken broth
    • 2 teaspoon chopped fresh thyme leaves
    • 1 large garlic cloves finely chopped or zested

    Instructions
     

    Brown the pancetta

    • Fry pancetta in a medium hot saute or frying pan until crisp. With a slotted spoon, remove pancetta to layers of paper towels to drain excess fat. Do not wash the pan.

    Prep Brussels sprouts

    • While the pancetta is browning, prep the Brussels sprouts. Trim the root end and peel off any withered or damaged outer leaves. Slice the sprouts in half through the root. You should have about 1 ½ pounds after trimming.

    Brown the sprouts

    • Add a tablespoon of olive oil to the pan. Working in 2 batches, place halves cut-side down and cook undisturbed until nicely browned; flip briefly, then transfer to a bowl. Don't crowd them, arrange in a flat layer so they brown.
      Repeat with remaining sprouts, adding oil as needed. When done, add all of the sprouts back to the pan.

    Add aromatics

    • Stir in the sliced shallot cooking until tender, about 2 minutes, the add the garlic and cook 30 seconds more.

    Finish the sprouts

    • Add broth and thyme; cover and cook over medium-low until tender, when pierced 3-5 minutes (depending on size). Uncover and let any liquid reduce to a light glaze. Add the pancetta and toss to coat. Taste, then season lightly with salt and pepper as needed.

    Nutrition

    Calories: 225kcalCarbohydrates: 18gProtein: 8gFat: 15gSaturated Fat: 4gPolyunsaturated Fat: 2gMonounsaturated Fat: 8gTrans Fat: 0.02gCholesterol: 12mgSodium: 268mgPotassium: 716mgFiber: 7gSugar: 5gVitamin A: 1180IUVitamin C: 131mgCalcium: 77mgIron: 3mg
    Tried this recipe?Let us know how it was with a comment and leave a star rating!

    Fast and Fresh Strawberry Coulis

    05/14/2023 by Sally Cameron 2 Comments

    Bright red strawberry coulis (strawberry sauce), in a jar with a gold spoon.

    Fast and fresh strawberry coulis. Grab a container of ripe red strawberries and let's make some delicious strawberry sauce to top cheesecake or ice cream, pancakes to waffles, and more. A simple recipe that takes little time. In winter use frozen berries, in spring and summer, use fresh. Freezes too!

    Fresh strawberry coulis, ready for a stack of waffles and breakfast.

    The French word coulis basically means puree; a fancy name for a simple strawberry sauce usable in many ways. You see it on restaurant dessert menus, but you can make it at home in a snap.

    It's fast and fresh because this recipe (version 1) is not cooked (a coulis does not have to be cooked). If you prefer a quickly cooked strawberry sauce (version 2), those instructions are included as well.

    [feast_advanced_jump_to]

    Why You'll Like This Recipe

    • Use fresh strawberries or frozen strawberries.
    • Use to garnish dishes from breakfast to your favorite dessert.
    • Make it with sugar or no-sugar with monk fruit blend.
    • Make it fresh and uncooked, or cooked.
    • A simple recipe, 3 ingredient sauce.

    For another easy uncooked sauce, try this creamy citrus mango coulis.

    Recipe Ingredients

    Three simple ingredients for making a strawberry coulis with lemon.
    • Strawberries - Use fresh red, ripe strawberries when they are in season. When it's not strawberry season, use frozen strawberries, thawed.
    • Sweetener - Use monk fruit blend to reduce sugar or use granulated sugar if you prefer (superfine or caster sugar is nice). Try a squirt of this monk fruit simple syrup.
    • Lemon juice - Just a little fresh squeezed lemon (the acidity) juice lifts the flavor of strawberry sauce.
    • Starch - Use cornstarch or arrowroot starch if you want to thicken the cooked version of the sauce.

    Substitutions and Variations

    There are two options to making a homemade strawberry coulis: fresh, uncooked sauce or a cooked sauce. I made both to show you what they look like side by side.

    The top one is the cooked sauce, the bottom is the fresh, uncooked sauce. The fresh sauce is a little brighter in color and taste. Even with thickening the cooked sauce, the viscosities were pretty close. Both have a pourable, perfect consistency.

    Two bowls of beautiful red strawberry coulis, side by side, raw and cooked.
    • For a slightly thicker sauce, cook the chopped berries with a slurry made of water and either arrowroot or cornstarch.
    • For a more intense strawberry flavor, skip the cooking and make the uncooked sauce. It's a bit more vibrant and faster to make with no cooking or cooling required.
    • For a smooth sauce, push the cooked strawberries through a fine-mesh sieve. If you don't mind the fine seeds, skip this step.

    For an adult dessert sauce variation, add a little berry liqueur such as Chambord, Cassis, or Framboise. Read more about berry liqueurs in this article.

    How to Make Coulis Two Ways

    Here's how to make a homemade strawberry sauce. Some recipes add maple syrup, vanilla extract, or orange juice, but it changes the pure fresh strawberry flavor. I prefer to let the flavor of the strawberries shine.

    Although just about every recipe out there is a cooked strawberry sauce or strawberry coulis, you do not have to cook it. Here are directions for both styles.

    Fresh strawberries in a colander being washed.
     A glass bowl filled with chopped red strawberries.

    Prep work 1: For either version, wash your strawberries (and buy organic), as strawberries are on always on the annual Dirty Dozen list for high pesticides in foods.

    Prep work 2: Chop the strawberries and move ahead with either the fresh or cooked strawberry coulis instructions.

    How to Make Strawberry Coulis (uncooked)

    A fresh strawberry coulis takes no time to make. Strain if desired to remove seeds. If the berries are having a hard time blending, add 1 tablespoon of water, but not much more as to not dilute the sauce.

    Chopped strawberries in a blend for pureeing into sauce.
    Straining strawberry puree through a fine sieve to remove seeds with a ladle.

    Step 1: Add strawberries, lemon juice and sweetener to a high-speed blender and puree.

    Step 2: For a smooth, seedless homemade strawberry coulis, push the sauce through a fine mesh sieve with a ladle or large spoon. It's ready to serve.

    Pureed red strawberry coulis sauce in a glass bowl.

    Even though strawberries are a low-pectin fruit, they have enough to provide body to an un-cooked sauce. Although both are delicious, I usually make the quick, uncooked strawberry coulis for it's speed and slightly fresher flavor.

    Chef's trick: To remove seeds from a puree, place a fine sieve inside a medium bowl, pour the puree into the sieve and push the puree through the sieve with a ladle or large spoon. A ladle works best and makes fast work of removing seeds.

    How to Make Strawberry Coulis (cooked)

    Chopped strawberries with added sugar for cooking to make sauce.
    Strawberries cooked until syrupy in a stainless steel pan.

    Step 1: Add chopped strawberries to a medium saucepan, add the tablespoon of lemon juice and sweetener.

    Step 2: Cook strawberries over medium to medium-low heat until thickened, broken down, and syrupy. The cooking time is 8-10 minutes. Put a lid on the pan after it gets going to retain the natural juices. If you want to thicken, do it near the end with a little arrowroot slurry. See recipe card for full directions.

    To finish, pour cooked strawberries into a blender and puree. For a smooth strawberry coulis, pour the strawberry puree through a fine sieve, pressing the puree with a ladle or the back of a spoon to grind out the seeds.

    Chef's Tip: Why arrowroot versus a cornstarch slurry? Arrowroot leaves a sauce, especially a fruit sauce, glossy with no aftertaste (it's flavorless). Cornstarch can leave it cloudy with a bit of an aftertaste. Arrowroot is also grain-free. Use it for sauces, soups, stews, and puddings. Read more about cooking with arrowroot here.

    Serving Suggestions

    Golden gluten-free waffles with melted butter and strawberry sauce poured over the top.

    Serve it cold or room temperature. Strawberry coulis is the perfect sauce for:

    • Desserts: cheesecake, frozen yogurt, ice cream sundaes, over a slice of angel food or pound cake, with this decadent chocolate tart or this lemon olive oil cake. Stir into a parfait glass of lightly sweetened whipped cream and make a dessert called a "fool". Serve beautiful red strawberry coulis with panna cotta.
    • Breakfasts: pancakes, waffles, French toast, fresh plain yogurt or a Greek yogurt bowl, even oatmeal or easy overnight oats with chia seeds.
    • Appetizers: try it over a baked brie with crackers or baguette.
    • If your kids like strawberry milk, stir in a couple of tablespoons.

    Use within 5 days when refrigerated or freeze. To freeze, try a silicone ice cube tray like this. They're great for freezing broth too.

    Use strawberry coulis to top vanilla panna cotta, and skip the sauce step in that recipe.

    Bright red strawberry coulis (strawberry sauce), in a jar with a gold spoon.

    Recipe FAQs

    What is a coulis?

    Coulis basically means puree in French. It's a culinary term referring to a pureed and strained sauce of fruit or vegetables. A couli is usually smooth, different than a strawberry compote, more of a chunky, jammy condiment. Coulis can be either uncooked or cooked.

    Why is lemon juice added to a coulis?

    The acidity in lemon juice lifts the flavor of strawberry coulis and other berry sauces. And use fresh lemon juice, it makes a difference. Just a little does the trick. Too much takes away from the fresh sweetness of the sauce.

    Does fruit coulis need to be cooked?

    No, fruit coulis does not need to be cooked. It is meant to be a fresh, brightly flavored sauce, more so than a cooked strawberry sauce. Both are delicious, just a little different.

    How do you thicken fruit coulis?

    To thicken a fruit coulis you will need to briefly cook it so that a thickener such as cornstarch, arrowroot starch, or kudzu will do their jobs and thicken. Start by making a "slurry" (starch mixed with a little cold water) until very smooth. Then, add to a small pan of hot coulis and cook for a minute or two until thickened. Slurries are generally added at the end of a cooking process. The coulis will thicken further upon cooling. For more information, enjoy this article about working with arrowroot.

    More Strawberry Recipes

    Take advantage of spring and summer fresh berries with the berry-inspired recipes, even a savory salmon recipe with raspberry sauce. For more sauce recipe ideas see this page for inspiration.

    • Gluten Free Strawberry Muffins
    • Strawberry banana smoothie in a glass.
      Strawberry Yogurt Smoothie with Banana
    • Strawberries with Balsamic syrup in stemmed glasses for dessert.
      Balsamic Strawberries (with Homemade Balsamic Glaze)
    • leafy green and berry salad
      Strawberry Goat Cheese Salad

    ⭐️Did You Make This Recipe?

    If you make this strawberry coulis, please leave me a comment. I appreciate your feedback and enjoy hearing from you. They really help other readers too. If you loved it, please give it a 5-star rating!

    📖 Recipe

    Bright red strawberry coulis (strawberry sauce), in a jar with a gold spoon.

    Simple Homemade Strawberry Coulis Recipe

    Sally Cameron
    With frozen berries in the freezer, you can always make this quick sauce for dessert for cheesecake, ice cream, frozen yogurt, or cake. It works equally as well for breakfast with pancakes and waffles, French toast, even swirled into plain Greek-style yogurt and oatmeal.
    5 from 1 vote
    Prevent your screen from going dark
    Print Recipe Pin Recipe
    Prep Time 10 minutes mins
    Total Time 10 minutes mins
    Course Breakfast, Dessert
    Cuisine French
    Servings 4 to 6 servings
    Calories 41 kcal

    Equipment

    • Fine sieve
    • 3 quart sauce pan (a saucier works great) if making the cooked sauce

    Ingredients
      

    • 16 ounces fresh strawberries
    • 1 tablespoon fresh lemon juice
    • 1 tablespoon monk fruit or sugar

    Options

    • 1 teaspoon arrowroot or cornstarch to thicken the cooked sauce
    • 1-2 tablespoons berry liqueur such as Chambord or Cassis for an adult dessert sauce

    Instructions
     

    • Wash fresh strawberries, slice off the top, then chop into small pieces.

    Uncooked Strawberry Coulis

    • Place chopped strawberries in a high-speed blender and puree with the lemon juice and sweetener until it's smooth. Set a fine sieve over a bowl, pour in pureed berries, and push the berries through to remove seeds. A ladle works best, or a large spoon. Taste and adjust the sweetness level if needed with a little more sweetener.

    Cooked Strawberry Coulis

    • Place the chopped berries in a medium saucepan with the lemon juice and sweetener. A pan called a saucier works great as it has sloped sides. Bring the berries to a simmer over medium heat, turn the heat down, put a lid on the pan, and cook 8-10 minutes until the berries are broken down and juicy. If you want to thicken the sauce, do it at this time.
    • To thicken the cooked sauce, add the starch to 2 teaspoons of cold water and mix until smooth. Stir this into the simmering berries. Cook another 1-2 minutes for the starch to do it's work. Puree the berries and strain for a smoother sauce if desired. Serve warm or cold.
    • Strawberry coulis keeps 4 days in the refrigerator and freezes well.

    Notes

    Yields: The fresh sauce recipe yields 1 ½ cups of strawberry coulis. The cooked version yields 1 cup. Another difference in volume will be if you strain or not. The color of the final sauce may also vary a little depending on how ripe and red your strawberries are. 
    For an adult dessert sauce, add a tablespoon or two of a berry liqueur, such as Framboise, Chambord, or Cassis. 

    Nutrition

    Calories: 41kcalCarbohydrates: 13gProtein: 1gFat: 0.4gSaturated Fat: 0.02gPolyunsaturated Fat: 0.2gMonounsaturated Fat: 0.1gSodium: 1mgPotassium: 177mgFiber: 2gSugar: 6gVitamin A: 14IUVitamin C: 68mgCalcium: 19mgIron: 0.5mg
    Tried this recipe?Let us know how it was with a comment and leave a star rating!

    Easy Spiked Hot Chocolate

    12/30/2022 by Sally Cameron 4 Comments

    Glass mug of hot chocolate with whipped cream.

    This easy spiked hot chocolate recipe is an easy to make sweet indulgence. The spirits take it up a level for an adult hot chocolate that will warm you to your toes on a chilly night, yet it's easily made a non-alcoholic hot chocolate for kids or times you don't want any alcohol. It doubles as dessert and a cozy winter drink in winter months, with a variety of spirit options.

    Hot chocolate in a glass mug with whipped cream.
    [feast_advanced_jump_to]

    Why This Recipe Works

    • It's warming, rich, and chocolaty
    • It's the perfect drink for snuggling around a warm fire to take the chill off.
    • It's made with two terrific liqueurs; Bailey's and Amaretto, but you can make it alcohol-free or vary the spirits.
    • Make it without the booze if preferred (or for kids).
    • Options for spirits and fun garnishes below.

    Recipe Ingredients

    Spiked hot cocoa ingredients labeled

    See recipe card for quantities. Easy spiked hot chocolate has simple ingredients with lots of options to customize, much better than a packaged hot cocoa mix.

    • Whole milk: Whole milk provides a smoother, richer drink and creamy hot chocolate versus low fat, plus you'll add whipped cream on top for more richness that melts in.
    • Cocoa powder: Buy unsweetened cocoa and sweeten to your preferred level. Two options are the "dutched" cocoa powder treated with alkali, or natural cocoa powder which is unprocessed. Learn more abut cocoa powder below.
    • Heavy whipping cream: For an optional whipped cream topping, or use coconut milk for non-dairy. Buy a small container and whip it yourself (or use the canned stuff).
    • Spirits: A combination of Amaretto liqueur (almond flavor) and Bailey's Irish Cream (the original is a blend of Irish whiskey, cream, chocolate and vanilla) work well. See options below for other spirits that go well with chocolate or use your favorite liquor.
    • Vanilla extract: Buy real vanilla extract, not artificial vanilla. Vanilla paste works too.

    Toppings: So Many Options

    Choose your favorite topping. Grated nutmeg, crushed peppermints, shaved chocolate or white chocolate, and sprinkle of cinnamon (or a whole cinnamon stick) or a drizzle of chocolate sauce. Some people love mini marshmallows, mini chocolate chips, or candy canes. Choose your favorites.

    Recipe Substitutions

    • For a vegan or non-dairy hot chocolate, use almond milk or oat milk for the base and top with coconut whipped cream. Use diluted, canned whole coconut milk for a truly rich indulgence.
    • Substitute homemade almond milk for the best flavor, and use the rest for a morning smoothie.
    • Go alcohol-free for kids version, make hot chocolate with whole milk, cocoa, cinnamon, and a little vanilla along with a little sweetener, skipping the liqueurs.
    • For no sugar, use monk fruit or a monk-fruit based syrup.

    Liqueur and Spirit Variations

    If Bailey's Irish Cream or Amaretto are not your thing, there are lots of options for liqueurs and spirits in easy spiked hot chocolate. Try dark rum, peppermint schnapps, bourbon, creme de menthe (minty), whiskey, Kahlua, Frangelico (hazelnut flavored), or Nocello (walnut), Chambord (black raspberry), chocolate liqueur, coffee liqueur, or vanilla vodka.

    Chef's tip: Go slow adding liqueurs and spirits as they are strong. Start with a little, less than you think, then add to get to the right level for yourself. It doesn't take much.

    Starting to mix hot chocolate in a pot.

    Recipe Instructions

    In a small saucepan, heat milk over medium heat bring it to just under a boil. Whisk in the cocoa powder, sweetener, and cinnamon until smooth. Add the spirits to each glass, pour in the hot chocolate, then top with whipped cream and add any desired garnishes. Simple!

    Cocoa Powder Tips

    You'll find two main types of cocoa powder: dutched and natural. Dutched cocoa powder mixes easier with liquid and is darker colored. Natural is lighter colored but higher in nutrition from higher flavanols. Both provide rich chocolate flavor.

    There are many good brands. I've used Hershey's cocoa (available everywhere), Valhrona cocoa powder, and Ghirardelli cocoa powder. For organic, try Navitas.

    Is it cocoa or cacao? Here's an article with a good explanation. Store cocoa powder in an airtight container in a cool pantry and it lasts for about 3 years. 

    Mixing hot chocolate in a pot with whisk.

    Hot Chocolate Bar For a Party

    For holiday parties and a batch to serve a crowd, do this. Make plain hot chocolate in a larger pot on the stovetop, then keep it hot in a slow cooker. Make it with no liquor and allow guests to add or not.

    Set up a fun bar with the spirits and garnishes (see below) and allow guests to add what they want. If you don't want to buy big bottles of booze, buy small or airline size.

    Sweetener Options

    To sweeten your hot chocolate try the following:

    • Agave syrup
    • Rice bran syrup
    • Monk fruit blend - either granular or powdered
    • Unrefined sugar
    • Organic coconut sugar - adds a caramel flavor
    • Chocolate liquid stevia drops
    • Keto sugar-free simple syrup
    Hot chocolate with whipped cream topping in front of a fireplace.

    Serving Options and Garnishes

    Here are garnish ideas for serving for spiked hot chocolate:

    • Whipped cream
    • A sprinkle of cinnamon, nutmeg, or warm spices
    • Cinnamon sticks
    • Mini marshmallows
    • Candy canes, sticks or crushed peppermint
    • Chocolate shavings (use a zester)
    • Chocolate sprinkles or mini chocolate chips

    Whipped Cream Notes

    Hot chocolate just would not be the same without whipped cream topping. Use a hand mixer or an immersion blender to whip your own. Add a little vanilla and sweetener first. For the easy way, get a can of real whipped cream. Read the label for icky ingredients (like partially hydrogenated oils).

    I use a neat tool called an Isi Thermo Whipper. It's a cool kitchen tool and bit of an indulgence, but you can do a lot more with it than just whip cream or coconut milk (for vegan or dairy-free).

    Recipe FAQs

    What is the best milk for hot chocolate?

    Whole cow's milk for the rich creamy taste, but you can use oat milk, homemade almond milk, or a combo if you don't do dairy. Even low fat milk works. Don't make it with water, its too thin and you lose the creaminess. Macadamia milk is another good option. Read ingredients for any additives.

    Is hot chocolate healthy to drink

    It is without the alcohol, for sure. Chocolate is a good source of flavanols, a category of phytonutrients, with health benefits. Natural cocoa powder offers more benefits than Dutched or processed cocoa powder. Other factors are type of sweetener and type of milk, but yes, it can be healthy. Here's a good article.

    Does hot chocolate help you sleep or relax?

    Once again, it's the flavanols but also other beneficial chemicals. Many consider hot chocolate as a sleep-promoting beverage as cocoa can help to lower blood pressure (here's an interesting study).

    More Chocolaty Recipes

    • Gluten-free brownies with melted chocolate in a square pan after baking.
      Fudgy Gluten-Free Chocolate Brownies
    • two chocolate smoothies in glasses on an antique tray.
      Chocolate Banana Smoothie
    • Bark bites on a round display plate for serving.
      Chocolate Bark Recipe (bark bites)
    • A silver tray of peanut butter protein balls tolled in coconut, ready to eat.
      Peanut Butter Oatmeal Protein Balls (no-bake)

    ⭐️Did you Make This?

    If you make this recipe, please comment and let me know, and if you loved it, please give it a 5 star rating! They really help other readers.

    📖 Recipe

    Easy Spiked Hot Chocolate

    Sally Cameron
    This adult hot chocolate drink doubles as dessert and an after dinner drink. Adjust the sweetness and chocolate to your taste preference. For those who do not indulge in spirits or for kids, skip the alcohol. It's still delicious. 
    5 from 1 vote
    Prevent your screen from going dark
    Print Recipe Pin Recipe
    Prep Time 10 minutes mins
    Total Time 10 minutes mins
    Course Dessert, Drinks
    Cuisine American
    Servings 2
    Calories 189 kcal

    Ingredients
      

    Basic hot chocolate

    • 2 cups whole milk sub coconut, oat, or almond milk
    • 3-4   tablespoons unsweetened cocoa powder
    • 1 tablespoon sugar or preferred sweetener add to taste
    • ¼ teaspoon vanilla extract
    • 1 pinch ground cinnamon optional

    Whipped cream (optional)

    • ¾ cup heavy cream well chilled, then whipped

    Optional spirits (see notes below for more options)

    • 2-3 tablespoons Amaretto liqueur
    • 2-3 tablespoons Baileys Irish Cream liqueur

    Optional garnishes

    • Grated nutmeg, crushed peppermints, shaved chocolate, ground cinnamon, chocolate sprinkles

    Instructions
     

    • In a small to medium saucepan, bring milk to just under a boil, then turn the heat down to low. Whisk in the cocoa powder, sweetener and cinnamon until smooth.
    • Add half of each liqueur into two tall mugs (skip for kids). Carefully pour in the hot chocolate. Top with a little whipped cream, or a lot! Garnish as desired.

    Notes

    Sweetener options: Sugar, agave syrup, rice bran syrup, coconut crystals or liquid stevia, monk fruit blend, or sugar-free keto syrup made with monk fruit.
    Whipped cream note: It's hard to whip just a small amount of heavy cream by hand, so I've listed ¾ cup. You won't need it all. 
    Spirits note: If Bailey's Irish Cream or Amaretto are not your thing, there are lots of options for spirits. Try dark rum, peppermint schnapps, bourbon, creme de menthe (minty), whiskey, Frangelico (hazelnut flavored), or Nocello (walnut), Chambord (black raspberry), chocolate liqueur, coffee liqueur, or vanilla vodka.
    Nutrition calculation full recipe: Including all of the heavy cream and spirits, the numbers are 588 kcals, 12 grams protein, 43 grams fat, 28 grams sugar, 33 grams carbs, 3 grams fiber. 
    Nutrition calculation basic recipe: Without spirits and cream, 189 kcals, 22 grams carbs, 9 grams protein, 9 grams fat, 3 grams fiber, 18 grams sugar. 
     

    Nutrition

    Calories: 189kcalCarbohydrates: 22gProtein: 9gFat: 9gSaturated Fat: 5gPolyunsaturated Fat: 0.3gMonounsaturated Fat: 2gCholesterol: 29mgSodium: 95mgPotassium: 483mgFiber: 3gSugar: 18gVitamin A: 396IUVitamin C: 0.01mgCalcium: 311mgIron: 1mg
    Tried this recipe?Let us know how it was with a comment and leave a star rating!

    Creamy Parmesan Polenta — Easy & Cheesy

    11/11/2025 by Sally Cameron Leave a Comment

    A bowl of rich yellow polenta with chives and a serving spoon.

    Cozy, creamy, and ready in about 30 minutes, parmesan polenta is Italian comfort in its purest form. No cream needed-the creaminess comes from slow simmering and just the right amount of liquid. Off the heat, a little sweet butter and a shower of Parmigiano-Reggiano cheese turn it glossy, savory, and ready for whatever you want on top. It's your easiest cheesy crowd-pleaser.

    White bowl of golden creamy polenta with chopped chives and olive oil drizzle.

    What's not to love about the Italian cousin of Southern grits? If it's a good vehicle for Parmesan, I'm in-and this Parmesan polenta is the version I've dialed in over the years that my family loves. I serve it under my red-wine-braised short ribs, but it's just as welcome at breakfast with a poached egg or alongside simply browned chicken sausage. Best part? It's so simple to make this creamy polenta recipe.

    [feast_advanced_jump_to]

    Parmesan Polenta at a Glance

    • Creamy Italian comfort - Easy to make on the stovetop with a heavy pot.
    • Simple ingredients - Just polenta, liquid, cheese, and butter.
    • Versatile base: For braised short ribs, poached eggs, browned sausage, roasted veggies.
    • Make-ahead friendly - This cheesy polenta reheats well with extra broth.

    With polenta in the pantry, make this lemon polenta cake (aka lemon olive oil cake) for dessert.

    Chef's Tip - Grits vs. Polenta
    Grits and polenta are culinary cousins, both made from ground corn, but they start with different varieties. Polenta is made from flint corn, which has a firm texture and a deeper, slightly nutty flavor. Grits are usually made from dent corn, which is softer and produces a creamier, milder porridge. Polenta = coarser and more rustic than grits.

    Ingredients for Polenta

    Ingredients for parmesan polenta in prep bowls on counter.
    • Cornmeal - Choose coarse-ground cornmeal labeled polenta for a rustic, textured bite. Medium grind cornmeal gives a smoother, creamier result. Not all cornmeal cooks the same. I use Bob's Red Mill polenta (coarse grind) with delicious results.
    • Simmering liquid - A combination of water and milk, or broth, provides balanced flavor and gentle richness. See chef's tip below.
    • Parmesan cheese - Use real Parmigiano-Reggiano for its nutty, savory depth and smooth melt.
    • Butter - Unsalted sweet butter adds gloss and subtle richness to finish the dish.

    Please see the recipe card for measurements, salt, and pepper.

    Chef's Tip - Choosing Your Cooking Liquid
    For the best flavor and texture, use a mix of liquids. I generally use half water and half milk for a clean, creamy result that lets the corn shine. For a deeper, savory note, try a blend of 2 cups water, 1 cup milk, and 1 cup chicken broth, for a beautiful balance that adds just enough richness without weighing it down.

    Substitutions and Variations

    • Fall flavor - Stir in canned pumpkin at the end for a cozy, savory pumpkin polenta.
    • Cheese options - Parmigiano-Reggiano is classic; Grana Padano is milder and Pecorino adds a sharper, saltier edge. Fresh goat cheese is another option!
    • Herb finish - Fold in thyme, chives, or parsley off heat.
    • Dairy-free - Finish with good olive oil; nutritional yeast adds a savory note.
    • Set & slice - Make a firmer batch, chill in a pan, then slice and pan-sear in olive oil until golden.

    Chef's Tip - Choosing the Right Pan for Polenta
    A 3½-quart Dutch oven or 3-4 quart saucier (often sold as a sautéuse), is ideal for a standard batch of polenta-deep enough to prevent splatter yet compact enough for even heat and easy stirring. A 5½-quart pot works too, especially for larger batches; its wider base gives more surface area for steady evaporation, just keep the heat low and stir often to avoid scorching.

    How to Make Creamy Polenta With Parmesan

    Milk in a white pot coming to a simmer for polenta.
    1. Add water and milk (or broth) to a 3 ½ quart pot and bring to a simmer over medium heat.
    Yellow cornmeal pouring into a pot of milk and water making polenta with a whisk.
    1. Rain in the cornmeal whisking as you pour until fully incorporated.
    A bubbling pot of milk, water, and cornmeal with wooden spoon.
    1. Allow the polenta to simmer and bubble until al dente to the bite and creamy. Keep stirring so the bottom doesn't stick. Watch the heat level.
    A golden swirl of yellow cornmeal polenta almost finished.
    1. Cook polenta, stirring, until rich and creamy texture is achieved, 25-30 minutes (or a bit longer), go by texture not time.
    Adding butter to a pot of cooking polenta.
    1. When polenta is about ready, stir in the butter.
    Grated parmesan cheese pouring into a pot of polenta to finish the dish.
    1. Then stir in the grated Parmesan cheese. It's ready to serve.
    A finished pot of golden parmesan polenta swirled with a wooden spoon.

    How to Enjoy Parmesan Polenta

    • With Braised Meats: Spoon this cheesy polenta under my braised short ribs or Italian pot roast a cozy, elegant dinner. The polenta soaks up the sauce beautifully.
    • For Breakfast or Brunch: Reheat leftovers and top with a poached or fried egg and wilted greens for a hearty start to the day.
    • With Roasted Vegetables: Serve it as a creamy base for roasted mushrooms, caramelized red onions, or fall vegetables like squash and Brussels sprouts.
    • Under Grilled or Seared Protein: Pair with grilled shrimp, stovetop salmon, or simply browned chicken sausage.
    • As Appetizer Cakes Chill leftovers flat in a sheet pan, slice, and pan-fry or grill for crisp-edged polenta cakes-great topped with marinara or tapenade.

    Storage & Reheating

    Refrigerate: Store leftover polenta covered in the refrigerator for up to 4 days. It will firm up as it chills, that's normal.

    Reheat: Add the cold polenta to a pan and break it up with a wooden spoon. Over low heat, add a tablespoon or two of water, milk, or broth, at a time, stirring, until it has regained it's creamy consistency, then heat through until hot.

    Freezing: Polenta made with milk doesn't freeze well. Dairy tends to leave a crumbly, drier texture once thawed. If you'd like to freeze it, make the recipe using water and broth, then portion and freeze in airtight containers for up to 2 months. Thaw overnight in the fridge before reheating with a bit of liquid to restore creaminess.

    Recipe FAQs

    Why isn't my polenta creamy?

    Usually it's from too little liquid or cooking it too quickly. Keep the heat low and stir often so the cornmeal fully hydrates. If it feels too thick, just whisk in a bit more hot water, broth, or milk until silky.

    Can I make creamy polenta without milk?

    Absolutely. Use a mix of water and broth instead. It will still be creamy from the slow cooking and butter, though slightly less rich.

    Can I use regular cornmeal to make polenta?

    Yes, but results vary by grind. Look for medium or coarse-ground cornmeal labeled "polenta" for the best creamy-yet-textured consistency. Fine cornmeal tends to cook up too soft and mushy.

    Can I make this dairy-free?

    Yes, but the flavor and texture will be different. Use olive oil instead of butter or a plant-butter, and a good-quality vegan Parmesan if you prefer a dairy-free version. It won't melt quite the same way, but still gives a nice savory note. Vegetable broth works beautifully as the liquid base for vegans.

    Complementary Recipes to Serve with Polenta

    Creamy Parmesan Polenta pairs perfectly with rich, savory mains - the kind that beg for something soft and buttery underneath. Try it with slow-cooked meats or a simple roast for a comforting, restaurant-quality meal at home.

    • Wine braised beef short ribs with sauce and vegetables in a pan.
      Red Wine-Braised Short Ribs Recipe
    • A golden crusted pork rib roast on a gray platter with fresh green parsley.
      Pistachio Crusted Pork Rib Roast
    • Golden baked chicken breasts on the dinner table.
      Roast Split Chicken Breast
    • Pork tenderloin with creamy mustard sauce close up with a serving fork.
      Roast Pork Tenderloin with Dijon Mustard Sauce

    Did You Make This Recipe?

    If you make Parmesan Polenta, please drop me a comment and let me know how you enjoyed it. And please leave a star. Both help readers and I enjoy hearing from you!

    📖 Recipe

    A bowl of rich yellow polenta with chives and a serving spoon.

    Parmesan Polenta

    Sally Cameron
    Classic Italian comfort food - simple, silky, and endlessly versatile. Finished with a knob of butter and Parmigiano-Reggiano for rich, savory flavor. Ready in about 30 minutes, it's perfect under braised short ribs, roasted vegetables, or a poached eggs.
    No ratings yet
    Prevent your screen from going dark
    Print Recipe Pin Recipe
    Prep Time 0 minutes mins
    Cook Time 30 minutes mins
    Total Time 30 minutes mins
    Course Side Dish
    Cuisine Italian
    Servings 4 to 5
    Calories 297 kcal

    Equipment

    • 1 3-3 ½ quart saucier or sauteuse this Le Creuset pan is terrific for making polenta and other dishes but use what you have that is similar.

    Ingredients
      

    • 2 cups filtered water
    • 2 cups low fat milk or whole milk
    • 1 cup polenta grind cornmeal coarse grind, or medium grind for a softer polenta
    • 2 tablespoons unsalted butter
    • ½ cup finely grated parmesan cheese Parmigiano-Reggiano

    Instructions
     

    • Bring liquids and salt to a simmer. Slowly rain in the cornmeal while whisking. Reduce heat to low and cook gently (no lid needed), stirring often, until thick and creamy (25-40 min, depending on grind).
    • Off heat, stir in butter and Parmesan. Taste and adjust salt and add pepper if desired. For serving add a splash of hot water or broth at the end to loosen slightly and increase creaminess if it has been sitting and stiffens.

    Notes

    Refrigerate: Store leftover polenta covered in the refrigerator for up to 4 days. It will firm up as it chills, that's normal.
    Reheat: Add the cold polenta to a pan and break it up with a wooden spoon. Over low heat, add a tablespoon or two of water, milk, or broth, at a time, stirring, until it has regained it's creamy consistency, then heat through until hot.
    Freezing: Polenta made with milk does not freeze well as the dairy makes it dry and crumbly. If you want to make ahead and freeze, do an all water batch or water and broth, which will freeze better.

    Nutrition

    Calories: 297kcalCarbohydrates: 38gProtein: 12gFat: 11gSaturated Fat: 6gPolyunsaturated Fat: 1gMonounsaturated Fat: 3gTrans Fat: 0.2gCholesterol: 29mgSodium: 253mgPotassium: 255mgFiber: 1gSugar: 6gVitamin A: 589IUCalcium: 303mgIron: 1mg
    Tried this recipe?Let us know how it was with a comment and leave a star rating!

    Turkey Rub (Easy Homemade Turkey Seasoning)

    11/06/2025 by Sally Cameron Leave a Comment

    A jar of blended turkey rub ready to go for use with a woodem spoon.

    This easy turkey rub recipe is my go-to for adding big flavor without fuss - perfect as a Thanksgiving turkey dry rub, for a smoked turkey breast, or even a simple roasted chicken. This homemade turkey seasoning blend is earthy, herby, and just a little sweet, with rubbed sage, thyme, garlic, and brown sugar to balance it out. Whether you're roasting, smoking, or grilling, this turkey rub seasoning recipe delivers savory flavor every time.

    A jar of colorful turkey seasoning blend with a wooden spoon, spices jars in the back.

    I originally developed this turkey rub seasoning recipe for my Thanksgiving turkey, and now use it for my smoked turkey breast. It's a flavorful change from my BBQ-style rub and works beautifully as a turkey smoking rub or a classic turkey dry rub for roasted poultry. Making your own turkey seasoning blends means no fillers, preservatives, or mystery ingredients - just pure flavor you can trust.

    Why You'll Love This Turkey Dry Rub

    • Simple to make - This turkey rub recipe comes together with just a handful of pantry spices.
    • Clean ingredients - No fillers, preservatives, or mystery additives - just a homemade turkey seasoning blend.
    • Salt-free flexibility - You control the salt based on your preferences or needs.
    • Versatile - Works beautifully on Thanksgiving turkey, smoked turkey breast, chicken, Cornish hens, and more.
    • Big flavor - Balanced with classic poultry herbs, a hint of sweetness, and savory depth.

    Ingredients You'll Need

    Ingredients to make a turkey seasoning rub in small prep bowls.
    • Brown sugar - Adds a touch of sweetness to balance the savory herbs and helps create a golden crust, especially when using this blend as a turkey dry rub for roasting, grilling, or smoking.
    • Sage - Brings classic holiday flavor and is essential in any homemade turkey seasoning. Ground sage is the most common in stores, but rubbed sage works too - it's lighter and less concentrated, so you may need a bit more.
    • Garlic - Granulated garlic or garlic powder gives earthy depth and aroma, making this turkey rub recipe richly savory.
    • Thyme - Dried thyme layers in herbaceous, woodsy flavor for a smoked turkey rub or roasted turkey.
    • Paprika - Use regular or smoked paprika for subtle warmth and rich color - smoked paprika is perfect if you're making this as a turkey smoking rub.
    • Onion powder - Adds a mild, savory-sweet note to round out this turkey rub seasoning recipe.

    Please see the recipe card for measurements, salt, and black pepper.

    Substitutions and Variations

    Here are a few ways to adapt this turkey seasoning to fit your preferences or dietary needs:

    • Sea salt - Optional in the turkey rub itself. Add salt separately before seasoning for more control, or omit entirely for a salt-free blend.
    • Fennel - Add ground fennel for a light licorice note, or try fennel pollen if you want a more aromatic, concentrated flavor. Start with less - it's potent!
    • Paprika - Swap regular paprika for smoked paprika for deeper flavor, especially if you're making this as a smoked turkey rub or turkey smoking rub.
    • Sugar-free option - Omit the brown sugar or use a golden monk fruit blend for a lower-carb variation (just note the browning will be lighter).
    • Herb swaps - You can adapt this turkey rub seasoning recipe with other herbs like rosemary, marjoram, oregano, parsley, or even ground bay leaf for a deeper aromatic profile.

    Chef's Tip: Salt in Your Turkey Rub
    I don't add salt to my turkey rub seasoning - I prefer to season poultry separately for better control. If you'd like to mix salt in, use 1 to 1½ tablespoons of kosher sea salt per batch (about 7 tablespoons total rub). I like Real Salt Kosher Sea Salt, La Baleine Kosher Sea Salt, and Diamond Kosher Salt, both flakier and milder than Morton kosher, but that works too. Avoid standard table salt - it's dense, overly salty, and tastes flat and metallic due to additives.

    How to Make Turkey Rub Seasoning

    While you can simply add the spices to a jar and shake well to combine, I like to take it a step further and grind the blend in a mortar and pestle. It brings the flavors together more uniformly and creates a finer texture that clings beautifully to poultry skin-especially helpful when using this turkey rub for smoking or roasting.

    This recipe makes about 4 ounces of seasoning-just enough for two whole bone-in turkey breasts or a whole turkey, depending on the size of the bird.

    Brightly colored herbs and spices in the bowl of a gray mortar for blending.
    1. Add all of the turkey seasoning ingredients to a mortar and pestle, or add to a jar to shake.
    Turkey seasoning rub blended together in a gray mortar and pestle.
    1. Grind the herbs and spice together.
    A jar of blended turkey rub ready to go for use with a woodem spoon.

    Using This Rub for Roasting vs. Smoking

    This turkey rub was originally developed for my smoked turkey breast, where the lower temperature and moist environment let the sugar caramelize slowly and build a flavorful crust. It also works beautifully for rotisserie turkey, where constant rotation helps prevent scorching. Here's how to adapt to your method:

    If you're oven-roasting a whole bird at 325°F or higher, sugar can darken faster. Here are a few tweaks for best results:

    • Reduce sugar slightly → Use 2 tablespoons instead of ¼ cup per batch (or skip).
    • Tent with foil → If the skin gets too dark toward the end of roasting, cover loosely with foil to finish cooking without burning.
    • Rub under the skin → Spread some of the rub beneath the skin with butter for flavor without as much surface caramelization.
    Turkey breast covered in dry rub seasoning on a baking tray.

    This turkey rub seasoning is featured in my Smoked Turkey Breast recipe, but it's also fantastic on roasted chicken, Cornish hens, or even pork tenderloin.

    Gift Idea: This turkey rub recipe scales easily and takes just minutes to make. Blend a big batch, add it to decorative jars, tie with ribbon or rustic twine, label and date - it makes a thoughtful homemade holiday gift for your favorite cook.

    Storage

    Turkey seasoning blend keeps well for up to 6 months when stored in an airtight container in a cool, dark place. Be sure to label and date.

    A sliced smoked turkey breast on a pewter platter with bay leaves and orange wedges.

    Recipe FAQs

    Is this seasoning gluten-free?

    Yes-this homemade turkey rub contains only spices and herbs, with no fillers or hidden gluten. Always double-check labels if you're using store-bought ingredients.

    Can I make it salt-free?

    Yes. This version is salt-free by design so you can control the sodium separately. Feel free to add 1 to 1½ tablespoons of kosher sea salt to the blend if you prefer.

    Can I use this rub on other meats?

    Absolutely! It's great on chicken, Cornish hens, and even pork. Try it on smoked or roasted poultry, or use it as a turkey smoking rub for flavorful smoked turkey breast or whole smoked turkey.

    Can I use this as a Thanksgiving turkey rub?

    Yes! This homemade turkey rub seasoning recipe was originally developed for my Thanksgiving turkey. It brings out classic holiday flavors and works beautifully whether you're roasting a whole bird or just the breast.

    Can I rub the turkey the night before?

    Absolutely. For the best flavor, apply this turkey dry rub up to 24 hours ahead. Refrigerate the seasoned turkey uncovered or lightly covered - it acts like a dry brine and helps the skin crisp while the seasoning penetrates.

    More Homemade Seasoning Recipes

    Making your own seasoning blends at home means better flavor, no unnecessary additives, and full control over what goes into your food.

    • Small bowl of homemade everything but the bagel seasoning with seeds, garlic, and onion.
      Homemade Everything But the Bagel Seasoning
    • Homemade taco seasoning blend in a glass jar.
      Homemade Taco Seasoning Mix and Ways to Use It
    • Savory dry rub for grilling with spices and a little brown sugar.
      Homemade BBQ Spice Rub
    • Crusty topped blackened fish filet on top of coleslaw in a gray bowl.
      Blackened Mahi Mahi (Air Fryer Recipe)

    Did You Make This Recipe?

    If you make this turkey seasoning, please add your comment. I appreciate your feedback and enjoy hearing from you. If you loved it, please give it a 5-star rating! They really help other readers.

    📖 Recipe

    A jar of blended turkey rub ready to go for use with a woodem spoon.

    Sally Cameron
    This simple turkey rub blends classic herbs and spices with a touch of sweetness for bold, balanced flavor. Perfect for roast turkey, smoked turkey breast, roast chicken, Cornish hens, or pork.
    No ratings yet
    Prevent your screen from going dark
    Print Recipe Pin Recipe
    Prep Time 5 minutes mins
    Cook Time 0 minutes mins
    Total Time 5 minutes mins
    Course Seasoning
    Cuisine American
    Servings 10 Yield 2.6 ounces
    Calories 24 kcal

    Equipment

    • Jar with a tight fitting lid

    Ingredients
      

    • ¼ cup light brown sugar
    • 1 tablespoon granulated powdered garlic
    • 1 tablespoon sage
    • 2 teaspoons dried thyme
    • 1 teaspoon paprika regular or smoked
    • 1 teaspoon ground black pepper
    • 1 teaspoon onion powder

    Optional

    • 1 - 1 ½ tablespoons kosher sea salt if you prefer it in the blend
    • ½ teaspoons ground fennel

    Instructions
     

    • Add all ingredients (and salt if using) and grind together in a mortar and pestle or shake well in a jar with a tight lid. Store turkey rub for up to 6 months in a cool dark place, labeled and dated.

    Notes

    Note on salt: I usually salt the turkey separately for more control, and leaving it out helps salt-sensitive people. 
    If you’re oven-roasting a whole bird at 325°F or higher, the sugar in the blend can make the turkey darken faster. Here are a few tweaks for best results:
    • Reduce sugar slightly → Use 2 tablespoons instead of ¼ cup per batch (or skip).
    • Tent with foil → If the skin gets too dark toward the end of roasting, cover loosely with foil to finish cooking without burning.
    • Rub under the skin → Spread some of the rub beneath the skin with butter for flavor without as much surface caramelization.

    Nutrition

    Calories: 24kcalCarbohydrates: 6gProtein: 0.1gFat: 0.1gSaturated Fat: 0.03gPolyunsaturated Fat: 0.03gMonounsaturated Fat: 0.01gSodium: 2mgPotassium: 21mgFiber: 0.3gSugar: 5gVitamin A: 107IUVitamin C: 0.1mgCalcium: 14mgIron: 0.4mg
    Tried this recipe?Let us know how it was with a comment and leave a star rating!
    • 1
    • 2
    • 3
    • …
    • 10
    • Next Page »
    Chef Sally Cameron of aFoodcentricLife.com in her kitchen.

    Welcome! I'm Sally, a professionally trained chef, former personal chef and caterer, lover of fresh healthy food, and sharing it with others.

    More about me →

    Valentine's Day Recipes

    • Rich red sauce with pot roast nestled into the vegetables and herbs on a gray plate.
      Italian Pot Roast (Stracotto)
    • Miso butter topped halibut on a bed of black rice in a gray bowl.
      Pan Seared Halibut with Miso Butter
    • Four golden chicken breasts topped with caramelized onions, herbs, and melting cheese.
      French Onion Soup Chicken (Easy Skillet Recipe)
    • Stuffed shells with kale and ricotta
      Pasta Shells Stuffed With Ricotta
    • A golden crusted pork rib roast on a gray platter with fresh green parsley.
      Pistachio Crusted Pork Rib Roast
    • Close up of creamy pork chops with sauce.
      Sour Cream Pork Chops Recipe

    Winter Salads

    • Deep red and golden roasted beets tossed with vinaigrette, herbs, feta, and nuts in a salad bowl.
      Beet Salad with Feta
    • kale salad tahini dressing
      Kale and Chickpea Salad With Tahini Dressing
    • spinach salad with pomegranate
      Pomegranate and Spinach Salad
    • kale salad with colorful veggies | afoodcentriclife.com
      Roasted Vegetable Salad with Kale

    Footer

    as seen on

    Logos of Featured Publications

    About

    • Privacy Policy
    • Disclaimer
    • Terms & Conditions
    • Accessibility policy

    Newsletter

    • Sign Up! for emails and recipes.

    Menu

    • Home
    • About
    • Contact
    • Facebook
    • Instagram
    • Pinterest

    As an Amazon Associate I earn from qualifying purchases.

    Copyright © 2025 aFoodcentricLife.com

    Rate This Recipe

    Your vote:


    A rating is required
    A name is required
    An email is required